
Some links in this post are affiliate links. This means I may earn a small commission if you make a purchase, at no extra cost to you. I only recommend products I use and genuinely enjoy in my own cardmaking. Read more here.
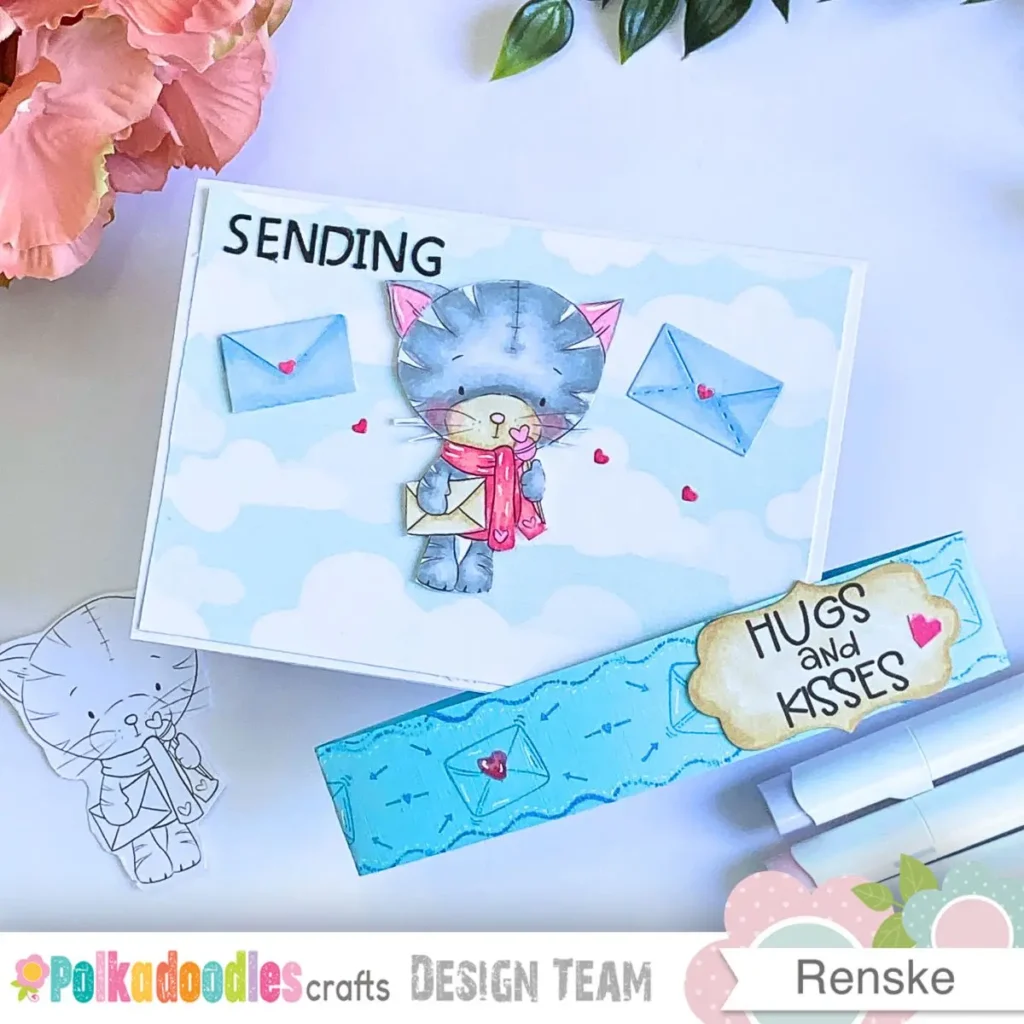
For this card, I wanted something soft that fits the Suki Cat digi stamp with her little lollipop. Polkadoodles asked the design team to make a wrap-around card, so I treated the belly band as part of the design from the start, not something that gets added at the end.
At first, I placed the cat on top of the belly band, but it didn’t feel quite right.
When I moved her behind the band instead, the whole card started to make sense. After that, each decision felt easier.
This card really started to come together when I stopped seeing the belly band as just a strap and started treating it as part of the scene. Once the cat was sitting behind it, everything fell into place much faster than I expected.
If belly band cards usually feel a bit fiddly, this is a good place to begin. Even if you’ve never tried one before, it’s more forgiving than it looks. It helps to test the fit with a strip of scrap paper before you use your final cardstock.
What is a Belly Band Card
A belly band card is a folded card that uses a decorative strip of cardstock to keep it closed and add design interest. It combines function and decoration in one simple element.
Most interactive cards rely on mechanisms. This one doesn’t.
It’s just a card and a strip. Putting it together isn’t difficult. Making it look like a finished design takes a little more thinking.
That’s usually the part I pay most attention to.
The desing of this happy Mail Belly Band card
This belly band card design is built around a soft postal theme where the wrap is treated as part of the scene instead of an after.
I started with the postal theme early and just kept going with it.
Once the envelopes appeared, everything else followed. Postal lines on the band. Stamp shapes on the front. A postage-style closure at the back.
If the theme doesn’t run through everything, the wrap can start to feel a bit disconnected. I’ve learned that the hard way.
The palette stayed soft. I went with aqua for the belly band, with pastel pink and beige running through the cat and envelopes, and a cloud paper on the front so nothing would fight for attention.
I skipped ink blending on purpose. The background didn’t need it, and the cat didn’t really need it either.
Materials and Tools You need
You need cardstock, a card base, decorative paper, dies or hand-cut shapes, colouring supplies, and basic tools like a trimmer, scoring board, and glue.
I usually lay everything out before I start, or I end up hunting for things halfway through.
I’ve grouped everything so it’s easier to follow along as you go.
Polkadoodles products
- Polkadoodles Suki Cat with Mail and Lollipop digital stamp
- Polkadoodles Tons of Love Sentiment Set
- Hugs and Kisses sentiment
- Polkadoodles Pretty Spring Paper Set
- Cloud patterned paper
Cardstock and paper
- White cardstock
- Card base
- Envelope die cuts
- Inside writing panel
- Aqua blue cardstock
- Belly band
- Inside mat layer
- DCP smooth paper
- Postage stamp element
Dies and tools
- Envelope die set
- Front envelope
- Folding envelope base
- Label die for sentiment panel.
- Alphabet punch board for the word Sending
- Scoring board
- Paper trimmer
- Fine scissors
- Foam tape
Colouring and ink supplies
- Ranger Vintage Photo Distress Ink
- Ranger Picked Raspberry Distress Ink
- Alcohol markers such as Ohuhu or similar
Embellishments and finishing details
- White gel pen
- Pink gel pen
- Small heart embellishments
- Hand-drawn flowers and postal doodles
Alternatives and substitutions
You can adapt this belly band card tutorial to your own stash. Dies can be swapped for hand-cut shapes or stamps, especially for envelopes.
If you don’t have a particular tool or material, there are plenty of swaps. You can use stickers instead of die cuts, washi tape or patterned paper strips for accents, or even hand-draw tiny envelopes and hearts onto your card base. Stamped images, printed clipart, and cut-outs from magazines all work too.
The goal is to make the design your own, no matter what supplies you have on hand.
If you don’t have alcohol markers, coloured pencils or watercolour work just as well for the Suki Cat image. The same goes for inks and cardstock colours, as the design works with lots of different combinations.
Step by step tutorial of this belly band card
A belly band card is made by first building a simple folded base, then adding a fitted cardstock strip and layering the design elements around it.
This looks more complicated than it is. Once you understand how the band sits on the card, everything becomes pretty logical.
Work from the base first, then layer the theme on top.
Step 1. Creating the card base
You cut and fold the card base to create a stable foundation that keeps all later layers aligned and prevents shifting when the belly band is added.
The card base is created by cutting cardstock to 21 x 14.8 cm and scoring it at 10.5 cm to form a standard folded card.
I always check this fold before moving on. If it sits slightly crooked, you’ll see it later once the belly band is on.
Use a bone folder to sharpen the crease.
I also keep the cardstock below 250 gsm. Heavier cards work too, but it takes more effort to get a neat fold.
Step 2. Adding the Cloud patterned paper
You add cloud patterned paper to create a soft visual base that supports the focal image without competing for attention.
For this step, we use the cloud patterned paper from the Polkadoodles Pretty Sping Paper Set. I made a specific choice here not to add any ink blending on top of the pattern.
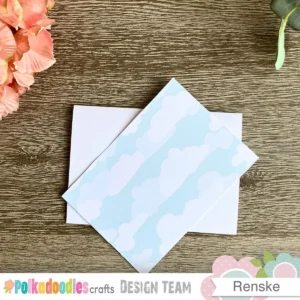
I thought about adding ink blending here, then I placed the cat on the paper and realised it wasn’t needed. The clouds already give enough interest. Any extra layer just started fighting with the cat.
Cutting the paper
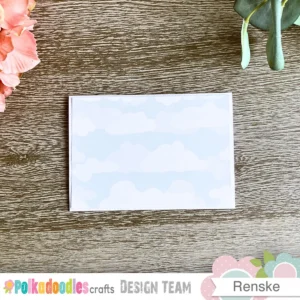
Cut your patterned paper with clouds to 10 centimetres by 14,3 centimeters. This keeps a small white border. Adhere the cloud paper to the front of your card.
Step 3. Preparing and colouring the Suki Cat digital stamp
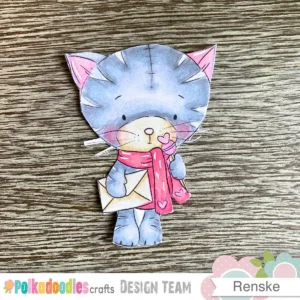
Here we prepare and colour the Polkadoodles Suki Cat digital stamp. The image becomes the focal point of the card, so I wanted the colours to work with the soft happy mail theme and the aqua belly band.
Printing the digital stamp
I resized the Suki Cat image in Microsoft Word to around 7.5 cm high. That size just felt right for the space I had on the front.
Before printing, I checked where the belly band would sit on the finished card. I didn’t want the cat getting squeezed or fighting with the wrap.
The image was printed on DCP paper, because it handles alcohol markers nicely. If you’re using something else to colour, just pick a paper that suits that medium.
If you want to know more about digital stamps and how to use it. I made a freebie about it
Choosing the colour palette
Before I started colouring, I tested a few grey combinations on scrap paper.
My first idea was to use warmer taupe greys. Against the cloud background, they looked a bit too brown and slightly heavy. Once I switched to cooler greys, the image instantly felt softer, and it matched the rest of the design much better.
After that, I stayed with the cooler greys and built everything around them.
Colouring the fur
- Cloud Grey CG01
- Pigeon Grey BGY02
- Light Grey CG02
- Grey CG25
Cloud Grey CG01 went down first as the base colour. I then built up the darker greys, just enough to add depth while keeping everything soft.
The smaller triangular fur sections stayed mostly in CG01. I kept those lighter on purpose so they felt fluffy instead of heavily shaded.
Colouring the scarf
The scarf helped bring the pastel pink tones into the design..
- Tender Pink R25
- Pink Satin R27
- Cherry Rose R48
Tender Pink was my base colour here. I added Pink Satin to build up the folds, just enough to give it shape. Cherry Rose only went into the deepest shadows to keep contrast without making the scarf feel too heavy.
Colouring the lollipop
The lollipop needed slightly more contrast than the scarf while still feeling part of the same palette.
- Sakura R23
- Valentine Pink R26
- Pastel Pink RV08
The first colour combination I tested felt a bit too warm next to the scarf. I wasn’t happy with it, so before finishing the image I switched to softer pinks. That immediately balanced the two elements.
Colouring the snout and envelope details
To bring some warmth into the design, I used beige tones on the snout and the envelope elements.
- Sandy Beige Y62
- Milk Tea Y69
- Dark Sand Y611
These colours appear again later on the sentiment label and the closure on the back of the card.
Blush and heart details
For the cheeks I used the Peachy Blush YR11 en the Deep Blush R210.
For the hearts I used the Valentine Pink R26 Marker.
Without them, she looked a bit flat, so I added them in.
Highlights and finishing touches
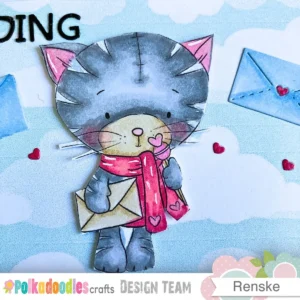
Once the colouring was finished, I added white gel pen highlights to the scarf and a few smaller details.
Normally I leave a small white border around digital stamps when I cut them out. I tried that first, but I didn’t really like how it looked. On the pale background, it felt a bit too harsh and pulled attention away from the image.
So I cut directly around the outline instead. That made the cat sit more naturally in the finished design.
Step 4. Make the envelope elements
You create envelope elements to reinforce the happy mail theme and add small supporting details that build storytelling around the main image.
These shapes help the design feel more interactive and layered.
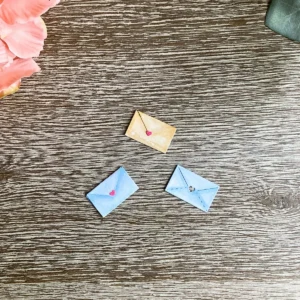
I used dies to create dimensional envelopes for the happy mail theme.
These are the dies I used.
- One die for the front.
- One die for the folding envelope base.
Both envelopes were die-cut from white card stock.
Creating the Blue envelope
The folded envelope was coloured in blue colour tones from my alcohol markers.
- Porcelain Blue B21
- Fog Blue B27
- Smoke Blue B28
Beige envelope
The front envelope was also coloured with alcohol markers.
- Sandy Beige Y62
- Milk Tea Y69
- Dark Sand Y611
A small heart was added to the flap and I coloured it with a Cherry Rose R48 marker.
I had more envelopes on my desk, but they never made it onto the card. After these two, I stopped. Anything else would have been too much.
Step 5. Designing the belly band
You design and fit the belly band to physically and visually bind the card together, while also creating a structured space that frames the focal image.
The band also helps create contrast between background and foreground elements.
The wrap-around belly band ended up being the hardest part of this card.
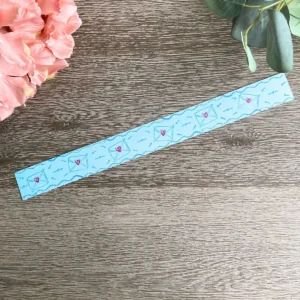
I tried patterned paper first. It looked wrong immediately. Too much noise against the cat. So I stripped it back to plain aqua cardstock. That’s when it finally clicked.
Belly band measurements
Cut your aqua cardstock to approximately 3 cm high. Wrap it around the closed card to find the correct length and mark where the ends meet.
Test the fit a few times before you decorate anything. It should slide on and off smoothly without snagging, but still stay put when the card is closed.
If it’s too tight, it will drag across your front pane. It will leave marks when you remove it. If it’s too loose, it can slip off during transport, and you lose the whole effect.
Quick troubleshooting checks that help
- Too tight, add a couple of millimetres before you cut your final length.
- Too loose means reduce slightly and re-test before committing to glue.
- Always test with the decorated card, not just the plain base.
This is the part where it usually goes wrong if you rush it. Getting the fit right takes a few test runs, but it’s worth taking your time.
Getting the fit right
- Wrap the card stock around the closed card.
- Add roughly 2 mm of ease before cutting to length.
- Test by sliding the band on and off several times
Decorating the belly band
Instead of layering more paper on top, I decorated the aqua strip directly.
This kept the card lighter and less bulky.
I grabbed a few small postal-themed stamps and filled the band as I went. Envelopes first. Then some arrows and dotted lines. A few wavy postal marks helped break up the empty spaces. I do like having a pattern on a belly band.
The heart details were coloured with the following colour combination.
- Tender Pink R25
- Cherry Rose R48
I added highlights on the envelopes and beneath the wavy lines.
That’s when it finally felt like one card, not a collection of loose parts.
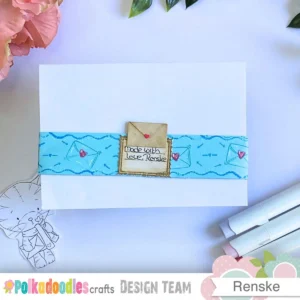
Closing the belly band
When wrapping the belly band around the card, I noticed the overlap at the back looked unfinished.
I turned the closure into part of the design.
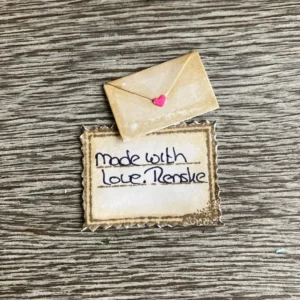
Making the back closure
I stamped a postage stamp image onto DCP paper using the Vintage Photo distress ink.
The stamp was coloured using the same beige colour marker combination as the front label.
- Sandy Beige Y62
- Milk Tea Y69
- Dark Sand Y611
Inside the stamp image were two lines.I hand wrote “Made with Love’ and Renske.
Step 6. Creating and positioning the sentiment
You adjust and position the sentiment so it fits the narrow label and strengthens the narrative flow across the card front. .
Breaking the text into parts helps it stay readable and balanced in the layout.
Adjusting the sentiment layout
The label was narrower than I expected. I tried fitting the sentiment on one line first, but it didn’t work.
Instead, I copied the “Hugs and Kisses” sentiment three times into Microsoft Word. From there, I cropped each version, so I ended up with three separate words. One image contained only “Hugs”; the second, only “and”; and the third, only “Kisses”.
It’s just a card and a strip. The construction is not difficult. The real challenge is getting those two pieces to look like they belong together.
When I was happy with the layout, I printed the sentiment and cut it out using the label die.
Printing and die cutting
The sentiment was printed and then cut using a matching label die. This ensures the text and shape work together as a single focal element.
At this stage I always check the scale against the front before committing to glue. I want the label to sit comfortably in the design without competing with the main image.
Colouring the sentiment label
To connect the sentiment with the rest of the card, I used the same warm beige palette found in the cat details and envelope elements.
- Sandy Beige Y62
- Milk Tea Y69
- Dark Sand Y611
I added the darkest shade around the edges to frame the sentiment. Milk Tea blends inward, while Sandy Beige stays in the centre as a soft highlight around the text.
Before adding the shading, the label looked unfinished.
Adding the word “Sending”
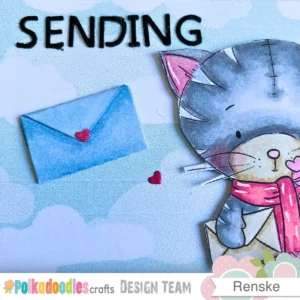
To complete the sentiment story, I added the word “Sending” to the front of the card using punched letters.
These were cut from black cardstock and placed in the upper left corner. This creates a phrase across the design that reads “Sending Hugs and Kisses”.
Step 7. Assembling the card front
You assemble the card front by layering elements in relation to the belly band so the cat appears integrated into the scene rather than placed on top of it.
Placing the Cat
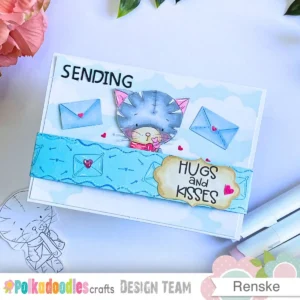
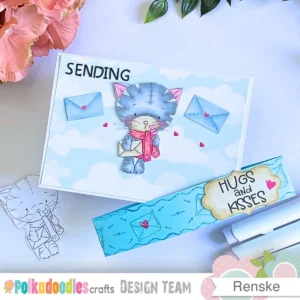
The Cat goes on first. I slide her behind the belly band so she feels anchored into it. Head above, feet below. That overlap does the work.
Slide the cat behind the band before glueing anything down. You’ll see quickly if the placement works. Mine was too high at first, so I moved it lower until the band crossed the middle of her body.
Moving her down so the band cut across her body made an immediate difference. Trust the overlap.
I place the cat with foam tape for dimension.
Placing the word sentiment
Use the black letters you punched and place them in the upper left corner of the card. Add a little liquid glue behind each letter, and arrange them to spell the word sending.
Placing the envelopes
Add the two envelopes to either side of the cat on the front of the card. Place the folded one on the left side of the cat’s head and the other envelope on the right side.
Placing the heart embellishment
When punching the envelopes, the hearts came out. I used these hearts as embellishments.
I coloured the hearts with Cherry Rose R48 Ohuhu alcohol marker. Place them next to the cat, one on the left and two on the right side.
Placing the sentiment on the belly band
Then place the sentiment on the belly band, to the right of the cat. Attach it with glue.
Step 8. Decorating the inside of the card
You keep the inside lightly decorated to support the front design while still leaving space for a written message.
First, the same aqua paper used for the belly band was cut to 10 cm x 14.3 cm
On top of this, a white panel was added measuring 9,5 cm x 13,8 cm. I placed three small hearts in the left corner to visually connect the inside with the front of the card.
Creating the floral border
Along the bottom of the inside panel, I stamped small hearts using Picked Raspberry Distress Ink.
To match the rest of the card more closely, I coloured over them using Cherry Rose R48.
I then hand-drew small flowers and coloured them with, pink tones, blue tones, and green leaves
I made dotted details to connect the flowers and the hearts with a gel pen.
The border adds a bit of detail, but there’s still plenty of space to write a message.
Finished result
The design comes together when the belly band, focal image, and postal elements visually connect into one cohesive scene.
Once the cat sat behind the band, the rest came together surprisingly quickly. The envelopes, colours and sentiment all seemed to fall into place after that.
The biggest challenge during the process was balancing the belly band with the focal image. Once the cat was positioned behind the wrap, the entire design started to work naturally.
Variaties op deze belly band card tutorial
The same belly band structure can be reused across different themes by changing colours, dies, and focal images.
The wrap-around construction works for almost any theme. You can use the same base format for birthday stamps, seasonal imagery, or friendship designs. Change the colour palette and die-cut shapes and the whole card transforms.
A winter version might use navy and silver with snowflake motifs on the band. A birthday version could use bright primaries with balloon or confetti shapes. The base stays the same, but the result looks like a completely different card.
This is what makes the belly band card format worth learning properly. You build the skill once and then apply it across many different designs. [link: friendship card ideas] [link: interactive card tutorials]
Common mistakes with a Belly Band card
The most common issues are incorrect band sizing, too much bulk on the strip, and inconsistent theme across the card.
The most common problem is a band that does not fit properly. Too tight and it buckles on removal. Too loose and it slides off before the card reaches its recipient. Always test the fit before decorating.
The second issue is too much bulk on the band itself. Each layer you add makes the band harder to slide on and off. Drawn, printed or stamped details are usually a better choice than stacked embellishments.
The third mistake is an inconsistent theme. If the front reads as postal but the inside and back do not connect to that idea, the card ends up feeling like three separate projects. Repeating a few shapes and colours across the card usually fixes it.
Frequently Asked Questions
Can I use a rubber stamp instead of a digital stamp for this card?
Yes, the colouring and placement steps are the same for both digital and rubber stamps. The main adjustment is that you will stamp your image onto smooth card stock before colouring and then fussy-cut it the same way you would a printed digital image.
What is the best way to store a belly band card so the band does not get lost?
Slide the band around the card before handing it over or mailing it. To take the belly band off is the fun part for the receiver.
Do I need a die for the envelopes, or can I cut them by hand?
You can cut them by hand with scissors or a craft knife. Envelope shapes like this are manageable without a die. A die just makes things quicker and more consistent if you’re cutting a few, but you really don’t need one for a first try.
Let’s get Creative together
A belly band card works best when you experiment with different themes, colours, and focal images while keeping the structure consistent.
You’ve got everything you need now to make your own belly band card with a happy mail theme. The colouring turned out to matter less than I thought. It really came down to the belly band placement.
Try your own version and see where it takes you. Change the stamp, shift the palette, or take the postal idea in a slightly different direction. This format gives you plenty of room to play.
Try your own version and see where it takes you. Change the stamp, shift the palette, or take the postal idea in a slightly different direction. This format gives you plenty of room to play.
Join the Polkadoodles Challenge
You can use this belly band card as inspiration for the Polkadoodles design team challenge, where the goal is to create your own project using the theme Anything goes.
If you join in, you can:
- Use your own stamps or digital images
- You can make anything you like.
More Friendship and Encouragement cards

Polkadoodles Products in the Spotlight
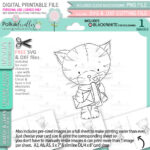
Suki Cat/kitten with mail & lollipop Digital stamp
Spring Tons Of Love Sentiment Set

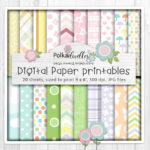
Pretty Spring Papers
I would like to enter my card in the following challenges
- Word Art Wednesday: Anything goes
- Crafty Catz: Anything goes
- Cut It Up: Friendship
- Lil Patch of Crafty Friends Challenge …: Anything goes
- A Perfect Time To Craft Open Challenge: Anything goes
- Crafts Galore Encore Challenge Blog: Anything goes
- Let’s Craft and Create: Anything goes + penny for your thoughts
- Pearly Sparkles Challenge Blog: This makes me smile
- Critter Crazy CHALLENGE BLOG: Anything goes + featured critter
- Crafty Animals: Anything goes + must use an animal

Very cute card with the little cat. Thanks for sharing with us at Cut It Up :)
Thanks a lot.
Renske, this is a really sweet card! I love the image of that cat, and you’ve colored it so very well with your markers. The belly band is a very fun addition! It was nice to hear how you came about making a part of the card. It’s fun when cards come together like that! Thanks so much for playing along with us at Word Art Wednesday. We appreciate your participation!