While birthday cards are great, have you ever thought about creating a shaker tag instead? This fun twist on the classic tag adds excitement to any birthday gift in January. If you’re looking for a way to elevate your gift-giving, this tutorial is just what you need. In today’s step-by-step shaker tag tutorial, I’ll show you how to create a fun shaker tag that is perfect for a birthday celebration.
I made this gift tag for the new Polkadoodles challenge. The design team were asked to create something for a January Birthday.
Grab your Polkadoodles products, and let’s get started!
- Materials and Tools Needed for the Shaker Tag
- Step-by-Step Shaker Tag Tutorial for a Fun January Birthday
- Let's Get Creative Together
- Polkadoodles products in the Spotlight
- I would like to enter my card in the following challenges
Materials and Tools Needed for the Shaker Tag
Gather these materials to create your shaker tag! We’ll be using some wonderful Polkadoodles products, such as the “Celebration – Winnie Winter Celebration” digital stamp and “Winnie Celebration Kit 1” papers.
Polkadoodles materials
- Celebration – Winnie Winter Celebration Digital Stamp: This adorable digital stamp features the perfect birthday-themed illustration, sure to bring your shaker tag to life. Find it here.
- Winnie Celebration Kit 1 Paper: These vibrant, celebratory papers are ideal for the background of your shaker tag. The patterns complement the digital stamp and add a festive touch. Get them here.
- Winnie Celebration Kit 2 Sentiments: These fun birthday sentiments will give your shaker tag that perfect finishing touch. Pick them up here.
Other supplies
- Tag die: A tag die is great if you have one! If not, you can easily cut your tag shape using a paper trimmer or scissors.
- White card stock: This provides a sturdy base for your shaker tag and holds everything together.
- Foam Tape: Use this to create the shaker effect by adding dimension to your tag.
- Alcohol Markers: These markers are perfect for colouring in your digital stamp. They blend beautifully and add vibrancy.
- White Gel Pen: Great for adding small highlights and details to your coloured images.
- Paper Glaze: Adds a shiny finish to your stamped image, making it look even more polished.
- Glue and Double-sided Tape: Use these to assemble the layers of your shaker tag and securely adhere to the foam tape.
- Scissors: For cutting out the stamped image and any other elements you’ll need.
- Optional extras:
- You can add some extra fun with sequins, glitter, or even small stickers for the shaker element. These will add a magical touch when you shake the tag!
Now that we have gathered all the materials, let’s get started on making this shaker tag!
Step-by-Step Shaker Tag Tutorial for a Fun January Birthday
Are you ready to create a vibrant shaker tag? In this tutorial, I will guide you through the process of making a fun and festive shaker tag for a January birthday using Polkadoodles products. This easy-to-follow guide will help you craft a tag that’s perfect for any birthday celebration. Let’s get started with the first step!
Step 1: Create Your Tag with Partial Die-Cutting
Creating the tag first helps you determine the right size for the digital stamp, ensuring it fits perfectly with your shaker tag. This ensures the size of your digital stamp fits perfectly with your shaker tag.
In this step, we’ll create a tag that’s slightly longer than the die I usually use, thanks to the handy partial die-cutting technique. This method adds a unique touch to your tag without needing to cut the entire die.
What you’ll need for this step
- Tag die
- White cardstock
- Washi tape or purple tape
- Die-cutting machine
Follow these steps to create your tag
- Position the Tag Die on the Cardstock: Place the die at the top of your paper where you want the tag to begin. Secure the die with washi tape to prevent it from shifting during the cut.
- Use Your Die-Cutting Machine and Adjust the Top Plate: Use your die-cutting machine and adjust the top plate to only cover the area where you want the tag to be cut. Ensure the bottom half of the die is not covered by the plate.
- Run It Through the Die-Cutting Machine: Now you’ll have just the top part of the tag cut out.
- Align and Extend the Die: Slide the die down the cardstock so the bottom part aligns with your desired length. Make sure it’s perfectly aligned with the cut edges from the first pass.
- Final Cut: Place the top plate over the bottom part of the tag die and run it through the machine again. This will give you the extended tag you need.
- Die- Cut the Small Circle: Finally, die-cut the small circle at the top where the ribbon will go through.
Now you have the perfect base for your shaker tag, ready for the next step: printing and preparing your digital stamp!
Step 2: Create the Shaker Window in the Tag
It’s time to create the shaker window! I’m using a rectangle die with a double-stitched border to make the process smoother.
What you’ll need for this step
- Rectangle die
- Acetatate
- Washi tape
- Die-cutting Machine
- Double Sided Tape
Here’s how to do it:
- Position the Rectangle Die: Place the die where you want the shaker window on your tag. Use washi tape to secure it.
- Run It Through the Die-Cutting Machine: Send the tag and die through the machine to cut a clean window.
Alternatives for Making the Window
If you don’t have a rectangle die that fits perfectly, no problem! You can cut the window by hand, or use partial die-cutting again if your die is slightly too large. Just follow the same process as before, cutting the top portion first, then sliding the die to cut the bottom half.
Adding the Acetate for the Shaker Window
To complete the window, we need to add acetate behind it. Here’s how:
- Add Double-Sided Tape: Apply double-sided tape around the perimeter of the window on the back of the tag.
- Cut and Attach Acetate: Cut a piece of acetate to fit the window and attach it securely to the back of the tag.
Now that the front of our shaker tag is all set, we’re ready to move on to creating the shaker effect! Stay tuned for the next step, where we’ll add the fun elements inside the shaker tag.
Step 3: Create the Shaker
It’s time to bring the shaker to life! We’ll be using the balloon-patterned paper from the Winnie Celebration Kit 1 for the background of our shaker tag. First, print the paper and trace the shape of the tag onto it with a pencil.
After that, cut it out, ensuring that the top portion of the tag is removed. From the bottom, keep the first curve and cut up to meet the top, leaving just the bottom part of the tag. This section will close off the shaker.
What you’ll need for this step
- Background paper
- Foam Strips
- Anti Static tool
- Shaker elements
Here’s how to do it:
- Prepare the Background Paper: Trace and cut out the tag shape from the balloon-patterned paper. Adjust the bottom part as needed.
- Attach Foam Strips: Flip the tag over and apply foam strips around the shaker window.
- Prevent Static: Use an anti-static tool to rub over the acetate and foam edges. This helps prevent shaker elements from sticking to the sides.
- Fill the Shaker: Add your shaker elements (sequins, glitter, beads) into the window. Seal it with the patterned paper and gently press down to secure it.
Now that the shaker is complete, we’re ready to bring in the digital stamp to finish off the tag. Stay tuned for the next step, where we’ll add our coloured image!
Step 4: Print and Colour the Digital Stamp
Now that the shaker tag is ready, it’s time to incorporate the digital stamp! I printed the stamp after creating the tag to determine the best size for it to complement the tag. For this project, I printed the digital stamp at around 5.5 cm, but you can adjust it to suit your tag.
What you’ll need for this step
- Winnie Winter Celebration Digital Stamp from Polkadoodles
- Alcohol markers
- White gel pen
- Paper Glaze
Colouring the digital stamp
Now it’s time to colour the digital stamp and to bring it to life. Here are the colour combinations I used:
- Skin: Tanned Skin, Peachy Blush, Salmon Pink, Pale Cream
- Hair: Clay, Walnut, Brown Grey, Pale Cream
- Hat and Scarf: Dark Sky, Midi Sky, Sky Blue
- Coat and Balloon: Yellow Green, Grass Green, Forest Green
- Skirt and Red Balloon: Cardinal, English Red, Burgundy
- Gloves: Cool Grey 4, Cool Grey 1
- Shoes: Clay, Walnut, Brown Grey
- Kite: Sky Blue, Dark Sky
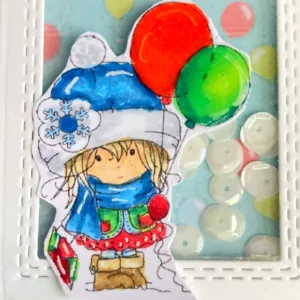
After colouring, I added highlights using a white gel pen on the balloons, the hat, and the polka dots on the skirt. I also added highlights to the kite for extra detail. To finish, I applied paper glaze to the balloons to give them a shiny, dimensional look.
Now that our digital stamp is fully coloured and ready, we can move on to assembling the final touches of the shaker tag!

Having trouble editing or colouring digital stamps? Download my free guide for extra tips and tricks to help you perfect your digital stamps!
Step 5: Add the Sentiment and Final Touches
With the shaker tag nearly done, let’s add the sentiment and secure everything in place. Since this is a January birthday project, I’ve chosen the “Let’s Party” sentiment from the Winnie Celebration Kit 2 sentiments set.
What you’ll need for this step
- The Let’s Party sentiment from Winnie Celebration Kit 2 Sentiments set
- Glue
- Ribbon
Assembly Steps
- Attach the Sentiment: Place the sentiment at the top of the acetate tag.
- Position the Digital Image: Attach the coloured image to the bottom of the tag, with the rest of the tag on the acetate. Be careful when glueing to acetate—ensure the adhesive is dry, and place something heavy on it for a while to let it set.
- Finish the Tag with Ribbon: Add the final touch with a green ribbon featuring white arrows. Tie it through the hole in the tag and trim any excess.
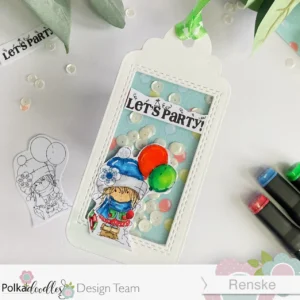
Your shaker tag is now complete! It’s a fun and personalised way to jazz up a gift for any January birthday celebration.
Let’s Get Creative Together
Shaker tags are a fun way to add a personal touch to your gifts. This January birthday project brings a festive feel to any present. Why not try making your shaker tag? Experiment with different colours, patterns, and embellishments to make it truly unique.
Have you ever created a shaker tag? I’d love to hear about your experience and ideas in the comments below. Let’s inspire each other!
Join the Challenge
Want to showcase your latest creation? Join the Polkadoodles challenge! The theme is always “Anything Goes,” so feel free to let your creativity shine. You don’t need to use Polkadoodles products, but we appreciate it when you do.
Click the button below to join the challenge blog and share your project with the community.
More Related Blogposts
Looking for more ideas? Check out these tutorials for additional card-making inspiration:
Polkadoodles products in the Spotlight
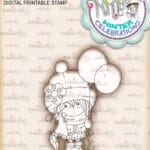
Celebration – Winnie Winter celebration digital stamp
Spring Gnomes Digital Paper set
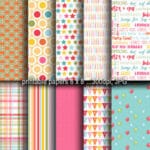
Winnie Celeberation Kit 1 – papers

I would like to enter my card in the following challenges
- Krafty Chicks Challenge: Birthday
- Cut It Up: Anything goes
- Lil Patch of Crafty Friends Challenge …: Anything goes
- A Perfect Time To Craft Open Challenge: Anything goes
- Crafts Galore Encore Challenge Blog: Anything goes


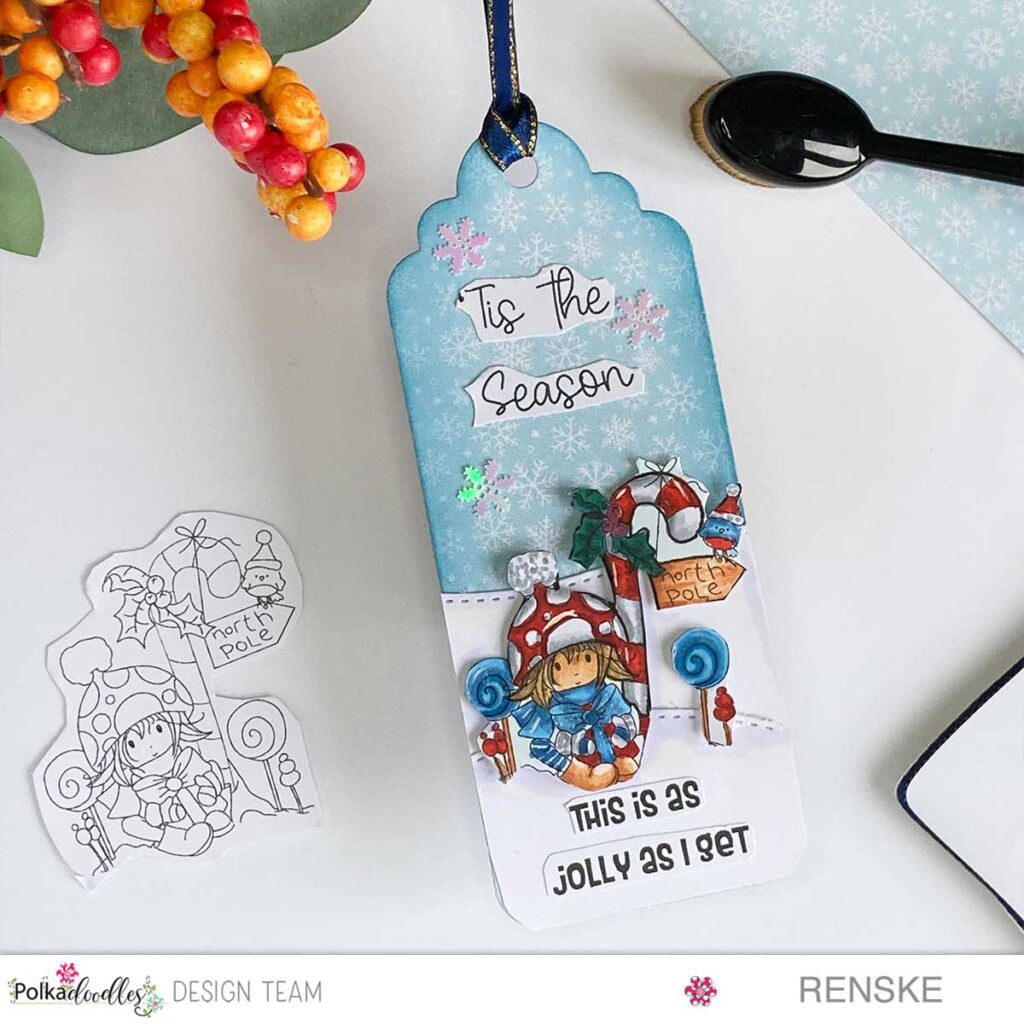
Cute tag, I love it. Thank you for joining us at the Crafts Galore Encore Challenge.
Hugs
Danka
Twórcze pasje Danki {My Blog}
Thank you Danka