
Some links in this post are affiliate links. This means I may earn a small commission if you make a purchase, at no extra cost to you. I only recommend products I use and genuinely enjoy in my own cardmaking. Read more here.
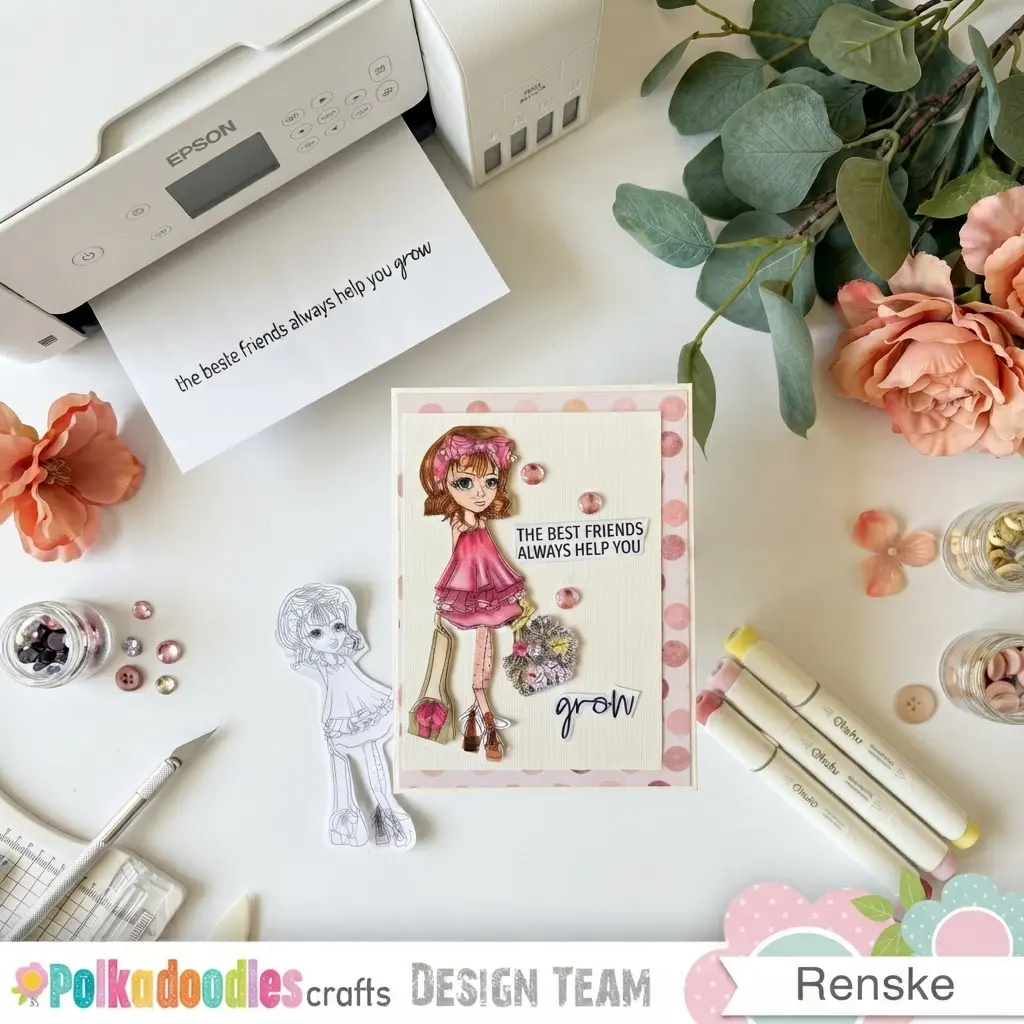
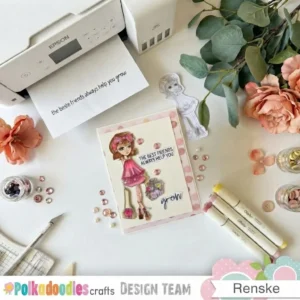
Sometimes you want to make a card for a friend to appreciate their friendship. That was the idea behind this Polkadoodles Design Team project, where I used the Ruby Flowers digital stamp to make this handmade friendship card.
Ruby is a large image, so she was always going to be the main image. The rest of the design stays fairly simple, with a sentiment from the Panda Bear Messages set and patterned paper from Spring Tongs of Love.
The patterned paper can also help you decide how to colour your image. For this card, I used stronger pinks in Ruby’s clothing and kept the flowers much softer, which gave the bouquet a different look without adding lots of extra detail.
In this tutorial, you’ll learn how to colour Ruby with alcohol markers and work out the rest of the card around her. If you have ever printed a digital stamp and wondered where everything else should go, there are a few things here you can try on your own cards.
Materials and Dimensions
You don’t need lots of supplies to make this friendship card. I’ve listed the Polkadoodles products first, followed by the paper, colouring materials and tools I used.
Polkadoodles products
- Ruby Flowers digital stamp
- Panda Bear Messages sentiment set, using the sentiment “The best Friends always help you grow”
- Spring Tongs of Love patterned paper
Paper
- White card base, 10.5 × 14.8 cm
- Light-coloured textured paper, 9 × 13 cm
- White DCP paper for printing Ruby, suitable for alcohol markers
- White DCP paper for printing the sentiment
If you already have a smooth marker-friendly paper that works well with your alcohol markers, you can use that instead. For the light-coloured panel, plain cardstock is also an option if you don’t have textured paper.
Colouring materials
- Ohuhu alcohol markers
You can use another brand of alcohol markers for Ruby, or try a different colouring medium such as coloured pencils.
Tools
- Printer
- Paper trimmer or cutting ruler
- Scissors
- Glue
- Foam tape or foam squares
- Pink embellishments
Once you have your supplies ready, we can start with the digital stamp. First, you’ll see how to resize Ruby and choose a size that gives the image enough space on the card before you start colouring.
How Do You Make a Friendship Card with a Digital Stamp?
Ruby’s size and the shape of her bouquet affected the rest of the card, so that’s where I started. First, we’ll focus on the colouring, background and layout before we add the sentiment and final details.
Step 1. Choose and Resize the Ruby Flowers Digital Stamp
Start with the Ruby Flowers digital stamp. Ruby has quite a few details, so printing her large enough helps keep those details visible on the finished card.
If you are new to digital stamps or want to learn more about how to resize and work with them, I have a free guide that covers the basics. You can get it by filling in the form below.
I resized the digital stamp to 12.5 cm high, which made it 6.23 cm wide. I then printed Ruby onto white DCP paper suitable for alcohol markers.
Because Ruby is quite large, I also had to think about where she would sit on the card before printing. Her bouquet extends to the right, so I knew I needed enough space there for the sentiment.
Step 2. Colour Ruby Flowers with Ohuhu Markers
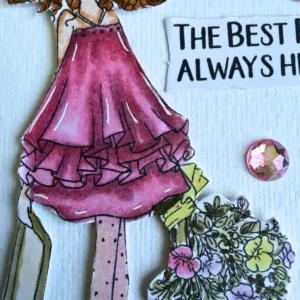
I started by choosing the main colours for Ruby and her bouquet. I wanted stronger, brighter pinks for her dress, while the flowers would be softer and more pastel.
Because the digital stamp has quite a few details, I kept the smaller areas fairly calm too. You can try the same approach with other detailed digital stamps. Using stronger colours in some areas and softer colours in others can help keep the image from feeling too busy.
I coloured the image with my Ohuhu markers. These are the combinations I used.
Ruby’s skin and hair
For Ruby’s skin, I used:
- YR00 Barely Blush
- YR03 Pastel Blush
- YR04 Pastel Peach
For her hair, I used:
- YR312 Light Earth Brown
- YR313 Potato Brown
- YR314 Sandalwood
- YR39 Cinnamon for the deepest shadows

The warm brown hair tones also work nicely with the warmer colours in the patterned paper.
Her dress and bows
For Ruby’s dress and large bow, I used:
- R22 Ballet Pink
- R25 Tender Pink
- R46 Old Rose
- R57 Rose Dust
I repeated these pinks in different parts of Ruby’s clothing so the colours would connect the different elements. You can use the same approach with your own digital stamps by repeating a colour in more than one part of the image.
For the dots on the large bow, I kept the colours subtle rather than adding another strong colour. I used YR33 Rose Cream and YR45 Rosewater for a little shading.
I also used YR45 Rosewater in some of the flowers. Repeating a colour in both Ruby and the bouquet helps connect the image without making all the colours the same.
For the small bow, I used R25 Tender Pink, R46 Old Rose and R57 Rose Dust. I coloured the bag with E17 Sage Grey, E19 Dried Sage and E212 Dusty Olive.
The pastel bouquet
For the bouquet, I chose a softer palette than I used for Ruby’s clothing. The flowers ended up even more pastel than I imagined, but I liked how this worked with the stronger pinks in her dress.
Rather than giving every flower a different colour, I picked a few flowers at a time and used the same colour combination on them. I then repeated those colours in different parts of the bouquet.
For the pink flowers, I used:
- R23 Sakura
- R28 Pink Carnation
- R38 Rose Pink
- R46 Old Rose
For the yellow flowers:
- Y02 Lemon Chiffon
- Y06 Butter
- Y07 Banana Cream
- Y26 Light Gold
For the peach and orange tones:
- YR03 Pastel Blush
- YR04 Pastel Peach
- YR45 Rosewater
- YR57 Tropical Peach
For the cooler accents:
- R50 Orchid Wisp
- R54 Lavender Fog
- V14 Pale Purple
- V22 Lavender Wisp
For the leaves:
- E26 Pale Celery
- E19 Dried Sage
- E212 Dusty Olive
- E314 Military Olive
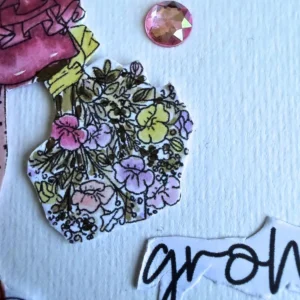
You don’t need to use all these colours to get a similar look. Pick a few colours from the list, use colours you already have or choose a simple palette with two or three main colours for your card.
A colouring tip for other digital stamps
When you have a detailed image, choose a few colours and repeat them in different parts of the image. This can help connect the different elements without giving every small detail its own colour.
For this card, the pinks connect Ruby’s clothing with the bouquet, while YR45 Rosewater appears in both the dots on her bow and the flowers. Keeping the bouquet softer than the clothing also gives you contrast without needing lots of extra colours.

Step 3. Build the Card Base and Add the Patterned Paper
Once Ruby was coloured, I started assembling the card.
Start with a white card base measuring 10.5 × 14.8 cm and keep the card in a vertical orientation. Cut the Spring Tongs of Love patterned paper to 10 × 14.3 cm, then glue it directly onto the card base, leaving a narrow white border around the edges.
The dotted pattern brings together pink, old rose, purple and warm brown tones, which worked nicely with the colours I had already used for Ruby.
At first, I thought about adding another soft pink background element. When I put everything together, though, I felt the patterned paper already had enough colour and detail, so I left it out.
If your patterned paper already adds plenty of colour and detail, you can let it do the decorative work and keep the other layers quieter.
Step 4. Add the Light-Coloured Panel
Cut a piece of light-coloured textured paper to 9 × 13 cm. Place it over the patterned paper, slightly towards the fold, leaving 3 mm of patterned paper visible along the fold, 8 mm at the top and bottom, and 1 cm along the open side of the card.
I normally centre a panel like this, but Ruby is positioned slightly to the left on the card. I decided to repeat that placement with the background panel rather than centring it.
This makes the background a little more interesting while creating a calmer area for Ruby and her bouquet. Shifting a layer slightly can change the feel of a familiar card layout without adding another decorative element.
Step 5. Position Ruby and Add the Sentiment
Before adding glue, place Ruby on the card and move her around until you find a position that works with the rest of the design.
For this card, Ruby sits slightly towards the left. Her large bouquet reaches towards the right, creating a natural area for the sentiment.
After printing and cutting the sentiment, place it on the card, but keep both pieces loose for now. This gives you room to move Ruby and the sentiment around together until you are happy with the composition.
The first part of the sentiment, “The best Friends always help you”, sits beside Ruby, while “grow” is placed underneath the right side of the bouquet. The sentiment is large enough to read, but when you’re crafting with a digital stamp, check the available space before printing so you know it will fit where you want to place it.

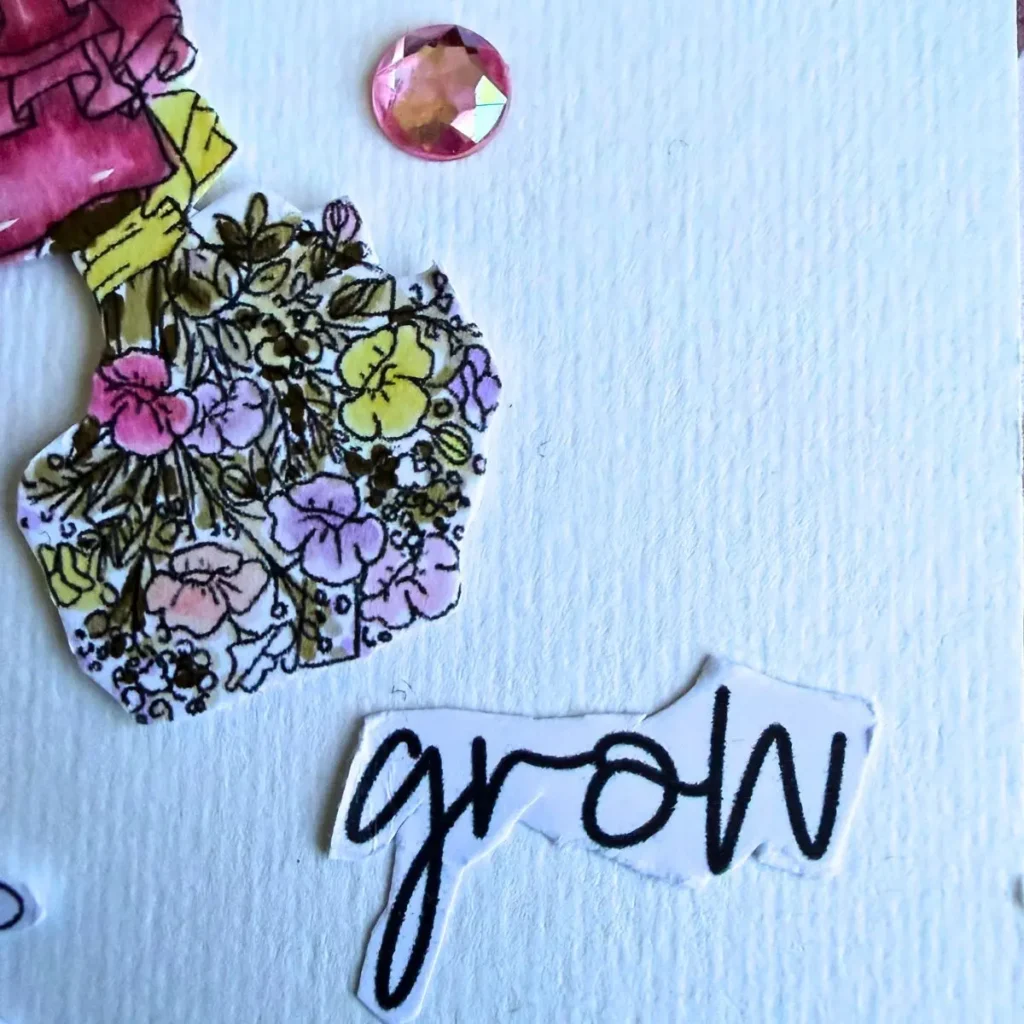
Once you are happy with the position of both pieces, glue them in place.
A composition tip
When working with a large digital stamp, look at the shape and direction of the image before deciding where to place your sentiment. Keeping the main image and sentiment loose while you work makes it much easier to test different positions before committing to one.
Step 6. Add Dimension and Finishing Details
Once the position was right, I attached Ruby using foam squares. You can also use foam tape from a roll if you have some in your craft supplies.
The raised image adds dimension and helps her stand out from the light-coloured panel.. I kept this part simple because the bouquet already has plenty of detail.
There was still some open space on the card, so I added three larger pink embellishments. They are all the same size and colour, and I chose pink to repeat one of the colours already used in Ruby and the bouquet.
I placed one pink gem beside Ruby’s head, another diagonally above the first part of the sentiment and a third underneath, just above the flowers. This placement draws attention to Ruby and the sentiment first, then leads your eye further down the card.
You do not need to fill every empty space with embellishments. Look at the card as a whole and see whether a small detail can fill an area that feels a little empty or repeat a colour you have already used.
For this card, the pink gems do both. They repeat the pinks in Ruby and her bouquet while adding a little interest to the open areas without competing with the main image.
Additional Tips and Alternatives
The ideas in this card can also help when you are working with other digital stamps. Here are a few things to keep in mind when you are choosing colours and building your card around a detailed image
Give a detailed digital stamp enough space
If your digital stamp has lots of small details, you don’t need to add more detail everywhere else. A simpler background helps the image stand out and can make the finished card easier to put together.
Try a different colour palette
Ruby doesn’t have to be coloured in pinks and warm tones. You could use cooler blues and purples for her clothing, or choose a more limited palette and let the bouquet provide contrast.
If you are making other flower cards, start with the part of the image you want to stand out and choose the remaining colours around it.
Let’s Get Creative Together
This friendship card brings together several ideas you can use in your own cardmaking. You can resize a digital stamp to suit your card, use patterned paper to help guide your colour choices, create contrast with softer and stronger colours, and add dimension with foam squares or foam tape.
One of the most useful things you can take from this card is to look at your main image before deciding where everything else should go. The shape and direction can help you find space for your sentiment, decide where to place your background layers and see whether you need any extra details.
When you’re working with a detailed digital stamp, keep your pieces loose while you work. Move the image and sentiment around together, look at the spaces they create and only add glue when you are happy with the composition.
Do you usually position your image first, or your sentiment? Let me know in the comments.
Join the Polkadoodles challenge
This card was made for the new Polkadoodles challenge. The challenge is always Anything Goes, so you can create a project that suits you and interpret the theme in your own way.
You also don’t have to use Polkadoodles products to join the challenge. If you don’t have any Polkadoodles stamps or papers yet, you can still take part, see what other crafters make and use their projects as inspiration for your own cardmaking.
It’s also a chance to win prizes, and you can use the challenge as a creative starting point if you are not sure what to make.
More Friendship Card Ideas
If you’re looking for more friendship card ideas, you can find them below. I’ve shared other friendship cards I have made using Polkadoodles products, so you can see how different stamps, colours and layouts can create completely different cards.

Handmade Easel Card For Memorable Friendship Moments
You might also like this handmade easel card. It combines a heart-shaped easel design with a cute dog, patterned paper and a friendship sentiment.

Mixed Media Card Tutorial – Create A Layered Friendship Card
Looking for another idea with a different technique? This mixed media card combines blended Distress Inks, stencilling, texture paste and die-cut feathers with two little birds.
Polkadoodles products used
Ruby Flower Digital stamp
Spring Tons of Love paper patterns 1

Noodle Panda themed messages

I would like to enter my card in the following challenges
- Unicorn Challenge Blog: Not Square
- Word Art Wednesday: Anything goes
- Lil Patch of Crafty Friends Challenge …: Anything goes
- A Perfect Time To Craft Open Challenge: Anything goes
- Crafts Galore Encore Challenge Blog: Anything goes
- Pearly Sparkles Challenge Blog: Pinks, Pearls and/or Sparkle
