

Some links in this post are affiliate links. This means I may earn a small commission if you make a purchase, at no extra cost to you. I only recommend products I use and genuinely enjoy in my own cardmaking. Read more here.
The tea birthday card features a detailed digital stamp, soft colours, a layered background and some dimensional details.
I made this card for the latest Polkadoodles challenge, using the Winnie Wonderland Always Tea Time digital stamp. The design team was challenged with the theme “September Birthday”, and this digital stamp seemed like a perfect fit with its tea set, flowers and warm colours.
The green seen in the teacup is also present in the card base and the leaves, and the peach and pink tones reappear in the flowers and the tableware. By repeating these colours in the card I was able to use a number of shades without the design seeming too crowded.
The background turned out darker than I had hoped, and it wasn’t quite the soft look I had in mind.
I had already attached the first background when I realised the colour was too strong. Rather than pull it off and risk damaging the card, I changed the plan. I’ll show you what I did in the background section.
In this birthday card tutorial, I’ll show you how I made the background, coloured the digital stamp, and added the leaves and flowers. I’ll also show you how I used foam tape to add dimension and build up the different layers.
Materials and Dimensions for this birthday card tutorial
These are the supplies I used for this tea birthday card. I’ve included the full Ohuhu marker list because I reused the same colours throughout the card. With a busy digital stamp like this, reusing a few colours helped me keep the different cups, flowers and leaves connected without needing a separate colour combination for every element.
Polkadoodles
- Polkadoodles Winnie Wonderland Always Tea Time digital stamp
- Polkadoodles Coffee, Tea and Cake Sentiments set
Card and Paper
- Green card base, 10.5 x 14.8 cm
- White cardstock for the first mat, 10 x 14.3 cm
- White cardstock for the background, 9.5 x 13.8 cm
- Small pieces of cardstock for the die-cut flowers and leaves
- Alcohol marker paper for the digital stamp
Inks
- Distress Ink Pine Needles
- Distress Ink Antique Linen
- Distress Ink Dried Marigold
- Distress Ink Mustard Seed
- Memento Lady Bug ink
Ohuhu alcohol markers
- Y42 Warm Ivory
- Y45 Cream
- Y69 Milk Tea
- Y415 Sand Storm
- YR33 Rose Cream
- YR34 Peach Cream
- YR47 Dusty Peach
- YR59 Cantaloupe
- R22 Ballet Pink
- R25 Tender Pink
- R46 Old Rose
- R57 Rose Dust
- E17 Sage Grey
- E19 Dried Sage
- E212 Dusty Olive
- YG215 Thatch Green
- Y413 Fawn
- Y416 Golden Brown
- WG10 Porcelain
- WG26 Silver Grey
- YR015 Burnt Orange
- BGY00 Cashmere Grey
Stamps and Dies
- Leaf stamp
- Small flower and leaf dies
- Die-cutting machine
Other supplies
- Blending tool
- Paintbrush or another tool for the water splatters
- Water
- Adhesive
- Foam tape
- Printer
If You Don’t Have the Same Supplies
You don’t need the same Ohuhu markers to make this card. Another marker brand or a different colouring medium will work too. Look for a few pink and peach shades for the tableware and flowers, then repeat a few greens in the leaves. Keeping some colours consistent helps the different parts of the card feel connected.
You can also use different dye inks for the background. I’d keep the first layer fairly soft, especially when your digital stamp has lots of detail. I found that the darker brown inks made this particular background feel heavier than I wanted, so softer colours worked better here.
For a bit of dimension, you can use foam squares, foam tape or layers of scrap paper. I kept the leaves flat and raised the flowers, which gave the arrangement some height without making it too bulky. You can add more or less dimension depending on the look you want.
How do I make a layered tea birthday card with digital stamps?
You can make a layered tea birthday card by combining a soft background with repeated marker colours on your image. Let’s get started with the card layers and background, then colour the digital stamp before adding the flowers and leaves.
Step 1. Prepare the Card Base and First Mat
Start with a green card base measuring 10.5 cm x 14.8 cm. The green picks up the colour of the teacup and comes back later in the leaves, so it gives you a colour to carry through the card from the start..
For the first mat, cut a piece of white cardstock measuring 10 x 14.3 cm. I didn’t have cardstock in a matching colour, so I coloured the edges myself. Use Ohuhu YR015 Burnt Orange to create a narrow orange border.
I liked how the orange border warmed up the white cardstock. It brought some of the warmer colours from the tea set into the card without making the mat feel too bright.
The card layers were ready, but the background didn’t quite go to plan.
Step 2. Create the Soft Mixed Media Background
The first background turned out darker than I had expected.
I planned to use checkered patterned paper and warm it up with Walnut Stain and Vintage Photo Distress Ink. It seemed like a good fit for the tea party theme, but once I added the ink, the background turned out darker than I had expected.

By then, the patterned paper was already attached to my first mat layer. I didn’t want to risk damaging the card by pulling it off, so I left it in place and added another background on top.
Cut a piece of white cardstock measuring 9.5 x 13.8 cm. This will be the background layer.
The darker checked paper still shows around the edges, adding another layer while the softer background stays in focus.
Have you ever had a background turn out darker than you expected? I’d be curious to know whether you would save it with another layer or start again.
Blending the background
For the new distress ink background, blend Antique Linen, Dried Marigold and Mustard Seed Distress Ink onto the white cardstock. Start with a light layer and build up the colour gradually, using a blending tool to work the inks into the cardstock.
Keep the centre lighter and build up more colour towards the edges. I kept the centre soft because there is already a lot of detail in the digital stamp, so the lighter area gives the tea party more room to stand out.
Add the water splashes
Finish the background with a few water splashes. I chose not to use white ink or gouache here, but kept it to plain water instead.
Dip a paintbrush in water, hold it over the cardstock and tap the brush with your finger to create small drops. The water lifts some of the Distress Ink, leaving lighter marks behind and giving the background a little texture.
Keep the splashes fairly light. A few small marks are enough to add texture without taking attention away from the tea party.
Step 3. Colour the Polkadoodles digital stamp for your Tea Birthday Card
The Winnie Wonderland Always Tea Time digital stamp is quite large, with lots of cups, a teapot, flowers, and small dots spread across the design.
I printed it at 8 x 12.5 cm on DCP paper, which is suitable for my alcohol markers. If you’re new to digital stamps or want to know how to print, crop and resize them for your cards, I have a free guide that walks you through the process.
Colouring the Tea Set
This digital stamp already has lots of cups, flowers, and little details, so I kept the colour palette fairly small. With so much going on in the image, using fewer colours helped keep the card from feeling too busy.
I repeated the same pink, peach, cream and green shades throughout the tea set. The cups don’t all match, but using the same colours in different combinations keeps the whole image connected without needing lots of different markers.

Cream and Warm Yellow
For the lighter pieces of the porcelain, I used:
- Y42 Warm Ivory
- Y45 Cream
- Y69 Milk Tea
- Y415 Sand Storm
Start with the lighter colours and use Y69 for the shadows. I added Y415 Sand Storm in a few areas where I wanted a little more depth.
Peach and Terracotta
For the peach-coloured pieces, I used:
- YR33 Rose Cream
- YR34 Peach Cream
- YR47 Dusty Peach
- YR59 Cantaloupe
I didn’t use all four colours on every piece. I chose the shades as I went, depending on the size of the area and how much shading it needed.
Soft Old Rose
For the pink pieces and details, I used:
- R22 Ballet Pink
- R25 Tender Pink
- R46 Old Rose
- R57 Rose Dust
R57 is quite a strong pink, so I used it mainly for deeper shadows and small details.
Adding Green
The green parts of the tea set use the following markers:
- E17 Sage Grey – the lightest green and my starting colour
- E19 Dried Sage – the next shade for building up the colour
- E212 Dusty Olive – a deeper olive green for the darker areas
- YG215 Thatch Green – the darkest green, used only for small accents
I used E17, E19 and E212 for most of the green areas. I added YG215 Thatch Green to a few darker areas where I wanted a little more depth.
I kept the greens fairly muted because there is already plenty of peach and pink in the image. The same greens appear in the leaves and the green card base, which helps keep the colour palette consistent throughout the card.
Colouring the Large Teapot
For the large teapot on the left, I kept the main body light with Y42 Warm Ivory and Y45 Cream. I added Y69 Milk Tea for the shadows, with Y415 Sand Storm in the darker areas.
I coloured the flowers with YR34 Peach Cream, YR47 Dusty Peach and R46 Old Rose. For the leaves, I used E17 Sage Grey and E19 Dried Sage.
For the lid, I went back to YR33 Rose Cream and YR47 Dusty Peach instead of adding another colour.
Repeating colours from the rest of the digital stamp helps the teapot fit in with the rest of the tea set, rather than making it stand out on its own.

Inside of the cups
For the tea inside, I used Y69 Milk Tea, Y413 Fawn and Y416 Golden Brown. Using the same browns across the different cups made the tea look consistent throughout the image.

Colouring the Green Cup
The small cup at the lower right is where I brought the green back in.
I used:
- E17 Sage Grey
- E19 Dried Sage
- E212 Dusty Olive
For the little flowers, I used YR34 Peach Cream and R46 Old Rose.
I used the same greens elsewhere in the tea set and again in the leaves. Repeating these colours kept the palette consistent without needing to add more markers.

Colouring the Other Cups
For the smaller cups, I went back to the colour combinations I had already used rather than adding more colours.
Colour combination 1:
- Y42 Warm Ivory
- Y45 Cream
- Y69 Milk Tea
Colour combination 2:
- YR33 Rose Cream
- YR34 Peach Cream
- YR47 Dusty Peach

I didn’t try to make every cup match. With so many different pieces in the image, I liked how the small variations made the tea set more interesting, while the repeated colours kept everything connected.
Which colour combination would you choose for your own tea birthday card?
Once I finished colouring, I cut out the whole digital stamp in one piece. I placed the complete tea-party scene on the card first so I could see exactly where the stamped leaves needed to go.
Step 4. Stamp and Colour the Leaves
Once the image was coloured and cut out, I could use it to work out where the leaves would go.
I placed the digital stamp on the background without attaching it and moved it around until I was happy with the position. Then I stamped the leaves while keeping the digital stamp in place as a guide.
In the top right corner, I stamped a green leaf with Pine Needles Distress Ink and a pink leaf with Memento Lady Bug.
I did the same in the bottom right corner, where another green and pink leaf peeks out from behind the digital stamp.
Around the large teapot, I added one green leaf, one pink leaf and one leaf stamped with Dried Marigold Distress Ink. I wanted the Dried Marigold leaf to be subtle, although it turned out a little more subtle than I had expected. Most of it is hidden once the digital stamp is in place, which I liked because it adds a little extra detail without standing out too much.
I found this much easier than stamping the leaves first. You can see exactly what will remain visible, so you won’t end up filling spaces that are later covered by the digital stamp.
Colouring the Leaves
I coloured the green leaves with the same markers I used for the green parts of the digital stamp:
- E17 Sage Grey
- E19 Dried Sage
- E212 Dusty Olive
The pink leaves were coloured with:
- R22 Ballet Pink
- R25 Tender Pink
- R46 Old Rose
- R57 Rose Dust
I used R57 mainly for the deeper shadows and small details because it is a strong pink.
The Dried Marigold leaf was meant to be subtle, although it turned out a little more subtle than I had expected. Most of it is hidden once the digital stamp is in place, which I liked because it adds a little extra detail without standing out too much.
With the leaves finished, the background was ready for the digital stamp.

Step 5. Attach the Digital Stamp and Add the Shadow
With the leaves finished, I attached the complete digital stamp with foam tape, raising the whole image rather than adding foam tape to separate parts.
With so many small details in the image, keeping the digital stamp as one piece gave the card some dimension without making it feel too busy.
Once it was attached, I noticed the tea set needed something underneath it. Without a shadow, it looked as though it was sitting above the background rather than on it.
Add a soft shadow under the tableware
I used BGY00 Cashmere Grey, WG10 Porcelain and WG26 Silver Grey to add a soft shadow underneath the tea set.
I kept the colour very light at first. On the card, there was already plenty of peach, pink and green, so I didn’t want a dark grey shadow to stand out too much.
Add a little more where needed and check the card as you go. You can keep adding colour until the tea set feels grounded, but there’s no need to make the shadow too strong.
Once the tea set looked like it was sitting on the background, I stopped. For this card, that was enough.
Step 6. Add the Die-Cut Flowers, Leaves and Sentiment
The card is almost finished. I only had the die-cut flowers and leaves and the sentiment left to add.
Die-Cut the Flowers and Leaves
Die-cut the small flowers and leaves from white cardstock using the flower and leaf dies.
Colour the Flowers and Leaves
Colour the die-cuts with colours that are already in the digital stamp. You can use the same shades or choose similar colours from your own stash, as long as they fit with the rest of the card.
Once the digital stamp was attached, I could see where the flowers and leaves worked best. I added the flowers with foam tape and glued the leaves straight onto the card.
Print and Place the Sentiment
For the sentiment, I used “Have a tea-rrific day” from the Polkadoodles Coffee, Tea and Cake Sentiments Set.
I placed it in the top left corner, above the large teapot. The text runs towards the stack of cups and stops before the top cup.
I added a leaf and flower above the sentiment and another underneath. I moved one of the flowers slightly because it was a little too close to the edge.

Finally, attach the finished background to the mat layer and then to the green card base.
Let’s get creative together
You can use the same approach to make this tea birthday card your own. Change the colours, try a different background or use another digital stamp while keeping the same basic layout.
You don’t have to decide every small detail before you start. Place the main image first, then see where the smaller leaves and flowers work best before adding them.
Start with the supplies you already have and adapt the design to suit your own style. You can swap colours, backgrounds and images depending on what you have in your stash.
Join the Polkadoodles Challenge
This card was made for the Polkadoodles challenge with the September Birthday theme.
You’re welcome to join the challenge and use the September Birthday theme as a starting point. You can interpret the theme in your own way and use the supplies you already have. This tutorial can give you some ideas, but there’s no need to copy the card exactly.
More Handmade birthday card ideas
If you’d like to try another digital stamp or a different cardmaking technique, check these posts next.

Make A Charming Autumn Birthday Card For November
A Autumn birthday card with the freddy fox digital stamp from Polkadooldles
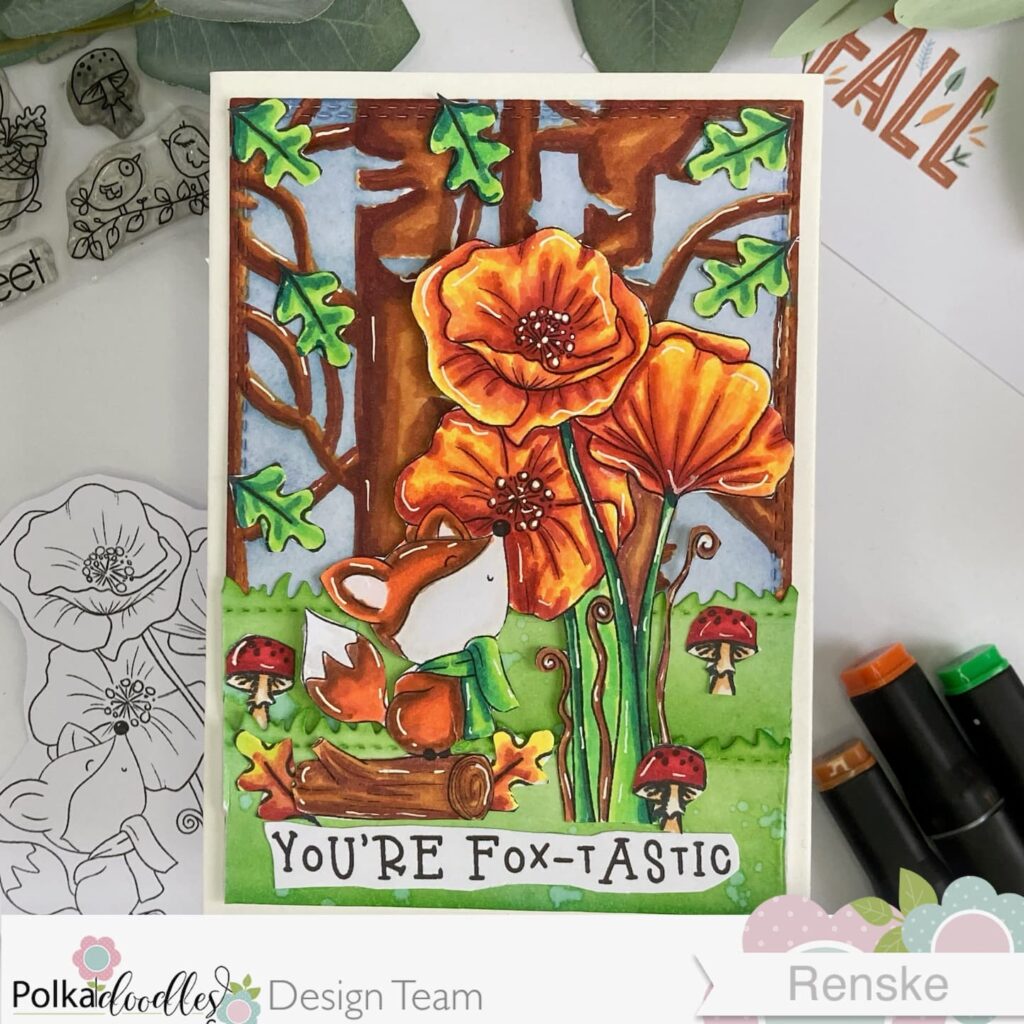
Create A Gorgeous Autumn Fox Card With Fox Card Tutorial
Another card with gorgeous autumn colours.
Polkadoodles In the Spotlight
Winnie Wonderland Always teatime

Coffee, Tea and Cake Greetings
I would like to enter my card in the following challenges
- Unicorn Challenge Blog: Not square
- Crafty Gals Corner: Anything goes + fall foilage
- Word Art Wednesday: Anything goes
- Seize the Birthday: Add a sentiment strip
- Craft Rocket Challenges: Use Dies
- Crafty Catz: Anything goes
- Lil Patch of Crafty Friends Challenge ...: Anything goes
- 613 Avenue Create: Anything goes
- A Perfect Time To Craft Open Challenge: Anything goes
- Classic Design Challenge Blog: Anything goes + Autumn Colours

What a beautiful card Renske!
Thank you again for joining us at LPOCF! Good luck!
thank you
Renske, first of all, your card is absolutely adorable! I love how you have taken digital stamps and created such a warm and cozy feeling with them. Your color choices and blending skills are spectacular! I also really love how you have given such detail in how you created this card. Even sharing the color and brand of markers that you used is really helpful. But what I am super duper impressed with is your photography skills. That first photograph with the printer, and all of your supplies is stunning! You are truly an inspiration! Thanks so much for playing along with us at Word Art Wednesday. We appreciate your participation!
Oh wow, thank you so much for your lovely comment. That is really great to hear.