
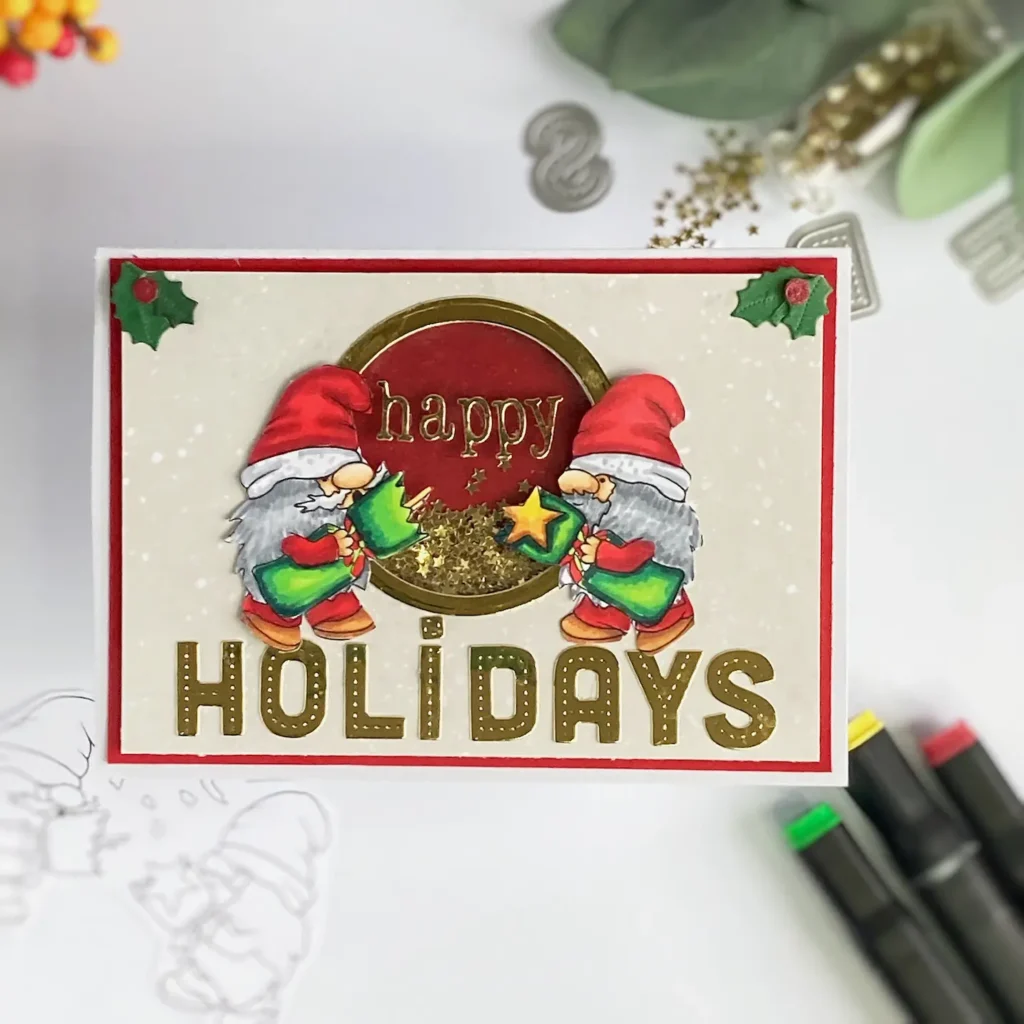
Crafting holiday cards is a thoughtful way to share joy and warmth with loved ones. Imagine a festive Christmas shaker card that sparkles with every shake, delighting its recipients. In this tutorial, I’ll guide you through the steps to create this charming card, ideal for friends and family.
This tutorial is part of the latest challenge from Penny’s Paper-Crafty Challenge Blog, themed “Anything Goes Using Paper.” This presents an opportunity to unleash creativity and showcase your skills.


A special shoutout goes to our generous sponsors, Sheepski Designs and Alex Syberia Designs, who have provided amazing products to inspire our crafting journey.
Let’s create something beautiful together that will warm the hearts of those you love!
Gather Your Supplies for an Easy Christmas Shaker Card
Creating a Christmas shaker card requires essential materials that contribute to the overall design. Here’s what you’ll need: Let’s go through what you’ll need:
| Materials and Tools | Description | Alternative |
|---|---|---|
| Crackers Digital Stamp from Sheepski Designs | This stamp features two gnomes pulling a cracker, adding a whimsical touch to your card. | Any festive digital or clear stamp that suits your theme. |
| Shiny Golden Paper | The shiny golden paper adds a festive flair. We will die-cut letters from it and the frame around the shaker window | Consider using metallic cardstock or any shiny paper you have. |
| Patterned Paper | The patterned paper provides depth and character. It is the background for our stamps. | Any patterned paper you have. But you can also make the background yourself. |
| Star Embellishments | Sparkly stars are perfect for enhancing the shaker effect. | Look for buttons, sequins, or cut-out shapes from leftover paper. |
| Holly and Berry Dies | These dies create intricate shapes that elevate your card design. We use it to embellish the card | You can hand-cut shapes or use stickers that align with your holiday theme. |
| Alcohol Markers | Alcohol markers are excellent for colouring your stamped images. | Alternatively, you can use coloured pencils or watercolour markers depending on your preferred technique. |
| Distress Ink Black Sooth | To add shadow to the holly die-cuts | You can use any black ink you have. |
| Blending Brush | Used for applying the black ink to the holly die-cuts | Makeup sponges work well too |
| Scissors | For cutting your materials. | Craft Knife |
| Foam Tape | To create dimension in the shaker, allowing the shaker elements to move freely. | Stack layers of paper on top of each other. |
| Double Sided Tape | To add the acetate to the back of the patterned paper | Glue |
| Acetate | To create the shaker window | Use plastic from packaging materials. |
| Die-cutting machine | To die-cut the holly and the berries | is optional if you having dies |
By being inventive with your materials, you can create a stunning shaker card that reflects your unique style. Let your imagination guide you!
Now that you’ve gathered your materials, let’s move on to the next part—crafting your Christmas shaker card! In the following section, I’ll guide you through the step-by-step process to create your Christmas shaker card.
Easy Shaker Card Instructions for Your Christmas Shaker Card Step-by-Step
Making your own Christmas shaker card is enjoyable and fulfilling. This step-by-step process will guide you through each phase, making it easy to follow along. These clear shaker card instructions will help you design a card that captures the festive spirit. Let’s get started.
Step 1 Prepare Your Sentiment Letters
In this step, you’ll prepare the letters for your card’s sentiment. Choosing the right size for the letters is crucial, as it sets the tone for your design.
Preparation
Start by cutting out the letters for the word “HOLIDAYS.” It’s best to do this before printing the digital stamp, as it helps determine the size of your stamped image. Using individual alphabet dies, cut each letter from shiny golden paper with a lovely stitched edge.
Sizing
For my card, measuring 10.5 cm by 14.8 cm horizontally, lay the letters on the card to gauge their size. I decide on a height of 7 cm for my digital stamp.
This step sets the stage for assembling your shaker card.
Step 2 Print and Colour Your Digital Stamp Crackers
With your letters ready, it’s time to print and colour your digital stamps. This step brings your characters to life.
Printing
With the height set according to the letters, it’s time to print the digital stamp. I print it on DCP paper, ensuring it has a smooth finish.
Colouring
Colour the image with alcohol markers, using the following combinations:
- Skin: Barely Beige (142), Salmon Pink (25), Peachy Blush (259), Tanned Skin (260).
- Beard: Cool Grey 5 (CG5), Cool Grey 4 (CG4), Cool Grey 3 (CG3), Cool Grey 1 (CG1).
- Hat, Shirt, and Trousers: Cardinal (244), English Red (249), Burgundy (247).
- Shoes: Sand (107), Rose Beige (97), Burnt Sienna (95).
- Cracker: Yellow Green (48), Grass Green (48), Forest Green (50), Dark Green (51).
- Star: Barn Red (245), Golden Yellow (222), Primary Yellow (221), Pastel Lemon (39).
Once coloured, carefully cut out the two gnomes.

Completing this step will bring your characters to life and set the stage for the shaker card assembly.
Step 3 Create the Card Base and First Layer
With your gnomes ready, it’s time to create the card base and the first layer. This base keeps your shaker card sturdy and attractive.
Card Base
I’m using a pre-made card base measuring 10.5 cm by 14.8 cm, but you can easily create your own by cutting a piece of paper to 21 cm by 14.8 cm and scoring it at 10.5 cm to fold in half.
First Layer
Next, I prepare a red frame for the shaker, cutting it to 10 cm by 14.3 cm. Avoid glueing this layer down just yet, as we’ll need to seal the shaker with it later, so keeping it separate makes the process easier.
This solid base ensures your shaker card remains durable and visually appealing.
Step 4 Create the Christmas Shaker
Now it’s time to assemble the shaker component of your card, adding an interactive element.
Shaker Window
To create the shaker, use patterned paper with a beige background and white snowflakes, cutting it to 9.5 cm by 13.8 cm.
Arrange the letters spelling “HOLIDAYS” on the paper, placing the gnomes on top. Position a circle die for the shaker window and secure it with purple tape before running it through the die-cutting machine.
Adding Elegance
For a touch of elegance, cut a golden border for the shaker window by nesting the circle die inside a slightly larger circle die, cutting both from shiny golden paper.
Adding acetate and foam tape to the back of the patterned paper
Adhere acetate to the back of the circle using double-sided tape as the window for the shaker. Attach foam strips around the circle to create the shaker base, leaving enough space for the shaker elements to move freely.


Add the golden stars to the shaker.
Position the golden stars on the red paper where the window will be. Once the foam strips are in place, add a bit of glue on top for minor adjustments when placing the panel on the red paper. Finally, press the panel down to secure it in place.

This step adds an engaging element to your Christmas shaker card.
Step 5 Create the Holly leaves as Additional Elements
With the shaker assembled, it’s time to add extra decorative elements that will enhance the festive theme of your card.
Holly Leaves
Create holly leaves for the top corners using dark green paper, cutting out the smallest and medium-sized holly leaves with your dies. Distress the edges with black soot ink to add depth.
Attach the holly leaves in the corners of the panel and finish with a red berry for a festive touch.
These additional elements will give your card that final festive flair.
Step 6 Complete Your Christmas Shaker Card
Now, it’s time to assemble the card. This step showcases your hard work.
Securing Letters
First, secure the letters spelling “HOLIDAYS” onto the panel. Use a T ruler for guidance to ensure they are straight. Once positioned correctly, glue them down.
I also have smaller letters that I’ve cut out to spell “HAPPY,” which I will place on the shaker window.
Positioning the two Gnomes
Now, position the gnomes so they stand on the letters, overlapping slightly onto the shaker window, ensuring the word “HAPPY” fits nicely in between. To bridge any height differences caused by the golden circle, place small pieces of white paper underneath.
Finally, attach everything to the card base.

You’ve crafted a delightful Christmas shaker card ready to spread joy and warmth this holiday season. Let’s keep the creativity flowing!
Let’s Get Creative Together
Creating your Christmas shaker card is a rewarding experience that brings joy to both you and your recipients. Let your creativity flow by exploring different designs and techniques. Each card reflects your festive spirit, so allow your imagination to shine!
Join the Challenge
Join the fun at the Penny’s Paper-Crafty Challenge! This fortnight, the theme is ‘Anything goes using paper.’ Share your beautiful creations and get inspired by others in our crafting community. Click the button below to participate!
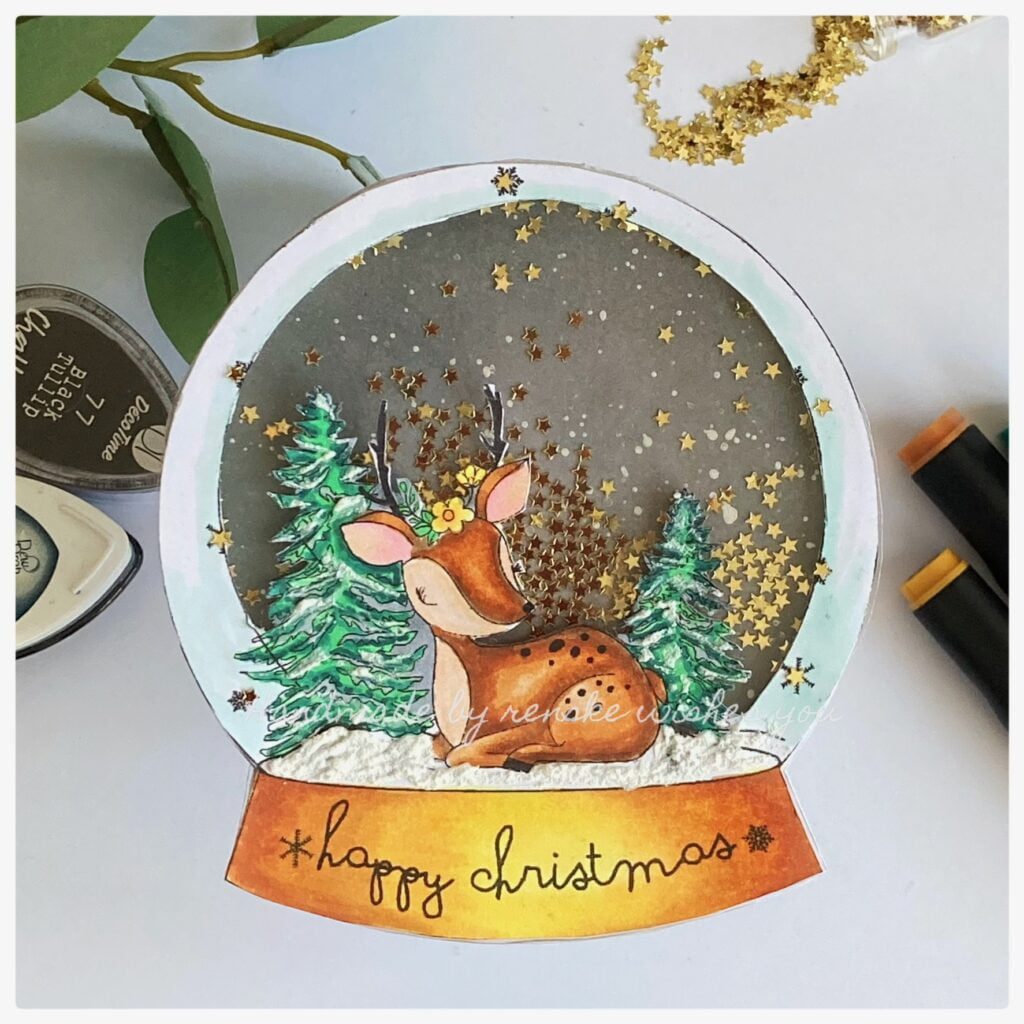
More Christmas shaker card ideas
Products Used
Affiliate Disclosure: The following materials include affiliate links – I may earn a small commission if you purchase through these links, at no additional cost to you. This support helps me continue sharing tutorials and inspiration
Products used with affiliate links
Crackers Digital stamp Sheepski Designs (oct 2025 shop doesn’t excist anymore)

Twin Markers set 300 pieces Decotimecrafs

Distress Ink Black Sooth from Ranger

Blending Brushes StudiolightNL

Products used without affiliate links
Here I will list al the products with links and without links. I try where I can add a link to the products.
Action Products
There are products I bought at ActionNL that you can only buy in the store. But Action does show the products on their website and you can mark them as a favorite. These are the products:
Tacky Glue

Double-sided tape

Hobby Paper trimmer

Scissors

Twin Markers 60 pieces

Twin Markers 12 pieces

Twin Markers 4 pieces

Boekenvoordeel shop
Foam Tape strips

Other Products
- Golden shiny paper out a paperback from Decotimecrafts
- Patterned paper from a Luxe Paperblock from Decotimecrafts
- Star embellishments (brand unknown)
- Holly and Berrie Dies from Aveccreative
- 2 Circle dies from Card & Deco
I would like to enter my card in the following challenges:
- A Place To Start: Anything goes
- Try it on Tuesday: Make it magical
- Unicorn Challenge Blog: Christmas or Winter
- Cardz 4 Galz: Showcase your patterned paper
- Krafty Chicks Challenge: Anything goes
- Allsorts challenge blog: The magic of the season
- Lil Patch of Crafty Friends Challenge …: Anything goes
- We Love Stamping: Christmas
- A Perfect Time To Craft Open Challenge: Anything goes
- Crafts Galore Encore Challenge Blog: Anything goes
- Daisy Chain Challenges: Christmas and/or Winter
- SheepSki Designs Challenges: Anything goes
- Peace On Earth Christmas: Anything Christmas goes
- The 12 Months of Christmas Link Up: Anything goes
This is a cute shaker card. Beautifully executed! Thanks for sharing with us at A Place to Start!
Hugz,
Chana
Thank you so much
Lovely shaker card. Pretty design. Thank you for joining us at A Place to Start this month. Hope we to see your lovely art work back here again soon. Judy DT https://hereisaplacetostart.blogspot.com/
Thank you so much
So pretty! Thanks for sharing with us at LPOCF.
thank you
Lovely card!
Thank you for sharing at We Love Stamping Challenge;-))m
Thank you so much
WOW what a fun & fabulous shaker card! Beautifully done! Thanks so much for joining in the fun at our Peace On Earth challenge! Good Luck and we hope you’ll come back often.
Darlene
DAR’S CRAFTY CREATIONS
Peace On Earth Co-Owner
Thanks a lot
Lovely sparkle shaker card! Love those gnomes too! Thanks for joining us at Try it on Tuesday!
Helen DT
thank you
Great card and colors!
The cracker popping gnomes are so fun!
Thank you for joining us at Allsorts!
thank you so much Gail.
A really fun shaker card, the traditional Christmas colors are a perfect choice for it. Thanks so much for sharing at Allsorts challenge this week!
Ellie
http://www.simplyellibelle.com
Thank you so much for your lovely comment
Beautiful design and fab instructions. Thanks for sharing over at Peace on Earth Christmas and hope to see you in future challenges.
Elaine DT
KraftiKards (my blog)
613 Avenue Create DT
Peace on Earth Christmas DT
Simply Clean and Simple DT
thank you, that is great to read you like it.
Love the design of your shaker card and those christmassy gnomes. Thanks for sharing it with us at we love stamping xx
thank you so much
A real fun Christmas shaker card, many thanks for sharing and joining in our Magic of the Season theme at Allsorts challenge.
B x
Thank you so much Brenda.