
Some links in this post are affiliate links. This means I may earn a small commission if you make a purchase, at no extra cost to you. I only recommend products I use and genuinely enjoy in my own cardmaking. Read more here.
Hello Crafty Friends!
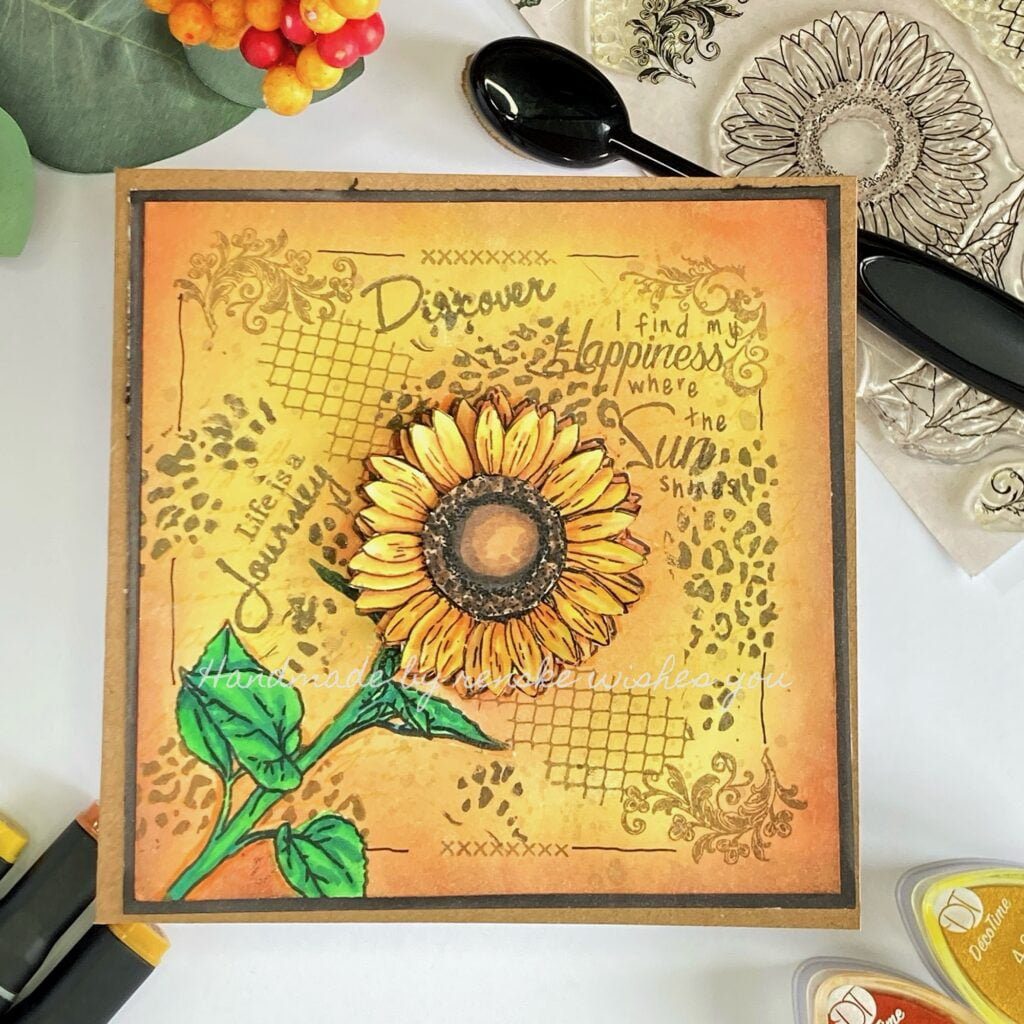
I’m super excited to share my latest card-making adventure with you. Today, I have a sunflower card tutorial that is sure to put a smile on everyone’s face. Whether you are a seasoned crafter or a beginner, this project is perfect for you!
Imagine a vibrant sunflower greeting your loved ones with its warmth and charm. It is a card that not only looks beautiful but also feels personal and sincere. Using various techniques, we bring this beautiful flower to life.
And don’t worry, I am with you every step of this process. I provide clear and detailed instructions, so you can create a sunflower greeting card as beautiful as you imagined. But don’t be afraid to get creative and add your personal touch – that’s what makes it unique!
So grab your materials, and let’s start making this card together. Don’t hesitate to ask questions, I’ll try to answer them as soon as possible. Follow along as I show you how to make your own Sunflower card. Your floral greeting is just a few steps away!
Gather your supplies: Materials for the Sunflower card tutorial
To start the creative process, it is useful to have all the necessary materials and supplies on hand. Here is a comprehensive list of what you need to bring your project to life:
- Craft cardstock: You can use a ready-made card base. My card base is 13 cm by 13 cm, but feel free to choose a size that suits you. To make your own card base, you will need a piece of craft cardstock measuring 13 cm by 26 cm. Score at 13 cm.
- White cardstock: This is used for making the main panel and stamping the sunflower image. Make sure it is of good quality to handle inks and colours.
- Sunflower stamp: This is the star of the show! Choose a detailed sunflower stamp that suits your style.
- Ink: You will need black ink for stamping the sunflower and different inks for colouring and creating a textured background. For our project, I used Memento Tuxedo Black ink for the sunflower (alcohol marker-friendly ink) and different chalk and Memento inks for the background.
- Masking paper: Provide masking paper to cover the sunflower while you work on the background. I used masking paper, but you can also use post-its for this.
- Colour medium: I used alcohol markers to colour the sunflower, but you can use any colour medium you like or have at hand.
- Stamps with text and background designs: Choose stamps with text and background designs to match your sunflower theme. You will also need a stamp with a grid or lattice pattern for extra texture.
- Crafting tools: Don’t forget your crafting supplies, such as acrylic blocks to stick stamps on, scissors, glue (double-sided tape or glue) and paper cutters.

Now that you have all the materials ready, let’s get to the fun part: making your Sunflower card step by step! Feel free to customise the materials and colours to suit your style and preferences.
The Sunflower Card tutorial – Step-by-Step Instructions
In this section, I tell you all about the creative process making this card. Learn how to create this Sunflower card.
Step 1: Preparing the background paper
Before we embark on the creative journey, we format the paper for our background.
Start with a white paper of your choice, For this project we used a standard card of 13 centimetres by 13 centimetres. We will make the white background at the size of 12 centimetres by 12 centimetres.
Make sure the white cardstock is smooth and has no stains or imperfections. This will be the canvas for the sunflower.
You also need a piece of white card stock measuring 12,5 centimetres by 12,5 centimetres. To match it with our background panel, I coloured the edge of the paper with an alcohol marker. I used the colour Dark Wood to match it with the image. This piece of paper will come behind our background panel on top of the card base.
Step 2: Stamping the Sunflower Image
- To create your Sunflower card, begin by selecting your desired sunflower stamp. You can stamp your image with either a stamping tool or an acrylic block.
- Next, use black ink, such as Memento Tuxedo Black, to ink your stamp. When stamping, ensure that the image is at an oblique angle to the centre of the background panel, and press down evenly to achieve a clean and sharp print. This stamped image will serve as the focal point of your card.
Step 3: Creating Depth and Dimension with Masking
If you want to ink the background while keeping the sunflower ink-free, you’ll need to use a masking technique. Here’s how you can do it:
- First, stamp the sunflower image onto masking paper and cut it out carefully. You can also use Post-it notes for this step.
- Next, place the cut-out mask over the stamped sunflower on your cardstock. This will protect the sunflower image while you create the background.
- Finally, you can start creating a beautiful background around the sunflower without worrying about getting any ink on it.
Step 4: Inking the background
To create a vibrant sunflower card, the background sets the tone and texture that bring it to life. Here are the steps to follow:
- Choose your inks for the background. I used a combination of chalk and Memento ink for a vibrant effect. Colours like Golden Sunset, Mellow Gold, Thistle Flower, and from Memento Lady Bug and Rich Cocoa are perfect for this step.
- Start by inking around the sunflower and darken the edges slightly to create a shadow effect.
- Let the ink gradually flow outwards, creating a soft, radiant background with a bright yellow centre.

Don’t release the masking paper yet. You will need it to stamp the elements and textures in the next step.
Step 5: Adding Background Elements and Textures
To add more charm to your sunflower card, you can incorporate some background elements and textures.
- Use stamps with text and background designs to make the card look better. In our example, we added text using “Golden Sunset” ink to create a subtle, handwritten message in the background. I also used the texts, Discover, I Find Happiness where the sun shines and Life is a Journey. I stamped these texts with the Rich Cacao colour.
- Moreover, using stamps with a grid or lattice pattern can add a textured effect to the background. Using Memento Rich Cacao and Truffle Espresso ink, you can stamp the patterns from the sunflower and Out of Afrika stamp sets to create a textured look. I did this randomly over the background, to create texture.
- Finally, decorative corner stamps can be used to create a frame around the sunflower, giving the card a polished look In between the corners I stamped the xx-es and added a black line with my fine liner.
Step 6: Stamping and Coloring Additional Sunflower Layers
To add dimension and depth to the sunflower, follow these steps:
- Stamp the sunflower image two more times on a separate piece of white cardstock.
- To create depth, cut away some petals and leaves from the second stamped sunflower, leaving space for the bottom layer.
- Carefully cut out the centre of the sunflower separately and colour it in.
- Use Twin markers (alcohol markers), or other colour mediums, to colour the stamps with the following combinations:
- Stem of the flower: weeds green (162), Grass Green (47), and Forest green (50).
- Flower petals: Rose Beige (97), Yellow (34), Golden Yellow (222), primary Yellow (221), Lemon Yellow (35), Pale Yellow (38).
- The Centre of the Flower: Dark Wood (119), Chocolate (118), Clay (116), Sand (107) and Barely Beige (29).
Now, that the colouring is finished, we can assemble our elements. Let’s go to the next step
Step 7: Assembling Layers for a 3D Effect
To create a beautiful 3D effect, let’s bring together all the coloured layers in the following way:
- Start by sticking the second stamped sunflower layer on top of the first stamped sunflower layer using foam tape. Make sure that the openings in the petals and leaves align with the bottom layer to create a dimensional effect.
- Next, attach the second coloured sunflower layer on top of the second stamped layer using foam tape. This will add depth and give a lifelike appearance to the sunflower.
- Finally, attach the middle part of the flower using foam tape, which will complete the 3D effect.

With the sunflower in the centre and the background providing texture and colour, your Sunflower card will be a beautiful whole.
More Card-Making Inspiration
Your creative journey doesn’t have to end here. If you’re looking for more card-making ideas and inspiration, you can join me. I have another card that is sunflower-inspired. This card is not only about sunflowers, but maybe it can inspire you to combine it with them.
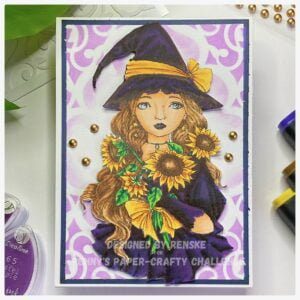
Each of these projects has its unique style and technique, so you can expand your creative horizons and get new ideas to feed your passion for cardmaking. Have fun exploring!
Closing Thoughts
We’ve reached the end of this tutorial, I hope you feel inspired and eager to start your card-making adventure.
The beauty of handmade cards lies not only in their visual appeal but also in the personal touch they bring. Your Sunflower card is a unique expression of your creativity and a sign of your affection.
I invite you to further explore the world of card making by checking out the inspiring card projects I linked above. Each one offers a new opportunity to unleash your imagination and create something beautiful.
Thank you for joining me on this creative adventure.
Have fun crafting!
Affiliate products used:
Affiliate Disclosure: This blog post may contain affiliate links. That means I may earn a small commission if you choose to make a purchase through those links, at no extra cost to you. I only recommend products or services that I have personally used and trust. Your support through these affiliate links helps me continue to provide quality content and helpful resources to my readers. I appreciate your support and thank you for being a part of my creative community.


Not available anymore (sept 2025)
Non- Affiliate products used:
- Clear stamps out of Africa from Joy crafts (link not found)
- Chalk ink Decotimecrafts
- Sticky glue
- Twin Markers (alcohol markers) from Decotimecrafts.
- Sunflower Clear Stamp set from Studio light ( I can’t find any links any more)
I would like to enter my card in the following challanges:
- A Place To Start: Anything goes
- Make My Monday Challenge Blog: Autumn Colours
- Try it on Tuesday: Autumn
- Fab ‘n’ Funky Challenges: Show some colouring
- The Paper Funday Challenges: Use yellow, orange and green.
- Lil Patch of Crafty Friends Challenge ...: Anything goes
- Stamping Sensations: Autumn Colours
- 613 Avenue Create: Autumn
- A Perfect Time To Craft Open Challenge: Anything goes
- Classic Design Challenge Blog: Anything goes
- Crafts Galore Encore Challenge Blog: Anything goes
- The Creative Crafters: Anything goes
- Crafter’s Cafe: Flowers
- SheepSki Designs Challenges: Autumn colours
Thanks so much for linking this beautiful creation to Beautiful Blossoms Challenge! XXO, Aimeslee DT
Wonderful project, Renske! Thanks for the wonderful tutorial!
Thanks for sharing with us and our players at A Place to Start!
Hugz,
Chana Malkah, Owner
Thank you so much
Fabulous card and a great tutorial.
Thanks for joining us at Crafts Galore Encore.
Helen x
DT
Thank you, glad you like it
Beautiful card, love the big sunflower and great background for it. Thank you for sharing with us over here at Sheepski Designs and best of luck with your entry.
Granne DT for https://sheepski-designs-challenges.blogspot.com/
Thank you
I love a mixed media card and you really spelled out all the details in your post. Enjoyed it! Thanks so much for joining us at The Beautiful Blossoms Challenge this month.
Thank you so much. Glad you like the tutorial
Thank you
A gorgeous sunflower card.
Thanks for sharing with us at Stamping Sensations.
Avril x
This is a gorgeous Autumn card, I love sunflowers and this one is so pretty. Great techniques and lots of interest. Thanks for joining in at The Paper Funday Challenge. We appreciate your support. We would also like to invite you to share your lovely card at the Beautiful Blossoms Challenge too!
Donna xx
Paper Funday Challenge
Beautiful Blossoms Challenge
Inspiration Station Challenge
Thank you so much for your lovely comment. I will check the other challenge too.
Beautiful card! Thanks for joining us at A Place To Start!
A glorious Sunflower card in the sunny yellows and golds, many thanks for sharing at Stamping Sensations October challenge.
B x
So beautiful, Renske, such stunning coloring! Fabulous tutorial on how to achieve that, too – wow! Thanks so much for playing at Make My Monday!
Thank you so much for your lovely comment
A step by step tutorial, a gorgeous Sunflower and a mixed media card – what’s not to like. I love the beauty you have created here. Thanks for joining us at MMM, Johanna DT
Ah thank you so much
You created a beautiful background for your stunning sunflower,thank you for joining in at MMM
Thank you
Fabulous background you created and love the beautiful Sunflower,great step by step too.Thank you for joining us at The Crafty Addicts and Stamping Sensations.
Carol DT x
Thank ypu
Het is weer een mooi kaartje, aan de ene kant zomers, maar tegelijk ook echt herfstig door het kleurgebruik van de inkt!
Mooi gecombineerd!