

Some links in this post are affiliate links. This means I may earn a small commission if you make a purchase, at no extra cost to you. I only recommend products I use and genuinely enjoy in my own cardmaking. Read more here.
Hello everyone!
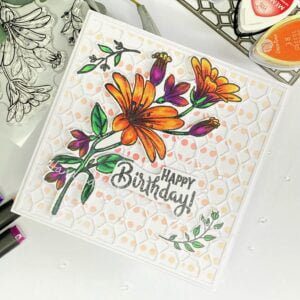
I don’t have a Christmas card to share today, but I’m excited to show you a cheerful floral birthday card tutorial. It all started when I won a beautiful clear stamp set from Alina Craft through a giveaway hosted by the Instagram account Creakarts, which is known for its stunning floral cards. I encourage you to check out her account if you get the chance.
For this card, I challenged myself to use a new colour palette and decided to mix purple and orange. These colours are not commonly used together, so it was an exciting challenge for me. In this tutorial, I’ll reveal the secrets behind creating this colourful, floral birthday masterpiece. We’ll explore stamping techniques, learn how to make a captivating background and bring these beautiful stamps to life.
Have you ever tried combining unique colours for a special card? Share your experiences with me as we embark on this lively tutorial. Are you ready to dive in and immerse yourself in the creative journey? Let’s get started!
Required Materials and Measurements for this floral birthday card tutorial.
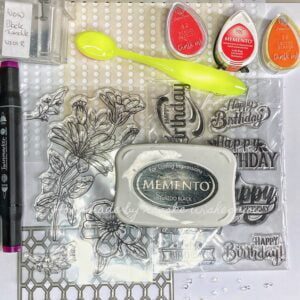
Gathering all the essential materials is crucial when it comes to creating a stunning floral birthday card. Here is a list of everything you’ll need:
- White Card Base: This will serve as the foundational structure for the card. It should measure 13 centimetres by 13 centimetres. You can use any sturdy cardstock of similar size if you don’t have a white card base.
- White Paper: This will be the canvas for the background design. It should measure 12.5 centimetres by 12.5 centimetres. Any smooth white paper or cardstock of similar dimensions will work.
- Ink for Dot Creation: This ink will be used to craft the captivating dot pattern on the background. You can use water-based or pigment inks in red, orange, and yellow tones to substitute for a vibrant dotted effect. I used a memento drop ink ladybug in combination with chalk ink from Decotimecrafts.
- Cover Plate for Texture: This will add texture and depth to the background. You can use textured embossing folders or DIY textured materials to create a similar effect.
- Clear Stamp Sets: These stamp sets will be used to create detailed floral designs and personalized birthday wishes. I used flowers from Alina Craft and the sentiment ‘Happy Birthday’ from Alina Craft. You can use any floral and sentiment stamps you have in your collection.
- Inks: Memento Tuxedo Black is a great option for a black impression, and it works well with colouring with alcohol markers. You can use any archival or pigment black ink for clear stamping.
- Embossing Powder – Sparkling Black: This will add sparkle to the card. You can use black glitter embossing powder or any sparkling powder for added shine.
- Heat Tool: This is essential for setting the embossing powder. You can use a hairdryer or any heat source that can melt embossing powder without damaging paper.
- Alcohol Markers: These will bring vibrant colours to the floral elements. You can use pencils, crayons, or any colouring medium you’re comfortable with.
- Embellishments: These will add final touches for a polished look. You can use sequins, buttons, or any decorative elements you prefer.
With these materials, you are all set to embark on your creative journey to craft a dazzling floral birthday card! I will link every product and brand (when possible) at the end of the blog post.
Crafting a Vibrant Floral Birthday Card: A Step-by-Step Guide
Now that we have all the necessary materials, it’s time to delve into the creative process of crafting a unique and beautiful flower birthday card. In the tutorial, I will be your guide, providing detailed instructions and insider tips for every step. Get ready to unleash your creativity as we bring this vibrant card to life, one petal at a time.
Step 1. Perfecting Impressions: Stamping for Vibrant Floral Imagery
In this step, we will stamp the image and the text that we will use for our card.
Stamping the Flowers
Start by choosing one of the beautiful floral stamps and using white DCP paper that works well with alcohol markers. It’s important to choose the right paper to ensure the best results when colouring. Use a stamping tool to create a clear and precise stamp impression. Place the stamp in the tool and use Memento Tuxedo Black ink, which is perfect for use with alcohol markers. The stampin tool allows you to re-stamp if needed to get a sharp, detailed print. If you don’t have a stamping tool yet, you can also stamp your image with the use of an acrylic block.
Preparing the Sentiment
Next, choose one of the ‘Happy Birthday’ stamps from Alina Craft’s collection. Use Memento Tuxedo Black ink to stamp the sentiment three times for a well-saturated result. Sprinkle embossing powder generously over the inked sentiment to ensure full coverage. Use a heat tool to melt and set the embossing powder. Once it’s cooled down, carefully trim around the sentiment so that it’s ready to be incorporated into your card design.
Now that we have our picture and sentiment ready, we can move on to the next stamp. Colouring the flower stamp.
Step 2: Captivating Coloring: Breathing Life into Floral Splendor
In this phase, we’ll explore the meticulous process of infusing vibrant colours into the floral stamp. The chosen hues of orange and purple will add depth and radiance to our creation. Employing alcohol markers from Decotimecrafts, the colours were meticulously blended to achieve a captivating visual tapestry.
Colour Combinations Used:
- Orange Flower: Achieving the vibrant hues of the orange bloom demanded a precise blend of French Vermillion (22), Orange (23), Yellow (34), and Lemon Yellow. These colours harmoniously dance across the petals, infusing life into each delicate curve.
- Leaves and Stems: The verdant allure of the leaves and stems emerges through the synergy of Weeds Green (162), Grass Green (47), Forest Green (50), and Dark Green (51), creating a vivid and natural contrast against the blossoms.
- Half-Open Flower: This unique blossom, a blend of purple and orange, serves as the centrepiece. The interplay of Ultra Marine (73), Vivid Purple (85), Magenta Deep (282), French Vermillion (22), Orange (23), Yellow (34), and Lemon Yellow (35) produces an enchanting transition, captivating the eye with its vibrant gradient.
- Purple Closed Flowers: A symphony of Ultra Marine (73), Vivid Purple (282), and Magenta Deep (292) brings the closed blooms to life, each petal a testament to meticulous detailing.
Enhancing Transitions: To accentuate the closed flowers, a delicate touch of an orange alcohol marker delicately grazed the petal ends, seamlessly blending and delineating the mesmerizing colour transition.

The video below will show you the colouring of this beautiful stamp.
Step 3: Vibrant Background Crafting: Setting the Birthday Tone
To create a captivating background for our floral masterpiece, we need to follow the steps below:
- Dotted Background Creation: We start with a white paper measuring 12.5cm x 12.5cm and use it as the canvas for our design. We secure the paper with tape to prevent any shifting during the process. Then, we use a stencil and craft the textured background using three vibrant ink colours:
- Memento Ladybug
- Chalk ink French Vermillion
- Chalk inkCarrot Orange
From the centre, we apply the red hue and gradually transition outward to lighter tones. We use a blending brush (or any preferred tool) to apply Lady Bug, followed by French Vermillion, and finally, Carrot Orange, to create a seamless gradient.
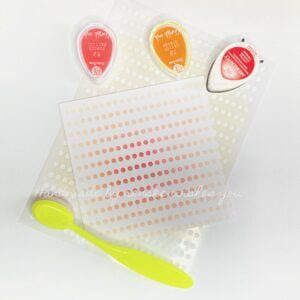
- Adding Texture: For added depth, we use a cover plate featuring an array of 8-corner designs, measuring 12.5cm x 12.5cm, to create an intricately textured background. We die-cut this pattern from white paper, which complements the birthday theme and card size.

- Assembly: By carefully adhering the die-cut background to our inked canvas, we create a harmonious fusion of texture and colour, culminating in a visually captivating backdrop for our floral showcase.
After meticulously crafting our vibrant backdrop, we’ve laid the foundation for our floral showcase. Ready with all the elements at hand, it’s time to assemble the card and bring our masterpiece to life in the next step.
Step 4. Assembling the Birthday Masterpiece
Now that we have gathered all the elements, it’s time to bring our card to life by assembling it.
- Attaching the Card Base: start by securely attaching the vibrant background to the card base. This will ensure a sturdy foundation for our design.
- Layering Floral Elements: Use foam tape to carefully position the stamped floral elements on top of the background. You can add dimension and depth to the composition by using varying levels of foam tape, which will enhance its visual appeal.
- Placing the Sentiment: Delicately place the sentiment, allowing it to overlap a leaf of the flower stamp. To ensure seamless integration, selectively apply foam tape only to the section of the sentiment that doesn’t overlap the raised floral element. For the overlapping section, secure it in place using glue to ensure a visually pleasing and secure arrangement.
Now that our card is assembled, it’s time to add the final touches. In the next step, we’ll explore the art of embellishing and adding finesse to our exquisite birthday masterpiece.
Step 6: Embellishing Brilliance: Adding Charm to Your Birthday Card
In this concluding step, let’s elevate our birthday card’s charm with some exquisite embellishments. Clear strass stones offer an elegant touch, emphasizing the sentiment area, which holds the essence of your card’s message.
To accentuate the sentiment and make it more eye-catching, consider adorning it with additional rhinestones. Employing an odd number of stones fosters visual balance and intrigue in the design.
Working in groups of two and three stones can create an engaging arrangement. Try placing two stones near the sentiment’s bottom left and forming a triangle with three stones above the right side of the sentiment.
This strategic placement draws attention to both the sentiment and the floral imagery, elevating the recipient’s experience with the card.
Inspire, Create, Share, and More!
Thank you for joining me in this tutorial where we explored the art of creating a captivating floral birthday card. We learned precise stamping, vibrant colouring, and assembling the elements to craft a beautiful masterpiece together. Embrace your creativity and make your unique handmade cards by experimenting with different techniques and letting your imagination flourish!
More flower card-making ideas
If you’re looking for more flower card inspirations, check out these related blog posts for additional techniques, ideas, and card-making inspirations:
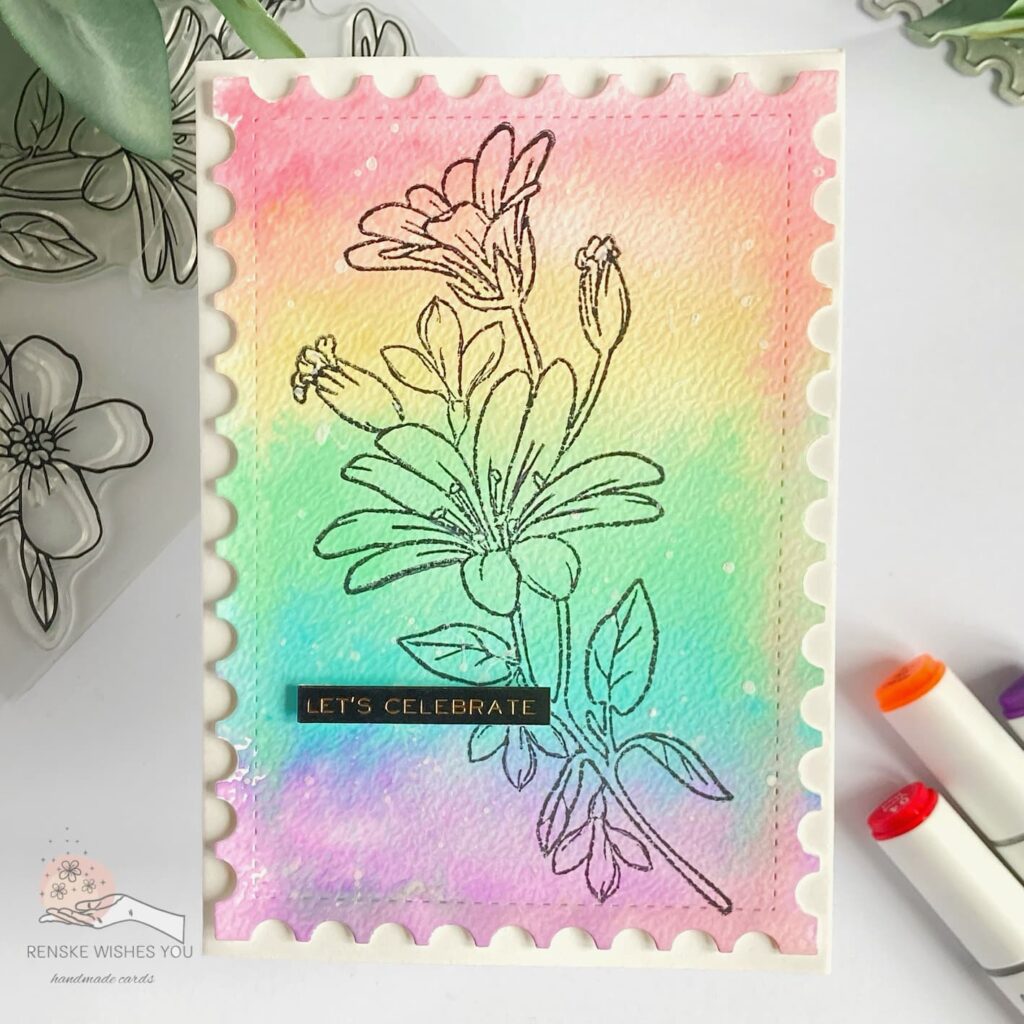
Inspire Your Creativity with a Beautiful Watercolour Flower Card
I used the same stamp for this card. This time I combined it with a watercolour rainbow background.
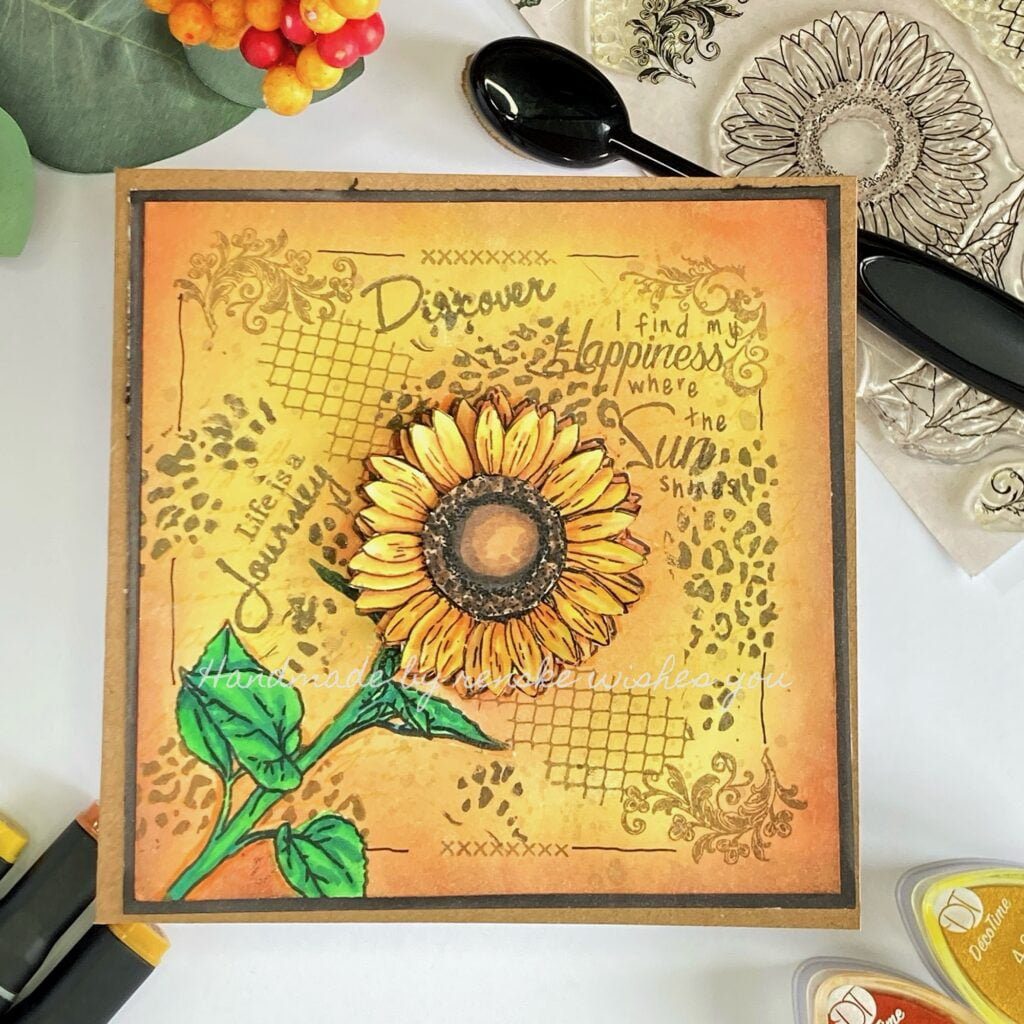
Sunflower Card tutorial: Step-by-Step Guide to Crafting Your Own Floral Greeting
For this card, I also used clear stamps and stencils to create a beautiful card.
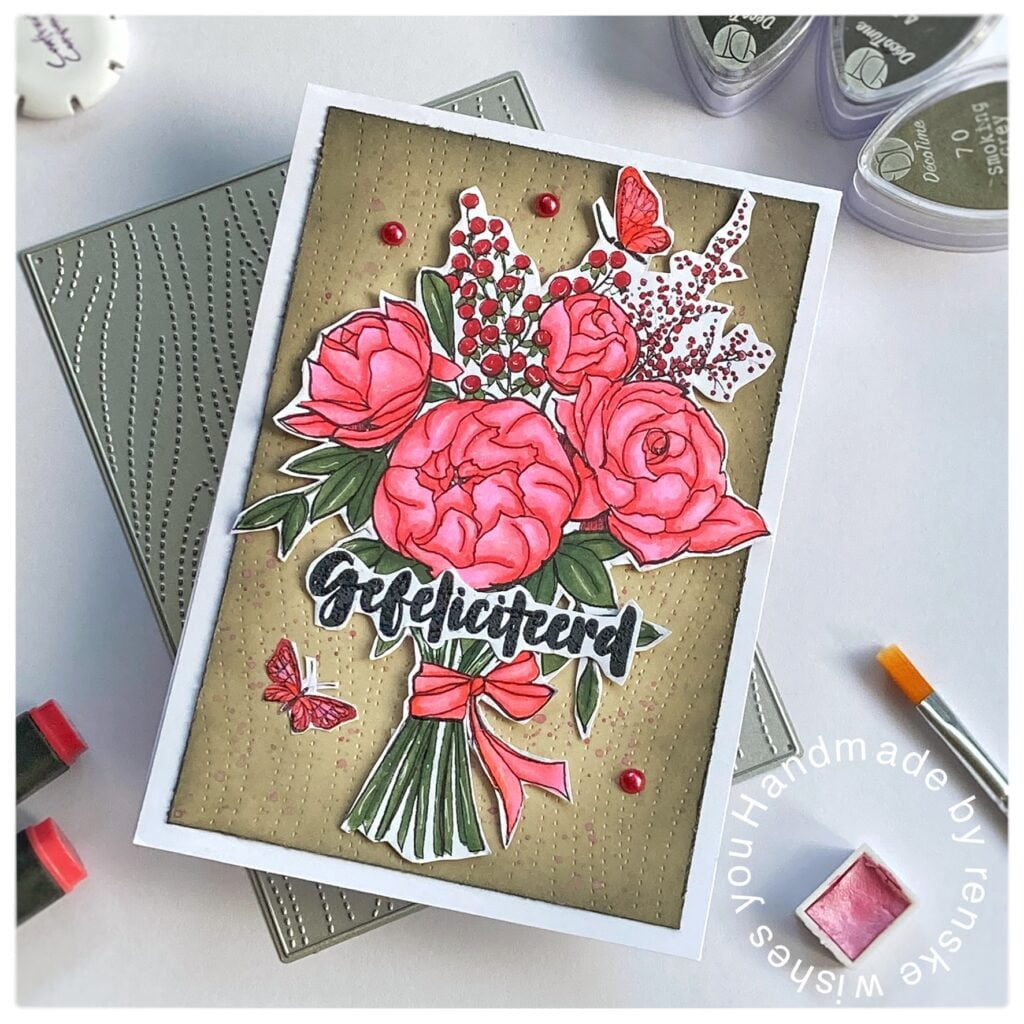
Beautiful Bouquet birthday card.
This card is made with a free digital stamp and a cover plate for the background.
I hope that with these articles I can give you even more ideas for a beautiful floral birthday card. Let me know in the comments which one inspires you the most.
Products and tools used for this card
To recreate the card, you can discover the products we used in this tutorial by following the links below (if possible).
Affiliate Disclosure: This post contains affiliate links. As an affiliate, I may earn a commission on qualifying purchases made through these links, at no extra cost to you. It supports me, to make more content like this. I appreciate your support.
Products with affiliate links
Alina Craft floral clear stamp

Memento Tuxedo Black Ink

Memento dew drop Lady Bug

Blending brushes Studiolight NL 30 mm.

Thank you once again for joining us on this creative journey. Follow me for more crafting adventures and let’s continue to make art from the heart!
I would like to enter my card in the following challenges:
- Dream Valley Challenges: Anything goes
- The Paper Shelter: Celebrations
- Krafty Chicks Challenge: Stamp act
- Crafty Catz: Anything goes
- A Perfect Time To Craft Open Challenge: Anything goes
Love the flower and your coloring is awesome, thank you for playing our Stamp Act challenge at Krafty Chicks Challenge. Have a great day!
Leanne DT Member/KCC
Krafty Chicks Challenge
Thank you
A beautiful card
Thank you for joining us at Crafty Catz Challenge Blog good luck Ginny DT for Crafty Catz Challenge Blog
My Blog