A friendship card design isn’t just about paper and ink, it’s a meaningful way to show someone you care. Ever struggled to create a card that stands out? Maybe your designs feel too simple, or you’re unsure about layering materials without it looking messy. A mixed media card can help with that, adding depth, texture, and interest to your design.
In this mixed media card tutorial, I’ll walk you through the steps to create a unique friendship card design featuring soft layers, delicate textures, and a beautiful handmade bird theme. You’ll learn how to blend colours with distress inks, create beautiful backgrounds, and add intricate details for a truly special finish.
By the end of this tutorial, you’ll have a card that looks professional but feels personal—something your friend will cherish. Let’s get started!
Materials for Your Mixed Media Friendship Card Design
When creating a mixed media friendship card, the materials you use matter. It’s all about layering textures, blending distress inks, and adding personal touches to make your card stand out. Here’s a list of supplies you’ll need, with a few alternatives to help you personalise your design.
What You’ll Need
- Distress Inks – Chipped Sapphire, Salty Ocean, Tumbled Glass, Mustard Seed, Mowed Lawn, and Villainous Potion. These colours will add depth and interest to your background.
- Memento Inks – Lady Bug and Rich Cacao. Great for adding stamped images and sentiments.
- Bird Dies & Background Die – From Aveccreative. These are great for layering and adding texture.
- Wooden Bird Stamp – From Craft Sensations. Ideal for your focal point.
- Written Text Stamp – From Choosa Crafts Fantasy. Perfect for adding subtle details in the background.
- Sentiment Sticker – From Tim Holtz. A simple way to finish off your message.
- Stencil – From Dutch Doobadoo. Perfect for adding patterns or texture.
- Texture Paste (Transparent Gloss) – From Ranger. Adds dimension and a shiny finish.
- White Gel Pen & White Metallic Paint – Great for adding highlights and little details.
- Aqua Shimmer Pen – Adds a subtle shimmer effect to your design.
- Foam Tape & Glue – To assemble your card layers.
- Stamping Tool – Helps ensure stamped images are crisp and clear.
Alternatives to Try
- No bird die? Try using a butterfly, flower, or any other shape die to add interest.
- No texture paste? Embossing powder or layering different papers can work too.
- No stencil? Get creative with items like lace, bubble wrap, or even a hand-cut template for texture.
Remember, it’s all about being creative and making the most of what you have. Use these supplies to bring your design to life
Step-by-Step Mixed Media Card Tutorial
Are you ready to create a mixed media friendship card? Let’s break it down into simple steps, so you can craft something that feels uniquely yours. I’ll walk you through each part of the process—before you know it, you’ll have a card that truly reflects your style.
If mixed media is new to you, no problem! I’ll offer alternatives as we go, so you can adapt the tutorial to what you’ve got on hand. It’s all about enjoying the journey and being creative, so let’s get started and see where your imagination leads!
Step 1: Create the mixed media Background
Let’s start with the mixed media background. I’m using a background die that creates a lovely wood-like texture, which works perfectly with the birds and feathers theme.
This technique is always visually appealing, though I sometimes wonder how much texture is too much. In the end, I just go for it and see what I can create.
Let’s prepare the background die
It’s one of those techniques that I always find visually appealing, but I sometimes feel uncertain about how much texture is too much. In the end, I just go for it and see what happens.
Don’t worry if the pattern doesn’t come out perfectly—it’s about the look, not perfection.
Apply Distress Ink
Now it’s time to add some color. While you can use any ink you like, I’m using Distress Inks in the following colors:
- Distress Ink Chipped Sapphire
- Distress Ink Salty Ocean
- Distress Ink Tumbled Glass
’ve found the colours blend better when the paper’s already picked up some ink. Start with the lightest color (Tumbled Glass) and work your way around, blending the darker colors into the lighter ones.
Sometimes the blending doesn’t turn out as smoothly as I’d like, but I keep working at it without stressing.
Stamp the Birds and Text
Once the background is fully blended, move on to stamping. For the birds, I’m using a wooden stamp from Crafts Stations that fits the theme perfectly.
- Stamp the birds in Memento Rich Cacao ink in the top right corner.
- Use a clear stamp with handwritten text, no need to plan it out perfectly, just stamp where it feels right.
Stencil and Texture Paste
Now we’re going to get a little more experimental. I’m using a stencil from Dutch Doobadoo that features partial circles.
- Use a stencil with partial circles.
- Apply transparent gloss texture paste with a spatula.
Don’t stress about making it look perfect; just let the stencil do its thing. It adds a nice touch without overthinking the process.
Add Some White Paint
To finish things up, add some white paint splatters using white metallic paint. Use a small brush and be careful not to go overboard—just enough to add some texture.
Now you’ve got your background ready! Honestly, sometimes I question whether I’ve done too much or too little with the background, but that’s the fun of card-making, right?
How do you usually create backgrounds? Do you prefer inks, sprays, or paints? I’d love to hear your go-to methods!
Step 2: Creating the Bird and Feather Die-cuts
Next up, let’s work on the birds and feathers for your card. This part is all about adding fun and colour to your design.
I’m going to show you how to add depth by layering textures and using vibrant colours in the feathers. This is a great chance to experiment and see how colour can transform your design.
Creating the Die-Cut Images
Here, we’ll use dies to create the feathers and birds. Dies are a great way to add dimension to your designs. Whether you’re just starting or you’ve been crafting for years, these tips will help you get the most out of your die-cutting tools.
Creating the Feathers
Let’s start with the feathers. I used a feather die for the first time recently, and this project was a great chance to experiment with it. I aimed to achieve a rainbow effect with the feathers, so I die-cut six feathers from white cardstock.
- Begin by die-cutting six feathers from white cardstock.
- For the rainbow effect, apply ink to each feather using a blending brush. Here is the process I followed:
- Red: Use Memento Lady Bug.
- Orange: Combine Mustard Seed with Memento Lady Bug to get an orange tone.
- Yellow: Apply Mustard Seed.
- Green: Use Mowed Lawn.
- Blue: Start with Chipped Sapphire and then layer Salty Ocean to lighten the tone.
- Purple: Use Villainous Potion, but be careful with Black Soot as it can cause darker smudges.
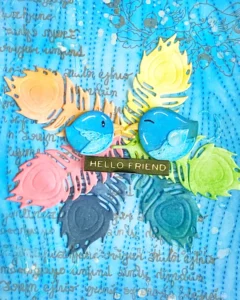
These colours will blend beautifully to create a vibrant gradient with that rainbow look.
Creating the Birds
Next, let’s focus on the birds. I used a die set from Aveccreative and die-cut the bird parts from white paper, just like we did with the feathers.
- Colour the birds using Distress Ink:
- Colour the main part of the bird with Chipped Sapphire.
- For the wings, use Salty Ocean for a softer effect
- For the beaks, start with Mustard Seed, then layer Memento Lady Bug for an orange finish.
- Assemble the bird parts. Use a black fine liner to add the eyes, then highlight the birds with a white gel pen. For some sparkle, use an Aqua Shimmer Pen on the lighter areas of the birds

Follow these steps, and you’ll have stunning die-cut images that bring your card to life!
Step 3: Assemble the Card
Now that everything’s ready, let’s bring it all together and assemble your card
Attach the Feathers
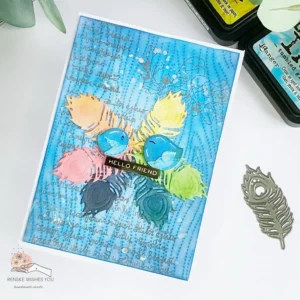
Start by attaching the feathers to the background. I arrange them in a circular pattern and just glue them down.
Position the Birds and Sentiment
Next, place the birds opposite each other in the centre, making sure they sit on top of the sentiment. I’m using a “Hello Friend” sticker from the Tim Holtz sticker book. To add a bit more dimension, I raised both the birds and the sentiment with foam tape.
Add the Background to the Card Base
Now it’s time to add the background to the card base. The background is the same size as a standard card base – 10.5 cm by 14.8 cm. At first, I thought the panel was a bit smaller, and I wanted that white border around it.
I couldn’t trim any more off without cutting into the feathers. So, I decided to make the card base a bit bigger. The new size is 11 cm by 15.3 cm.
To do this, cut a piece of white paper to 22 cm by 15.3 cm, score it at 11 cm along the long edge, and then fold it in half.
Final Touches
Finally, glue the panel onto the card base, and your card’s done
Let’s Get Creative Together
I love how the vibrant colors, dimension, and texture all come together to create a design that truly stands out.
As you look at your creation, think about how you might tweak it—maybe add more details or try a different colour palette next time. I’d love to hear what changes you might make—feel free to share in the comments.
More mixed media card ideas
Let’s keep the inspiration going. I can’t wait to see how you bring your ideas to life. Happy crafting
Products used for this mixed media card tutorial
Affiliate disclosure: This post contains affiliate links. If you purchase through these links, I may earn a small commission at no extra cost to you. I only recommend products I use and love. Your support helps me continue creating free tutorials and card-making inspiration. Thank you!
Products with affiliate links
Distress Ink Chipped Saphire from Ranger

Distress Ink Salty Ocean from Ranger

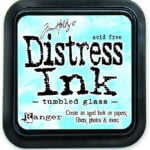
Tumbled Glass Distress Ink from Ranger
Mustard Seed Distress Ink from Ranger

Mowed Lawn Distress Ink from Ranger

Villanious Potion Distress Oxide from Ranger

Memento Rich Cacoa Ink

Memento Lady Bug Ink

Nuvo Aqua Shimmer Pen

Products without affiliate links
- Bird die from Aveccreative
- Feather die (brand unknown).
- Wooden bird Stamp from Decotimecrafts
- Sentiment sticker from Tim Holtz
- Foam Tape (brand unknown).
- Glue
- Stamping Tool
I would like to enter my card in the following challenges
- 4-Season Swap Challenge Blog: 3-6-9 (there are 6 feathers)
- Alphabet Challenge Blog: The W is for Wings
- Lil Patch of Crafty Friends Challenge …: Anything goes
- 613 Avenue Create: Anything goes + any occasion
- A Perfect Time To Craft Open Challenge: Anything goes
- Crafts Galore Encore Challenge Blog: Anything goes
- Daisy Chain Challenges: Animals
- Critter Crazy CHALLENGE BLOG: Anything goes + featured critter
- Crafty Animals: Must use an animal


