
Some links in this post are affiliate links. This means I may earn a small commission if you make a purchase, at no extra cost to you. I only recommend products I use and genuinely enjoy in my own cardmaking. Read more here.
I didn’t plan to use a masking technique on this card. I wanted to give this little bookworm somewhere to sit.
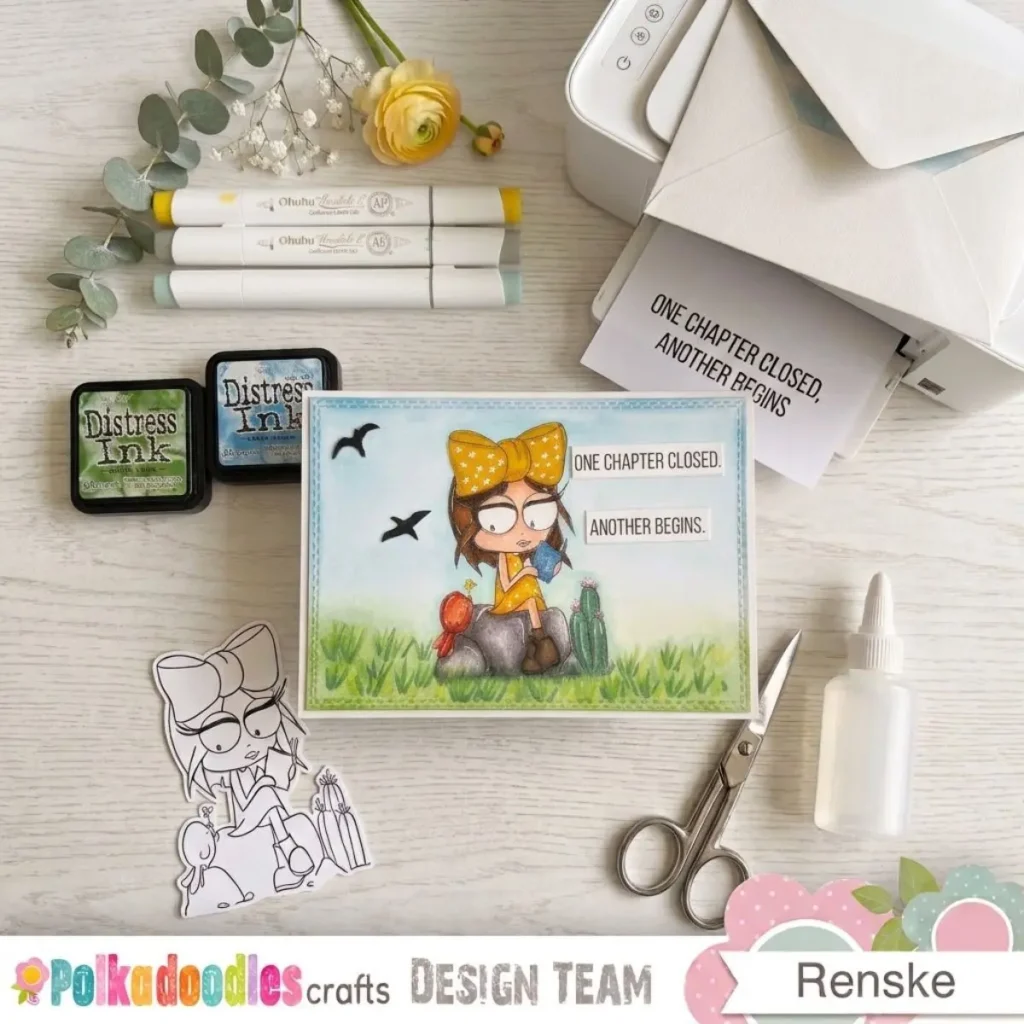
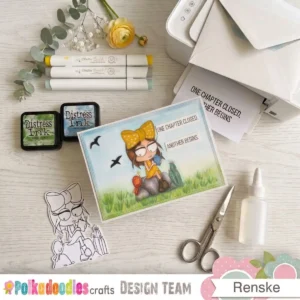
When I started making this back-to-school card for Polkadoodles, I kept coming back to the Bookworm/Study Rebel digital stamp. The girl is sitting on a rock with her book, but a little bird is distracting her. I liked that it already had a little story going on, so I didn’t want to cover it up with lots of extra elements.
Instead, I kept the background simple and used ink blending to build the scene around her. That’s where the masking technique came in.
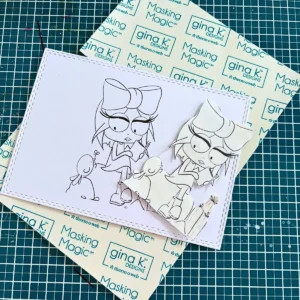
I’ve used this masking technique with digital stamps before, so I knew it would work well for this card. I printed the same image again on masking paper and used it to protect the girl while I blended the sky and grass around her.
In this tutorial, I’ll show you how I made the mask, blended the background with Distress Ink and finished the scene with alcohol marker colouring. I made the card for the Polkadoodles design team using the Bookworm / Study Rebel digital stamp and a sentiment from the Graduation School Sentiment Quotes collection.
What You Need to Make This Back to School Scene Card
For this card, I used the two Polkadoodles digital products below and then picked out the supplies I already had. You won’t need everything in the same version, though, and I’ve added alternatives where they make sense.
Polkadoodles Supplies
- Bookworm / Study Rebel digital stamp
- Graduation School Sentiment Quotes digital sentiment set.
Cardmaking Supplies
- A6 grey card base, 10.5 × 14.8 cm
- Alcohol marker paper
- Masking paper
- White printer paper, as an alternative to masking paper
- Double-sided tape for the printer paper alternative
- Rectangle die with a double-stitched edge.
- Black cardstock
- Die-cut bird dies
- White gel pen
- Alcohol markers
- Distress Ink in Tumbled Glass, Salty Ocean, Mowed Lawn and Pine Needles
- Blending tool
- Printer
- Die-cutting machine
- Scissors
- Paper trimmer
Working with what you have
Don’t worry if you don’t have every item on my supply list. Here’s how you can adapt the materials and tools.
Masking paper
Use ordinary printer paper with a little double-sided tape instead. Test the tape on scrap paper first. Washi tape can also work if you reduce the tack slightly by pressing it against your hand first.
Rectangle die
Cut your panel with scissors or a trimmer if you don’t have a die. You’ll lose the stitched edge, but the masking technique works just the same.
Bird dies
The extra birds are optional. You can leave them out or draw simple flying birds with a black marker instead.
Grey card base
White, cream or another neutral cardstock will work just as well.
Distress Ink
Use similar light and dark colours from another ink brand if you already have them.
Blending tool
Use your usual blending tool, blending brush or make-up sponge.
Colouring supplies
I used Ohuhu alcohol markers, but another alcohol marker brand will work too. You can also use coloured pencils, watercolour pencils or another colouring medium.
How to Use a Masking Technique to Create a Back to School Scene Card
You can start with your digital stamp and let that choice guide the rest of your card. I checked the size before printing because I’d be using the same digi again for the mask, and the two copies really do need to match. Once that was sorted, I could move on without worrying about whether the mask would fit later.
Step 1. Prepare and print the digital stamp at the right size
I started with the Polkadoodles Bookworm / Study Rebel digital stamp. I knew I wanted to make a landscape card, so I chose 8 cm. It made the girl large enough to stand out while still leaving me enough space to build the background around her.
Keep the width proportional so the image stays at its original proportions. I printed the digital stamp on DCP paper that works well with alcohol markers.
Keep the size the same
This is worth getting right before you print anything else. For the mask, use the same digital file and keep the height at 8 cm, so both versions match when you place the mask over the original image.
If the second print is even slightly smaller or larger, the mask will not sit neatly over the image.I found it much easier to choose the size first. That way, I could use the same setting again for the masking version.
Step 2. Create the landscape panel for the scene card
I knew I wanted the card in landscape, so I needed a panel with enough space around the girl. I used a rectangle die with a double-stitched edge and cut it from the DCP paper.
The panel measures 13.5 × 9.7 cm. I placed the die horizontally and checked that the digital stamp was centred on the panel. I wanted it to have enough space around her for the sky and grass.
I liked the stitched edge because it gave the panel a finished look. Since I was already keeping the background quite simple, that was enough detail for me.
No rectangle die? Make the panel yourself
You can make the panel without a rectangle die. Cut a 13.5 × 9.7 cm rectangle from your DCP paper using a paper trimmer or scissors.
You won’t have the stitched edge, but that doesn’t affect the masking technique. The important thing is the size of the panel and having enough space around the digital stamp to create the background.
Step 3. How do I create a mask with a digital stamp?
This is where I could finally stop worrying about getting ink on the girl. I used Gina K A5 Masking Paper, which can go through the printer, and printed the same digital stamp again.
I printed the same digital stamp again on masking paper. Masking paper is designed to stick temporarily, so you can place it over the image while you work on the background and then remove it without leaving a strong adhesive behind.
I kept the height at 8 cm, like the first print. The two prints need to be the same size; otherwise the mask won’t line up properly with the original image.
I cut around the printed image and placed the mask over the digital stamp on my card panel. I took a little extra care around the hair and the small bird, then checked that the image was covered before pressing the mask down.
Once the mask was in place, I could blend Distress Ink over the whole panel. I didn’t have to worry about working around the girl or leaving an awkward gap between the image and the background.
Why digital stamps work for masking
You don’t need a matching physical stamp for this technique. You can print the same digital file again and use that second copy as your mask.
I find that particularly useful with digital stamps because the mask is made from the same image. You don’t have to guess where a separate mask should sit or find a matching stamp in your stash.
No masking paper? Try this instead
No masking paper? Try this instead
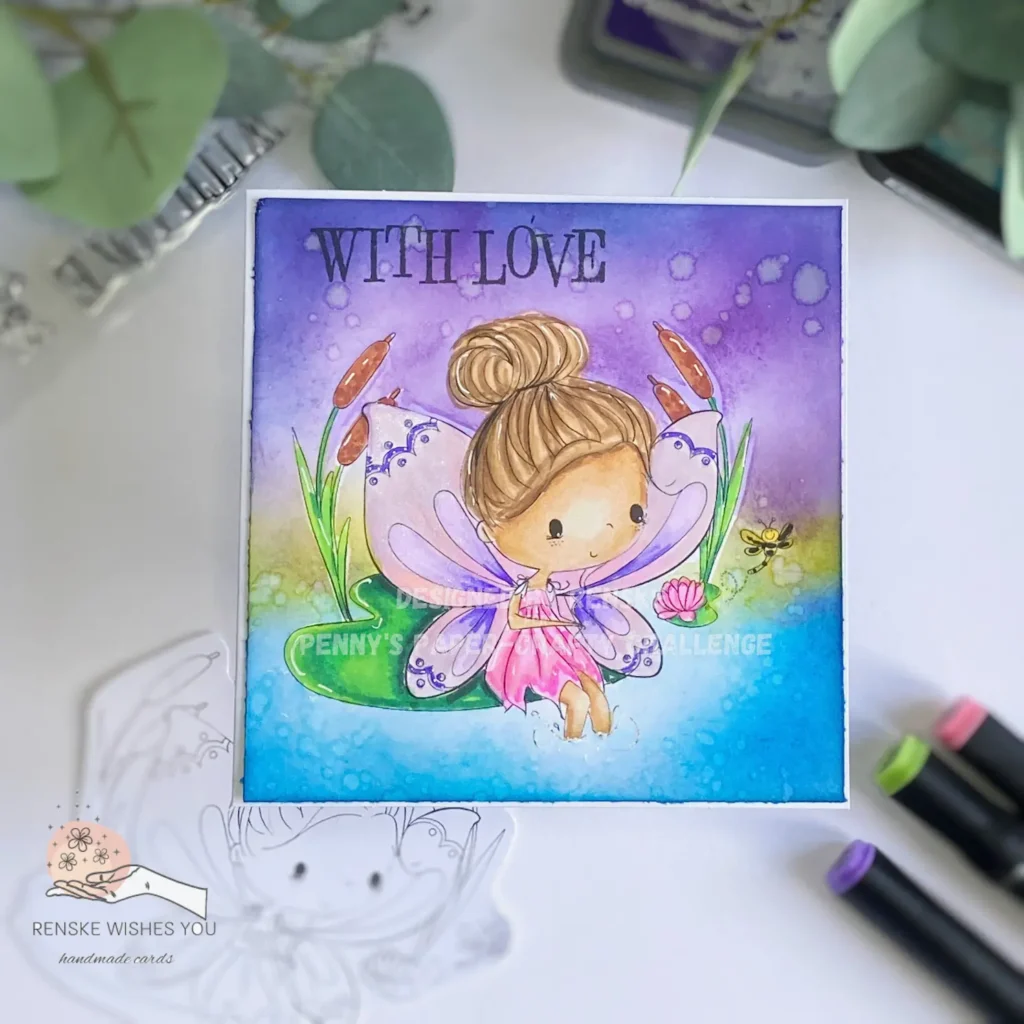
You can use ordinary printer paper and washi tape instead. I used this combination for my Magical Fairy One-Layer Card, and you can see exactly how I used it in that tutorial.
Pro Tip: Test your washi tape on scrap paper first, especially if you’re using a brand you haven’t tried for masking before. Peel it off slowly when you’re finished.
Step 4. Create the background with an ink blending technique
Once the mask was in place, I could start with the background. I used Tumbled Glass and Salty Ocean Distress Ink for the sky, then switched to Mowed Lawn and Pine Needles for the grass.
You don’t need these exact Distress Ink colours, though. If you use another ink brand, you can choose similar light and dark shades for the sky and grass and create a similar effect with the colours you already have.
I started with the lighter colours and added the darker ones. That gives me more control because I can always add more ink, but removing it is a lot harder. I noticed this most with the grass, so I kept the darker green fairly light-handed.
I blended across the whole 13.5 × 9.7 cm panel rather than stopping around the girl. I liked the result better this way because the background felt like an actual setting for her, rather than a patch of colour behind the digital stamp.
Keep the scene simple
I kept the rest of the background quite simple on purpose. The digital stamp already has the girl sitting on the rock, the little bird and the cactus, so I didn’t think it needed lots of extra elements.
What I liked about this digi was that it already had a little story going on. She is supposed to be reading, but of course she has been distracted by the little bird.
I didn’t want to cover up that little story by adding too many extra elements. The ink blending gave her a place to sit without making the scene feel crowded, so I left the background at that.
Step 5. Remove the mask and start the alcohol marker colouring
Once the background was finished, I carefully peeled off the masking paper. This is the part where I always check the edges twice, because you can’t really see how clean they are until the mask is gone.
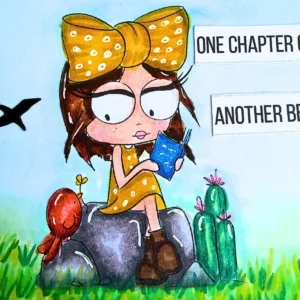
Luckily, the edges around the digital stamp were clean, so I could move on to colouring the Bookworm / Study Rebel with my Ohuhu alcohol markers. I mostly worked from light to dark, adding the deeper colours gradually and blending as I went.
I kept the colouring fairly warm because the background already has quite a lot of blue and green. That helped the girl stand out without making the colours too bright.
Colour the skin
I used YR34 Peach Cream as the base, with YR33 Rose Cream and YR47 Dusty Peach for the shadows. For the cheeks, I added a little R22 Ballet Pink.
I went back over the darker areas with YR34 to soften the transitions. I prefer adding blush gradually because it is very easy to make it stronger than you intended.
Colour the hair
For the hair, I used warm brown shades.
- Lightest shade Y69 Milk Tea
- Middle shade E614 Maple Syrup
- Dark shade E511 Chocolate Mocha
- Deepest shadow E515 Black Brown
I used Y69 as the base, then added the darker browns where I wanted more depth. I used individual strokes and followed the direction of the hair rather than filling it with one flat layer.
I kept E515 for the deepest areas. It is such a dark brown that I only needed a little of it.
Colour the dress and shoes
For the dress, I used mustard and warm golden brown shades.
- Base Y111 Mustard
- Shadow Y410 Goldenrod
- Deepest shadow Y216 Caramel
I used Y410 around the folds and kept Y216 for the areas that needed the most depth.
For the shoes, I chose brown instead of black.
- E413 Dark Brown
- E515 Black Brown
I left the shoelaces white. That small detail gives the shoes a bit of contrast without adding another colour.
Colour the supporting elements
For the rock, I used three grey shades.
- WG10 Porcelain
- WG26 Silver Grey
- GG07 Steel Grey
I didn’t try to make the rock completely even. Leaving some variation in the grey made more sense for a stone surface.
For the cactus, I deliberately avoided bright green.
- G43 Vintage Pale Green
- G113 Dusty Jade Green
- G114 Aged Pine Green
I wanted the cactus to sit within the scene rather than becoming the main focus. For the flowers, I used R22 Ballet Pink, R25 and a little R46.
For the bird, I used warm red-brown colours to give it a robin-like appearance.
Breast
- YR57 Tropical Peach
- YR015 Burnt Orange for the darker areas
Back
- E614 Maple Syrup
Wings
- E511 Chocolate Mocha
The warmer breast gives the bird a little more character, while the brown keeps it from becoming too bright.
For the grass in the digital stamp, I used G43, G36, YG111 and G114. I kept the darker greens mostly in the shadow areas.
For one of the books, I used BV414 and BV514. I liked adding that little bit of purple because most of the other colours in the image are warm.
Step 6. Add white highlights and small details
Once the colouring was finished, I picked up my white gel pen. I like adding these little details, but I’ve learned that I don’t need them everywhere.
I added small white dots to the bow and dress, then a few highlights to the rocks, cactus and bird. The dots on the dress were my favourite because they made the clothing feel a little more finished without changing the colours I’d already chosen.
I left the rest alone. It’s tempting to keep adding white once you have the gel pen in your hand, but too many highlights can make the image look busy.
Let the colouring dry first
Give your alcohol marker colouring a little time to dry before using the gel pen. If the alcohol is still wet, it can mix with the white ink and leave you with a dull, greyish mark.
I’ve rushed this part before because I was ready to finish the card. Waiting a few minutes is worth it, especially after spending all that time colouring.
Step 7. Add the extra die-cut birds
The digital stamp already has a little bird, so I decided to add two more flying birds to the sky. I die-cut them from black cardstock and moved them around until I liked where they sat.
It’s a small detail, but I liked what it did to the scene. The extra birds give the sky a little more movement without adding another large element to the card.
I did move them around a few times. When they were too close together, they looked more like a little pattern than birds flying in the distance, so I spread them out.
No bird dies? Try these instead
You don’t need bird dies for this part. Since the birds are just small black silhouettes, there are a few alternatives.
- Draw a few small flying birds with a black marker. Simple curved lines are enough.
- Use small bird stamps if you already have some.
- Add bird stickers if you want to keep this part quick.
I’d keep the birds small and fairly simple. They’re there to add a little life to the sky, while the girl stays the main focus.
Step 8. Add the back-to-school sentiment
For the sentiment, I used “One Chapter Closed, Another Begins” from the Polkadoodles Graduation School Sentiment Quotes digital collection.
I chose it because the girl is holding a book, so the idea of a new chapter felt like a natural fit. It also works for a back-to-school card without saying “back to school” in the most obvious way.
I kept the sentiment small because the scene already has quite a lot going on. I wanted the girl and the little details around her to catch your eye first, with the sentiment adding something when you look at the card a bit longer.
Step 9. Assemble the finished scene card
Once everything was done, I mounted the panel onto an A6 grey landscape card base measuring 10.5 × 14.8 cm.
I chose grey because the panel was already quite colourful. A bright card base would have added another strong colour, and I didn’t think the scene needed it. The grey gives the panel a simple border and lets the colouring stay in focus.
Before adding glue, I put the panel on the card base and checked the position one last time. I’ve definitely glued things down too quickly before and then noticed that one edge was slightly wonky.
It’s worth checking at this point because once the glue is down, there’s not much you can do about it. I made a small adjustment, glued the panel in place and called the card finished.
Why I Would Use This Masking Technique Again
The masking is probably the part of this card I’ll use again. I’ve used masking with physical stamps before, but I hadn’t thought about doing it with a digital stamp until I made this card.
It turned out to be much easier than I expected. I printed the digi at 8 cm high for the card, then printed it again at the same size on masking paper. That second copy protected the image while I worked on the background, so I didn’t have to worry about getting Distress Ink over the colouring.
I can see myself using this on other scene cards too. You could build a sky, grass, snow or a simple landscape around a digital stamp without needing a matching physical stamp.
The size is the part I’d pay the most attention to. Both prints need to match; otherwise the mask can sit slightly outside the original image. Mine lined up well at 8 cm, although cutting around the hair and little bird took a bit of patience.
Once the mask was in place, though, the rest was much easier. I could blend right over the image instead of trying to work around it.
Let’s Get Creative Together
I’ve used masking with digital stamps before, and I still like how much it can change a scene. With this card, the background would have been much harder to build without the mask, especially around the girl.
What I like about this technique is that you can take a digital stamp you already have and use it in a slightly different way. I can see myself using it again for other scene cards, especially when I want to add a sky, grass or another simple background around the image.
You don’t need to copy this card either. Once you understand how the masking works, you can change the colours, choose a different digital stamp and make the scene your own.
Join the Polkadoodles Challenge
I made this card for the Polkadoodles Challenge. If you have a Polkadoodles digital stamp sitting in your collection, this could be a good reason to get it out and make something with it.
You don’t have to make a scene like mine. Use a different image, change the colours or try the masking technique in a completely different way.
The challenge is always “Anything goes”. You don’t need to use Polkadoodles products to enter. Click the following button to go to the challenge.
Join the conversation
Have you ever used a digital stamp as a mask? If you have a tip that makes the process easier, I’d love to hear it. Let me know in the comment section.
I’d love to know what kind of scene you would create around one of your favourite digital stamps. And if you’ve found something that works instead of masking paper, tell me what you use. Those little craft-room solutions can be surprisingly useful.
Related Cardmaking Ideas
Learn more about masking
If you want to see another way to use a digital stamp for masking, have a look at my Create a Magical Fairy One-Layer Card with Masking and Digital Stamps tutorial. In that card, I used ordinary printer paper and washi tape instead of masking paper.

How To Make A Halloween Card Step-by-Step Tutorial
An example from another scene building with a digital stamp and masking paper.

Magical Mice Christmas Card With Night Sky Background
Here you will learn how to mask and create a moon in a night sky background.
More Back to School inspiration
If you’re looking for more Back to School cardmaking ideas, have a look at my other Back to School card. It uses a different design and gives you another way to approach the theme.

I would like to enter my card in the following challenges
- Try it on Tuesday: Make it colourfull
- Word Art Wednesday: Anything goes
- CREATIVE INSPIRATIONS: Anything goes
- Lil Patch of Crafty Friends Challenge …: Anything goes
- A Perfect Time To Craft Open Challenge: Anything goes
- Carlin’s Kaartenparadijs: Alles mag (anything goes)
- Crafts Galore Encore Challenge Blog: Anything goes
