
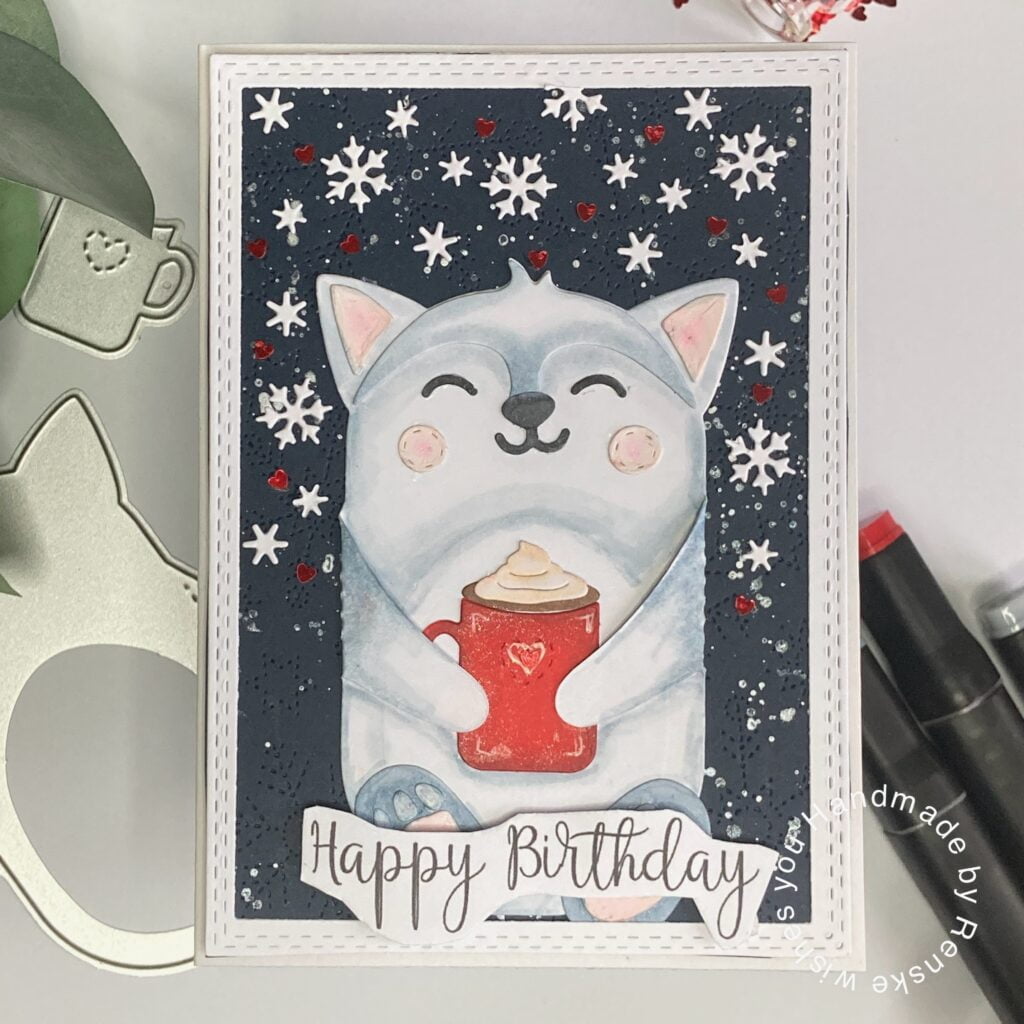
Welcome to my tutorial on how to make a beautiful winter birthday card! In this guide, I will take you through the process of, creating an adorable card featuring a teddy bear enjoying a cup of hot chocolate step-by-step. Whether you’re a seasoned card maker or new to the world of card making, this tutorial is designed to inspire and guide you through the creative process.
We will use die-cutting, colouring, and various techniques to add details to the card. My focus on the winter theme will add a touch of seasonal magic to your birthday wishes, making them perfect for celebrating during the colder months.
Let’s get started and create something special together!
Materials Needed for this Winter Birthday Card
Before embarking on the creative project of crafting a winter birthday card with a bear and hot cocoa, it is important to gather all the necessary materials. Here’s a list of items that you will need to bring your winter birthday card to life:
- Pre-made card base: For this card, I used a pre-made card base with measurements of 10.5 centimetres by 14.8 centimetres. However, if you want to make your card base yourself, you will need a piece of sturdy white card stock measuring 21 centimetres by 14.8 centimetres.
- White card stock: Used to die-cut the bear and to make the frame.
- Die-cutting machine: Necessary to be able to die-cut everything.
- Bear die-cutting set: I used a die set from Aveccreative to make this bear. However, you can use any die-cutting set of your choice.
- Colour medium: used alcohol markers to colour my bear, but you can also use coloured card stock or any other colour medium of your choice.
- Metallic paint: Needed for adding magical splatters.
- The rectangle dies: used two rectangle dies – one with a stitched die and a regular rectangle to make the frame.
- Winter-themed background die: Used to give some texture to the background.
- Snowflake dies: Necessary to create the snowflakes.
- White gel pen: Used to create highlights.
- Sentiment: I used a digital stamp as text. But of course, you can use stamps, stickers or other alternatives.
- Foam squares: Needed for dimension.
- Glue or adhesive: Necessary to adhere everything together.
Now that we have gathered all the materials, it’s time to get started with our tutorial. Are you ready to bring this card to life?
Step-by-Step Tutorial: Crafting a Winter Card with Bear and Hot Cocoa
Let’s learn how to create a winter birthday card with a cute bear enjoying a cup of hot cocoa. I will guide you through the entire crafting process, from die-cutting the bear to adding final touches to your card. Let’s begin and bring this charming card to life!
Step 1: Preparing the card base
Let’s begin by preparing the base of our winter birthday card. This step sets the foundation for the rest of the crafting process. You can either use a ready-made card base or make it yourself.
If you’re using a ready-made card base, make sure that it measures 10.5 by 14.8 centimetres, which is the standard size. If you prefer to make the basic card yourself, you will need sturdy white paper measuring 21 centimetres by 14.8 centimetres. Make a score line at 10.5 centimetres and fold it in half to create the base.
Now let’s move on to shaping our card and bringing our bear to life!
Step 2: Die-Cutting and Coloring the Bear
Let’s bring our adorable bear to life by using a die-cutting machine and adding vibrant colours!
- To start, use Aveccreative’s bear die set with high-quality white card stock to cut out the bear shape and its intricate details.
- After die-cutting the bear, it’s time to add some colour! Grab your alcohol markers and follow these suggested colour combinations for a cosy winter look:
- For the bear’s fur: Blue Grey 5 (BG5), Blue Grey 3 (BG3), and Blue Grey 1 (BG1) with touches of Cool Grey 9 (CG9) for depth.
- Add rosy cheeks with Pale Pink (17), Blush (136), and Leather (113) for warmth.
- Use Blue Grey 5 (BLG) and Blue Grey 3 (BG3) for the feet.
- Bring the mug to life with Cardinal (244), English Red (247), and Burgundy (247), and fill it with Chocolate (118) and Clay (116) hot cocoa.
- Finish with a dollop of Hazelwood (108) for the whipped cream.
Once coloured, assemble the bear according to the die set instructions, paying attention to the fold lines for the arms. Now that our bear is ready to use, we can get to work creating our background.
Step 3: Creating the Background
Let’s craft a stunning background for our winter happy birthday card! Here’s how:
- Begin using a background die with ice flowers and star shapes to create the design on dark blue paper. This gives our background a festive and wintery feel.
- Next, we can add some magic with metallic paint splatters. Take your metallic paint and a fine brush. Add water to the metallic paint and apply it to your brush. Then tap your brush while holding it above the paper to create paint splatters. Metallic paint shines a bit, so it will create a shiny snow-like background.
These simple but effective techniques will make our background sparkle and shine, perfectly complementing the cosy scene of our bear and hot chocolate.
Let’s move on to creating the frame for our winter wonderland card!
Step 4: Making the Frame with the partial die-cutting technique
Let’s add an elegant frame to our winter birthday card using the partial die-cutting technique. Here’s how:
- Begin by selecting a stitched rectangular die and placing it on white paper. Run this through the die-cutting machine. You will now have a rectangular paper with double-stitched edges.
- Next, we will use the die-cutting machine to partially cut out the frame. Place the sandwich with paper and dies on the platform, ensuring that the top cutting plate only covers the area where you want to cut out the top of the frame. Run it through the machine and repeat the process for the bottom of the frame.
- Once the frame is die-cut, we can attach it to our background.
Now that the frame is in place, our winter birthday card is one step closer to completion. Let’s continue adding the finishing touches to make it truly special!
Step 5: Adding the Text
Let’s add some heartfelt text to our wintery birthday wishes card! To do this, we will use the phrase “Happy Birthday” from the Polkadoodles digital sentiment set “Winnie Daisy Messages”. Here are the steps:
- Print the desired sentiment onto DCP paper using a printer.
- Carefully cut out the sentiment, following the shape of the letters for a neat finish.
Now that we have a text for our card, we can start putting the card together and adding the details.
Step 6: Adding Details and Assembling the Card
Let’s put the finishing touches and put our winter birthday card with snowflakes together! Here’s how:
- Place the bear on the blue background with its feet just below the frame so that the frame overlaps them slightly.
- Use a die tool to create ice flower and star shapes from white paper. Arrange them around the top portion of the background, surrounding the bear. Place stars above the bear’s arms, leaving the area below clear. Adhere to the shapes using glue.
- Add red heart-shaped embellishments among the stars and ice flowers for extra sparkle. Place one heart in the centre of the mug as well.
- Position the sentiment onto the card using square foam blocks for elevation. Place it halfway over the bear’s feet, ensuring the longer letters align perfectly with the frame.
- Finally, adhere the assembled panel onto the base card using glue. Make sure it is centred and secure before pressing down firmly.
With these final details in place, our winter birthday card is ready to spread joy and warmth to its recipient. Let’s admire our handiwork and celebrate the creation of this heartfelt card!
Inspire, Create, Share, and More!
As we conclude our winter birthday card tutorial, let’s take a moment to reflect on the creative journey we’ve been on together. From die-cutting our adorable bear to adding details and heartfelt sentiments, we have created a beautiful card that is sure to bring joy to its recipient.
More birthday card ideas with a winter theme
You can find related articles linked below to explore even more card-making inspiration.
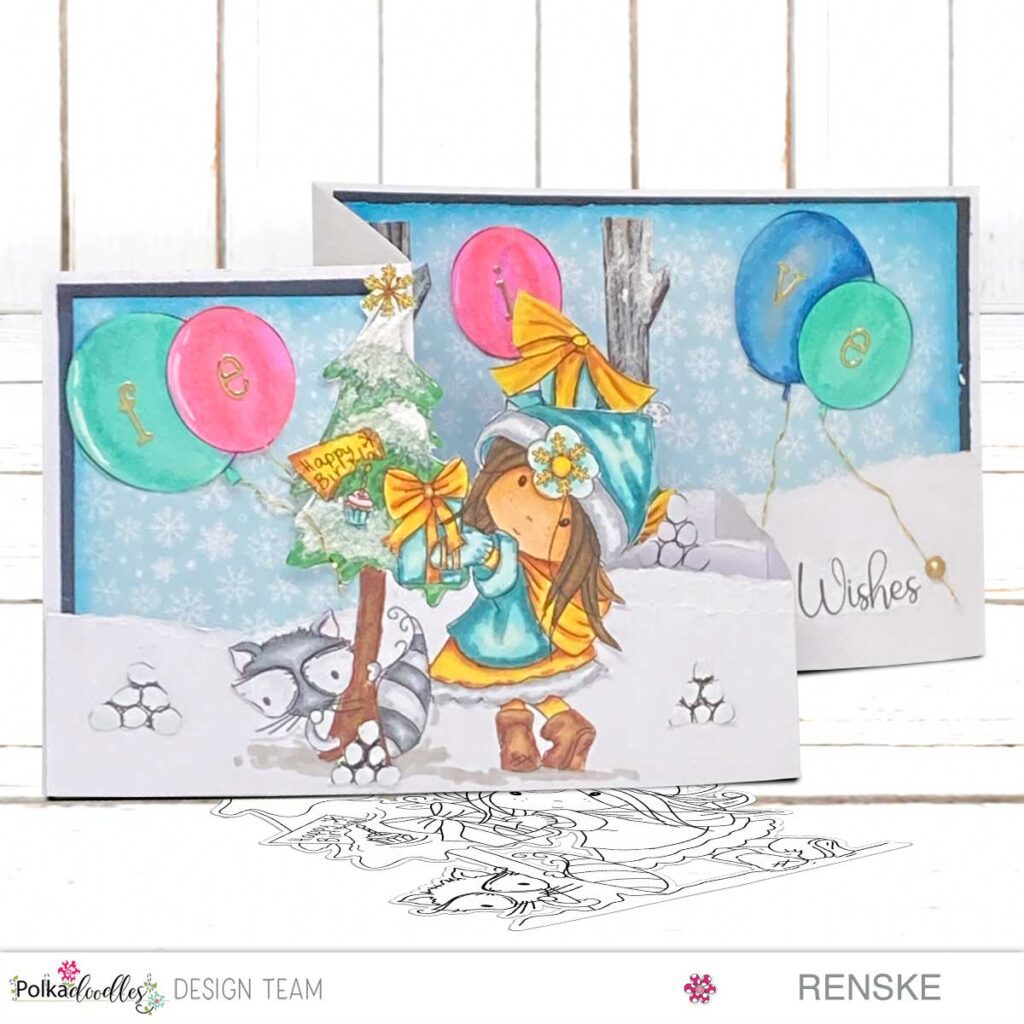
Crafting Magic: DIY Christmas Birthday Card with a Double Z-Fold Tutorial
This is how you can also make a winter birthday card with possibly Christmas products.

This is also a birthday card with a winter theme or a Christmas theme.
Products Used
Before we move on, it’s important to note that some of the product links provided in this tutorial are affiliate links. If you choose to purchase through one of these links, I may earn a small commission at no additional cost to you. Your support helps me to continue creating valuable content for our crafting community, and I thank you for your support!
Products Used with Affiliate Links
Nuvo Aqua Shimmer Pen

White Gel Pen 08

Products Used without Affiliate Links
- Bear die set from Aveccreative.
- Snowflake dies from Aveccreative
- Heart embellishments (brand unknown).
- Rectangle dies from Card & Deco.
- Blue Card stock (brand unknown).
- Twin Markers (alcohol markers) Decotimecrafts.
- Metallic Paint (brand Unknown).
I would like to enter my card in the following challenges
- Dream Valley Challenges: Add a sentiment
- Crafty Gals Corner: Winter Fun
- The Paper Funday Challenges: Anything goes + No patterned paper
- The Sisterhood of Crafters: The Winter Blues
- Craft Rocket Challenges: Birthday
- Lil Patch of Crafty Friends Challenge …: Anything goes
- A Perfect Time To Craft Open Challenge: Anything goes
- Classic Design Challenge Blog: Anything goes
- Crafts Galore Encore Challenge Blog: Anything goes
- Critter Crazy CHALLENGE BLOG: Anything goes + featured image
- Crafty Animals: Anything goes + must use an animal
Beautiful – that bear is so cute!
Thanks for joining us at the Critter Crazy Challenge.
Helen x
DT
Thank you
Adorable card! Your tutorial is wonderful, so much detail and yet so easy to follow. Thanks for sharing with us at the Paper Funday Challenge!
Thank you so much. Glad you like the tutorial
Great card and background.Love the cute bear.Thank you for joining us at The Crafty Addicts.
Carol DTx
Thank you
Adorably cute cute winter card!!
Thank you for joining our challenge at The Sisterhood!
Diane TSH DT
{Nellies Nest}
{The Sisterhood}
Thank you
Cute card!!! Thanks so much for participating in our LIL PATCH OF CRAFTY FRIENDS challenge!!! I appreciate that you play along and I enjoy visiting your blog!! Have a happy crafty day!! Deanne at A Little Bit O’ Paper
Thank you so much for your lovely comment