
Some links in this post are affiliate links. This means I may earn a small commission if you make a purchase, at no extra cost to you. I only recommend products I use and genuinely enjoy in my own cardmaking. Read more here.
Hello Crafty Friends!
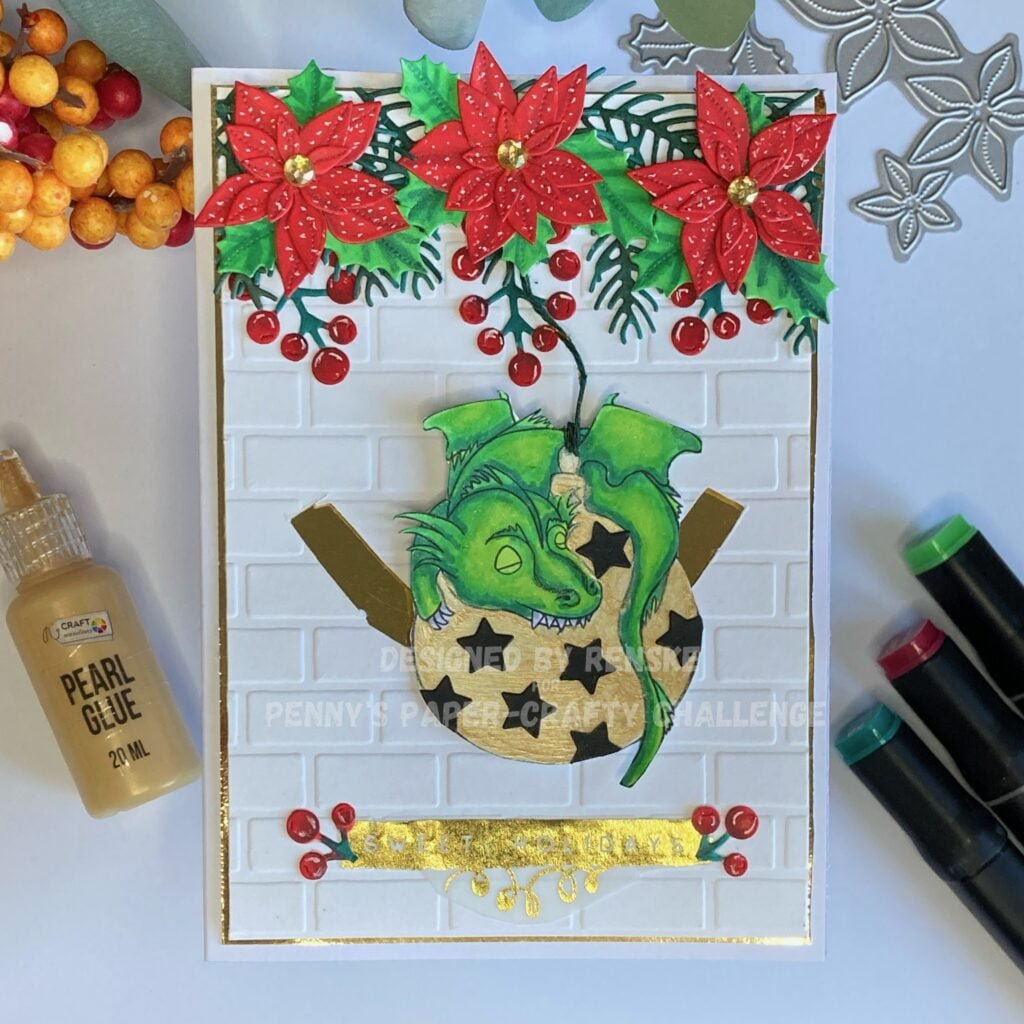
I am happy to welcome you to our festive crafting journey as we explore the magic of creativity by making a unique Slider Christmas card.
Today a new challenge has started on the Penny’s Paper-Crafty Challenge blog. The theme is as always “Anything goes using paper”. As a design team member, I created this card to inspire you to participate in the challenge.
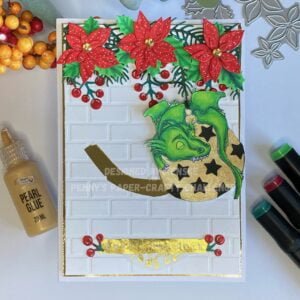
Our sponsors for this challenge, Sheepski Designs and Alex Syberia Designs have added an extra layer of enchantment to our crafting adventure. I got to work with the adorable “Christmas Snooze” digital stamp from Sheepski Designs, featuring a dozing dragon on top of a Christmas bauble.

Prize: 3 digital image’s of the winner’s choice

Prize: the digital images the DT used in this challenge
I had a moment of uncertainty about how to incorporate the image into the card, but then an idea came to mind. Why don’t I let the dragon and the Christmas bauble wave gently? Let the dragon swing wonderfully on this Christmas bauble so that he can sleep soundly. This is how the concept for our Slider Christmas card was born.
In the following steps, we will delve into the creative process together. I will guide you through each step and share insights into how to recreate this charming card. So, let’s dive into the world of crafting magic and bring this Slider Christmas Card to life! Are you ready for the adventure?
Crafting Essentials & Measurements for Your Slider Christmas Card
Let’s start by gathering the materials and tools required to create our Slider Christmas card. We will need:
Materials:
- A digital stamp (Christmas Snooze from Sheepskidesigns is recommended, but you can use any stamp you prefer).
- White cardstock for the card base (measuring 22 cm x 15.3 cm).
- White cardstock for creating the embossed background.
- A star die (or stickers).
- A colouring medium (such as alcohol markers).
- Golden Pearl Glue.
- Dies set to create poinsettia flowers, pine needles, and berry-laden branches.
- A Luxe Paper Block (Vellum Sentiment) for a luxurious touch.
- Bakers Twine (dark green and gold).
- Rhinestones add sparkle and shine to the floral embellishments.
- An Embossing Folder (Stone Wall) to create a brick wall effect.
- A Nuvo Aqua Shimmer Pen to add magical glitter to the dragon’s scales.
- A white gelpen 08 to add intricate touches to leaves and berries.
- A Luxe Paper Block (Gold Paper) for a regal frame.
- DCP paper to print the digital stamp on.
Tools
- Adhesive or glue.
- Die Cutting and Embossing Machine.
- Paper Cutter.
- scissors.
Card Dimensions
- Card Base: 11 cm x 15.3 cm (score a 22 cm white paper at 11 cm and fold it in half) .
- Golden Paper: 10.5 cm x 14.8 cm.
- Stone Wall Panel: 10 cm x 14.3 cm.
These are all the materials and tools we need to create our Slider Christmas Card. Stay tuned for the upcoming steps where we will reveal the secrets behind each element.
Unlock the Enchantment – A Step-by-Step Guide to Crafting Your Slider Christmas Card
Embark on a creative journey as we explore the enchanting process of creating your very own Slider Christmas card. In this step-by-step tutorial, I will guide you through each element of the card and show you how to bring it to life. Are you ready to get started? Let’s begin!
Step 1: Creating the Card Base
To start, let’s lay the foundation for our Slider Christmas Card. We will use a larger 11-centimetre by 15.3-centimetre card base, which provides plenty of space for the fascinating stone wall panel.
To create the base, take a sturdy piece of white paper measuring 22 centimetres by 15.3 centimetres. Score the 22 centimetres side at 11 centimetres and fold it in half.
As we will be using gold in our card, we need to prepare a piece of gold-coloured paper. Cut this to 10.5 centimetres by 14.8 centimetres. This elegant frame will beautifully accentuate the scene.
Are you ready to add grandeur and charm to your Slider Christmas card? Let’s move on to the next step in our crafting adventure!
Step 2: Printing and Coloring the Digital Stamp Christmas Snooze
Now let’s breathe life and colour into our Slider Christmas card by bringing the Christmas Snooze digital stamp to life.
Start by printing the adorable “Christmas Snooze” digital stamp on DCP paper. This image depicts a dragon nestled atop a Christmas bauble, creating a beautiful scene that captures the spirit of the holiday season. Feel free to use any stamp you have, making sure the details are crisp and clear.
I used alcohol markers for colouring, but you can use any colour medium you prefer. I used the following colour combinations of my Twin markers:
- Dragon’s Body: Embrace the enchanting forest hues with Forest Green (50), Grass Green (47), Weeds Green (162), and Yellow Green (48).
- Teeth and Nails: A touch of Cool Grey 1 for the dragon’s charming smile.
- Christmas Bauble: Here’s where the magic happens. Instead of traditional colouring, we’ll use the Golden Pearl Glue to adorn the bauble. Apply the glue gently with a brush, creating a captivating, shimmering effect reminiscent of holiday magic.

Now that we have coloured our digital stamp, we can move on to the next step. Are you ready to add texture to the background with a stone wall embossing folder? Let’s go to the next step.
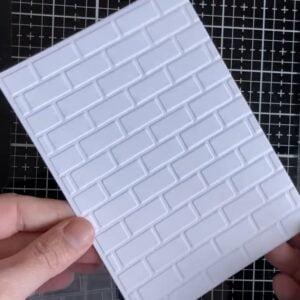
Step 3: Embossing the Stone Wall Panel
Now it’s time to create a stone wall effect for our background. To achieve this, we will use an embossing folder. This technique provides depth and texture to our card. If you don’t have an embossing folder, you can also use a stencil to get the same effect. In the following article, I will tell you how you can do it. You can find it here.
For the background, I used an embossing folder with a wall motif. The embossed pattern gives the impression of a charming and rustic background, providing the perfect backdrop for our festive dragon.
Here’s a simple guide to this magical step:
- Selecting Your Embossing Folder: Choose an embossing folder with a brick wall pattern that complements the whimsical theme of our Slider Christmas Card.
- Preparing Your Paper: Take a piece of white cardstock measuring 10 centimetres by 14.3 centimetres. This will be the stone wall panel that holds the magic of our card.
- Embossing Process: Place the cardstock inside the embossing folder, ensuring it is centred for a balanced pattern. Run it through your die-cutting and embossing machine, applying gentle pressure to create a pronounced embossed effect.
This stone wall panel will serve as the base for our Slider Christmas card and set the stage for the delightful holiday scene we are creating.
Now that our background is ready, we can start creating our slider mechanism. Let’s move on to the next step.
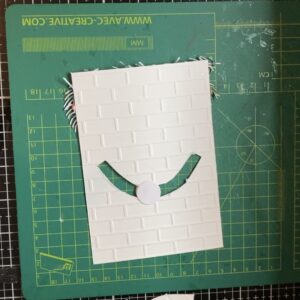
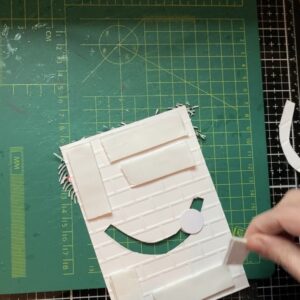
Step 4: Making the Slider Mechanism
Now, let’s add a whimsical touch to our Slider Christmas Card by creating the sliding mechanism for our festive dragon on the Christmas bauble. This adds an interactive element to the card, making it truly magical.
Follow these steps:
- Designing the Slider Slot: On the stone wall panel, carefully design a slender slot where the dragon will glide back and forth. This slot should be wide enough to allow smooth movement but snug enough to keep the dragon securely in place. I made the slit about half a centimetre wide and I made it in the shape of a smiling mouth.
- Cutting the Slot: Use precision and patience to cut along the marked lines, creating the slider slot. If you’re new to slider cards, take your time and remember, practice makes perfect.
- Choosing a Circular Element: Now, select a circular element for the dragon to slide on. A small coin, circular die-cut, or any similar item can serve as a guide. This circular element will determine the path of the dragon’s delightful journey. I die-cut out two circles from white paper.
- Creating the Slider Mechanism: Elevate the circular element using foam tape. This raises it slightly above the surface, allowing the dragon to slide smoothly along the designated path.
This sliding mechanism is the heart of our card and brings the dragon and the Christmas bauble to life. The gliding motion adds an element of surprise and delight, making it a striking creation.
Are you ready to add twine to our Christmas bauble? Let’s move on to the next step in our crafting journey.
Step 5: Attaching Twine to the Dragon and Christmas Ball
Let’s add a touch of realism to our Slider Christmas card by attaching dark green and gold baker’s twine to the dragon and Christmas ball. This extra layer of charm will make the card more visually appealing and vibrant. You can also use ribbon instead of twine if you prefer.
Follow these simple steps to attach the twine:
- Selecting the Twine: Choose dark green and gold baker’s twine to complement the festive theme of your card.
- Measuring the Twine: Cut a piece of twine long enough to drape across the card but not too long to make it look awkward. The length depends on where you made the slider mechanism and where the rope will no longer be visible.
- Attaching the Twine: Use adhesive or glue to secure the end of the twine to the dragon and the Christmas ball. Ensure they are firmly attached to withstand movement but not too tight to allow free gliding along the slider mechanism.
Following these steps will add an extra dimension to your Slider Christmas Card, making it even more captivating. Are you ready to see your card come to life with these realistic touches? Let’s continue our crafting journey!
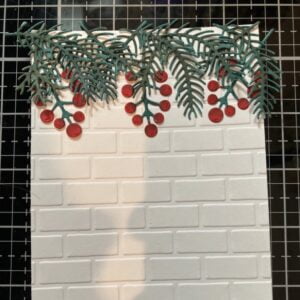
Step 6: Die Cutting Christmas Foliage
To take the festive charm of our Slider Christmas card to the next level, let’s add details with die-cut Christmas leaves. We are going to make beautiful poinsettia flowers, pine needles, and holly leaves to decorate our card.
Follow these steps to bring your Christmas foliage to life:
- Selecting Your Dies: Choose a set of dies that includes poinsettia flowers, pine needles, and holly leaves. These elements add a delightful seasonal touch to our card.
- Preparing Your Paper: As the digital stamp is coloured with alcohol markers, it’s best to die-cut everything out of white paper to colour it. If you prefer, you can use coloured paper instead.
- Die Cutting Process: Place the dies on the chosen paper and run it through your die-cutting machine.
- Colouring the Elements: Once die-cut, add depth and dimension to the foliage by colouring them. I used the following colouring combinations:
- The pine needles: Pine Forest (241), and Forest Green (50).
- The holly leaves: Forest Green (50), Grass Green (47), and Weed Green (162).
- De Poinsettia: Cardinal (244), English Red (249), Burgundy Red (247).
- The berries: Cardinal (244) and Burgundy Red (247).
- Applying the elements to the background: Once you’ve coloured all the parts, you can start applying them to the stone slab. Check how you want everything to look before sticking it on. Then stick it in place with glue. Make sure the string of the Christmas ball comes under the middle flower. Then, you can cut the rope.
By incorporating these die-cut Christmas foliage elements, we’ll create a visually stunning scene on our Slider Christmas Card. The intricate details will capture the essence of the holiday season and add a touch of elegance to our whimsical design. Are you ready to add extra details? Let’s proceed to the next step and continue our crafting journey!
Step 7: Adding Extra Details
Let’s take the charm of our Slider Christmas card to the next level by adding some extra details. Follow these enchanting steps to enhance the look of your card:
Enhancing Flowers with a White Gel Pen and Rhinestones:
- White Gel Pen Touch: Add dots to the leaves of the flowers with a white gel pen and highlight the berries. Adding fine lines and highlights will make these elements stand out with a touch of elegance.
- Rhinestones Sparkle: Bring a shimmering effect to your card by embellishing the flowers with rhinestones. Choose rhinestones that complement the festive colours and place them in the middle of the flowers. This will add shimmer and shine to the flowers.
Adding Glitter to the Dragon with Nuvo Aqua Shimmer Pen
- Magical Glitter: Unleash the magic by applying glitter to the dragon using an Aqua Shimmer Pen. This will give the dragon’s scales a captivating sparkle, enhancing the whimsical and festive feel of the card.
These extra details will take your Slider Christmas card to the next level, making it a true masterpiece that captures the essence of the holidays. Let’s move on to the next step!
Step 8: Placing the Sentiment
Let’s add a heartfelt touch to our Slider Christmas Card by placing a sentiment that captures the spirit of the season. Follow these warm steps:
Follow these warm steps:
Choosing and Attaching a Vellum Sentiment with “Sweet Holidays”:
- Sentiment Selection: Choose a vellum sentiment that resonates with the joyous theme of your Slider Christmas Card. For our card, we opted for a sentiment that reads “Sweet Holidays,” adding a delightful and warm message to the scene.
- Attaching the Sentiment: Carefully place the vellum sentiment in a position that complements the overall design. I placed the text in the middle under the Christmas bauble. Be careful where you apply the glue. Apply the glue to the areas where colour can be seen on the vellum. This way the glue will not be visible.
By incorporating this sentiment, you’ll infuse your Slider Christmas Card with a sweet and heartfelt message, making it a perfect greeting for the holiday season. Let’s move on to the final step and complete our crafting adventure!
Step 9: Assembling the Card
Now that we’ve added all the enchanting elements to our Slider Christmas Card, it’s time to bring them together in a harmonious composition. Follow these final steps to complete your festive creation:
Attaching the Stone Wall Panel to the Golden Paper
- Prepare the Components: Make sure you have the stone wall panel ready.
- Apply Adhesive: Place on the background of the stone wall foam tape. Make sure you place the foam tape in such a way that it does not affect the slider mechanism Attach the stone wall background panel to the golden paper.
Placing the Complete Assembly onto the Larger Card Base
- Final Arrangement: Lay out all the components on the larger 11 cm x 15.3 cm card base. Arrange them in a visually appealing manner, considering the placement of the stone wall, the interactive dragon, and the festive foliage.
- Secure the Components: Once satisfied with the arrangement, secure all the components onto the larger card base.
By completing these steps, you’ll have successfully assembled your Slider Christmas Card. The final result will be a captivating and interactive creation that captures the magic of the holiday season. Let’s celebrate the completion of our crafting adventure!

Inspire, Create, Share, and More
Thank you for joining me on this creative journey as we explore crafting with this handmade slider Christmas card.
Join the Challenge
Are you inspired to embark on your crafting journey? I invite you to participate in the Penny’s Paper-Crafty Challenge! Share your unique creations, discover a supportive community, and let your creativity soar. Click the button below to join the challenge and be part of the crafting magic.
Follow for More Card-Making Inspirations
For continuous inspiration, follow my crafting escapades. Delve into the world of card-making and discover new techniques, styles, and ideas. Simply enter your email below and don’t miss a post.
More Card-Making Ideas
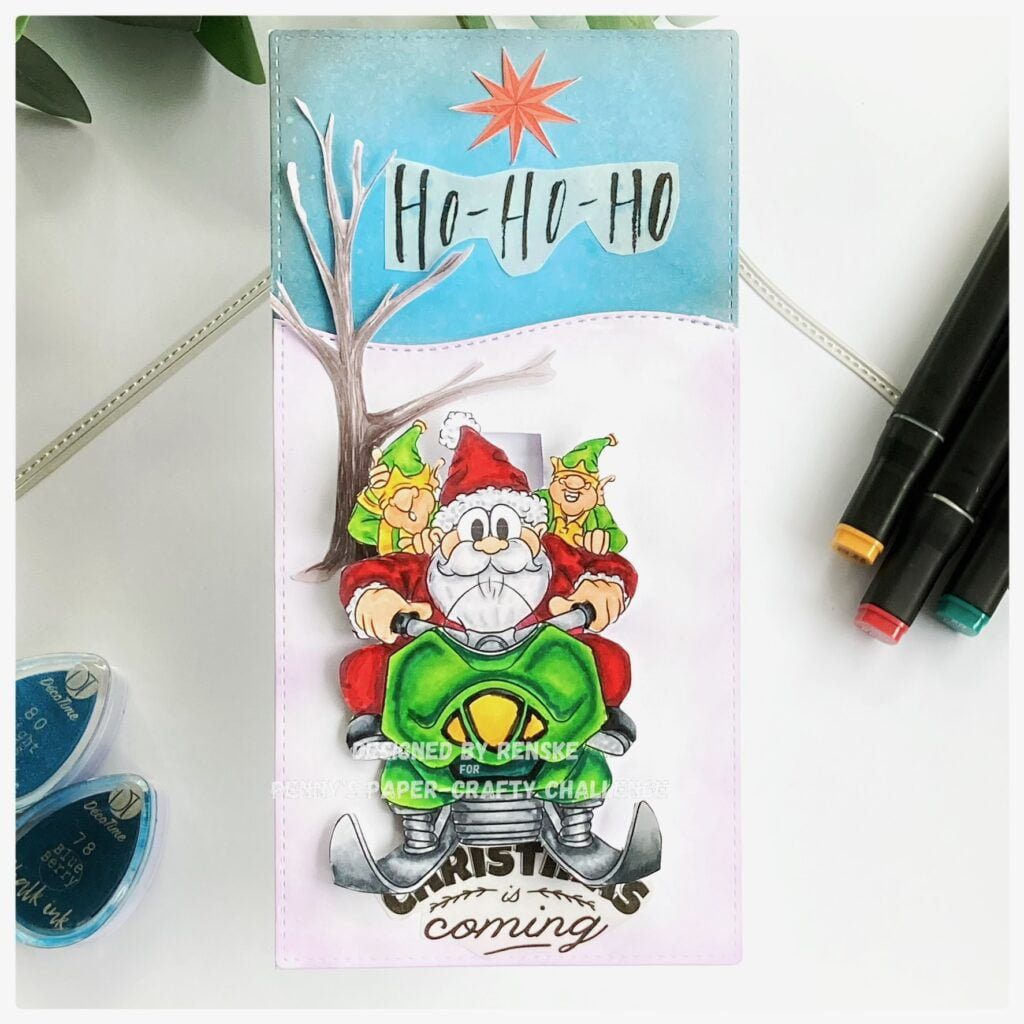
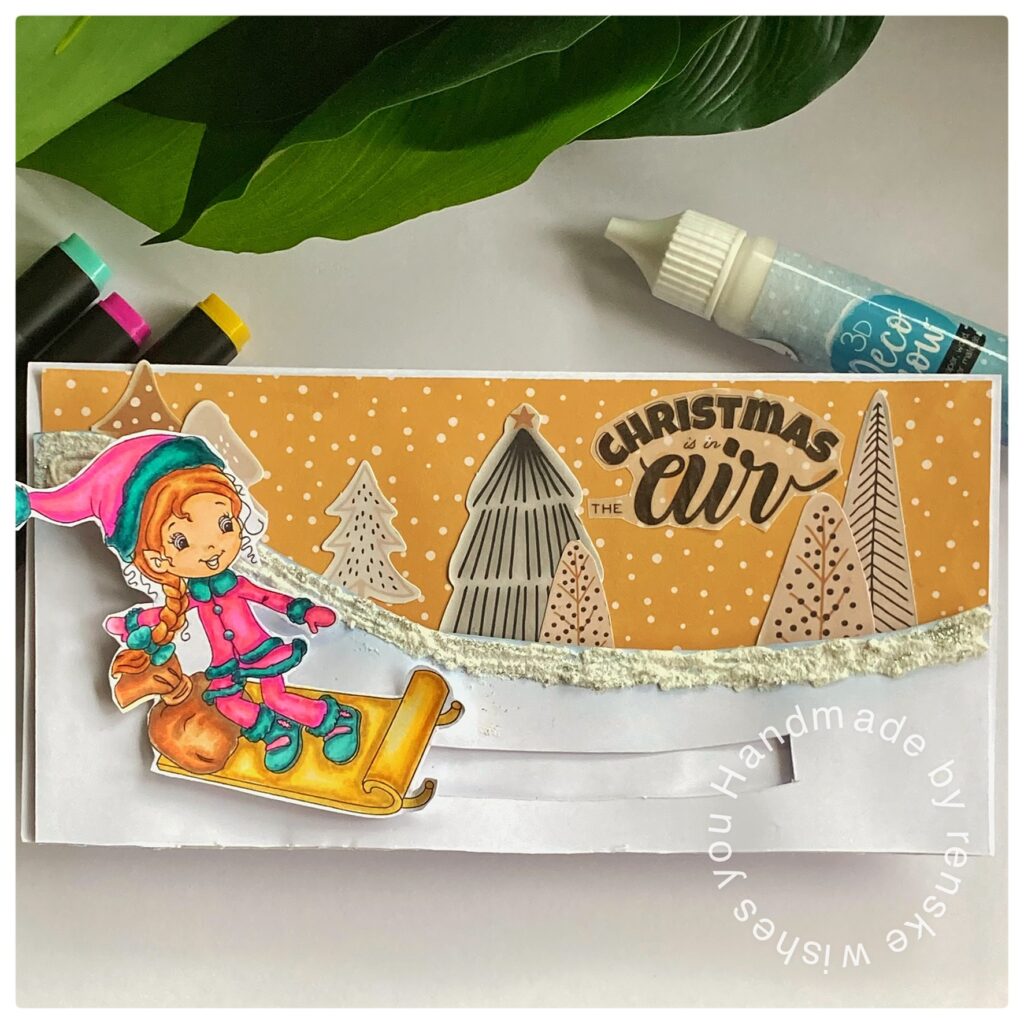
I have made more Christmas sliding cards in the past. These are articles where you can get even more inspiration for an interactive Christmas card.

Products used for this card
Affiliate Disclosure: This post may contain affiliate links. If you purchase through these links, I may earn a small commission at no additional cost to you. This helps support and maintain our blog, allowing us to continue creating valuable content and inspiring tutorials. Thank you for your support!
Products used with affiliate links
Christmas Snooze from Sheepski Designs

Shop not available anymore (okt.2025)
Nuvo Aqua Shimmer Pen

Gelly Roll White gel pen 08

Products without affiliate links
- Star die from Aveccreative
- Twin Markers (alcohol markers) from Decotimecrafts.
- Golden Pearl Glue from Craftsensations
- Christmas die set with poinsettia, pine leaves and berries from Aveccreative.
- Luxe Paper block from Decotiemcrafts for the golden paper and sentiment.
- Bakers twine. Brand unknown.
- Rhinestones from Aveccreative.
- Tacky glue from ActionNL.
- Foam tape, brand unknown.
I would like to enter my card in the following challenges:
- Fab ‘n’ Funky Challenges: Stamp it.
- Krafty Chicks Challenge: All occasions
- Allsorts challenge blog: Anything but square
- Lil Patch of Crafty Friends Challenge …: Anything goes
- Classic Design Challenge Blog: Anything goes
- The Creative Crafters: Anything goes
A great slider card. Thanks for sharing with us at Allsorts challenge.
Thank you
Cute card, many thanks for sharing at Allsorts challenge this week.
B x
Thanks
So cute!!! Thanks so much for participating in our LIL PATCH OF CRAFTY FRIENDS challenge!!! I appreciate that you play along and I enjoy visiting your blog!! Have a happy crafty day!! Deanne at A Little Bit O’ Paper
Thank you
Wonderful card, what a great design. Thank you for joining in the Allsorts Challenge this week using the Anything but Square option.
Liz xx
Thank you so much ❤️