Hello everyone!
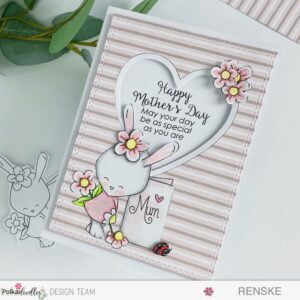
As a member of the Polkadoodles design team, I’m excited to invite you on a creative journey to celebrate Mother’s Day. Our challenges always embrace the “Anything goes” theme, which allows crafters to express themselves without limits. This time, our assignment as a design team was to create a handmade Mother’s Day card, and I’m thrilled to showcase how you can make a heartfelt card using Polkadoodles products.
This tutorial will explore the enchanting world of handmade card-making with the delightful Polkadoodles Bunny Rabbit blank Greeting Card digital stamp. We’ll go through the process step by step to create a beautiful and personalized card that will surely warm the hearts of mothers everywhere.
Get ready to unleash your creativity, craft a keepsake and make this Mother’s Day memorable.
- Materials needed for this Handmade Mother's Day card
- Step-by-Step Tutorial: Creating Your Handmade Mother's Day Card
- Inspiration Hub: Let’s Get Creative Together
- Polkadoodles products in the Spotlight
- I would like to enter my card in the following challenges
Materials needed for this Handmade Mother’s Day card
Gather all the necessary materials beforehand to create a beautiful handmade Mother’s Day card. Below is a list of materials and tools you’ll need:
Polkadoodles Products Used
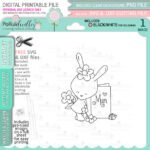
- Bunny Rabbit blank Greeting Card digital stamp: This digital stamp features an adorable bunny rabbit surrounded by flowers, holding a blank greeting card. It’s perfect for creating personalized Mother’s Day cards. Click HERE to shop.
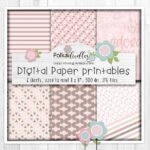
- Love Always printable papers bundle: This set includes a variety of digital pattern papers in coordinating colours, providing the perfect backdrop for your handmade card. I used the striped patterned paper from this set in pink, white and taupe. Click HERE to shop
- Spring Flower Mothers Day Friends greetings sentiments: This set contains heartfelt sentiments, specifically designed for Mother’s Day cards. I used the sentiment Happy Mother’s Day. May your day be as special as you are. Click HERE to shop.
Additional Materials and Tools
In addition to the Polkadoodles products, you’ll also need the following materials and tools to complete your Mother’s Day card:
- DCP paper for printing the digital stamp
- Alcohol markers for colouring
- Glue for assembly
- Foam tape for dimension
- Paper trimmer for cutting
- Heart-shaped dies for the window in the card
- Die-cutting machine for cutting the hearts and the rectangle.
- Rectangle die for creating the pattern paper layer.
- White gel pen for adding highlights
Collect these supplies and tools, and create a beautiful handmade Mother’s Day card!
Step-by-Step Tutorial: Creating Your Handmade Mother’s Day Card
We collected all the materials and tools needed for our handmade Mother’s Day card. Now, we will begin with the step-by-step tutorial. In this section, I will provide detailed instructions for each step, making it easy for you to follow along.
Making a handmade card is not only about the result; it’s also about the satisfaction of creating something special with your hands. So, gather your craft supplies, get comfortable, and embark on this creative journey together.
Are you ready? Let’s begin with step one!
Step 1: Printing the Polkadoodles Products
Before we start creating our handmade Mother’s Day card, let’s print the necessary products from Polkadoodles, which include the digital stamp, pattern papers and sentiment set.
- Digital Stamp: To print the digital stamp, download it from the Polkadoodles website and save it to your computer. The stamp features an adorable bunny rabbit holding a blank greeting card, perfect for Mother’s Day.
- Pattern Paper: For the pattern paper, I’m using a size of 10 centimetres by 14.3 centimetres. If you paste the pattern paper into Microsoft Word, it will automatically adjust it to 16 centimetres by 16 centimetres. You can change the size as per your preference.
- The Sentiment: I chose the text “Happy Mother’s Day. May your day be as special as you are.” Keep the size of the digital stamp in mind and ensure that the text fits snugly in the heart window.
Printing Process
- Open a document in Microsoft Word and copy the downloaded digital stamp, pattern paper, and sentiment into the document.
- Adjust the size per your preference and ensure it fits your chosen card size.
- Print the products.
Now that everything is printed and ready, we can move on to the next step and colour our digital stamp.

Having trouble editing or colouring digital stamps? Download my free guide for extra tips and tricks to help you perfect your digital stamps!
Step 2: Coloring and Cutting the Digital Stamp
Now that we have printed our Polkadoodles products, it’s time to add colour to our bunny stamp and prepare it for assembly. Here’s how I brought the digital stamp to life:
Colouring the Digital Stamp
I meticulously coloured each element of the digital stamp using alcohol markers. Here are the colour combinations I used:
- Bunny: Warm Grey 2 and the colourless blender
- Dress, flowers: Old Pink, Blush, Pink Mauve
- Inside of flowers: Pale Yellow and Canaria Yellow
- Greeting card Mum: Warm Grey, Blush, and Pink Mauve
- Ears: Warm Grey, Blush, and Pink Mauve
- Leaves: Spring Green, Yellow Green, and Weeds Green
- Ladybug body: Old Red and Cardinal
- Ladybug spots: Black
- Cheeks: Blush and Pink Mauve
After colouring, I added highlights to the flowers, flower centres, dress, and cheeks using a white gel pen.

Cutting Out the Digital Stamp
Once the colouring was complete, I carefully cut out the main digital stamp image. Additionally, I cut out extra elements from other printed copies of the stamp:
- The full flower for the bunny’s head, and separately, the centre of that flower.
- The flower she holds next to her, with only the centre cut out.
- The flower on the ground.
- The ladybug’s body.
Adding Dimension
To create a 3D effect, I used foam tape to adhere the additional elements to the digital stamp image, adding depth and dimension to the design.
With our beautifully detailed elements ready, let’s proceed to the next step!
Step 3: Creating the Background Panel
Let’s focus on making the background panel for our Mother’s Day card. This panel will be made of pattern paper from the Polkadoodles set. Use a stitched rectangle die to cut out a rectangle shape. Next, I created a heart-shaped window to showcase the printed sentiment.
Creating the Heart Window
To create the heart-shaped window, I used a heart-shaped die. I positioned the die exactly where I wanted the heart shape on the panel and ran it through the die-cutting machine.
Adding a Heart Frame
Next, I used another die to cut out a heart-shaped frame from white paper. This frame perfectly fits within the heart shape we cut out from the pattern paper. To secure the frame in place, I adhered it to the back of the pattern paper using tape.
By carefully crafting the background panel with a heart-shaped window and frame, we’re setting the stage for our heartfelt Mother’s Day card. Let’s move on to the next step!
Step 4: Placing the Sentiment
Let’s focus on placing the sentiment “Happy Mother’s Day. May your day be as special as you are.” We printed this sentiment earlier, it will be positioned behind the heart-shaped window we created on the background panel.
Cutting Out the Sentiment
I used the same heart-shaped die we used for the background panel to die-cut the sentiment. Using the same shape ensures the sentiment fits perfectly behind the window, adding a delightful touch to our card design.
Positioning the Sentiment
Once I cut out the sentiment, I gently slide it behind the heart-shaped window. It fits snugly, adding a heartfelt message that will surely bring joy to the recipient.
Adding the sentiment behind the heart-shaped window gives a personal touch to our handmade Mother’s Day card. Now, we can move on to the next step and assemble the card!

Step 5: Assembling the Card and Adding Extra Embellishments
Let’s combine all the card elements and add some extra embellishments to finish our handmade Mother’s Day card.
- Placing the Heart with Text: Start by placing the heart with the printed sentiment on the base card. Use a pencil to mark where you want the heart window placed on the card. Once you have found the right spot, glue the heart in place.
- Attaching the Background Panel: Use foam tape to attach the background panel to the base card, so that the heart with the sentiment falls behind the window.
- Placing the Digital Stamp: Position the digital stamp in the bottom left corner of the card, allowing the bunny’s ears to overlap the window. Secure everything on the panel with glue, and use foam tape behind the ears for added dimension.
- Creating and Attaching the Extra Embellishments: To make the extra embellishments, cut out extra flowers from the printed digital stamp. Colour them using the same technique as before, then adhere them to the card using a combination of glue and foam tape. Place the large flower with glue and use foam tape for the smaller flowers, adjusting their placement to enhance the overall design.
With all the elements securely in place, our handmade Mother’s Day card is now complete!

Inspiration Hub: Let’s Get Creative Together
At the end of this tutorial, let’s take a moment to reflect on what we have accomplished and what we have learned. Together, we embarked on a journey to create a heartfelt handmade Mother’s Day card using Polkadoodles products. We used different techniques along the way, from printing digital stamps to colouring and placing text behind a heart-shaped window.
Join the challenge
Now, it’s time for you to get started. If you’re ready to showcase your creativity and put your newfound skills to the test, join the Polkadoodles challenge and create your card. The theme for this challenge is “Anything goes”, which means you can make anything you want. However, if you feel inspired by this Mother’s Day card, we would love to see it. Share your creations with our vibrant crafting community and be a part of it.
More Handmade Mother’s Day Card Inspiration with Polkadoodles
Need more handmade Mother’s Day card inspiration with Polkadoodles? Explore my collection of related articles featuring handmade Mother’s Day card ideas using Polkadoodles products. Discover new techniques, designs, and creative possibilities to fuel your crafting journey.
Polkadoodles products in the Spotlight
Bunny Rabbit blank Greeting Card digital stamp

Love Always printable papers bundle

Spring Flower Mothers Day Friends greetings sentiments

I would like to enter my card in the following challenges
- A Place To Start: Anything goes + Add one or more flowers
- Unicorn Challenge Blog: Use dies
- Crafty Gals Corner: Anything goes
- Simon Says Wednesday challenge: Anything goes
- Through The Purple Haze Challenges: Anything goes
- Lil Patch of Crafty Friends Challenge …: Anything goes
- Dragonfly Dreams: Use a die
- A Perfect Time To Craft Open Challenge: Anything goes
- Creative Moments: Cute and Cuddly
- Daisy Chain Challenges: Not square
- The Creative Crafters: Anything goes
- The Cutie Pie Challenge Blog: Simply Cutties
- Critter Crazy CHALLENGE BLOG: Anything goes + featured critter
- SheepSki Designs Challenges: Anything goes
- Crafty Animals: Anything goes + must use an animal


Your card is so soft and pretty, beautiful colouring!
Thank you so much
Wat een superschattig kaartje!
Weer een mooi geheel zo! ❤️
Dank je wel ❤️
Beautiful Mothers Day card,love the cute image,design and pastel colours.Thank you for joining us at Dragonfly Dreams.
Carol DT x
Thank you for your lovely comment