

Some links in this post are affiliate links. This means I may earn a small commission if you make a purchase, at no extra cost to you. I only recommend products I use and genuinely enjoy in my own cardmaking. Read more here.
The Netherlands is currently celebrating the week of Reading Days, which is a great opportunity to get creative with a fun project – making your bookmark! Let’s come together to celebrate this literary occasion by combining the pleasures of crafting with the joys of reading.
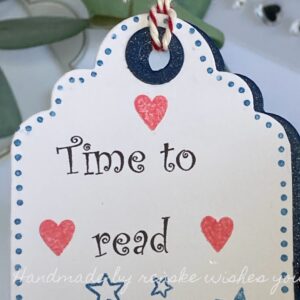
Today, we’ll focus on creating a charming and easy handmade bookmark. For this literary accessory, I’ve chosen the delightful digital stamp “Time to Read” from All Dressed Up Stamps, which is a perfect choice for this occasion.
Being a book enthusiast myself, I know how difficult it can be to find the time to read. That’s why I’m thrilled to explore how a homemade bookmark can add an extra bit of joy to our reading experiences. Perhaps it will give us the push we need to read more often – and who wouldn’t want to dive into a good story with such a lovely bookmark?
Are you ready to add a touch of creativity to your reading moments? Let’s embark on this journey together and create an easy handmade bookmark with our tutorial
Materials and Tools
Let’s start by gathering all the materials and tools we need to create a beautiful homemade bookmark. Here is a detailed list of everything required:
Materials Used for the Bookmark
- Quality White Cardstock: (e.g., DCP paper): Ideal for printing the chosen digital stamp.
- Digital Stamp: I chose the “Time to Read” digital stamp from All Dressed Up Stamps, but feel free to use your favourite.
- Colouring Medium: I used alcohol markers, but any colouring medium will work.
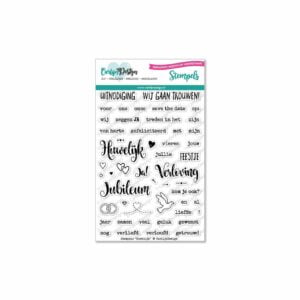
- Clear Stamp Heart: I used a heart stamp (Marriage set by Carlijn Design), but you can choose any heart stamp or even stickers.
- Clear Stamps Dots and Stars: I used stamps for a Christmas Clear stamp set (e.g., Christmas Village from Yvonne Creations). Look through your collection for suitable alternatives.
- Dark Blue Paper: Essential for die-cutting the background.
- Red Ink: Used for stamping hearts (Lady Bug from Memento).
- Blue Ink: Applied for stamping stars (Nautical Blue from Memento).
Tools
- Die-Cutting Machine: Use this to precisely cut the bookmark and achieve a professional finish.
- Glass Craft Plate: A transparent surface for smooth crafting.
- Acrylic Block: Essential for clear stamping.
Now that we have everything we need, let’s move on to the next step in our easy guide to creating handmade bookmarks and infusing colour and creativity into our project
Crafting an Easy Handmade Bookmark: Step-by-Step Tutorial
Crafting a handmade bookmark is easy with this step-by-step tutorial. Follow the guide below to turn basic materials into a beautiful literary accessory.
Step 1: Preparing the Digital Stamp and printing
Let’s start our creative journey by preparing the digital stamp and printing it. This is a crucial step in making a simple handmade bookmark. Follow this guide to ensure the printing and sizing process is done correctly:
- Choose the appropriate size for your digital stamp. For a tag die of about 6 centimetres, set the digital stamp to around 5 centimetres. This will ensure your design is well-proportioned, leaving room for a neat border.
- Position the text above the image. Use Microsoft Word to align the text perfectly within the tag. For example, you can type the phrase “Time to Read” above the digital stamp. Adjust the positioning according to your preference.
- Select the right printing paper. Use high-quality white paper, such as DCP paper, for printing. This paper is suitable for colouring with alcohol markers. If you plan to use a different colour medium, make sure to check which paper is appropriate for it.
- 4. Adjust the printing quality. Choose a high resolution to capture the intricate details of the digital stamp. This will ensure that the characters and elements in the “Time to Read” stamp are vibrant on your bookmark.
Once you have set everything up, go ahead and print the image and text.
Step 2: Partial Die-Cutting for a Larger Bookmark
In this step, we will use the partial die-cutting technique to make a larger bookmark. As the tag die we have is not big enough, we will use this technique to increase its size. We follow these steps twice. The first time with the white paper and the digital stamp on it. You repeat the process again, but then from blue paper. To do this, we need to follow these steps:
- To make the bookmark larger than the die allows, we will use the partial die-cutting technique. Place the die on the paper, making sure that the bottom part of the punch is where you want the end of the bookmark to be. Put this on the bottom plate of the punching machine. Cover only the bottom part of the die with the glass plate so that the machine can only cut the selected area.
- Repeat the process, but this time align the die to cut out the top part of the bookmark. Place the bottom part of the punch upwards, ensuring that the cut edges fit into the part that has already been punched out. This ensures that it is punched as one whole. Place the glass plate on the top part of the punch, leaving the bottom part free. The result is a tag bookmark shape larger than the actual die.
By using the partial die-cutting technique, we have increased the size and visual impact of our bookmark. Now, let’s bring vibrancy to our creation with the next step of colouring!
I made a short video about Partial Diecutting on Youtube.
Step 3: Coloring with Alcohol Markers
In this step, we will start colouring the picture, which will make it more lively. For this project, I used my alcohol markers from Decotimecrafts and the following colouring combinations:
- Skin: Barely Beige (29), Salmon Pink (25), Peachy Blush (257), Tanned Skin (260).
- Hair: Leather (113), Brown Grey (104), Walnut (100), Clay (116).
- Cat: Hazelwood (108), Sand (107), Rose Beige (97).
- Dog: Hazelwood (108), Sand (107), Rose Beige (97), Burnt Sienna (95).
- Chair: Frost Blue (182), Blue Sky (76), Sweet Dreams (272), Midi Sky (190).
- Shirt: Cardinal (244), English Red (249), Burgundy (247).
- Trousers: Dark Sky (191), Dark Denim Blue (195), Dark Indigo (188).
- Shadow on the Floor: Cool Grey 4 and Cool Grey 1.
- Around the Image: Cool Shadow.
By carefully selecting colour combinations and employing blending techniques, we can bring our bookmark to life with vibrant and captivating colours. Are you ready to see your creation flourish? Let’s move on to the next step and add the finishing touches to our handmade bookmark!

Step 4: Adding Details to Our Bookmark
Now that we have coloured our bookmark, it’s time to make it even more beautiful by adding some creative details that will make it stand out.
- Stamping Red Hearts: Use a clear heart stamp and red ink to stamp hearts strategically around the text and image. This adds a pop of colour and reinforces the theme of our bookmark.
- Dot Borders with Clear Stamp: Utilize a clear stamp with dots to create borders around the edges of the bookmark. This adds a charming detail that enhances the overall aesthetic.
- Adding Stars: Use a clear stamp featuring stars and blue ink to stamp stars around the bookmark. This adds a touch of whimsy and complements the colour palette.
- Adding a ribbon and a ring around the hole. For the final touch, we will add a ribbon and a ring around the hole in the top of the bookmark. We can use the tag die to cut out a ring from blue paper and attach it to the hole. Then, we can attach both tags together using baker’s twine in red and white.
By adding these creative details, we are taking our bookmark to a new level of visual appeal.
And now the bookmark can be used in a book to read.
Inspire, Create, Share, and More
Thank you for joining me on this creative journey to create our simple homemade bookmark. I hope this has inspired you to get started yourself.
In honour of Reading Days, our bookmark decorated with the digital stamp “Time to Read” captures the essence of this occasion. The pleasure of reading is beautifully complemented by the pleasure of crafting.

More Papercrafts Inspiration
Explore other crafting adventures and discover related articles that might pique your interest. Dive into a world of creativity and continue to explore unique projects for reading enthusiasts.
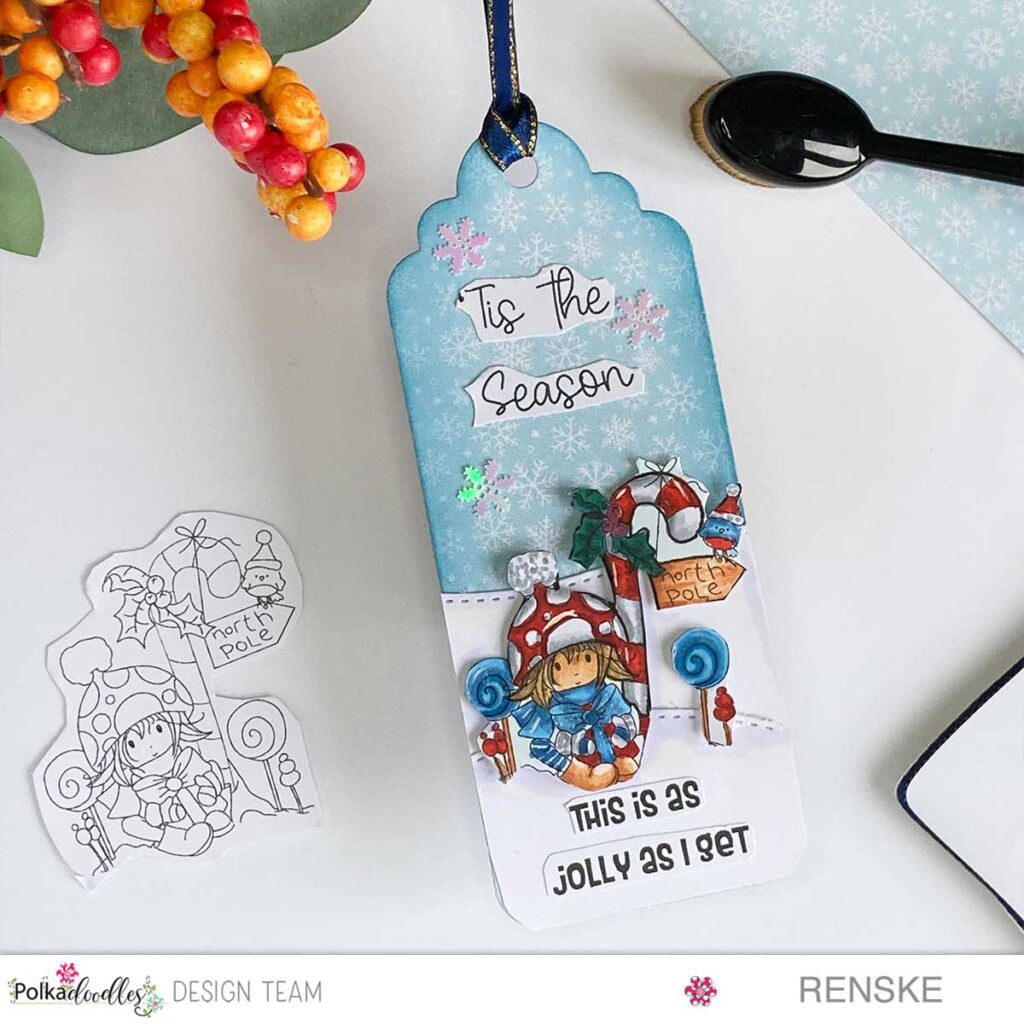
DIY Christmas Tag Tutorial: Create Festive Handmade Tags for the Holidays
I made this tag in December. I also used the same partial die-cutting technique here.
Thank you so much for joining me on this journey. I hope you get inspired by the articles I make.
Happy Crafting!
Products used for this handmade bookmark
Affiliate Disclosure: This post contains affiliate links. If you purchase through these links, I may earn a commission at no extra cost to you. I only recommend products I trust and use myself.
Products used with affiliate links

Time to Read Digital Stamp All Dressed Up Stamps

Lady Bug Memento Ink

Nauticual Blue Memento ink
Products without affiliate links
- Tag die from Aveccreative
- Twinmarkers (alcohol markers) from Decotimecrafts
- Bakers Twin brand unknown
I would like to enter my card in the following challenges:
- Try it on Tuesday: Add some text
- The Paper Shelter: anything but square
- A Perfect Time To Craft Open Challenge: Anything goes
- Classic Design Challenge Blog: Anything goes
- Daisy Chain Challenges: No design paper
- SheepSki Designs Challenges: Anything goes
What a beautiful image! This is such a brilliant idea! Thank you for joining us at Try It On Tuesday, Chrisx
Thank you
What a wonderful bookmark, Renske. Thank you for sharing your lovely card with us on The Paper Shelter Challenge Blog. Good luck, and hope to see you again soon. Lori – DT
Thank you so much for your lovely comment ❤️