
Some links in this post are affiliate links. This means I may earn a small commission if you make a purchase, at no extra cost to you. I only recommend products I use and genuinely enjoy in my own cardmaking. Read more here.
Looking for a Christmas card that stands out this holiday season? Why not follow my double Z fold card tutorial to create a festive handmade Christmas card? This unique design is perfect for showcasing your creativity.
For this project, I used the adorable ‘Here is Santa’ digital stamp from our sponsor, The Paper Shelter. It’s part of the upcoming Penny’s Paper-Crafty Challenge, where the theme is always ‘Anything Goes’ using paper.
In this tutorial, I’ll guide you step-by-step to create your own Double Z Fold card. We’ll combine handmade details with pre-made elements for a festive and polished result. This tutorial has you covered for all the steps.
Let’s get started and create this festive card together, spreading some holiday cheer along the way.
- About the Penny's Paper-Crafty Challenge
- Gather Your Supplies for a Stunning Double Z Fold Card
- Step-by-Step Double Z fold card tutorial for a Magical Christmas card
- Let’s Get Creative Together
- Products used
- I would like to enter my card in the following challenges:
About the Penny’s Paper-Crafty Challenge
Penny’s Paper-Crafty Challenge is a bi-weekly event that invites paper crafters to showcase their projects. The theme is always ‘Anything Goes’ using paper. It’s the perfect opportunity to experiment with designs like this Double Z Fold card.

This challenge is sponsored by The Paper Shelter and Polkadoodles, who offer a variety of high-quality digital products. For this project, I used The Paper Shelter’s ‘Here is Santa’ digital stamp. This stamp is paired beautifully with the festive design of the Double Z Fold card.
Want to join the challenge? Visit the Penny’s Paper-Crafty Challenge blog to share your own project and get inspired by the other entries.
Gather Your Supplies for a Stunning Double Z Fold Card
Before we start with this Double Z fold card tutorial, let’s gather our materials. The great thing about this project is its flexibility—you don’t need to stick to specific products. Use what you have on hand, and get creative!
Let’s gather the supplies you’ll need:
| Material or Tool | Where you need it for | Alternative |
|---|---|---|
| Cardstock | You’ll need sturdy cardstock for the base of your card. I used a festive colour deep red for that holiday feel. | If you don’t have these colours, any cardstock you have on hand will work – just choose a colour that complements your design. |
| Patterned Paper | This will be used for the panels that make up the “Z” folds of your card. I used it for the card base a brick-patterned paper and for the strip of paper with presents. | Don’t have seasonal patterned paper? You can use solid colours or repurpose the paper from old cards, magazines, or scrapbooking stash. |
| Digital Stamp “Santa is here”from The Paper Shelter | I used the “Here is Santa” digital stamp from The Paper Shelter for the focal point of my card. | Digital Stamp “Santa is here” from The Paper Shelter |
| Alcohol markers | These are used for colouring the digital stamp. | If you don’t have alcohol markers, try regular coloured pencils or crayons for a more textured look, or go for watercolors for a softer effect. |
| White Gel Pen | For adding little details like highlights or accents. | Use white paint instead |
| Scoring Board & Trimmer: | A scoring board will help you create the folds for the Double Z design with precision, and a trimmer will ensure your edges are neat and straight. | If you don’t have a scoring board, you can use a ruler and bone folder to score your lines, and a paper cutter or scissors can substitute the trimmer. |
| Adhesive: | Strong adhesive like double-sided tape or liquid glue is essential to secure the folds and layers of your card. | If you don’t have double-sided tape, try using glue sticks or tape runners, as long as they provide a strong hold. |
| Pre-made die-cuts from the Luxe Paperblock from Decotimecrafts | I used images from a luxe paperblock, to create a cosy scene. | f you don’t have paper blocks with images, use stickers or create images with stamps. |
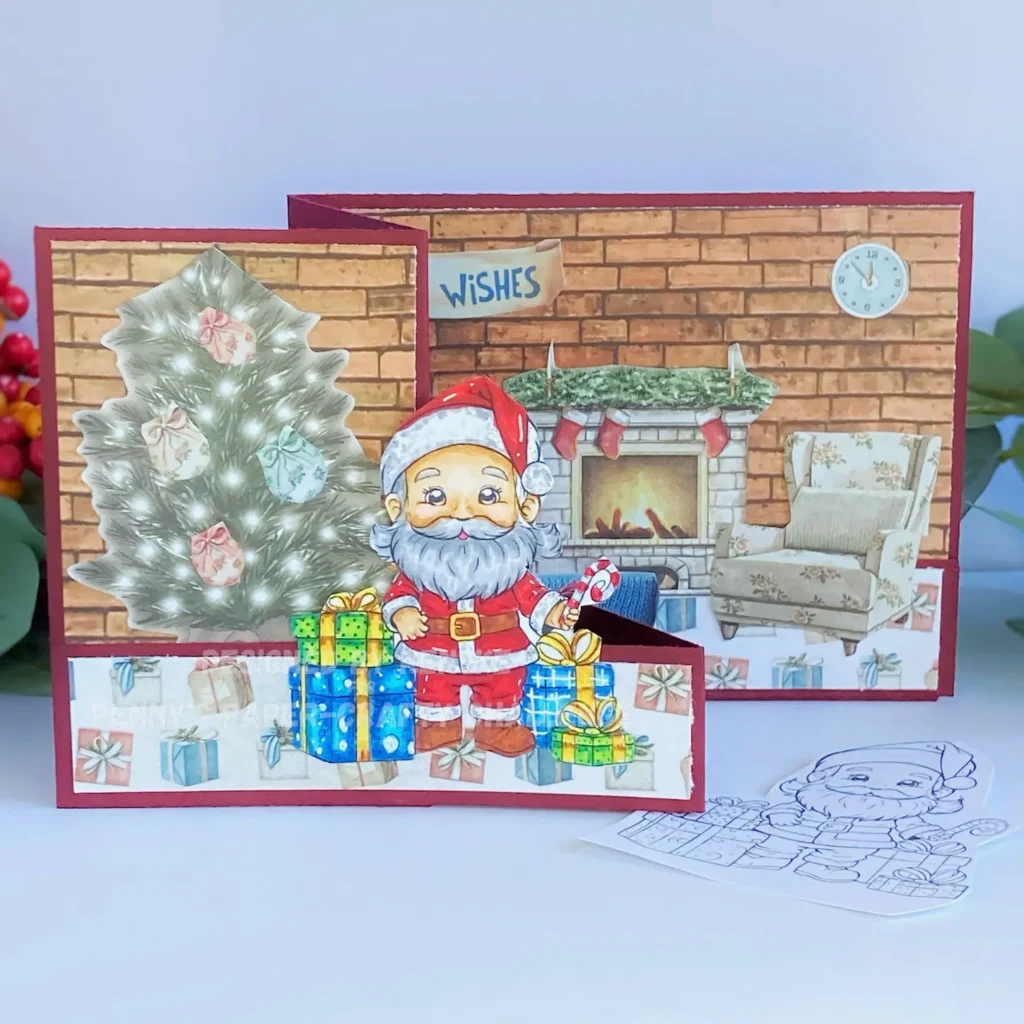
The finished double Z fold card

Here’s a quick preview of the finished Double Z Fold card I’ll be guiding you through. It features the Here is Santa digital stamp. There is a combination of festive patterned paper. Die-cut images tie everything together. This card is the perfect balance of handmade details and time-saving pre-made elements. Whether you’re short on time or love adding those personal touches, this design will work for you!
Now that you’ve gathered your supplies, let’s start creating this beautiful card!
Step-by-Step Double Z fold card tutorial for a Magical Christmas card
Now that we have everything ready, let’s begin with the steps. We will create a festive Double Z Fold card. It will feature the adorable “Here is Santa” digital stamp. This double Z fold card tutorial will guide you through each part. It ensures you end up with a beautifully designed card. You will learn how to make this handmade Christmas card that will stand out.
Step 1: Printing and Colouring the Digital Stamp Here is Santa
Let’s kick off by printing and colouring the ‘Here is Santa’ digital stamp. This is where the magic begins! I’m using the black-and-white version of the ‘Here is Santa’ digital stamp from The Paper Shelter. I find it perfect for creative colouring. (There’s also a coloured version if you prefer.)
Printing the digital stamp
Download the black and white image from The Paper Shelter’s website. Insert the image into a Word document. Resize it to about 7 cm in height. The width will automatically adjust.
When printing digital stamps, always check that your printer settings are set to the highest quality. This ensures clean, crisp lines, which is especially important when colouring. If you’re using alcohol markers, choose a paper type designed for blending, like DCP paper, for the best result
Colouring the ‘Here is Santa’ digital stamp
I coloured the image using Decotimecrafts alcohol markers. Here are the combinations I used:
- Skin: Tanned Skin (260), Peachy Blush (259), Salmon Pink (25), Pale Cream (142)
- Beard: Cool Grey 5, Cool Grey 4, Cool Grey 3, Cool Grey 2
- Hat and Suit: Cardinal (244), English Red (249), Burgundy (247)
- Hat Band and Suit Trim: Cool Grey 4, Cool Grey 3, Cool Grey 1
- Gift Ribbons: Barn Red (245), Golden Yellow (222), Primary Yellow (221)
- Blue Gifts: Dark Blue (191), Medium Blue (190), Boy Blue (144)
- Green Gifts: Yellow Green (48), Grass Green (47), Forest Green (50)
After colouring, I added highlights with a white gel pen. This gave a little shine, particularly on the blue gifts. I also highlighted Santa’s suit. Then, I carefully cut out the image with scissors.

Now that your image is all coloured and cut out, you’re ready to move on to creating the card base in the next step.

Having trouble editing or colouring digital stamps? Download my free guide for extra tips and tricks to help you perfect your digital stamps!
Step 2: Making the Double Z Fold Base
Now that your image is ready, let’s create the card base. Let’s make a Double Z Fold card using red cardstock. It’s an easy yet impactful fold. This will add some dimension to your design.
- Cut the base: Start by cutting a piece of red cardstock to 11″ x 4-1/4
- Score the cardstock: Score the cardstock at 5-1/2″ and 2-3/4″.
- Fold the cardstock: Fold the larger section at 5-1/2″ inwards to create the first fold. Use a bone folder to sharpen the crease. Next, fold the smaller section at 2-3/4″ outward, again using the bone older for a crisp finish.
Now that the base is folded and sharp, you’re ready to add your patterned paper. It will add that extra bit of design magic!
Step 3: Adding Pattern Paper to the Base
Now that your card base is prepared, it’s time to add some patterned paper. For a cosy, homey feel, I chose a brick-wall pattern. Here’s how to cut and apply the paper:
Paper Sizes
You’ll need three pieces of patterned paper:
- One piece measuring 5-1/4″ x 4″
- Two pieces measuring 2-1/2″ x 4″
Apply the Paper
Attach these pieces of paper to the base of your Double Z Fold card. Place the larger piece in the centre, and the two smaller pieces on the side panels.
Tip: When attaching your patterned paper, always double-check the orientation of your patterns. For example, if your patterned paper has a specific design, make sure it’s facing the right way. Do this before you glue it down.
Now the base is dressed and ready for the next step in your design!
Step 4: Creating the Front Strip for the Double Z Fold
In this step, we’ll create the front strip that forms the second “Z” in your Double Z Fold card. Follow these instructions:
Creating the base of the strip
- Cut the Strip: Start by cutting a piece of red cardstock to measure 12″ x 1-1/4″.
- Score the Strip: Score the strip at 4″ and 7-1/4″ to create the necessary fold lines.
Add the Patterned Paper
To add a festive touch, I’ve chosen a patterned paper featuring Christmas gift designs that complement the Santa image. You will need three pieces of patterned paper, each 1″ tall, cut to the next sizes:
- 4” x 1”
- 3” x 1”
- 3-3/4” x 1”
Attach these pieces to the red strip, covering its full length.
Attach the Strip to the card base.
Now it’s time to attach the strip to the card base:
- Start by attaching the right end of the strip to the right panel of the base.
- Next, align the left end of the strip with the first panel and secure it in place. This will create the Z-fold effect.
The base is now finished, and you’re ready to move on to decorating your card!
Step 5: Decorating the Card
Now it’s time to add all the fun details and bring your card to life! I used a mix of die cuts from a Paperblock. I also used a digital stamp to create a warm and festive feel. Here’s how I decorated each panel:
Tip: When decorating your card, lay everything out first before attaching it. This allows you to adjust the placement of each element and get a feel for the overall design.
- Left Panel: I started by placing a Christmas tree die cut. Then, I added some colourful ornaments to the tree.

- Second Panel: For this panel, I used a die-cut window scene. Since the original window was too large, I trimmed it to fit perfectly.

- Right Panel: On this panel, I placed a fireplace, a chair with a blanket, and a gift box. I also added a clock in the top-right corner to enhance the charm.

- Sentiment: Position the sentiment “Best Wishes” above the fireplace to add a festive touch to the scene.
- The digital stamp: Finally, I adhered the coloured “Here is Santa” image to the front strip. It is just past the Christmas tree. This placement ensures that Santa and his presents become the focal point of this handmade Christmas card.
With everything attached, the card is now ready to be sent out! What was your favourite part of this project? Do you have any questions or tips for others? Share them below—let’s inspire each other!
Let’s Get Creative Together
I hope this tutorial has inspired you to create your own festive Double Z Fold card! The possibilities are endless when you explore your favourite patterns and embellishments. Don’t hesitate to experiment and add your personal touches. Let your creativity shine!
Join the Challenge
Feeling inspired? Don’t miss out on the chance to showcase your creativity! Join the Penny’s Paper-Crafty challenge now and get a chance to win amazing prizes. Click the button below to enter and share your paper crafting masterpiece with us!”
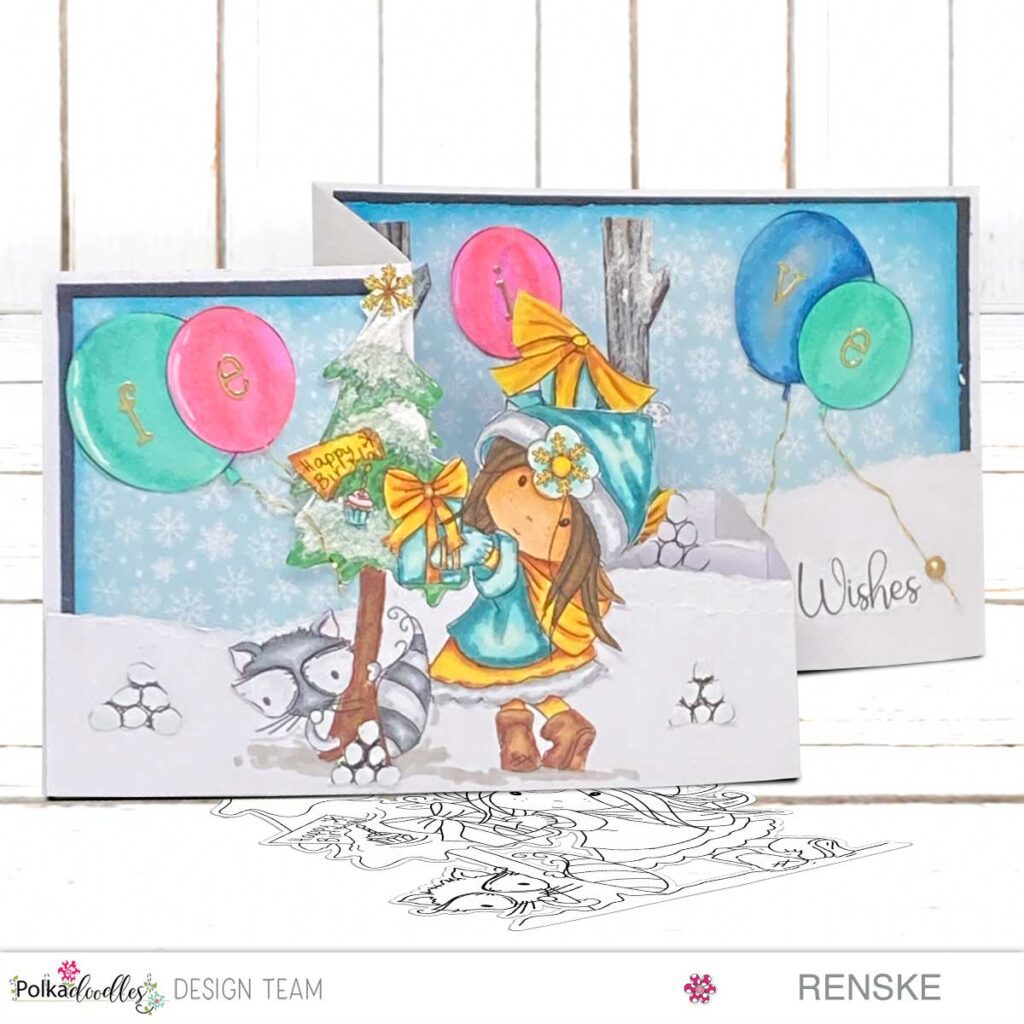
More Double Z fold card inspiration
Products used
Affiliate disclosure: Please note the links in this post are affiliate links, and I may earn a commission if you choose to purchase through them. This comes at no extra cost to you. I only share products and brands that I trust and use in my crafting projects. Your support allows me to continue sharing helpful tips and tutorials. Thank you for your support!
Support my work and find all the products I’ve used in today’s project—just click the links below to get your hands on these amazing crafting supplies. Your support helps me continue bringing you more tutorials and inspiration!
Products with affiliate links
Twin Markers XXL set 300 pieces from Decotimecrafts

Spring Gnomes Digital Paper set

Products without affiliate links
The digital stamp “Santa is here” from The Paper Shelter

Other Products
- Die-cutes from Luxe Paper block Christmas from Decotimecrafts
- Red Cardstock from the Coloured Cardboard block from Via Chasse.
- Brickstone patterned paper (brand unknown)
- Patterned paper with the presents from the Luxe Paper block Decotimecrafts
I would like to enter my card in the following challenges:
- Unicorn Challenge Blog: Christmas and/or Winter
- Crafty Gals Corner: Anything goes + use 3 layers
- Craft Rocket Challenges: Christmas and/or Winter
- Krafty Chicks Challenge: Christmas
- Lil Patch of Crafty Friends Challenge …: Anything goes
- A Perfect Time To Craft Open Challenge: Anything goes
- Crafting Happiness Challenges: Anything goes
- Peace On Earth Christmas: Anything goes
Great cute scene and images. Great details on how you created such a beauty. Thanks for sharing over at Crafty Gals Corner
Thank you so much. Glad you like it.
OMG what a fun scene on this Double Z creation! Well done! Thanks so much for joining in the fun at our Peace On Earth challenge! Good Luck and we hope you’ll come back often.
Darlene
DAR’S CRAFTY CREATIONS
Peace On Earth Co-Owner
Thank you so much for your lovely comment. Glad you like it.