
Some links in this post are affiliate links. This means I may earn a small commission if you make a purchase, at no extra cost to you. I only recommend products I use and genuinely enjoy in my own cardmaking. Read more here.
Have you ever received a handmade Valentine’s Day card that made you feel special? DIY cards hold a unique charm, crafted with love and creativity. This is why I love crafting for Valentine’s Day, it’s the perfect chance to add a personal touch to a heartfelt gift.
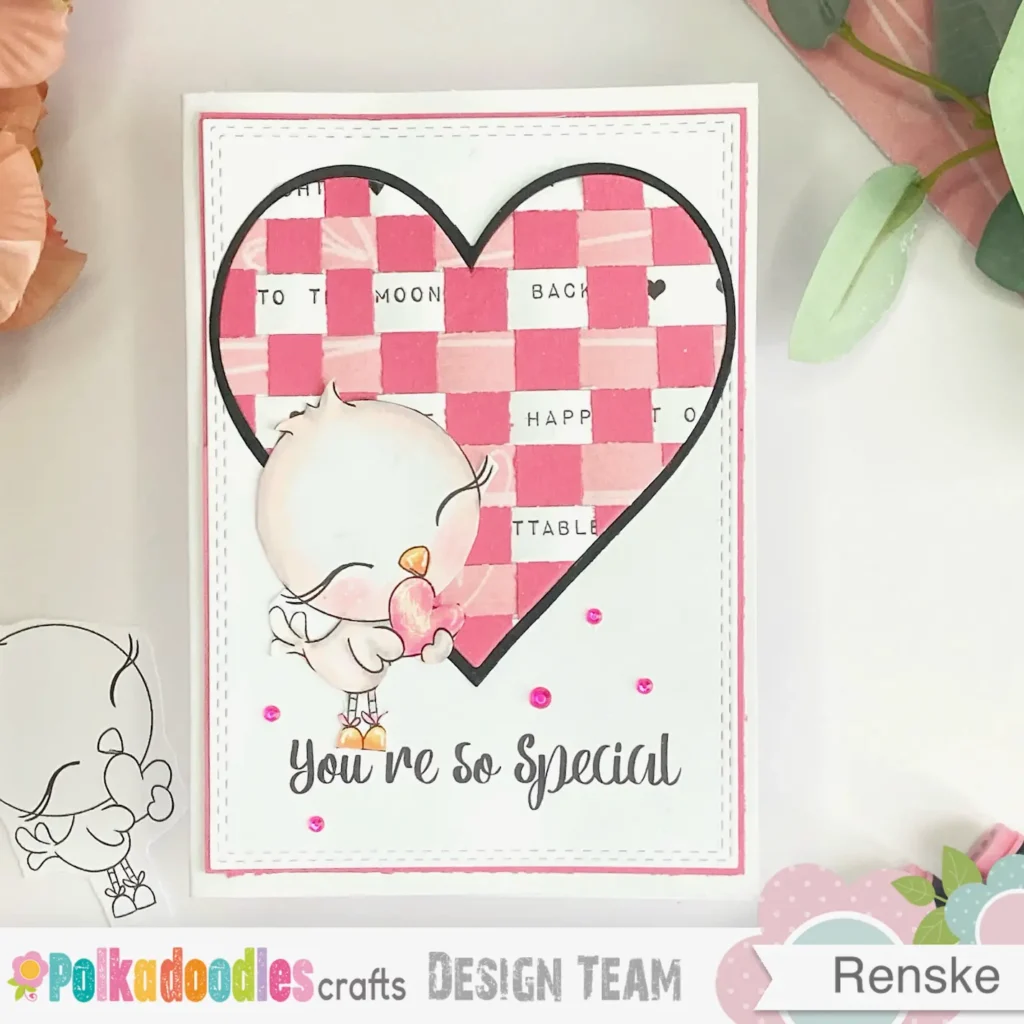
For the latest Polkadoodles challenge, I used the paper weaving technique to create a Valentine’s Day card. I’m excited to show how this technique can elevate your card-making by adding texture and depth to make your card stand out.
In this post, I’ll guide you through the steps of making a beautiful Valentine’s Day card with Polkadoodles products and paper weaving. You’ll see how simple it is to add a creative and personal touch to your cards. Let’s get started!
Materials Needed for Your DIY Valentine’s Day Card
To make a beautiful easy DIY Valentine’s Day card, you’ll need a mix of Polkadoodles products and essential supplies. The best part? Most of these materials are easy to find, and I’ve included alternatives to fit your needs. Let’s take a look at what you’ll need to get started.
Polkadoodles Materials
To craft a stunning and personalized DIY Valentine’s Day card, begin with these Polkadoodles products:
- Love Bird Heart – blank Valentine digital stamp: This digital stamp is the perfect starting point for your card. It adds a personal touch and can be coloured or left as is for a simple look.
- Tons of Love Printable Papers: These printable papers feature Valentine’s Day designs, perfect for paper weaving. The patterns add texture to your card, making each woven strip stand out.
- Spring Tons of Love Greeting: Add a sweet sentiment with the Tons of Love greeting. This phrase fits perfectly with the Valentine’s Day theme.
Other Materials
Along with the Polkadoodles products, you’ll need a few key materials to complete your card:
- Pink Card Stock: This is used for the base strips for the heart and the border around the background panel. You can use any colour you prefer.
- White Card Stock: Perfect for creating the background panel.
- Pink Embellishments: Add finishing touches like pearls, sequins, or small flowers to enhance your card’s Valentine’s Day theme.
- Rectangle Die with Double-Stitched Edge: Use this die to create a rectangle background panel. You can also cut a rectangle by hand if you prefer.
- Glue, Scissors, and Double-Sided Tape: These basic tools are key for adhering your pieces together and keeping everything in place.
Now that you have your materials, it’s time to move on to the fun part, making your beautiful DIY Valentine’s Day card! With Polkadoodles products at the heart of this project, and the right tools and embellishments, you’re ready to bring your card to life.
Create Your Own DIY Valentine’s Day Card with Paper Weaving
Are you ready to make your very own DIY Valentine’s Day card using the paper weaving technique? This step-by-step guide will show you how to use Polkadoodles products and a few simple tools to create a card that’s heartfelt and unique.
Materials Needed for This Step
- Polkadoodles Love Birds Heart Digital Stamp
- Alcohol markers (Pearl White, Leather, Blush, Warm Grey 2, Yellow, Orange, Cool Grey 3, Pale Pink, Rose Pink, Peony Purple)
- White gel pen
- Paper Glaze
- DCP paper (for printing)
- Printer
- Scissors
Print the Digital Stamp
- Start by inserting the digital stamp into a Word document and adjusting its dimensions. Set the height to 7 cm; the width will adjust automatically to maintain the proportions. This size will work perfectly for your card.
- Print the image onto DCP paper, as we’ll be colouring it with alcohol markers. This type of paper ensures that the ink doesn’t bleed, providing a crisp and clean look for your design.
Colour the Love Birds Heart Stamp
Now, it’s time to bring your Love Bird Heart to life! This little bird is perfect for a cute Valentine’s day card.
Here’s how I coloured it using alcohol markers:
- The bird: I used Pearl White, Leather, Blush, and Warm Grey 2 for a soft, natural look.
- The beak and feet: Yellow and Orange bring warmth and vibrancy.
- The legs: Cool Grey 3 adds a subtle shading to keep it looking realistic.
- The heart: I used a mix of Pale Pink, Rose Pink, and Peony Purple to give it a lovely, deep colour that pops.
Add Highlights and Shine
After colouring, grab a white gel pen and add small highlights to the beak, feet, and heart for a little extra touch of dimension.
I wanted the heart to really stand out, so I decided to add a layer of Paper Glaze. It gives the heart a glossy, shiny finish, making it look extra special. Let the Paper Glaze dry thoroughly before moving on—this may take a bit of time, but it’s worth it!

While your stamp is drying, you can start thinking about the paper weaving technique and how it will complement this beautiful coloured image. Ready for Step 2? Let’s keep going!

Having trouble editing or colouring digital stamps? Download my free guide for extra tips and tricks to help you perfect your digital stamps!
Step 2: Crafting the Heart with Paper Weaving
Now that your Love Bird Heart digital stamp is coloured and ready, it’s time to start with paper weaving. This was my first time trying it, and I really enjoyed the process!
The weaving technique adds texture and depth, making it a great backdrop for your heart. Let’s get started!
Materials Needed for This Step
- Tons of Love Printable Papers (Polkadoodles) – Patterned paper with pink hearts and white lines
- Spring Tons of Love Greeting Set (Polkadoodles) – White paper with black text
- Dark pink cardstock – A solid base colour
- Double-sided tape
- Heart die (for cutting out the heart shape)
- Scissors
Prepare the Paper Strips
Start by cutting your papers into 1 cm strips. I used three different types of paper for the weaving:
- Dark pink cardstock – this is your base paper.
- Tons of Love printable papers – I used pink paper with white lines and hearts.
- Spring Tons of Love greeting set – The white paper with black text adds a lovely contrast and texture.
Once you’ve cut the strips, line them up vertically on your work surface to form your base for weaving.
Weave the Paper
Now for the paper weaving! Start weaving the other papers through the vertical strips you just laid out. I chose to use pink paper with white hearts and strips with text to weave through. Keep weaving until the woven piece is large enough to fit a heart die on top. The texture you’re creating with the weaving will give your card a beautiful, layered effect. This will be a beautiful focus point for you paper weaving Valentine card
Secure the Weaving with Double-Sided Tape
Before cutting the heart shape, secure the weaving so it stays in place. Take a wide roll of double-sided tape and carefully stick it to the back of the woven piece. This will keep the strips firmly together, making it much easier to work with later.
Die Cut the Heart Shape
Once the tape is in place, grab your heart die and position it over the woven paper. Run it through your die-cutting machine to create your heart shape. The die will also cut a border around the heart, which adds a nice touch of detail.

Add a Black Border to the Heart
To make the heart stand out even more, use the same heart die to cut out another heart from black cardstock. You can then glue this black heart around the woven heart for a striking contrast that frames the design perfectly.
With the woven heart ready, you’re one step closer to completing your DIY Valentine’s Day card. Let’s move on to Step 3, creating the background panel with the sentiment.
Step 3: Creating the Background Panel with the Sentiment
In this step, you’ll create the background panel with the sentiment, “You’re so special. This part ties the design together and creates a base for your woven heart. And we will add a soft pink border to frame the background panel Ready? Let’s get started!
Materials Needed for This Step
- You’re so special sentiment (printed and cut to size)
- Rectangle die (for cutting out the sentiment)
- Pink cardstock (for the border)
- Scissors
- Glue or double-sided tape
- Word document for printing the sentiment
Prepare the Sentiment
Start by typing the “You’re so special” sentiment in your Word document. Adjust the font size to your preference and position it where you want it on the page. Make sure it fits within the rectangle die.
This will make sure your sentiment is centred exactly where you want it. Once you’re happy with the positioning, print it out.
Die-Cut the Sentiment
After printing your sentiment, take the rectangle die and position it over the text. Use your die-cutting machine to cut out the rectangle shape with the sentiment in the centre. This die will ensure the text is perfectly placed and framed, ready to be added to your card.
Create the Pink Border
Now, add the pink border. Take your pink cardstock and cut it to a size of 10 cm by 14 cm. This will be the base panel that the sentiment will sit on. Gluing it onto this background creates a pink frame around the background panel with the sentiment.
Assemble the Panel
Once you’ve got your background panel and sentiment cut, it’s time to assemble them. Use glue or double-sided tape to attach the sentiment panel to the pink cardstock border. Press firmly so everything stays in place.
This background panel is now ready to pair with your paper-woven heart! It frames your design and highlights the sentiment. Let’s move on to the next step to complete this card.
Step 4: Assembling Your Paper Weaving Valentine’s Card
With all the pieces ready, you can now assemble the card. In this step, you’ll assemble the heart, sentiment, and bird. Place each piece carefully to ensure a balanced design.
Materials Needed for This Step
- The Heart with paper weaving (created in Step 2)
- Bird digital stamp (coloured and cut out in Step 1)
- Foam tape (for adding dimension)
- Black border for the heart (cut in Step 2)
- Glue (for securing the pieces)
- Card base (10.5 cm by 14.8 cm)
Attach the Paper Woven Heart
Start by placing the paper-woven heart on your background panel. Adjust its position so it aligns with the bird placement.
Once you’re happy with the positioning, carefully remove the backing from the double-sided tape you placed on the heart in Step 2 and stick the heart down onto the panel.
Glue the black border around the heart for contrast. This adds contrast, making the heart stand out.
Place the Bird
Now it’s time for the bird! Apply foam tape to the back of the coloured bird from Step 1. This creates a 3D effect, adding dimension to your design.
Press down to secure the bird in place. Once you’re happy with the placement, press down to secure her in place.
Adhere the Panel to the Card Base
The final step in assembling the card is attaching the completed panel to your card base.
Apply glue or double-sided tape to the back of the 10.5 cm by 14.8 cm card base. Centre it on the card base and press firmly so it stays in place.
Your card is now coming together beautifully! The heart, the sentiment, and the bird are perfectly arranged, and it’s almost ready to give as a special Valentine’s treat. A few final touches left.
Step 5: Adding Final Touches and Embellishments
We’ve reached the final step of this card-making adventure, adding the embellishments!
These small details add extra charm and bring the design together. In this step, we’ll use dark pink pearls to add a touch of elegance and balance to the design.
Materials Needed for This Step
- Dark pink pearls (for embellishing)
- Tweezers (for precision placement)
- Glue (for attaching the pearls)
Placing the Pearls Above “Special”
Start by adding three dark pink pearls in a triangle shape above the word “special.” This will draw attention to the sentiment and add some lovely texture to the design. The pearls add just the right amount of shine to make the card feel extra special.
Placing the Pearls Near the Letter “Y”
Next, place two more dark pink pearls: one above and one below the letter “Y” in “You’re.” These small additions help balance the composition and bring a cohesive look to the card.

Your card is now finished and ready to send. The heart, bird, sentiment, and pearls come together beautifully, creating a thoughtful and unique Valentine’s card. Now, all that’s left is to write your personal message inside and share the love!
Let’s Get Creative Together
I hope you enjoyed making this Valentine’s card with paper weaving and the Love Bird digital stamp.
Paper weaving is a great way to add texture and interest to your card designs. Now that you know how to create a paper-woven heart, make one for someone special.
Join the Challenge
Want to show off your creation? Join the Polkadoodles challenge and share your Valentine’s card with the world.
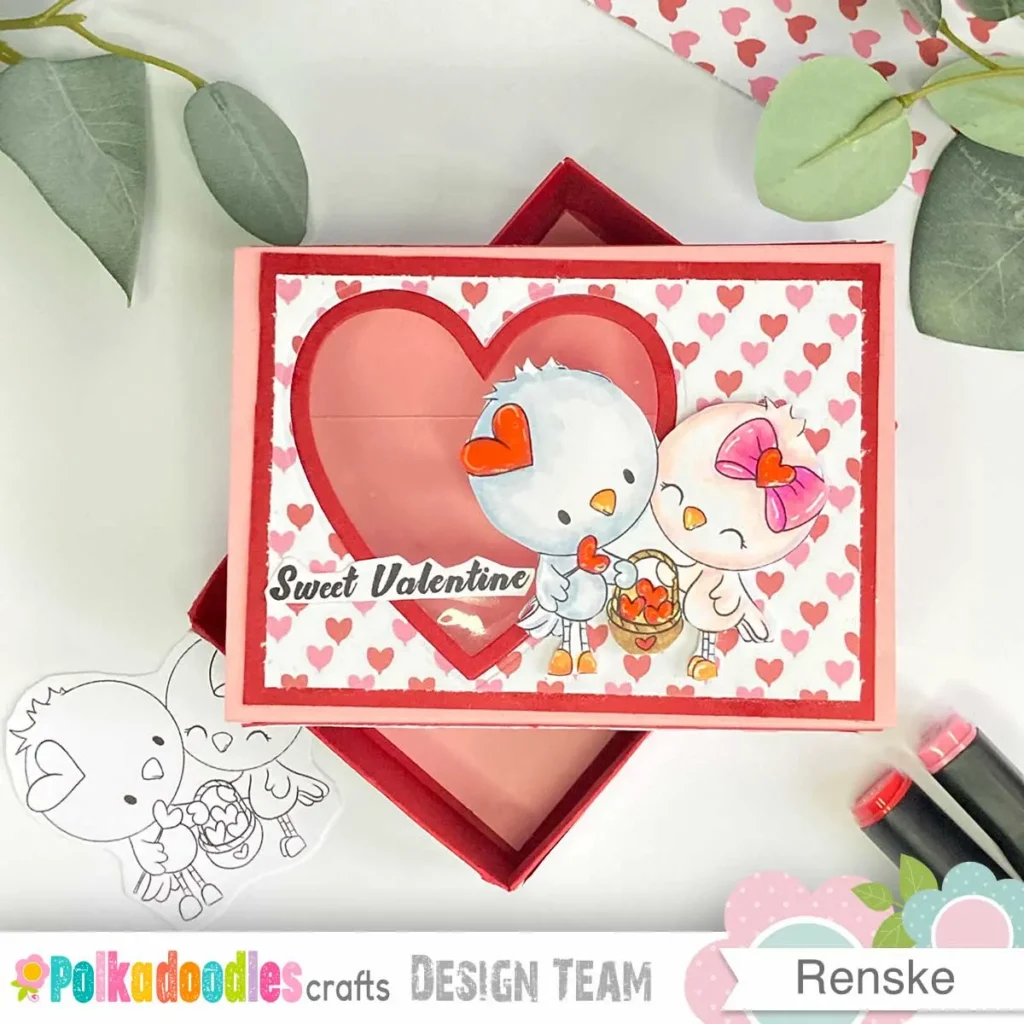
More DIY Valentine’s day cards ideas
Polkadoodles products in the spotlight
Affiliate Links: The products mentioned in this post are affiliate links. If you decide to purchase through these links, I may earn a small commission at no extra cost to you. These commissions help keep my blog running, so I truly appreciate your support!
Love Bird Heart

Tons of Love printable papers set 1

Tons of Love Greetings

I would like to enter my card for the following challenges
- Simon Says Stamps Monday: Have a heart
- The Paper Shelter: Pretty in Pink
- Fab ‘n’ Funky Challenges: Include a stamped image (digital or real)
- Simon Says Stamps Wednesday: Anything goes
- Krafty Chicks Challenge: Anything goes
- Cut It Up: Have a heart
- Crafty Animals: Anything goes + must use an animal
- Creatalicious Challenges: Anything goe + love is in the air
Oh so adorable! And a wonderful technique for the heart. Such a pleasure having you join the Anything Goes challenge with Krafty Chicks this week.
Diane – DT KCC
Ah Thank you so much for your lovely comment Diana.
very cute car , thanks for joining us at The Paper Shelter Challenge
Thank you so much
Cute card, love the paper woven heart and the little birdie!
Thank you for joining us at Cut it Up for our Have a Heart challenge.
Thank you