
Some links in this post are affiliate links. This means I may earn a small commission if you make a purchase, at no extra cost to you. I only recommend products I use and genuinely enjoy in my own cardmaking. Read more here.
Are you looking for a creative way to express your love this Valentine’s Day? A DIY Valentine card design is a thoughtful way to show someone you care while adding a personal touch that store-bought cards just can’t provide. Handmade cards not only reflect your feelings but are also an eco-friendly choice by repurposing scrap paper you already have.
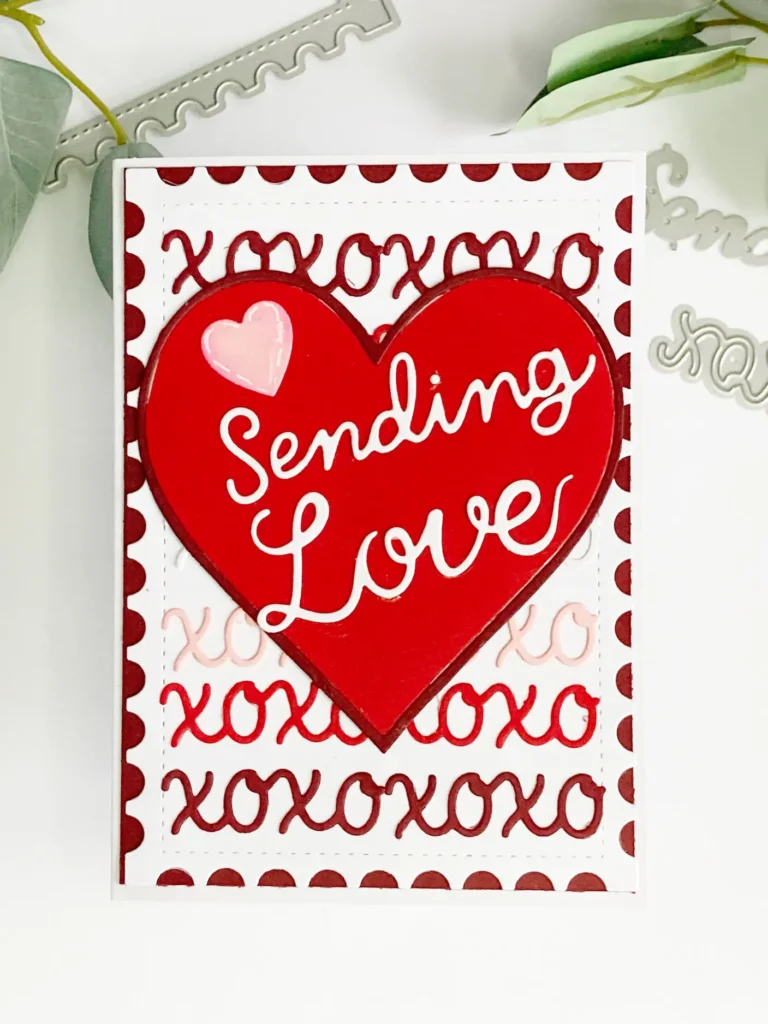
For this card, I joined a Rediscovery Hop, where participants were encouraged to use materials they hadn’t touched in months. With the Hearts theme and a colour palette of dark red, red, pink, and grey, I created a simple but heartfelt design using heart-shaped dies and paper scraps. The result is a simple yet meaningful design anyone can replicate.
In this tutorial, I’ll show you how to create your DIY Valentine card design using die cuts and scrap papers. This xoxo card is beginner-friendly and perfect for using up leftover materials. Let’s get started.

Materials for Your DIY Valentine Card Design
Making your Valentine’s card is easy and only requires a few essential materials. Here’s what you’ll need to get started:
- Die cuts: For this card, I used the XOXO die from Aveccreative, as well as several other dies including the Heart die, Love die, and Sending die, all from Aveccreative and Scrapfever. These versatile dies are perfect for creating detailed shapes that add elegance to your design
- Scrap papers: Use leftover papers in shades of red, pink, and grey to form the backdrop of your card. Using scraps not only helps reduce waste but also gives your card a personal, handmade touch. The variety of textures and colors in your paper scraps can enhance your design.
- Adhesives: Use a strong adhesive, like glue, to secure your die cuts and layers. For added dimension, consider using foam tape to make certain elements pop.
- Basic tools: You’ll need a few simple tools: scissors for trimming your paper and tweezers to help carefully arrange your die cuts.
Optional Substitutions: If you don’t have a die-cutting machine, don’t worry, you can still create a stunning cardYou can use pre-cut shapes, or make your own templates to trace and cut out the needed shapes.
Creating Your DIY Valentine Card Design: A Simple Step-by-Step Guide
In this tutorial, I will guide you through the process of making a beautiful DIY Valentine card. Let’s get started with the first step!
Step 1: Creating the XOXO Background for Your Valentines day card
The background is the foundation of your design, setting the tone for the entire xoxo card. In this step, I’ll show you how to create a layered, textured backdrop using die cuts and scrap paper to bring your colour palette to life. Let’s go through the process.
Die Cut the Postage Stamp Background
Cut a large postage stamp shape from white cardstock with the die. This will form the base of your background. The postage stamp die adds a subtle, decorative frame that gives your card a polished look.
Prepare the ‘XOXO’ Die Cuts
Next, cut out several ‘XOXO’ die cuts using your scrap papers. Choose colours like dark red, red, pink, and white-grey to match the theme. Cut four die cuts from each colour, except for the white-grey, from which you’ll only cut two
Align the Die Cuts in Rows
Now it’s time to create the background pattern. Arrange the die cuts in rows on the white cardstock according to the colour palette. Start with dark red at the top and bottom rows, followed by red and pink, finishing with the white-grey in the centre. Use a T-ruler to keep the rows straight as you work.

Attach the Die Cuts
Using a pair of tweezers, carefully pick up each ‘XOXO’ die cut and apply a small amount of glue to the back. Gently press each piece onto the white cardstock, one row at a time. Ensure the die cuts are properly aligned for a clean, polished look.
Now, You have a beautiful xoxo background for your DIY valentine card design. Let’s go on with the next step.
Step 2: Adding Borders and Layers for Depth
This step focuses on framing your background to give the card a polished, finished look. Adding a bold border enhances the depth and dimension of your Valentine card design, making it stand out. Let’s get started.
Cut the Dark Red Border
Use dark red paper that complements your colour palette. Cut a piece measuring 10 cm by 14.3 cm to frame your background. This border will contrast nicely with the ‘XOXO’ die cuts, helping the central design pop. Trim the paper to fit just behind the postage stamp shape.
Attach the Border to the Background
Once the dark red border is cut, carefully adhere it to the edges of the white cardstock background. The contrast between the dark red and the layered ‘XOXO’ die cuts creates a beautiful, bold framing effect. This small detail will make your card feel more polished and complete.
Once you have cut the dark red border, carefully adhere it to the edges of the white cardstock background. The contrast between the dark red border and the layered ‘XOXO’ die cuts creates a bold, polished framing effect. This small detail will make your card feel more polished and complete.

With the border and layers in place, your xoxo card base will look refined and dynamic, ready for the next design elements
Step 3: Designing the Focal Point
Now that the background and borders are complete, it’s time to create the focal point of your card. The heart and sentiment are the key features that will draw attention. In this step, you’ll layer a heart-shaped die using complementary colours and add the ‘Sending Love’ sentiment for balance and emphasis.
Cut and Layer the Heart Die
Use a large heart-shaped die that cuts both the heart and a border.
I cut the heart from red paper and the border from dark red-brown paper.
Glue the red heart onto the background, positioning it where it looks best Since the background has texture from the ‘XOXO’ die cuts, the heart may need extra time to adhere. Place something heavy on top while the glue sets to ensure a strong bond.
Attach the Heart Border
Once the red heart is securely in place, it’s time to add the dark red-brown border around it. This thin border creates a subtle shadow effect, adding depth and interest. se a small amount of glue to avoid excess showing. Carefully position the border around the heart to complete this layered look.
Position the ‘Sending Love’ Sentiment
Next, let’s add the sentiment. I used two separate die cuts: one for the word “Sending” and another for “Love.” Both were cut from the same grey-white paper used for the centre of the ‘XOXO’ rows. For a playful effect, angle the words slightly when glueing them onto the heart.
Start by placing the word “Sending” first, then position “Love” underneath it. The slight tilt adds a fun detail and helps balance the design.
")
With the heart and sentiment in place, the focal point of your card is ready, adding a personal touch that’s perfect for a DIY Valentine’s card design.
Step 4: Adding the Finishing Touches
The final step focuses on those small details that make your DIY Valentine card design stand out. These touches enhance the card’s texture and depth, adding a bit of love. Let’s complete it with some embellishments and accents.
Add the Smaller Heart
To give the heart a little something extra, I cut out a smaller heart using the pink paper we had already used. To add dimension, blend Distress Ink in Picked Raspberry around the edges for a soft shadow effect. Add a stitched outline with a white gel pen to give the heart a textured, handmade look.
Mount the Card onto a Base
With all the elements in place, mount your design onto a card base. I used a standard size of 10.5 cm by 14.8 cm for a clean and neat finish. This step ties everything together and provides the base for your handmade Valentine’s card.

With these finishing touches, your card is now complete and ready to be gifted or displayed as a lovely token of affection.
Let’s Get Creative Together
I hope you’ve enjoyed this tutorial and feel inspired to create your own layered die-cut Valentine’s card. Crafting with die cuts and scrap paper is a great way to rediscover forgotten supplies and design something truly unique. Whether you follow the steps or add your own twist, I’d love to see your creation!
Join the Instagram Hop
This card was part of an exciting Instagram hop, where we celebrated rediscovering crafting materials and embraced the ‘Hearts’ theme. Each participant shared their take on using supplies that had been sitting unused for months.
Be sure to check out my Instagram post to see how this card fits into the hop and explore the inspiring creations from other crafters. You can find the hop here.
More Valentines Day card ideas
Looking for more ideas? Here are some related blog posts you might enjoy:
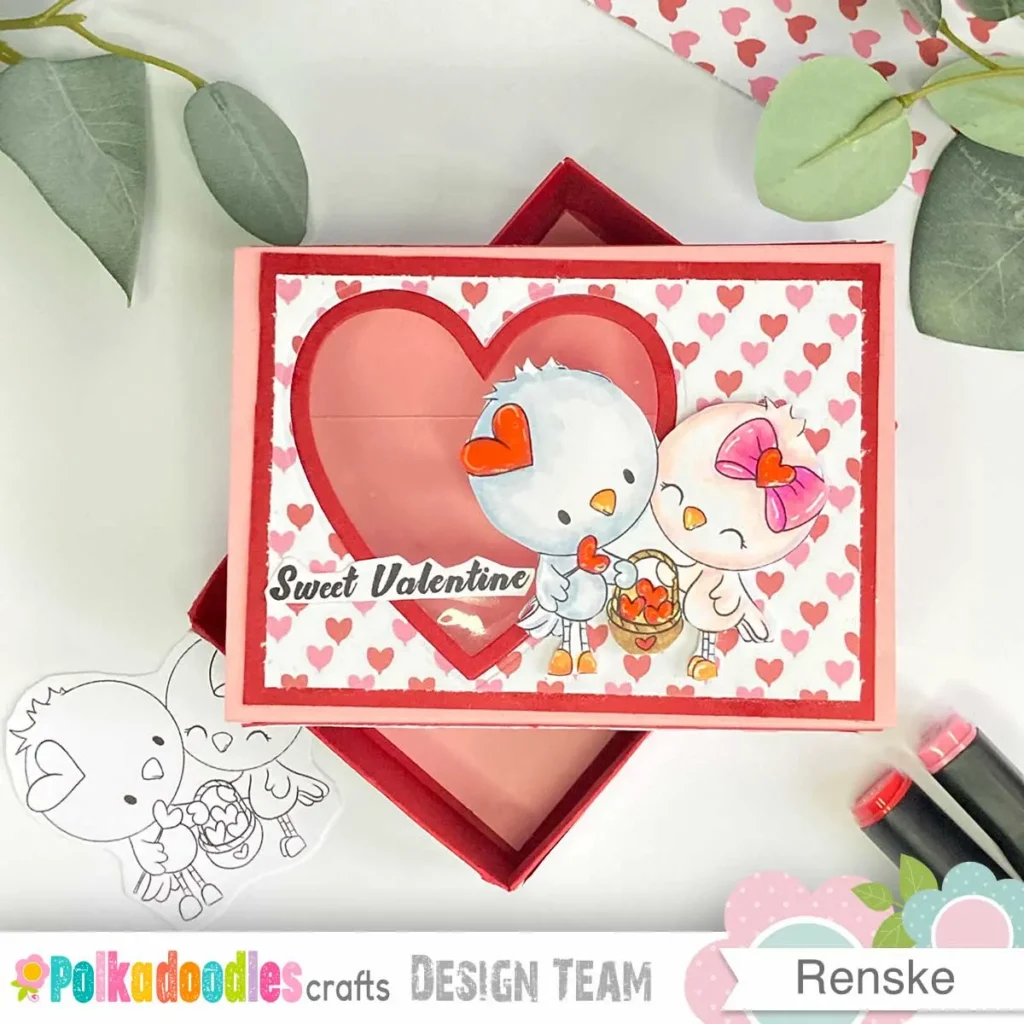
Make a Stunning Slider Valentine Treat Box in Easy Steps
On this papercraft, I used the same heart die with a frame. This is a bit of different kind of valentine craft
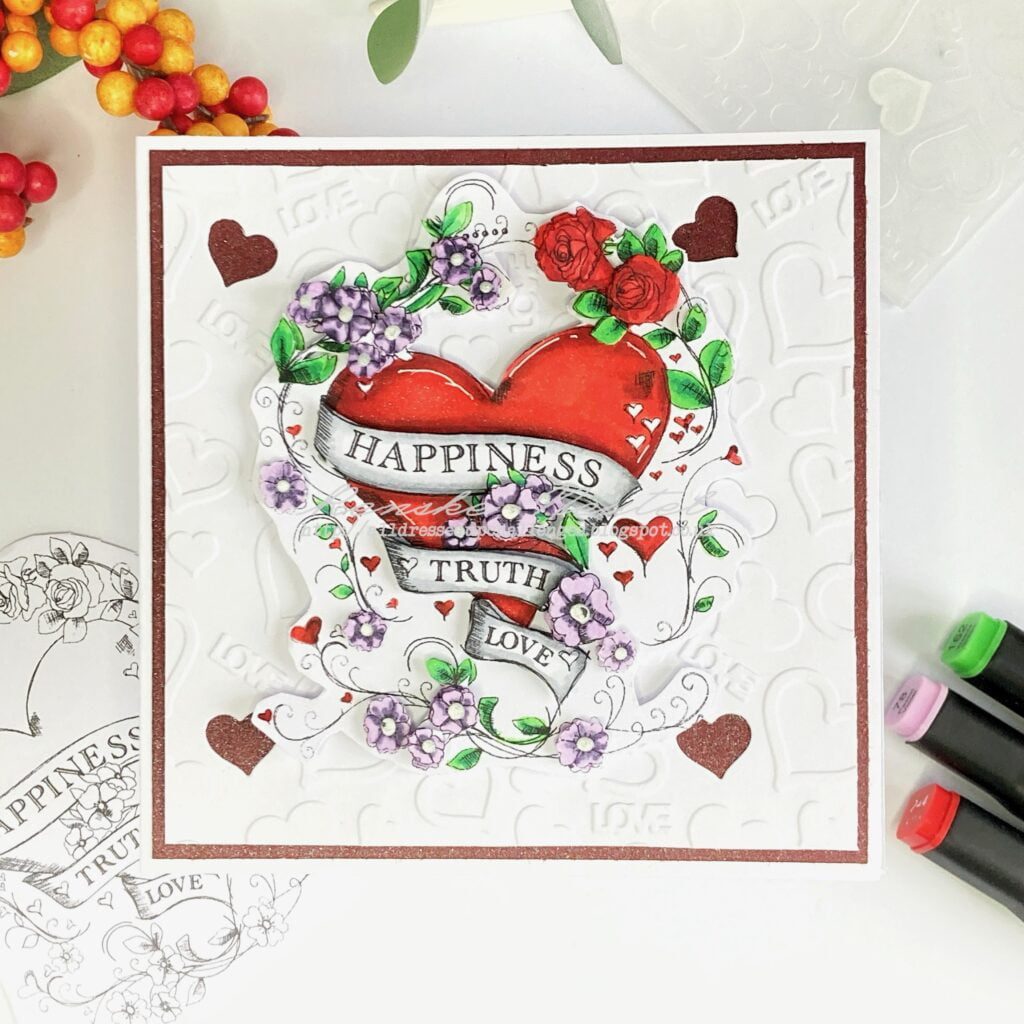
Crafting Depth: Unveiling the Magic Behind My 3D Valentine’s Card
Another Valentine card with the theme hearts.
Products used
Affiliate Links: The products mentioned in this post are affiliate links. If you decide to purchase through these links, I may earn a small commission at no extra cost to you. These commissions help keep my blog running, so I truly appreciate your support!
Products with affiliate links
Distress Ink Picked Raspberry from Ranger

Blending brush from StudiolightNL

Products without affiliate links
- The sentiment die Sending from Scrapfever
- The sentiment die Love from Aveccreative
- The heart dies from Aveccreative
- The Post stamp die from Aveccreative
- Coloured card stock scraps (brand Unknown).
- Sticky Glue from ActionNL
I would like to enter my card in the following challenges
- Word Art Wednesday: Anything goes
- Cardz 4 Galz: Anything but square
- Cut It Up: Have a heart
- A Perfect Time To Craft Open Challenge: Anything goes
- Daisy Chain Challenges: No design paper