
Some links in this post are affiliate links. This means I may earn a small commission if you make a purchase, at no extra cost to you. I only recommend products I use and genuinely enjoy in my own cardmaking. Read more here.
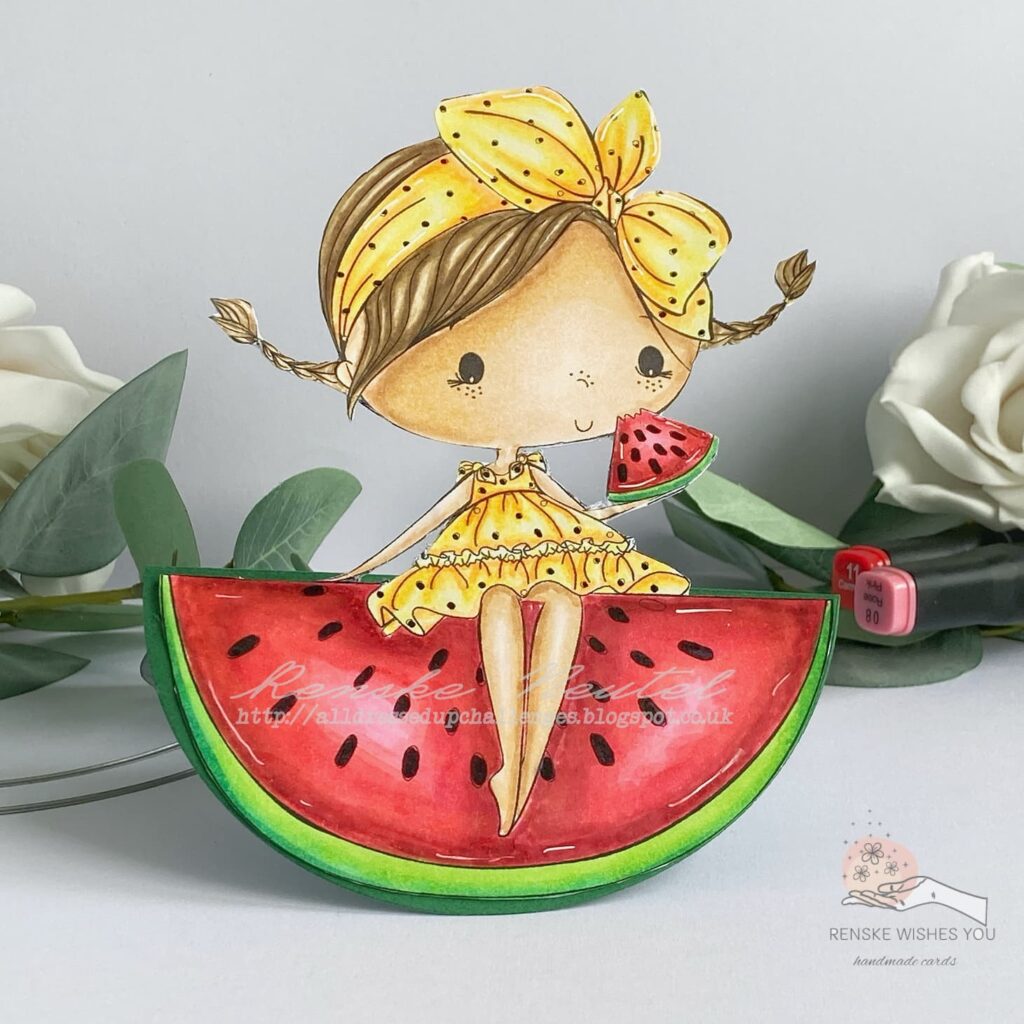
Hello fellow crafters! Today, I am excited to share a fun project with you: creating an easy, yet beautiful, watermelon rocker card. This unique card shows off your creativity and includes an interactive element that will bring a smile to anyone’s face.
Interactive cards like this one have a special charm. Their movement and engagement with the recipient add joy and surprise, making them perfect for any occasion. This month, All Dressed Up Stamps has released three fantastic new digital stamps, and I just had to use one of them—the “Sweet as a Melon” stamp—for this tutorial. Alongside “Seashells” and “Bubbles,” these stamps are designed to inspire and bring out your creativity. These are the three stamps from the New Release:


In this tutorial, I will guide you through creating your watermelon rocker card. We will cover everything from colouring techniques to assembling the card base so that by the end, you will have a beautiful, interactive card that will amaze everyone. So let’s get started and explore the card-making world with this fun and engaging project!
Materials Needed for this Watermelon Rocker Card
To create a beautiful Watermelon Rocker card, you will need various materials and tools. Below is a detailed list of everything you will need, along with alternative suggestions in case you don’t have the exact supplies on hand.
- Materials Needed for this Watermelon Rocker Card
- Step-by-step tutorial for creating a watermelon rocker card
- Let’s Get Creative Together
- Products used for this watermelon rocker card
- I would like to enter my card in the following challenges:
Materials
- Digital Stamp: “Sweet as a Melon”: This will be the main image for our card, featuring a cute girl sitting on a watermelon slice. You can purchase this stamp on Etsy if you want to follow along with the tutorial. You can buy it here
- Colouring medium: I used alcohol markers for this project, but feel free to use any colouring medium you prefer.
- White Gel Pen: This will add highlights and details to the coloured image. Alternatively, you can use a fine-tipped white paint pen or a white coloured pencil.
- Nuvo Aqua Shimmer Pen: This will add a touch of glitter and shimmer to the watermelon. You can also use any glitter pen or glue for a similar effect.
- DCP Paper: This is for printing the digital stamp and works well with alcohol markers. Are you using a different colouring medium, you may need another type of paper.
- Green Cardstock: This will be used to create the rocking base of the card. Any sturdy cardstock in the colour of your choice that matches the card theme will work.
Tools
- Circle Die: This will be used to cut the circular base of the rocking card. If you don’t have a circle die, you can use a compass to draw a circle and cut it out with scissors.
- Craft Knife: This will be used to cut out the detailed parts of the digital stamp, especially the inner sections. Precision scissors can also work for this, though a craft knife provides more control for intricate cuts.
- Die-cutting machine (optional): This is for die-cutting the circle for the card base.
By gathering these materials and tools, you’ll be well-equipped to start creating your delightful watermelon rocker card. If you’re looking to purchase any of these items, I have listed the items I could find below at the end of the blog post.
Step-by-step tutorial for creating a watermelon rocker card
Creating your watermelon rocker card is a fun and straightforward process that allows you to showcase your creativity and card-making skills.
In this section, I will guide you through each step, from preparing your digital stamp to assembling the card. So, gather your materials and dive into the wonderful world of handmade cards!
Step 1: Printing and Coloring the Digital Stamp
In this step, we will work with the digital stamp “Sweet as a Melon” from All Dressed Up Stamps.
Size Considerations and Printing Tips
Before you start, consider the size of your digital stamp. For this project, I printed the “Sweet as a Melon” stamp at 16 centimetres. While this size worked well, next time I would print it slightly smaller, around 15 centimetres, so it fits neatly into a 15 by 15 centimeter envelope. Use DCP paper for printing, as it’s ideal for alcohol markers and prevents bleeding.
Colouring Techniques and Color Combinations
Once your digital stamp is printed, it’s time to bring it to life with colour. I used alcohol markers, but feel free to use any colouring medium you prefer. Here are the colour combinations I used:
- Skin: Tanned Skin (260), Peachy Blush (259), Salmon Pink (25), Pale Cream (142)
- Hair: Pale Cream (142), Brown Grey (104), Walnut (100), Clay (116)
- Watermelon Flesh: Rose Pink (08), Coral Pink (16), Carmine (11), English Red (249), Burgundy (247)
- Watermelon Rind: Apple Green (160), Grass Green (47), Forest Green (50)
- Bow and Dress: Pale Yellow (38), Pastel Lemon (29), Lemon Yellow (35), Yellow (34)
Adding Highlights and Shimmer
After colouring, use a white gel pen to add highlights to the bow, dress, and watermelon. This step enhances the details and gives your image a professional look. To add a touch of sparkle, apply the Aqua Shimmer pen to the watermelon, giving it a delightful shimmer that catches the light beautifully.
Cutting Out the Image
With your digital stamp beautifully coloured and shimmering, it’s time to cut it out. Carefully cut around the image, removing any white space. For the intricate inner sections, use a craft knife to achieve precise cuts. This step ensures that your image stands out and integrates seamlessly into your card design.

Now that your digital stamp is ready, you’re all set to move on to creating the rocking base of your card.
Step 2: Creating the Rocking Base
Creating the rocking base for your card is simple and adds an interactive element to your project. Here’s how you can do it:
- Die-Cutting the Circle: Use a large circle die to cut out a circle from green cardstock. This will form the base of your rocker card. If you don’t have a circle die, you can use a compass to draw a large circle and cut it out with scissors.
- Folding the Circle: once you have your green circle, fold it in half to create the rocking base. This folded circle is now your card base, allowing it to rock back and forth when placed on a flat surface.

And that’s it! Your rocking base is ready, providing a fun and unique foundation for your watermelon rocker card. Now, let’s move on to assembling the card.
Step 3: Assembling the Card
With your rocking base ready, it’s time to attach the beautifully coloured digital stamp and complete the assembly of your card.
Attaching the Digital Stamp to the Base
Before attaching the digital stamp to the base, consider the issue of alcohol markers bleeding through the paper. Here’s how you can ensure a clean and polished finish:
- Prepare the back of the digital stamp: Place your coloured digital stamp on white paper and adhere it securely. Carefully cut around the stamp again, following the same lines. This backing will hide any bleed-through from the alcohol markers and give your card a neat appearance from all angles.
- Attach the Digital Stamp: Position the digital stamp on the front of the rocking base. Ensure that the watermelon slice aligns with the bottom of the base so that the girl appears to be sitting prominently above the fold. Use a strong adhesive to secure the stamp in place. This placement ensures that the card will rock while showcasing the playful scene.

Your card is assembled, with the digital stamp securely attached to the rocking base. This step brings your card to life, ready for the final touches.
Step 4: Adding the Inner Message
To complete your watermelon rocker card, you can add a personal touch with an inner message. Here are the steps to create a space for your message:
- Creating the Half-Circle Insert:
- Use a slightly smaller circle die than the one used for the rocking base to cut out a circle from white paper. This will ensure the insert fits neatly inside the base without extending beyond the edges.
- Fold the white circle in half and cut along the fold to create a half-circle. This half-circle will be used for your personalized message.
- Placing the Insert:
- Adhere the half-circle insert to the inside of the rocking base. Ensure it aligns well with the fold of the base and provides ample space for writing a message.
- The white paper will contrast nicely with the green base, making your message stand out and adding a professional finish to your card.
By adding this simple yet thoughtful element, your watermelon rocker card becomes a charming piece of art and also a meaningful gift with a personal message inside. Your card is now complete and ready to bring joy to its recipient!
Let’s Get Creative Together
In this tutorial, we created a fun watermelon rocker card designed to bring a smile to anyone’s face. First, we printed and coloured an adorable digital stamp from All Dressed Up Stamps, then crafted a playful rocking base from green cardstock. After assembling the card and adding a polished finish to the back, we included a personal message insert. Now it’s your turn to get creative and design your unique rocker card!
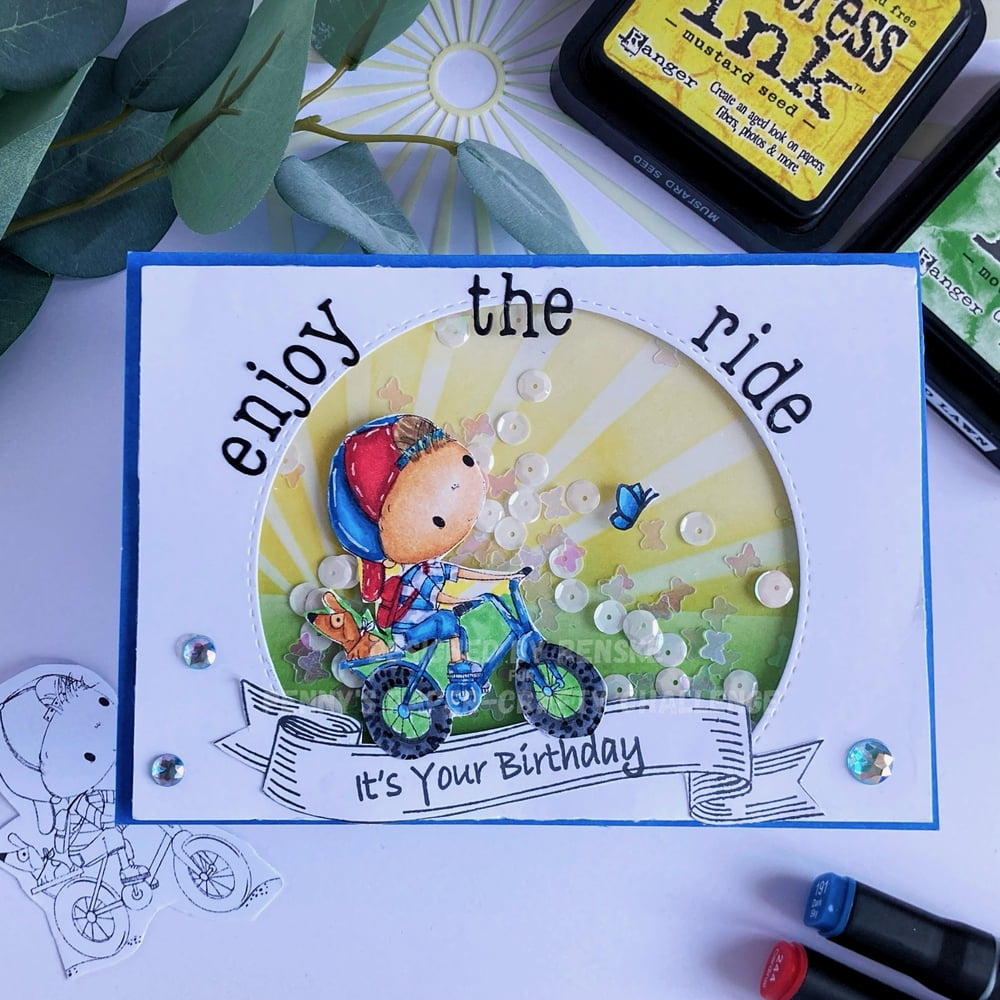
More Interactive Card Inspiration with All Dressed up Stamps
Looking for more fun and interactive card ideas? Check out these related blog posts for inspiration:

Happy crafting, and don’t forget to share your beautiful creations with me!
Products used for this watermelon rocker card
Affiliate Disclosure: This post contains affiliate links, which means I may earn a small commission at no extra cost if you purchase through these links. I only recommend products and services that I use and trust. Your support helps me continue to provide free tutorials and creative inspiration. Thank you for supporting my blog and helping me to keep sharing my passion for card making!
Affiliate Products used
Sweet as a melon digital stamp

White Gel pen

Nuvo Aqua Shimmer Pen

Non-Affiliate Products used
- Alcohol markers from Decotimecrafts
- Green Card Stock (brand Unknown)
- Circle Dies from Card & Deco
- Craft Knife (brand unknown)
I would like to enter my card in the following challenges:
- A Place To Start: Anything goes
- Unicorn Challenge Blog: Not Square
- CREATIVE INSPIRATIONS: Anything goes
- Crafty Catz: Anything goes + make it cute
- Lil Patch of Crafty Friends Challenge …: Anything goes
- A Perfect Time To Craft Open Challenge: Anything goes
- Classic Design Challenge Blog: Anything goes + summer holiday
That looks amazing – what a fabulous design!
Thanks for joining us at the Creative Inspirations Challenge Blog.
Helen x
DT
Thank you so much
Really lovely card. Thanks for sharing it with us at the Crafty Catz challenge Janet DT
Thank you so much
A super fun card with a very original shape. The girl is adorable and the colouring awesome. Thanks for joining us at A Place To Start. Hugs, María.
Thank you so much