
Some links in this post are affiliate links. This means I may earn a small commission if you make a purchase, at no extra cost to you. I only recommend products I use and genuinely enjoy in my own cardmaking. Read more here.
Hello, craft enthusiasts! Today, we will embark on a creative journey inspired by the soothing shades of blue. In the spirit of Blue Monday, a day where a touch of calm can make all the difference, we will delve into the world of monochrome colours.
Although it’s tempting to stick with things we already know, for this tutorial, we will try something new – making a monochrome blue flower card. We will create a perfect mix of simplicity and elegance. Not only will you discover the step-by-step process behind the creation, but we will also explore the emotions and meanings woven into each element of the card.
So, why blue? Today is Blue Monday, so doing something with the colour blue makes sense. Blue is not just a colour; it is a mood, a feeling. It is calm, serenity, and a touch of magic. As we explore the process, you will understand why blue flowers become more than ink on paper. They become a message, a hug, a gesture of peace.
Whether you’re a seasoned hobbyist or just starting, this tutorial is made for you. Join me in exploring colours, emotions, and the art of sending a piece of handmade warmth. Let’s get started with this monochrome masterpiece!
Inspiration Behind the Card: Embracing Blue Monday Vibes
Today’s inspiration is Blue Monday, a day known as the most depressing day of the year. However, as a creative person, I draw inspiration from life’s moments, and I want to use this day to create something beautiful. I suggest using the colour blue to send a card to someone who might need a hug or some warmth.
For this card, I chose to use the colour blue as inspiration. I wanted to capture the essence of this unique day by creating something serene, a gentle antidote to the Monday blues. The card features a monochrome blue flower design, which I find beautiful when I see them passing by.
Although I haven’t tried creating monochrome cards very often, I took up the challenge to work on it myself. Blue is my favourite color, so it was the perfect starting point. Let’s get started.
Step-by-Step Tutorial: Making the Monochrome Blue Flower Card
Welcome to the heart of the creative adventure! In this section, I will guide you step-by-step on how to create an enchanting monochrome blue floral card.
Let’s begin this crafting journey and turn the ordinary into something extraordinary. So, are you ready? Let’s get started and let the crafting magic begin!
Step 1. Gather Materials and Tools
Let’s start the creative journey by gathering the materials and tools required to make our monochrome blue flower card. The following are the things you’ll need:
Materials
- Clear Flower Stamp: Select a clear stamp with intricate petal details for the upper part. For this tutorial, I used the sunflower set from StudiolightNL, but feel free to choose any flower stamp you prefer.
- Blue Ink: Select a blue ink pad. Select a blue ink pad. I used the Memento Dew Drop Nautical Blue, but you can use any that you have available.
- Clear Embossing Powder: Use clear embossing powder to make your design stand out and create a glossy effect on the flower details.
- Word Dies or Stickers: Use word dies or stickers to convey your chosen sentiment. We’ll be using “Sending Hugs” for our card, but you can choose any other alternative.
- Coloured Cardstock: use coloured cardstock for the background panel border and letters. The background panel measures 13,5 centimetres by 9,3 centimetres. For this card, we’ll be using blue cardstock, but you can experiment with different tones to get your desired effect.
- White card stock for the card base: You need white cardboard measuring 21 centimetres by 14.8 centimetres. With this piece, we create the card base.
- White card stock for the background panel: You need a piece of white card stock measuring 8,8 centimetres by 13 centimetres.
- Heart Die or Punch: Use a heart-shaped die or punch to add a charming touch to your card.
- Foam Tape: Use foam tape to attach the background panel to the base and give your card more dimension.
Tools
- Heat Gun: You’ll need a heat gun for heat embossing, which sets the clear embossing powder and gives a glossy finish to stamped images.
- Adhesive or Glue: Use a reliable adhesive or glue to secure the various elements of your card.
- Die Cutting Machine: Use a die-cutting machine to cut out the sentiments and heart from the blue cardstock.
- Paper Cutter: Use a paper cutter for precise and straight cuts to ensure that all your elements fit together seamlessly.
- Crafting Mat: Use a crafting mat to protect your work surface, especially during the heat embossing process. I recommend using a glass mat.
- Bone Folder: Use a bone folder to create crisp folds in your card base. However, you can also use your scissors for this purpose.
Feel free to use any alternative materials and tools to add your unique touch to this crafting adventure. We’ll provide specific brand recommendations and affiliate links at the end of the blog post for those interested in the products mentioned.
Step 2: Preparing the Base Card
To create the card base, we will begin by making our own. First, take a sheet of white paper measuring 21 centimetres by 14.8 centimetres. Score the long side at 10.5 centimetres and then fold it in half along the score line. This will create your base card.
Step 3: Creating a Background with Blue Flowers
Let’s dive into the creative process of making a captivating blue flower background for our monochrome card. Follow these steps to add charm and elegance to your card:
- Cut the background panel: Begin by cutting a white paper to the size that you will use as the background. I suggest using the size 8.8 centimetres by 13 centimetres. However, you can adjust the size to your liking.
- Prepare a clear floral stamp: Take the clear stamp set and focus on the top part of the flower for its intricate details. As an example, we will use the sunflower set from StudiolightNL.
- Ink and stamp: Apply blue ink to the stamp using a stamping tool or acrylic block. Carefully use Post-it notes to cover parts of the stamp where you do not want the ink to spread. This ensures a clean and accurate impression. Stamp the flower on the white paper so that you get a clean and accurate impression. For this project, I suggest using Memento Dew Drop Nautical Blue ink.
- Stamp multiple flowers: Repeat the stamping process to create a cohesive pattern of blue flowers across the card. Use the stamp tool for consistent placement and even coverage. Stamp the flowers strategically so that some extend beyond the edges for a natural and dynamic look.
- Clear embossing magic: To add a touch of magic to your stamped flowers, try sprinkling some clear embossing powder over them. This will not only give the flowers a glossy and textured appearance but also seal the ink. Make sure that the powder sticks to the inked images by observing how long the ink stays wet. If the ink dries quickly, it’s best to emboss each flower immediately after stamping it. However, if the ink takes longer to dry, you can stamp everything first and then emboss everything at once.
- Heat Embossing: Use a heat gun to melt the embossing powder. Watch as the flowers transform, gaining a glossy and textured appearance. This not only enhances their visual appeal but also adds a delightful tactile quality to your card.
By following these steps, you will transform a plain white paper into an enchanting canvas with blue flowers. This background not only sets the tone for your monochrome card but also serves as a beautiful backdrop.

Step 4: Crafting the Text, Adding a Blue Heart, and Final Touches
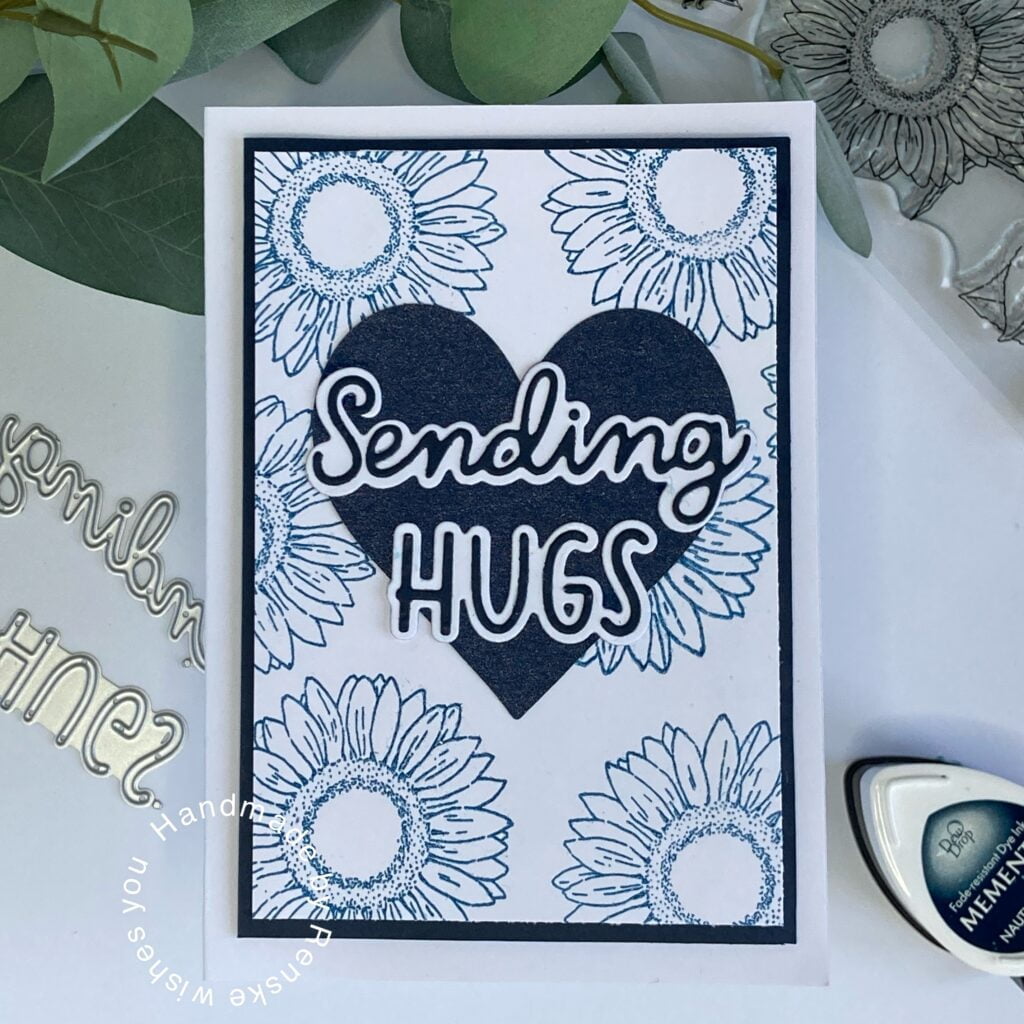
In this step, we will be adding a heartfelt message to our monochrome blue flower card using word dies. The sentiment that we have chosen is ‘Sending hugs’. Let’s explore how to integrate these elements and maintain a balanced design for optimal readability.
- Selecting the sentiment: Choose the word dies or stickers that complement your theme. For this project, I have selected the word “Sending Hugs.” The set typically includes both the letters of the word and a shadow die for added depth.
- Choosing Blue Cardstock: To cut out the letters from the word dies, choose blue cardstock. Make sure to use the same blue paper for the border around our background panel. This maintains the monochrome theme and ensures seamless integration with the blue floral background.
- Creating the Sentiment: Cut out the letters from the blue cardstock using the word dies. Use the shadow dies to cut the shadows from white paper. Assemble the sentiment by layering the letters on the corresponding shadow, adding depth and visual interest.
- Adding a Blue Heart: To elevate the design, incorporate a blue heart. Use a heart-shaped die or punch to cut out a heart from the same blue cardstock used for the sentiment. Place the heart strategically on the card to complement the overall composition.
- Cutting and Placing the Blue Border: Cut a piece of dark blue cardstock to 9.3 cm by 13.5 cm. This will serve as the border for your background panel. Carefully place the blue border around the edges of the floral background, enhancing its visual impact.
- Adhering Elements: v
- Placing the background panel on the base card: Now place the panel on the base card with foam tape.
By following these steps, you will not only convey a heartfelt message but will also improve the overall visual impact of your monochrome blue flower card. Each element plays a crucial role in creating a balanced and aesthetically pleasing final product.
Feel free to explore variations in sentiment and embellishments to adapt the card to different occasions. Let your creativity guide you in expressing the perfect message for your recipient.


Crafting Harmony: Inspire, Share, Create, Connect.
Thank you for joining me on this creative journey as we explore the world of crafting with a monochrome blue flower card. Crafting is not just about creating beautiful things, but also about building connections with fellow art enthusiasts and sharing the love of handmade creations. Your presence in this creative space is greatly appreciated.
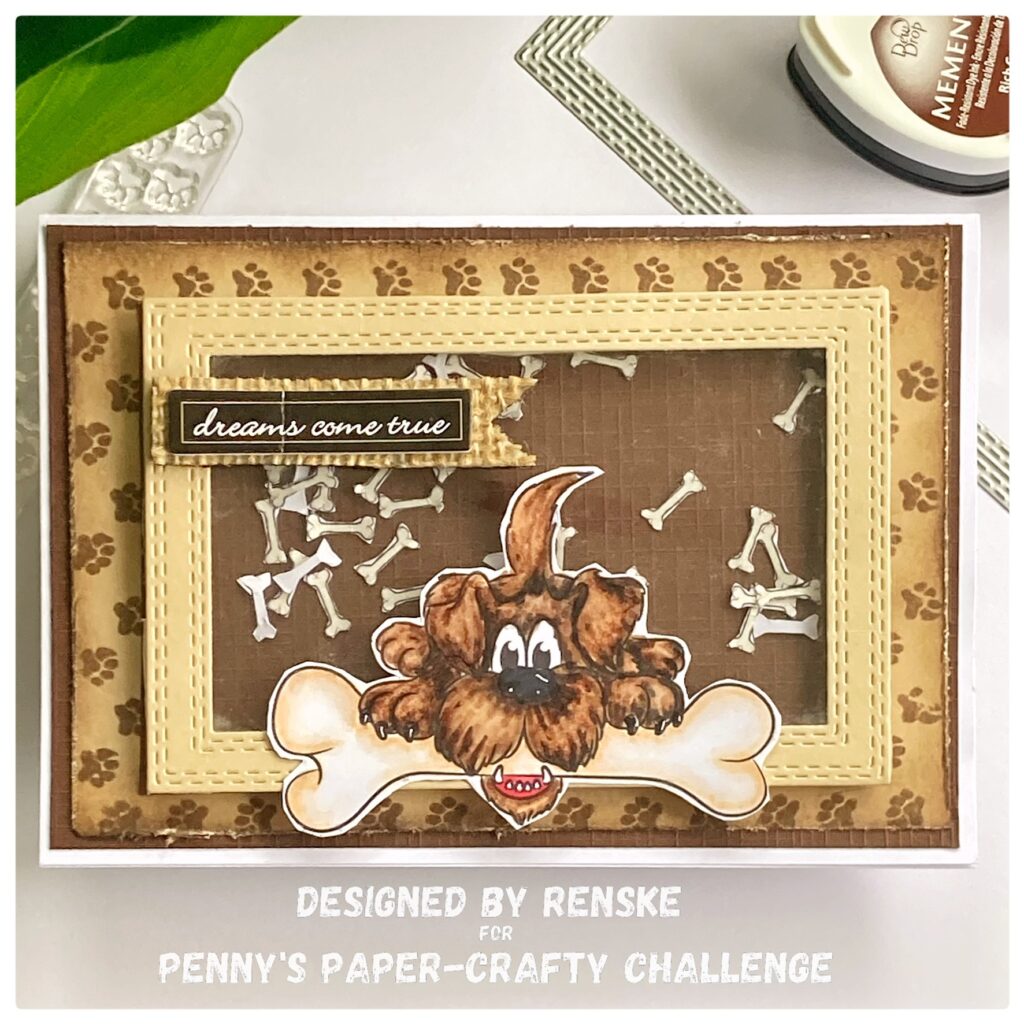
More Card-Making Inspiration
For even more card-making inspiration, check out these curated inspirations that will stimulate your creativity and help you discover new things about card-making
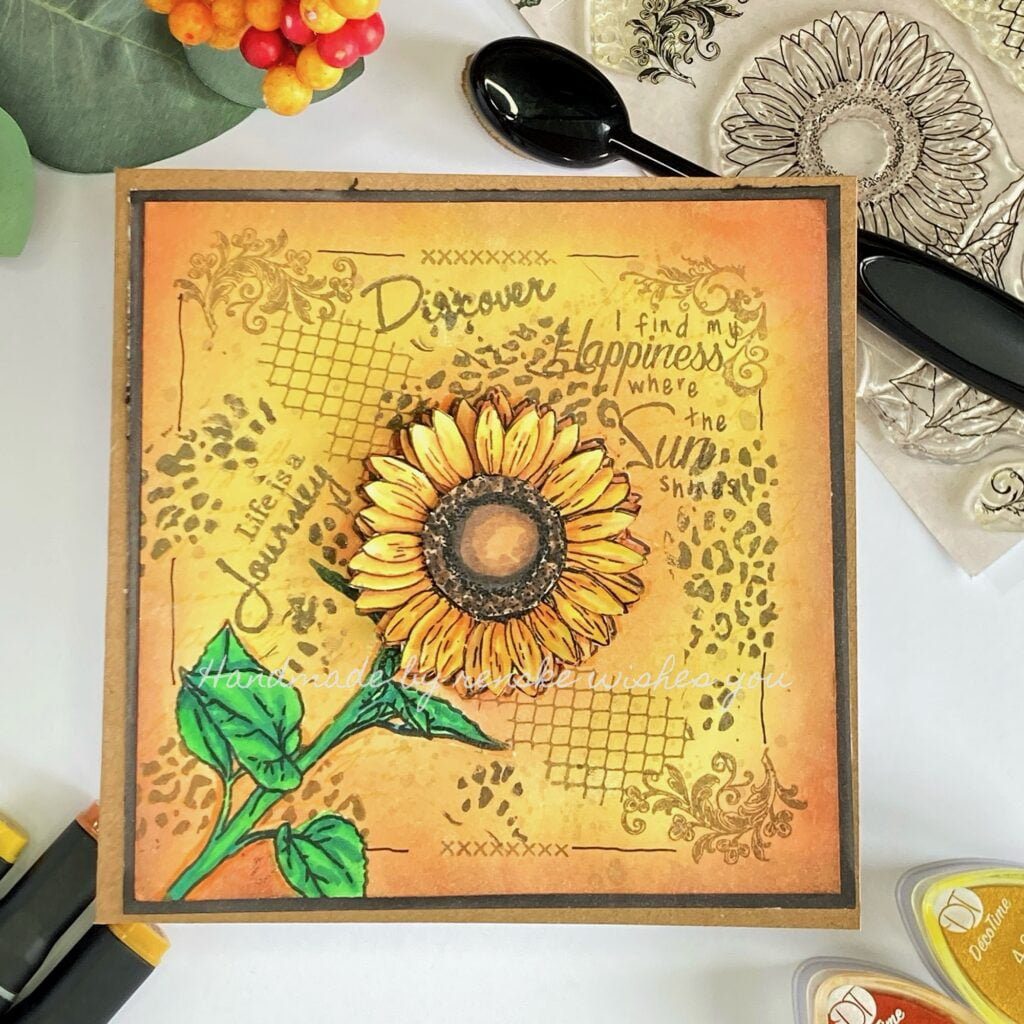
I made this card with the same stamp set. This time I used the whole flower.
Our crafting journey continues, and I’m excited to take you along.
Products with Affiliate links:

Sunflower Clear Stamp set from StudiolightNL
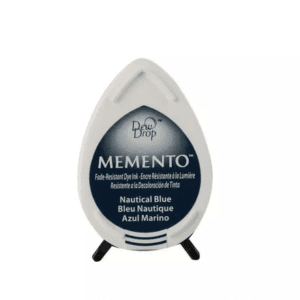
Nautical Blue dew drop Memento ink
Clear Mark Embossing ink pad from Nuvo
Products used without affiliate links
- Clear embossing powder brand unknown.
- Word dies from Scrapfever
- Blue cardstock, brand unknown.
- Foam tape brand unknown
I would like to enter my card in the following challenges:
- Try it on Tuesday: Winter Blues
- The Paper Funday Challenges: Anything Goes + Celebrates
- Seize the Birthday: Embossing wet or dry
- Craft Rocket Challenges: Use embossing
- Crafty Catz: Anything goes + no design paper
- Allsorts challenge blog: Make your own background
- Lil Patch of Crafty Friends Challenge …: Anything goes
- A Perfect Time To Craft Open Challenge: anything goes
- Classic Design Challenge Blog: Anything goes
- Daisy Chain Challenges: No design paper
- The Cutie Pie Challenge Blog: Feeling sentimental
Thank you for joining us at Seize the Birthday with your beautiful blue daisy card! And thank you for the tutorial!
Thank you
I love those blue daisies. Thanks so much for joining us at Try It On Tuesday, Chrisx
Thank you so much ❤️
So beautiful in shades of blue! Thank you so much for sharing with us at Allsorts challenge this week!
Ellie
Thank you
Gorgeous card in blue shade.
Thank you for sharing at Allsorts.
DT Mervi
Thank you so much
Lovely stamping and design. Thanks for sharing at Allsorts this week.
Lorraine
Thank you so much ❤️
A gorgeous card
Thank you for joining us at Crafty Catz Challenge Blog good luck Ginny DT for Crafty Catz Challenge Blog
My Blog
Thank you
A short C&P comment as I’m unable to type/craft much with MS flare up, but wanted you to know I’ve seen your Allsorts entry and thank you for sharing with us.
B x
Oh sorry to hear that. Hope it will calm done soon. Thank you for your comment ❤️