

Imagine the scent of pine as you brush ink over the soft, textured surface of kraft paper. Let’s make a cozy autumn card together. I’ll walk you through a woodgrain background card tutorial, perfect for sending a little warmth this season.
This tutorial is part of my autumn card series. For more inspiration and different background techniques, see my post 5 Autumn Card Backgrounds, where I explore multiple fall card backgrounds you can mix and match with this projec
If you’re new to cardmaking or just want a simple fall project, this tutorial is perfect for you. I’ll break down each step. We’ll ink-blend on kraft paper, add paint splatters, die-cut leaves and mushrooms, and layer everything for depth. This project takes about an hour to complete, allowing plenty of time to enjoy the process. By the end, you’ll have a beautiful autumn card showcasing your crafting skills and creativity, ready to share with friends or display with pride.
By the end, you’ll have a colorful autumn card to share or display. Remember, it’s okay if your card turns out differently from the example. The beauty of cardmaking lies in personal expression and creativity, so embrace your unique results. Grab your supplies and let’s get started.
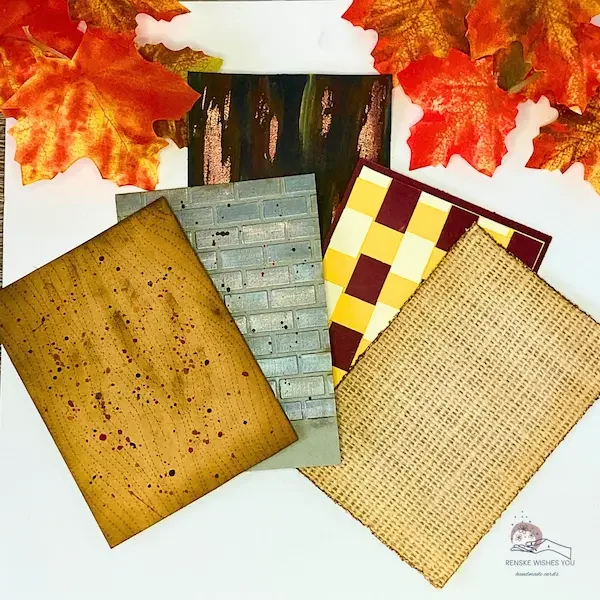
Materials You’ll Need for This Woodgrain Background Card Tutorial
Gather your supplies before you start. It’ll make everything go more smoothly.
Quick Prep Checklist
- Woodgrain die
- Leaf and mushroom dies.
- Distress inks
- Acrylic paints
- Label die
- Clear stamp or sentiment sticker
- Ribbon
- Foam tape
- Brushes
- Kraft paper
- Light yellow card base
- Twin marker
- Tacky glue
- Optional: Sentiment bundle

Detailed Materials Guide & Substitutions
- Woodgrain die (Avec Creative) creates a natural wood pattern, adding unique depth and dimension to your card. This tool not only enhances the tactile feel but also elevates the visual appeal, making your card truly stand out. If you don’t have a woodgrain die, you can confidently use an embossing folder, stencil, or score lines into the paper with a bone folder as alternatives. Each of these options will still provide engaging texture and allow for creative flexibility in achieving a similar final effect.
- Leaf dies (AVEC Creative, 2 styles) – use both small and medium shapes for depth. If you don’t have these, any leaf dies you own will work.
- Mushroom die – brand unknown. If you don’t have a mushroom die, draw mushrooms by hand or stamp them as a substitute.
- Distress inks – Vintage Photo, Walnut Stain, Mustard Seed, Pine Needles, Antique Linen, Black Soot. If you don’t have these shades, use similar colors or any brand of ink you prefer.
- Acrylic paints (Scarlet, Burnt Umber, Burnt Sienna – Creative Artist) – for splatters or shading. If you prefer, other warm-toned acrylic or craft paints work too.
- Label die (AVEC Creative) – use this for your sentiment area, but if you don’t have a label die, any label or tag die is a good alternative.
- Clear stamp “hello” (Inkadinkado Baby Clear Stamp Set) – if you don’t have this, use a sticker or your favorite sentiment stamp as a substitute.
- Ribbon – Use a narrow ribbon in autumn colors. Any cozy-colored ribbon you prefer is also suitable.
- Foam tape – for dimension when layering elements.
- Brushes – for ink blending and acrylic splatters. Blending brushes helps soften edges.
- Kraft paper – use as the base for your woodgrain background. Colored cardstock can also be used if you don’t have kraft paper.
- Light yellow card base – 21 × 14.8 cm, folded in half. Alternatively, any neutral or warm-toned card base will work.
- Twin marker (Dark Wood) – for coloring edges or details. Any brown or wood-toned marker is a fine substitute.
- Tacky glue – for strong adhesion.
- Sentiment bundle (Polkadoodles, optional) – this provides extra sentiment options, but you can use any sentiment bundle you prefer.
You don’t need every exact supply listed here. Swap out colors, dies, or stamps for what you have on hand. You can still make a beautiful kraft paper card or a fun mushroom card that fits your style. Additionally, consider household alternatives to expand your creative options. For example, use makeup sponges for ink blending instead of specialized blending tools, or hand-cut shapes from recycled cardboard if you lack dies. This approach makes the tutorial more accessible, allowing you to craft stunning cards with readily available materials.
Step-by-Step Woodgrain Background Card Tutorial
I’ll walk you through each step. You’ll blend inks, die-cut leaves and mushrooms, and add paint splatters. The project takes about an hour, so take your time and enjoy it.
Step 1: Create Your Cozy Woodgrain Background
I first experimented with the woodgrain background in my 5 Autumn Card Backgrounds post. It’s a versatile technique that works beautifully for any autumn card and pairs well with the leaves, mushrooms, and splatters in this tutorial.
Cut and Die-Cut Your Kraft Paper
Cut your kraft paper to 9.5 by 14.3 cm. Use the woodgrain die in your die-cutting machine to add texture.
Tip: Don’t have a woodgrain die? You can still achieve a similar look with simple tools. Score lines with a bone folder, use a woodgrain embossing folder, or stencil the pattern with texture paste. Drag the edge of a brown ink pad across kraft paper, layer strips of torn paper for a faux plank effect, or lightly draw grain lines with a coloured pencil or fine-tip marker.
Blend Distress Inks for Depth
For this step, we are using:
- Vintage photo,
- Walnut stain
Use these inks to capture the essence of autumn colors, with each hue reflecting the season’s natural beauty. Browns like Vintage Photo and Walnut Stain evoke the rich tones of tree bark. If you don’t have these specific inks, use similar colors that reflect the same natural palette.
Here’s how you can add the woodgrain effect to your background panel.
Blend Walnut Stain around the edges, then use Vintage Photo in the center. Leave some kraft paper showing. Use a small brush to follow the woodgrain lines with Walnut Stain for more texture.
Tip: Keep a scrap piece of paper nearby to test your blending first. Adjust pressure and motion until you achieve the look you want. If your inks look patchy, blend in small circular motions and add a light second layer. For harsh edges, use a clean, dry brush to soften transitions. If you accidentally over-blend and your colors look muddy, try lifting some ink with a damp brush or gently dabbing the area with a paper towel. Smudging can be fixed by blending the surrounding area with a clean brush to create a softer look, or you might consider incorporating the smudge into your design creatively.

Add Acrylic Paint Splatters

Mix water with Burnt Sienna, Scarlet, and Burnt Umber. Tap your brush lightly over the woodgrain background to create small splatters. The Scarlet splatters echo fallen leaves, while Burnt Sienna and Burnt Umber provide depth, capturing the essence of autumn’s natural beauty..
Tip: To control splatter size, tap the brush handle gently or vary the amount of paint on the brush. You can also use a toothbrush for a finer spray effect.
Final Touches and Drying
Let your background dry completely before adding anything else.

Step 2: Prepare and Color Your Autumn Sentiment Label
Cut a label for your card and get your sentiment ready.
Use a label die to cut a piece of white paper. This is where your sentiment will go.
Tip: If you don’t have a label die, a rectangle or oval punch works just as well. The important part is leaving enough room for your text.
Prepare and Print Your Sentiment
I print the sentiment ‘Hello, Fall’ a few times to pick the best placement. You can stamp or handwrite your sentiment if you want.
Line up your label over the printed word and run it through your die-cutting machine. Now your label has ‘Fall’ in place.
Add Color and Distress
Brush Antique Linen Distress Ink over the label. Add Walnut Stain around the edges for depth.
Tip: Blend the inks gently so the colors flow naturally. This gives a polished, professional look without being fussy.
Stamp the “Hello”
To finish the sentiment, use a clear stamp for “Hello” (or any stamp you have). Ink it with Memento Tuxedo Black and carefully stamp it above the word “Fall.”
Tip: Acrylic blocks make positioning easier. If you prefer, stickers or hand lettering work just as well for a personal touch.
Now get your mushrooms and leaves ready to decorate. Use autumn colors for a cozy look.
Step 3: Die-Cut Leaves and Mushrooms for Your Autumn Card
This is the fun part. We’ll die-cut and color leaves and mushrooms to layer over the woodgrain background.
Die-Cut Your Mushrooms
Cut your mushrooms from white paper with a die, or draw them by hand if that’s easier. Use a mix of sizes for a natural look.
Tip: Don’t worry if you only have one size die. You can cut multiple mushrooms and layer them for the same effect.
Colour the Mushrooms
- Large mushroom: Use Mowed Lawn over the cap, then blend Pine Needles along the edges.
- Medium mushroom: Cover the cap with Mustard Seed, then add Memento Ladybug along the edges.
- Small mushroom: Color the cap with Memento Ladybug and shade the edges with Black Soot.
Tip: Work from lighter to darker shades. Blending gently along the edges helps the mushrooms look dimensional and natural.

Add Acrylic Paint Splatters
Mix your autumn acrylic paints with a little water. Tap the brush over the mushrooms and leaves for splatters.
Tip: Start lightly and add more if needed—this gives texture without overpowering your design.

Step 4: Assemble Your Handmade Fall Card
Layer your woodgrain background, sentiment label, and die-cut leaves and mushrooms. After each layer, check that everything is straight and spaced well. Adjust before sticking down with foam tape or glue. If something isn’t quite right, gently reposition the elements without rushing. Use a craft knife to carefully lift stuck pieces, and, if needed, creatively cover small mistakes with additional embellishments or paint splatters to maintain the overall design.
Create the base and the frame for our woodgrain background card
Cut light yellow cardstock to 21 by 14.8 cm. Score at 10.5 cm and fold for your card base.
Add a panel behind your woodgrain background to frame it. Unfortunately, I didn’t have any matching card stock, so I decided to make it myself. I took white paper and cut it to 10 centimeters by 14.3 centimeters. I colored the edge of the paper with a Dark Wood alcohol marker to create a suitable frame for our woodgrain background.

Attach the Sentiment Label
Place your sentiment label at the top of the woodgrain panel and stick it down with foam tape for some lift.
Add Ribbon or Other Embellishments
Wrap a ribbon slightly wider than your panel, then tape it at the back. This is your base for layering leaves and mushrooms.
Arrange the Die-Cut Leaves and Mushrooms
Layer the mushrooms on the left, letting large, medium, and small ones overlap. Tuck green leaves under the ribbon and place yellow leaves on top. Add foam tape under pieces not on the ribbon for depth. Move things around until it looks balanced.
Tip: Slightly overlapping elements and using foam tape where needed will add dimension and keep your arrangement visually balanced.
Finish the Card
Attach your layered woodgrain panel to the frame, then stick it onto your card base. Check the layout and make any small tweaks to keep everything balanced.
Tip: Step back and view your card from a slight distance—it helps spot any placement tweaks before finishing.
You’re done! Your woodgrain background card is finished. You’ve practiced ink blending, die-cutting, and adding paint splatters, skills you can use on other fall cards. But don’t stop there; these techniques can be easily adapted to create beautiful cards for winter, spring, or any other season.

For winter, consider using cool tones like icy blues and silvers, and swap the leaves for snowflakes. In spring, pastel colors and floral elements can bring your design to life. In summer, vibrant hues such as bright yellows and greens paired with sunshine motifs will bring warmth to your cards.
Experiment with different color palettes and designs to let your creativity flourish throughout the year. This will not only enhance your skills but also keep your card-making fresh and engaging.
Tips, Tricks, and Creative Variations for Your Autumn Cards
Once your card is done, try changing colors, moving things around, or swapping embellishments to make cards that fit your style.
Experiment with Inks, Paints, and Papers
Swap Distress Ink shades or paint colors to change the mood of your card:
- Warm tones like Spiced Marmalade or Fired Brick add a cozy, autumnal feel.
- Greens and browns give a rustic, natural vibe.
Try different base papers like kraft, cream, or patterned sheets for a new look.
Creative Layout Variations
- Arrange your die-cut leaves and mushrooms in different ways. Cluster them in a corner or scatter them for a natural look.
- Swap leaves for acorns, pinecones, or berries to give your card a playful twist.
- Change mushroom sizes or mix in fun colors for a unique focal point.
Occasion Ideas
This design works for many autumn occasions:
- Thanksgiving cards
- General fall greetings
- Cozy autumn notes for friends or family
Pro Tips for a Polished Finish
- Use foam tape to add dimension to some elements.
- Add light paint splatters to tie everything together.
- Step back and look at your card. Small tweaks to placement or spacing can make a big difference.
Personalize Your Card
Change shapes or swap colors to match your style. Little changes like these let you make different autumn cards for friends, family, or decor.
Get Creative
If you have questions, tips, or ideas to share, let me know what step you’re on and I’ll help out. Card-making is all about learning, experimenting, and having fun. Which autumn memory inspired your color choices? Sharing your personal stories can spark creativity and bring our crafting community closer together.
I’d love to see your woodgrain background card! Try different leaf shapes, mushroom sizes, and autumn colors to make it your own. Share your creations on social media so I can see your take.
Have questions or tips to share? Let me know what step you’re working on and I can help. It’s all about learning, experimenting, and having fun with autumn card-making.
I’d love to see your woodgrain background card! Try different leaf shapes, mushroom sizes, and autumn colours to make each card uniquely yours. Share your creations on social media to show your take on a handmade fall card.
Have questions, tips, or variations to share? Let me know what step you’re working on, and I can help troubleshoot. It’s all about learning, experimenting, and having fun with your autumn card-making.
- Blending lines – too much pressure or too little ink; try using circular motions with a lighter touch.
- Patchy splatters – paint mixture too thick; add a little more water and test on scrap paper.
- Uneven layering – foam tape pieces spaced too far apart; add smaller sections for balanced support.
- Warped paper – too much moisture during splattering; allow layers to dry fully between steps.
Paying attention to these details will make your next autumn card even better.
More Autumn card ideas
Looking for more autumn card ideas? Check out these posts for new techniques and inspiration:
5 Cozy Autumn Card Backgrounds You’ll Love To Create
Want to try more autumn card designs? Check out my 5 Autumn Card Backgrounds tutorial for step-by-step inspiration and creative ideas to expand your cozy fall cards.
Products used
Affiliate Links: The products mentioned in this post are affiliate links. If you decide to purchase through these links, I may earn a small commission at no extra cost to you. These commissions help keep my blog running, so I truly appreciate your support!
Products with affiliate links
Halloween Trick or Treat printable Greetings

Distress ink Vintage Photo

Distress ink Walnut Stain

Distress ink Mustard Seed

Distress ink Pine Needles

Blending brushes 1 cm StudiolightNL

Distress ink Antique Linene

Distress ink Black Soot

Ink blending brushes 3 cm StudiolightNL

I would like to enter my card in the following challenges
- Word Art Wednesday: Anything goes
- Lil Patch of Crafty Friends Challenge …: Anything goes
- 613 Avenue Create: Anything goes
- A Perfect Time To Craft Open Challenge: Anything goes
- Classic Design Challenge Blog: Anything goes + Autumn Splendor
- Crafts Galore Encore Challenge Blog: Anything goe
- Let’s Craft and Creat: Anything goes + use twine
Beautiful creation! Thank you for sharing with us over at Let’s Craft and Create.
~ Sherry DT/Admin xx
Thanks a lot
Beautiful! Thank you so much for entering our challenge at 613 Avenue Create with this lovely creation. Looking forward to see you again next challenge.
Regards,
Mia
Designer for 613 Avenue Create
craftartista.blogspot.com {My Blog}
Thank you so much Mia.
It’s beautiful, Renske! Thanks for joining us at 613 Avenue Create. I hope we see you on the front porch again soon!
Hugs, Em
613 Avenue Create Co-Owner
Creative Em my blog
Creative Em on YouTube my Youtube channel
thanks