
Some links in this post are affiliate links. This means I may earn a small commission if you make a purchase, at no extra cost to you. I only recommend products I use and genuinely enjoy in my own cardmaking. Read more here.
Greetings Crafty Friends!
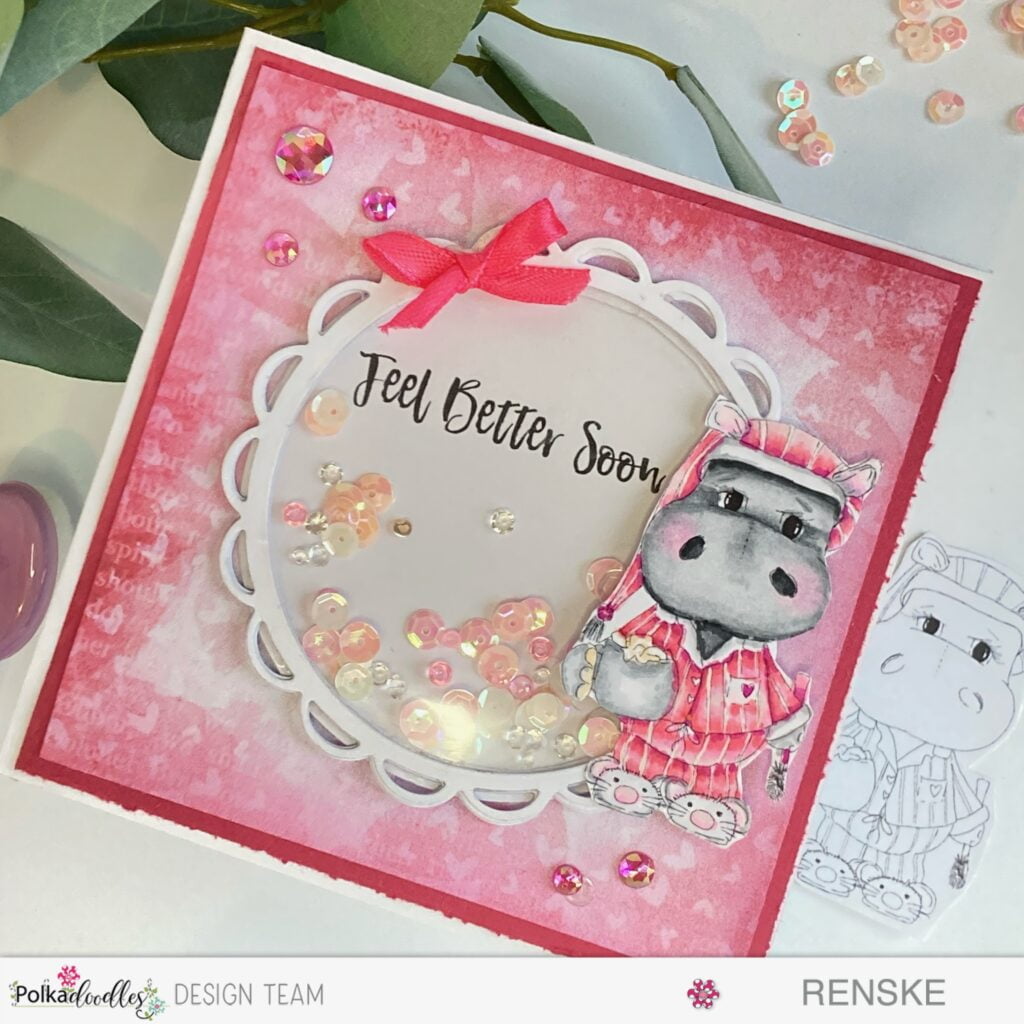
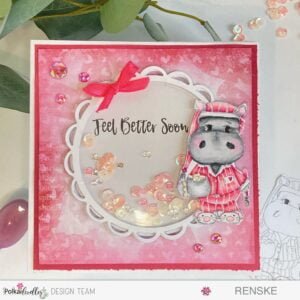
Today, we are exploring the enchanting world of card making and embarking on a crafting adventure. Our project is the Hippo Shaker Card, which not only looks visually appealing but also conveys warm get-well wishes to the recipient.
This card is a unique creation that is waiting to be shared. Also, we are launching a brand-new challenge on the Polkadoodles Challenge blog today. Would you like to participate in the crafting festivities and take up the challenge?
So, gather your craft supplies, put on your creative hat, and let’s infuse some magic into our day by bringing the Hippo Shaker Card to life. This is not only about crafting but also creating moments of joy through handmade art.
Are you ready to accept the challenge? Let’s get started!
Products and Materials Used
To craft our delightful Hippo Shaker Card, a magical mix of Polkadoodles products and additional materials was the key to bringing this whimsical creation to life:
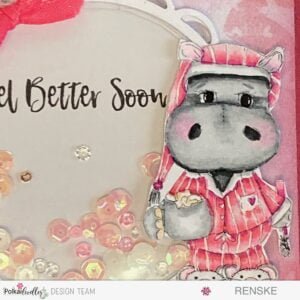
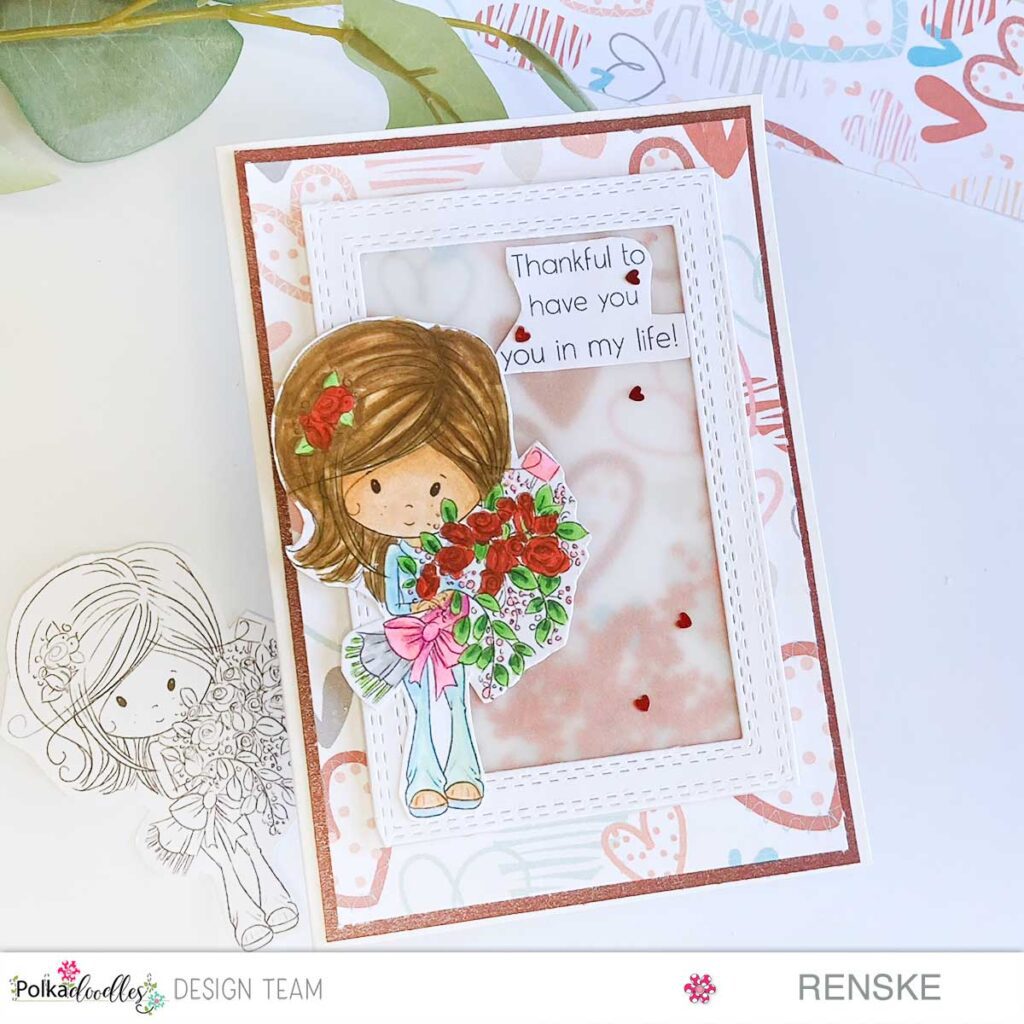
- Hippo Helga Bedtime” Digital Stamp by Polkadoodles: Our main focus was on this charming digital stamp. This stamp features Helga in her cosy pyjamas, holding a mug of warmth and a scrub brush, making it the perfect embodiment of comfort and cheer for our get-well wishes.
- Hippo Paper Heaven 4” Set by Polkadoodles: For the backdrop of our card, I used the delightful patterns from the “Hippo Paper Heaven 4” set by Polkadoodles. These papers not only serve as a visually appealing background but also add a touch of playfulness with huggable hippos and heartwarming patterns.
- Hippo Helga Sentiment Set by Polkadoodles: To add a personal touch, we used the sentiment set featuring Helga’s whimsical expressions from Polkadoodles. The chosen sentiment, “Feel Better Soon,” perfectly complements the theme of our card, spreading comfort and well wishes.
- Alcohol Markers: To infuse life into our Hippo Helga and her accessories, I used alcohol markers in a colour palette of rosy pinks and soothing greys for added elegance.
- Acetate Sheets: Transforming our card into an interactive delight, I’ve incorporated acetate sheets to create the magical shaker element. These sheets add a layer of playfulness, allowing the recipient to engage with the card.
- Sturdy Cardstock: The foundation of our artistic endeavour is laid on high-quality cardstock, providing stability to our handmade creation.
- Shaker elements: We put the shaker elements in our shaker section so that we can shake them back and forth.
- Additional Embellishments: A few extra touches, such as a decorative bow, pearls, and a touch of Paper Glaze for added shine, complete our crafting ensemble.
By blending these carefully chosen materials, we created a handmade Hippo Shaker Card that not only meets the challenge criteria but also encapsulates the comforting and joyous spirit we aimed to convey through our creation.
Crafting Enchantment Unveiled: A Step-by-Step Hippo Shaker Card Tutorial
I’m excited to take you through the step-by-step process of creating a Hippo Shaker Card. I’ll guide you from start to finish, explaining each step in simple terms so that everyone can follow along. We’ll explore the colours and magic of crafting a shaker card together.
Are you ready to infuse a bit of magic into your crafting repertoire? Let’s dive into the tutorial!
Step 1: Crafting the Card Base
To begin our creative journey, we’ll start by creating the base of our Hippo Shaker card.
First things first, let’s create the card base. We’ll be using sturdy white cardstock to provide a solid foundation for our masterpiece. Cut your cardboard to 26 cm x 13 cm to make a square card base measuring 13 cm x 13 cm. Fold the paper in half at 13 cm on the long side of 26 cm. You can use a scoring board to get an even tighter fold.
Now that we have our homemade card base, we’re ready to add layers of creativity to bring our Hippo Shaker Card to life. Join me as we continue on this crafting adventure!
Step 2: Incorporating Patterned Paper
As we continue with our crafting adventure, let’s move on to the next step of incorporating patterned paper into our Hippo Shaker card. This step adds a layer of charm and visual appeal to our creation. Here are the details:
The use of patterned paper
For this particular card, we will be using the beautiful patterns from the “Hippo Paper Heaven 4” set by Polkadoodles. These papers not only serve as a background but also contribute to the overall cheerful atmosphere of the card.
Choosing patterns and measurements
The Hippo Paper Heaven 4 set contains six digital paper patterns. I have chosen the pink paper with hearts. I want to convey some love with this card, and I believe this paper does that. But above all, choose the paper that conveys the best feeling for you.
Cut the selected patterned paper to dimensions of 12 cm by 12 cm. This square dimension perfectly complements the card base and creates a harmonious visual balance.
With the patterned paper in hand, we can now move on to the next phase of our creative journey and add a touch of playfulness to our Hippo Shaker card.
Step 3: Printing and Coloring the Digital Stamp
As our Hippo Shaker card takes shape, we move on to the next step of printing and colouring our digital stamp. This step adds the personal touch of hand colouring, bringing our Hippo Helga to life. Here are the details:
Step-by-Step Coloring Process
Begin by printing the digital stamp of Hippo Helga in her bedtime attire on high-quality DCP paper.
With precision and care, colour the elements using alcohol markers, ensuring a vibrant and lively appearance. I used the following colour combinations with my alcohol markers:
- The Hippo: Cool Grey 9, Cool Grey 8, Cool Grey 5, Cool Grey 4, Cool Grey 1.
- Cheeks Blush: Pale Pink and Blush for a gentle, rosy touch.
- Pyjamas: Peony Purple, Rose Pink, Pastel Pink, and Pink Mauve for a cosy and charming look.
- Mug: Cool Grey 5, Cool Grey 4, Cool Grey 1, mimicking the comforting shades of a warm beverage.
- Marshmallow: Hazelwood, adding sweetness to the scene.
- Rabbit Slippers: Cool Grey 4 and Cool Grey 1, capturing the adorable details.
After the cheerful colouring process, carefully cut out the digital stamp.
With our digital stamp coloured and cut, we can now move on to making the shaker element.
Step 4: Creating the Sentiment for the Back of Our Shaker Element
In this step of creating our shaker card, we will work on the sentimental message that will be printed on the back of our shaker element. This step is essential to add an emotional touch to our card, making it a heartfelt and personal gesture for the recipient.
The feel better soon sentiment
To begin, we need to choose a sentiment that matches the theme of our card. For this particular card, I selected the sentiment “Feel Better Soon” from the Helga Hippo Sentiment Set by Polkadoodles. This sentiment perfectly matches the purpose of our card and conveys warm wishes and comfort to the recipient.
Printing and Cutting the Sentiment
Once we have our selected sentiment, we need to print it on high-quality white paper. When printing, consider the colour of the paper you want to use as the background for your shaker element. In my case, I opted for white to match our frame. Make sure to leave enough space around the sentiment to die-cut a circle.
Next, we need to use a circle die to cut out the sentiment. Choose one large enough to cover the back of our shaker section. Alternatively, you can carefully cut it by hand, depending on your preference and the tools available.
With the sentiment and circle ready, we can now proceed to create the shaker element.
Step 5: Creating the Shaker Element
As we continue our creative journey, it’s time to create the shaking element for our Hippo Shaker card. This step will add a magical and interactive touch to the card. Here are the steps to follow:
Step-by-Step Description of Creating the Shaker Element
- Die-cut the circle with the wave edge: Use a round die with a wavy edge to cut about six rounds from white paper. The wavy edge will add a playful touch to the shaking element.
- Create the frame in the circles: Take three of the die-cut rounds and cut out the centre with a smaller round die or by hand, creating a frame-like structure. Repeat with the other three rounds.
- Adding the acetate: Attach a piece of acetate to the back of one of the circles. Use different adhesives to see which one works best, as acetate and paper can be difficult to stick together. I recommend using sticky glue. This transparent material will serve as a window for the shaker, allowing the recipient to see the beautiful elements inside.
- Attaching all the circles: Attach all other circles behind the acetate with glue. This will create dimension, so you don’t need foam tape. I chose to do this because the edges of the round frame are thin.
- Choosing the shaker elements: Choose nice elements for the shaker. I used pink and white embellishments and pink and white rhinestones.
- Adding the shaker elements: Place the frame with the acetate on top of your desk. Place the shaking elements in here.
- Closing the shaker element: Apply glue to the bottom round frame. Place the circle with the text you punched out on the back of the shaker frame. This will enclose the shaker element.
Now that the shaker element is ready, we can move on to the final step of assembling the card.
Step 6: Assembling the Card
As we approach the final phase of our creative journey, it’s time to bring all the elements together and create our Hippo Shaker card. This step is where the magic happens. Here’s what you need to do:
- Make a pink border: Make a pink border for our patterned paper. Cut a 12.5 cm x 12.5 cm square from pink paper and place the patterned paper on top of it. Stick this onto the base card.
- Placing the shaker element: Place the shaker element in the centre of the card base. This will ensure a balanced and visually attractive placement, allowing the recipient to enjoy the effect of the shake card fully.
- Placing the digital stamp Hippo Helga: Position the digital stamp Hippo Helga on top of the shaker element, creating a beautiful centrepiece. Think about the angle and orientation that will bring out the best of your chosen elements.
- Adding the Decorative Bow and pearls: dd the decorative bow and pearls. Place a bow on the frame of the shaking element and use pink rhinestones. Place three different sizes in the top left corner and two in the bottom right corner.
Congratulations! You have successfully created a playful and heartfelt Hippo Shaker card. This tutorial was a wonderful journey exploring the enchanting world of card making and bringing a touch of magic to your creative repertoire.
Now your Hippo Shaker card is ready to be shared with someone special.
Inspire, Create, Share, and More!
Thank you for joining me in creating this handmade hippo shaker card. I hope you enjoyed the process and found inspiration in the magic of Polkadoodles products.
If you have any questions, need clarification, or just want to share your thoughts, please comment below. I will answer this as soon as possible.
Join the Polkadoodles Challenge
Remember, the beautiful handmade hippo shaker card was created to inspire you to participate in the Polkadoodles’ “Anything goes” challenge. I am excited to see your creative journey unfold! This is your chance to showcase your skills, so get your craft supplies ready and let your imagination soar. Show us the amazing projects you come up with! I strongly encourage you to join in this thrilling challenge, create your art, and share your work with our lively community. Your talent deserves recognition, and who knows? You might be our next winner!
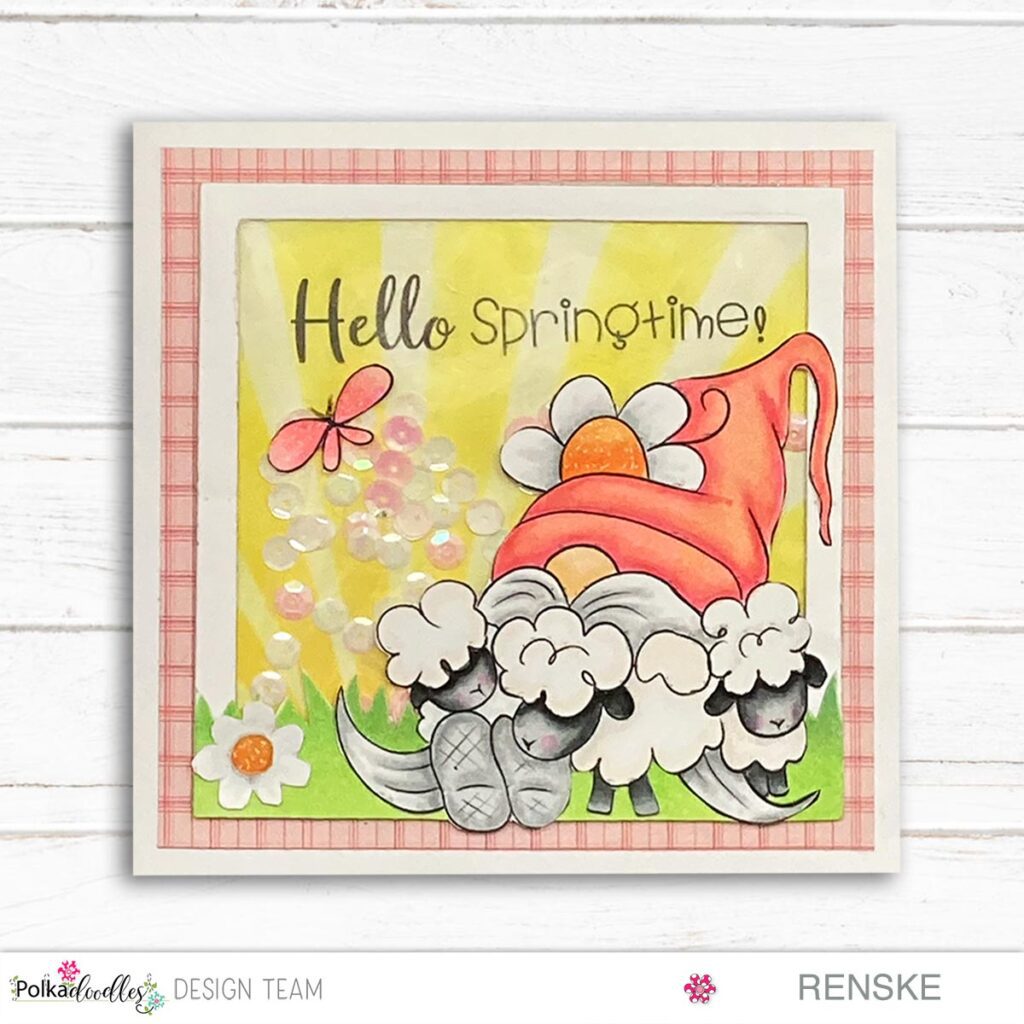
More shaker card ideas
I made more shaker cards with Polkadoodles products. Below you will find the links to the articles.
Polkadoodles products in the spotlight
Affiliate Disclosure: This post contains affiliate links, which means I may earn a small commission at no extra cost if you purchase through these links. I only recommend products and services that I use and trust. Your support helps me continue to provide free tutorials and creative inspiration. Thank you for supporting my blog and helping me to keep sharing my passion for card making!
Helga Hippo Bedtime Digital stamp

Helga Hippo Paper Heaven 4

Quotes and Sentiments Digital Stamps

I would like to enter my card in the following challenges:
- Make My Monday Challenge Blog: Use your pattern paper
- Krafty Chicks Challenge: Stamps
- Lil Patch of Crafty Friends Challenge …: Anything goes
- A Perfect Time To Craft Open Challenge: Anything goes
- Classic Design Challenge Blog: Always Anything goes
- Crafts Crafts Galore Encore Challenge Blog: Anything goes
- Critter Crazy CHALLENGE BLOG: Anything goes + featured critter
- SheepSki Designs Challenges: Anything goes
- Crafty Animals: Anything goes + Must use an animal
Such a sweet Get Well, shaker card. I love the colours and design. Thank you for sharing your project with us at the Crafts Galore Encore “Anything Goes” February Challenge. Good Luck and hope to see you again soon!
Carole x DT Craftilicious Creations
Thank you so much for your lovely comment
Fabulous, fun design – love it!
Thanks for joining the Krafty Chicks Challenge.
Helen x
Guest Chick
Thank you, glad you like it
wow, thank you for sharing your wonderful creation with us at MMM challenge
Thank you
Anybody would love a hippo to bring get well wishes, so beautiful and a lovely tutorial as well Thank you. So glad you shared your hippo with us at Critter Crazy, CarolG
Thank you, I am glad you like it
Hi Renske, a super cute get-well card, love the colours and hippo dressed in pyjamas, thank you for joining us at Lil Patch of Crafty Friends, good luck in the prize draw… Megan DT LPoCF
Thank you so much ❤️
Oh gosh, so many thing about this card to love! Shaker – love it! Adorable hippo – yay! Beautiful washed papers for your background – just perfect! This one ticks ALL my boxes, lol. Thanks so much for playing at Make My Monday!
Ah thank you so much for your lovely comment. It makes me happy you like it.