
Hello everyone!
Today, a new challenge on the Polkadoodles Challenge blog has started under the theme “Anything goes.” Our design team has created inspirational cards for you with the theme of “Thank you/Thanksgiving.
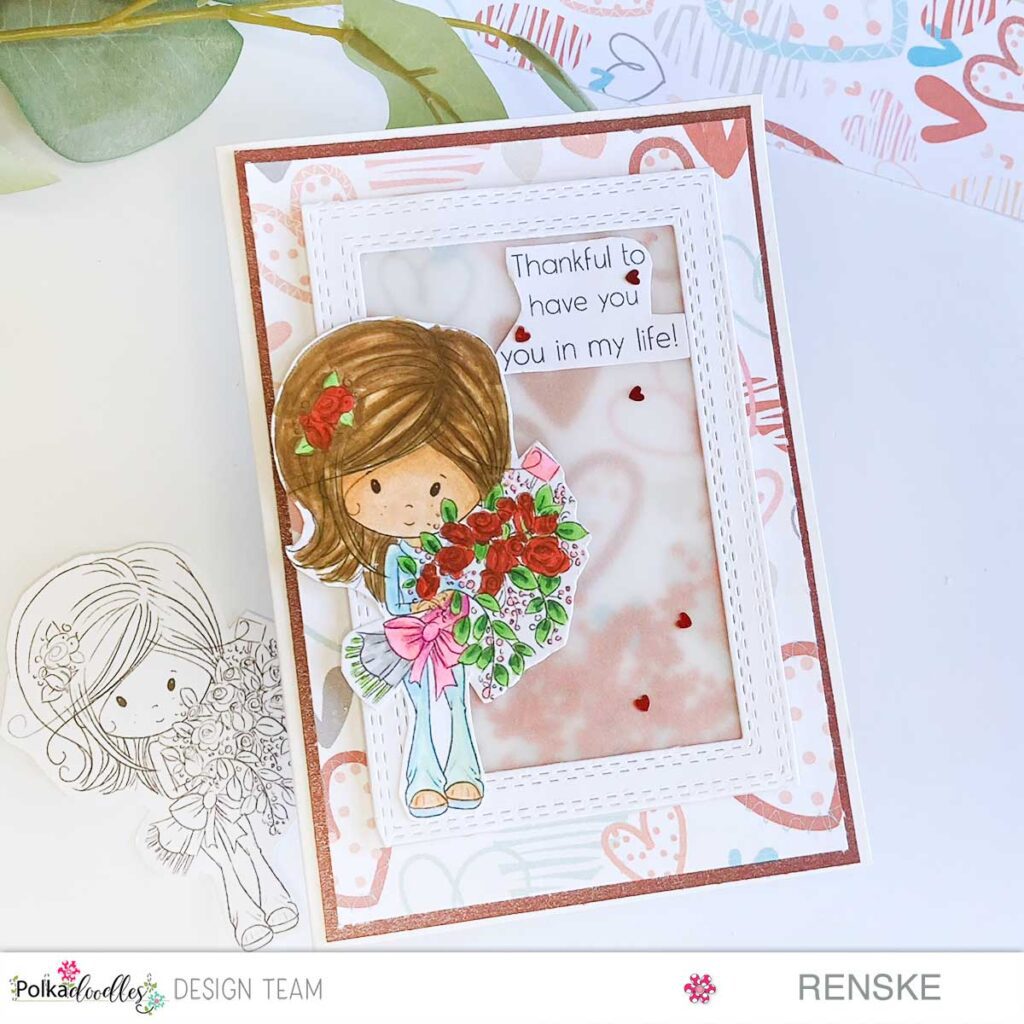
For my card, I decided to make a shaker card to express my special thanks to someone. In this tutorial, I will guide you in creating a beautiful thank-you card that is simple and easy to make. So, if you have your craft supplies ready, let’s get started and add a touch of sparkle to your gratitude.
Materials needed for this Thank You Shaker card
Before we embark on this creative journey, we first gather our supplies. Here is a list of products I used for our “Thank You Shaker Card”. The materials are:
- Big Bunch Digital Stamp: This is our star of the show. This girl holding a bountiful bouquet is the heart of our card. You can find and shop the digital stamp here.
- Love Birds Valentine Digital Paper Set: The background of our card comes alive with hearts and vibrant colours from this digital paper set. You can find the digital paper set here.
- Winnie Sunshine Delight Sentiments: The perfect sentiment for your “Thank You Shaker Card” is in this set. I used the sentiment “Thankfully to have you in my life”. You can find this set here.
- Vellum: I used vellum for my shaker window this time. It creates a dreamy, translucent effect.
- Foam Tape: You’ll need this to create the shaker element.
- Markers: For colouring the Big Bunch digital stamp, you’ll want some alcohol markers or other colour mediums. Feel free to choose your favourite brands and colours to bring our girl and her bouquet to life.
- Scissors and Paper Cutter: These tools will be handy for cutting out your digital stamp, papers, and the shaker window.
- Shaker Fillings: Go wild with your choice of shaker elements. Think sequins, glitter, tiny confetti, or anything else that tickles your fancy.
- Adhesive: You’ll need adhesive to secure everything in place. Double-sided tape and glue will do the trick.
Now that we have gathered our materials, let’s move on to the fun part: making our “Thank You, Shaker Card”.
Step-by-Step Guide:
Step 1. Preparing the Big Bunch Digital Stamp:
Printing the Digital Stamp
- To get started, make sure you have the Big Bunch digital stamp ready. If you haven’t already, download it and save it to your computer. You can find it on the Polkadoodles website. (The link is listed at the bottom of the blog post)
- Once you have it, open the image, and print it on DCP paper. This is the first step in bringing your “Thank You Shaker card” to life.
Colouring the digital stamp Big Bunch
Now comes the fun part! Grab your alcohol markers, and let’s colour this digital stamp.
Here is an overview of the colours I used:
- Skin: Tanned Skin, Peachy Blush, Salmon Pink, and Barely Beige.
- Hair: Leather, Walnut, Brown Grey, Clay.
- Red Roses: Cardinal, English Red, and Burgundy.
- Clothing: Baby Boy, Frost Blue, and Cool Shadow.
- Leaves: Weeds Green, Grass Green, and Forest Green.
- Berries: Roe Pink.
- Bow: Pastel Pink, Pale Pink, Rose Pink, Azalea Purple.
- Paper Bouquet: Cool Grey 5, Cool Grey 4, Cool Grey 1.

Take your time and let your creativity shine as you colour each element. Remember, it’s all about making this card truly yours.
Cutting It Out
When you have finished colouring, carefully cut out the Big Bunch digital stamp. This time, I decided to leave a small white border around the image, as some of the pieces are too complicated to cut along the edge.
With our beautifully coloured and carefully cut-out Big Bunch ready, we are one step closer to finishing our card.
Step 2. Preparing the shaker element
Now that our Big Bunch digital stamp looks great, it’s time to prepare the shaker element that will add a touch of magic to our “Thank You Shaker Card”.
Using vellum for the Shaker Window
Why vellum? Instead of traditionally using acetate for our shaker window, we chose vellum this time. Vellum has a unique translucent quality that softens the busy background of the “Love Birds Valentine” digital paper. It gives the card an elegant touch.
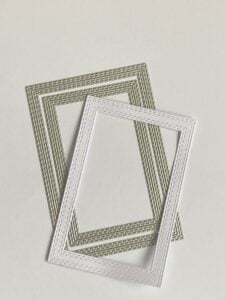
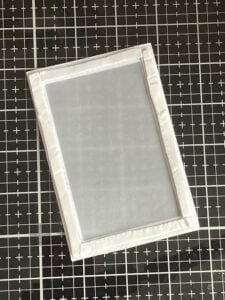
Cutting the shaker frame
Using two rectangular dies to cut a frame out of white paper. Unfortunately, I don’t have a rectangular frame die, but I do have a regular rectangle die. I then use two sizes of dies to die-cut a frame.
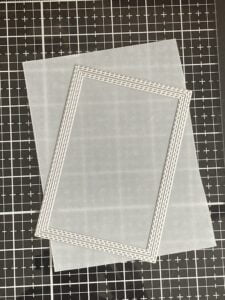
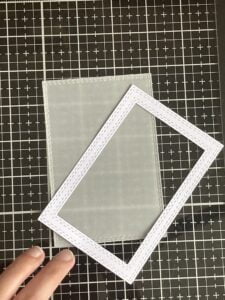
Cut the vellum and attach
Now you can cut Vellum to the right size. I used the biggest rectangle die for that. So, I am sure it will fit behind the frame. Attach the vellum to the back of the frame. Use double-sided tape or glue sparingly to hold it in place. This vellum makes the perfect window for our shaker elements.
Step 3. Creating the Shaker Frame with Foam Tape
Building the Frame
Now it’s time to add depth and dimension to your shaker element. Add foam tape around the edges of the frame you have made. The foam tape creates space for your shaker elements to move and shake.
Anti-Static Precaution
To prevent your shaker elements from sticking to the tape, run an antistatic object along the edges of the foam tape and over the vellum. This quick step makes a world of difference in keeping your shaker card in tip-top shape.
Once you have your vellum window and foam tape frame ready, you are on your way to creating a shaker element that will delight and surprise everyone who receives your card. The magic can begin! In the next steps, we will assemble the shaker element and finish the card. So let the creative energy flow.
Step 4. Preparing the Card Base
Before we go any further, we need to make sure we have a solid base for our “Thank You Shaker Card”. We are going to make the base on which we will attach our shaker element.
- Select your card base: Start with a standard card base measuring 10.5 centimetres by 14.8 centimetres. You can use a ready-made base or make your own. You need white card stock measuring 21 centimetres by 14,8 centimetres. Score at 10,5 centimetres and you have your card base.
- Cut the red card stock to size: I want a red frame around the pattern paper. You need a piece of red card stock measuring 10 centimetres by 14.3 centimetres.
- Cut the pattern paper. Okay, now it’s to cut the pattern to size. We need a size of 13.8 centimetres and 9.5 centimetres.
- Adding this to the card base: We glue the patterned paper to the red paper. We stick this together on our card base.

Now that your card base is ready and the pattern paper is in place, you’re all set to attach the shaker element we’ve been working on. So let’s get on with it!
Step 5. Adding the Shaker Elements
Select Your Fillings
Gather your shaker elements; these can be sequins, glitter, small confetti or other fun little pieces that will bring your card to life. I chose to use red hearts.
Place the Fillings
Wrap the frame with the foam tape you prepared earlier. Now add your selected shaker elements on the pattern paper where your shaker element will be. Be generous but not overzealous – you want the elements to have room to dance and shimmer as you move the card.
Step 6. Attaching the Shaker Element to the Card
Find the Perfect Spot
Before you attach the shaker element, decide where it will go on your card base. Place it on the part of the “Love Birds Valentine” digital paper where you’re sure the frame will cover.
Peel and Stick
Now, peel off the backing from the foam tape on the frame. Carefully align the frame over the selected spot on your card base. Gently press it down to secure it in place. Make sure it’s firmly adhered to prevent any shaker elements from escaping.
The shaker element is now a part of your card, and you can give it a little shake to watch the magic unfold. The vibrant, shimmering elements dance within the frame, adding that extra bit of charm to your “Thank You Shaker Card.” With the hard part done, let’s move on to placing the digital stamp and the sentiment. The card is coming together beautifully!
Step 7. Placing the Digital Stamp and Adding the Sentiment
Now that our shaker element is in place, it’s time to bring our “Thank You Shaker Card” to life with the beautifully coloured Big Bunch digital stamp and a heartfelt sentiment.
Positioning the Big Bunch Stamp:
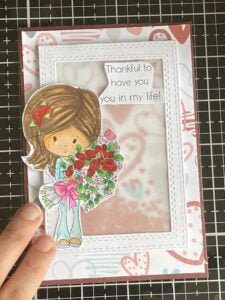
- Take your meticulously coloured Big Bunch digital stamp and decide where you’d like to position it on the shaker window. The vellum adds an elegant touch, allowing the background to subtly peek through. I decided to place the coloured digital stamp to the right of the shaker panel.
- Gently press the digital stamp onto the vellum, making sure it aligns perfectly with the shaker frame. The result will be a delightful visual that brings together the elements of your card.
Adding the Sentiment
- To express your gratitude in the most heartfelt way, reach for the “Thankful to have you in my life” sentiment from the Winnie Sunshine Delight Sentiments set.
- Place this sentiment elegantly in the upper right corner of the vellum. This position allows it to complement the Big Bunch and adds a touch of emotional depth to your card.
Final Decorative Touch
To enhance the sentiment and add a touch of playfulness, consider adding a few small heart accents around it. These tiny hearts can also be scattered at the bottom of the vellum to tie everything together.
With the Big Bunch digital stamp and the heartfelt sentiment in place, your “Thank You Shaker Card” is now bursting with personality and emotion.

And there you have it, your “Thank You Shaker Card” is now ready to make a statement and bring a smile to someone’s face. The combination of the Big Bunch digital stamp, the shaker element, and your personal decorative touches make this card a masterpiece of gratitude and artistry.
Before we wrap up, don’t forget to add your own unique flair and make it a truly personal expression of your gratitude.
Inspiration for Customization:
Now that you’ve mastered the art of creating a stunning “Thank You Shaker Card” with Polkadoodles products, it’s time to let your creativity run wild. Here are a few ideas to inspire you and your fellow crafters to put your unique spin on this project:
- Colour Variations: Change up the colour palette to reflect your style or to suit the preferences of the person you’re giving the card to. Experiment with different shades and combinations to create a completely different look.
- Alternate Stamps: While we’ve used the Big Bunch digital stamp for this project, Polkadoodles offers a wide range of other beautiful stamps. Consider using a different stamp to create a card for a different occasion. The possibilities are endless!
- Mixed Media Magic: For those who love mixed media, don’t hesitate to add texture and dimension with techniques like embossing, stencilling, or adding some texture paste for a unique background.
- Die-Cutting Delights: Incorporate die-cut shapes, frames, or sentiments to elevate the design. These can add a touch of elegance or whimsy, depending on your chosen style.
Inspire, Create, Share, and More!
Thank you for joining me on this creative journey as we crafted a beautiful “Thank You Shaker Card” together. I hope you’ve enjoyed the process and feel inspired to create your unique cards using Polkadoodles products.
If you have any questions, need clarifications, or simply want to share your thoughts, I’d love to hear from you. Crafting is not just a hobby; it’s a wonderful community, and I’m here to support you in your creative endeavours.
Join the Challenge
Remember, this card was designed to inspire you for Polkadoodles’ “Anything Goes” challenge. I’m genuinely excited to see your creations! This is your moment to shine, so get your crafty gears in motion, and let’s see what amazing projects you come up with.
I encourage you to participate in the challenge. Craft, create, and share your projects. The crafting community is waiting to celebrate your talent, and who knows, you might just win a prize!
You can find the challenge blog here.
More Thank You card ideas
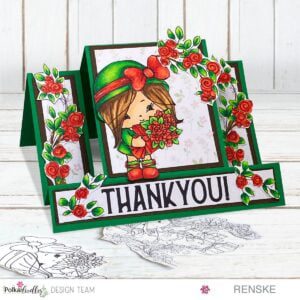
Thank You Stepper Card ook met Polkadoodles producten
Affiliate product used:

Digital stamp Big Bunch
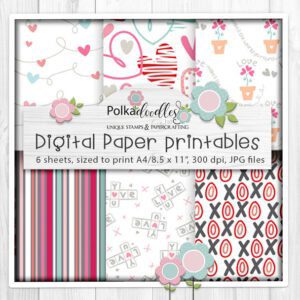
Love Birds Valentine – Digital Paper

Winnie Sunshine delights sentiments
I would like to enter my card in the following challenges:
- 4-Season Swap Challenge Blog: Schudkaart/Shaker
- A Place To Start: Anything goes
- Cut It Up: Add a sentiment
- Lil Patch of Crafty Friends Challenge …: Anything goes
- Classic Design Challenge Blog: Anything goes
- Crafter’s Cafe: Flowers
Lovely! Thanks for sharing with us at A Place to Start!
Hugz,
Chana Malkah, Owner
Thanks
Sweet card, thanks for joining us at The Crafter’s Café this month for our Flowers challenge.
Thank you so much
Wat een mooi én lief kaartje en origineel met de shakers achter het vellum geplaatst. Superleuk dat je zo gedetailleerd hebt beschreven hoe het gemaakt is. Bedankt voor je deelname aan onze 4 seasons challenge, groetjes Danielle
Dank je wel