
Some links in this post are affiliate links. This means I may earn a small commission if you make a purchase, at no extra cost to you. I only recommend products I use and genuinely enjoy in my own cardmaking. Read more here.
Ahoy there, fellow crafters!
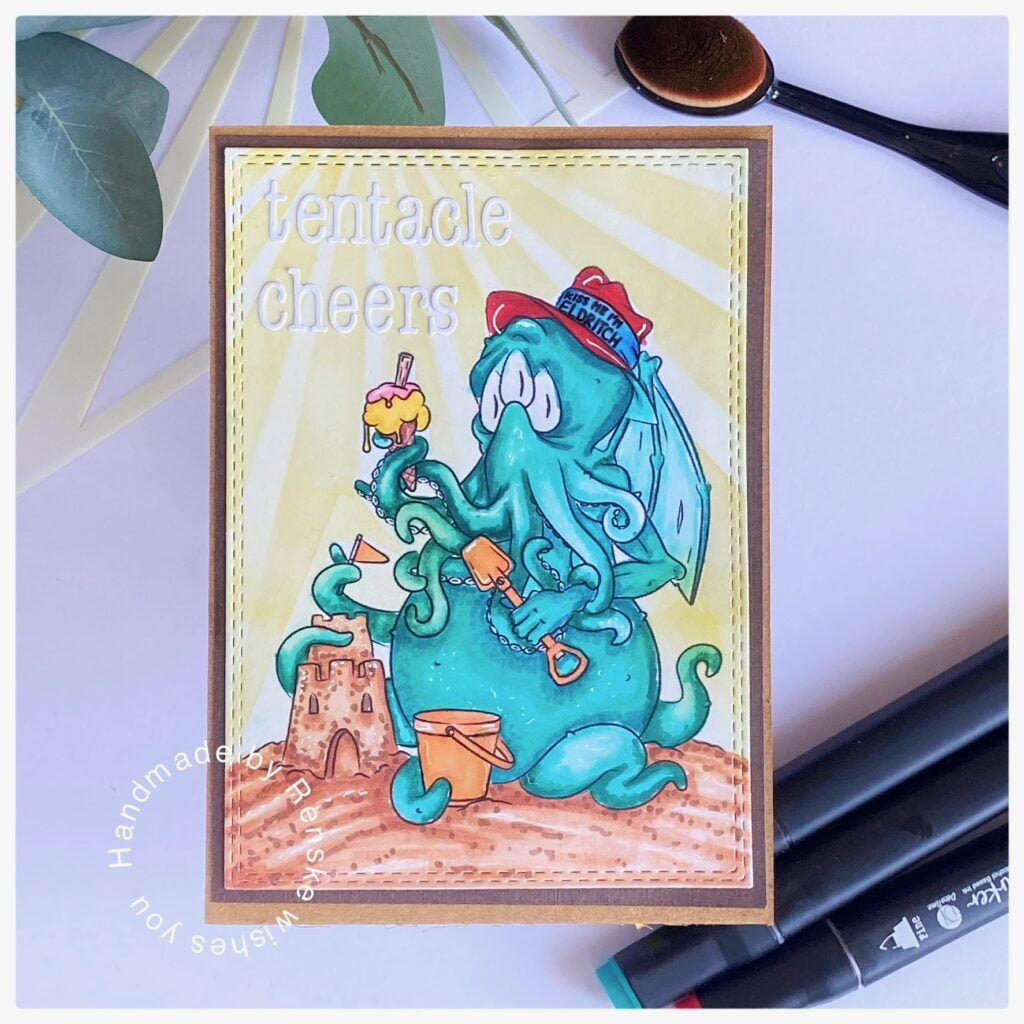
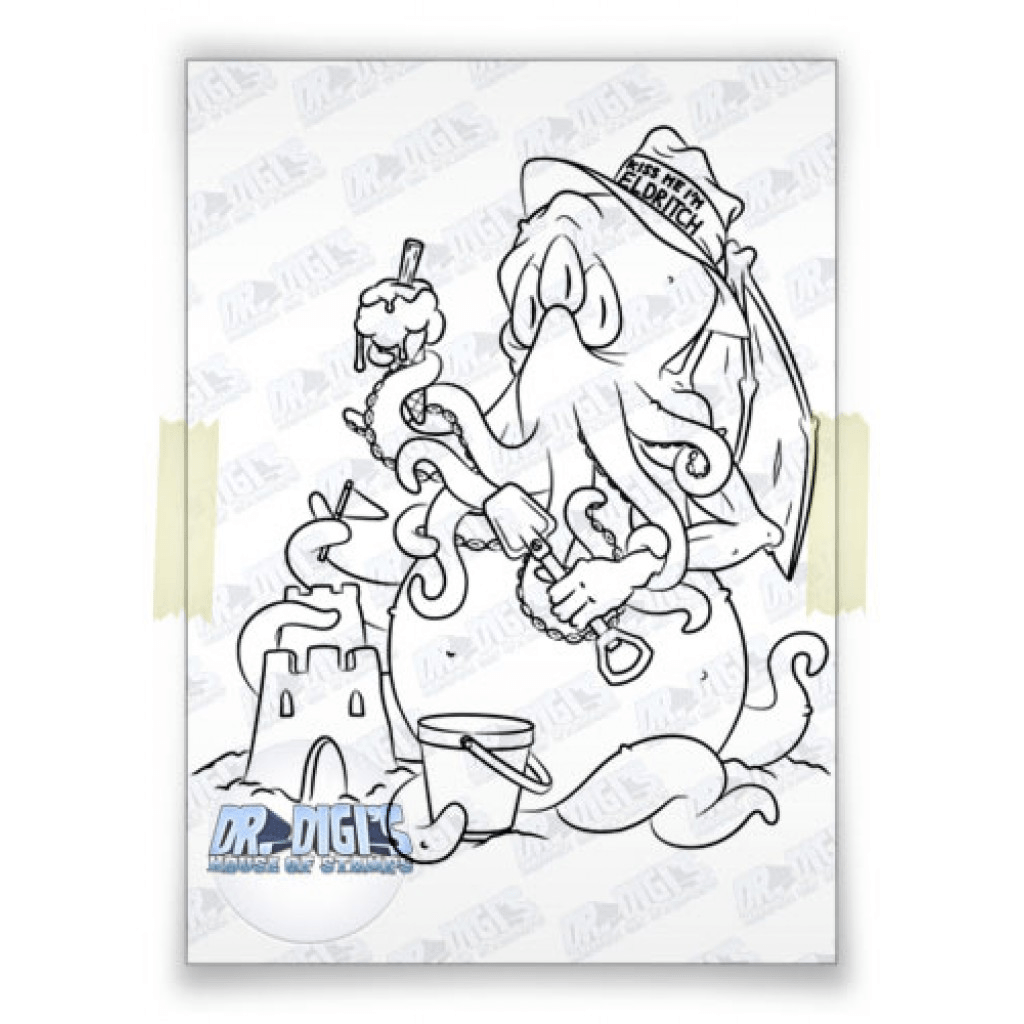
Today, I am delighted to share my design team’s inspiration for the CRAFT challenge blog! My creative journey revolves around the beautiful digital stamp “Cthulhu by the Seaside”, sponsored by the fabulous Dr Digi’s House of Stamps.
Our theme for this challenge? We will be working on the theme of summer. So grab your crafting gear and join me on this delightful card journey. Together, we’ll get to work making this funny octopus card that’s perfect for summer.
This challenge is also sponsored again. This time our generous sponsor is Dr Digi’s House of Stamps.

Printing the Digital Stamp Cthulhul by the seaside on DCP Paper
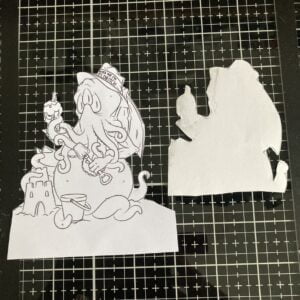
The first step is to print the charming digital stamp “Cthulhu by the seaside” on DCP paper. I thought carefully about the layout of the card so that I could die-cut it effortlessly with a rectangular die-cut of 10 by 14 centimetres. This preparation forms the basis for a perfectly sized panel that becomes the centrepiece of our beautiful card. I printed the image two times. One for the card and the other one I use to make a mask for the digital stamp.
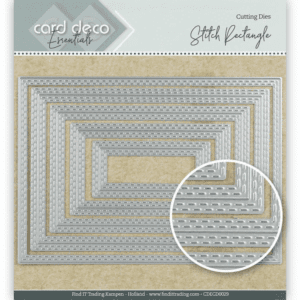
After printing the digital stamp, you can die-cut the digital stamp out with the rectangle stitched die.
Creating the Beachy Background: Sun-Kissed Stenciling with masking technique.
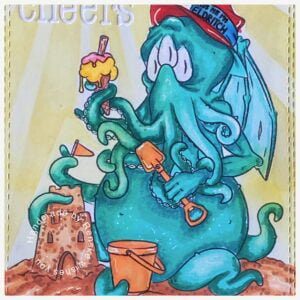
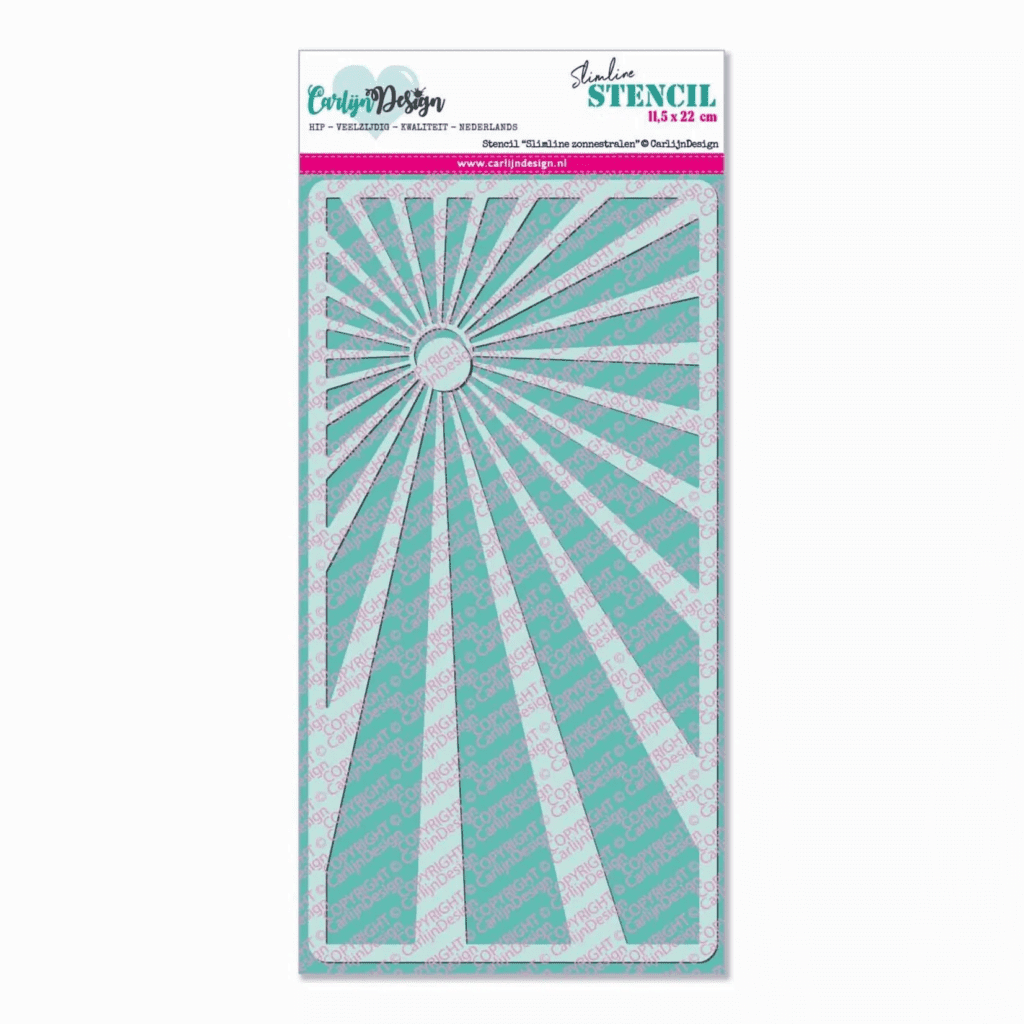
To create a beautiful sunny background, we will use the sunburst template and vibrant ink colours. We are going to apply the background to the panel on which the digital stamp is printed. Because to do so without the image getting ink on itself, it is necessary to mask the image.
To do this, use the second printed image that is the same size as the digital stamp on the panel. Cut out this image. Now you can apply the outer lines of this digital stamp to the masking paper. Cut these out and you have your perfect mask for your digital stamp. Stick this exactly onto your digital stamp.

Now you can place the stencil on your panel and apply the sunrays with the different colours of yellow ink.
Now comes the satisfying part, namely removing the mask from your digital stamp. Now you have beautiful sun rays in the background, without the image getting ink on itself.
Colouring the Octopus: Charming colour combinations.
Now that we have our charming digital stamp “Cthulhu by the shore”, we are going to bring this quirky octopus to life with colour! I carefully chose a combination of Twinmarkers to make our octopus friend shine:
- Octopus body: Teal Blue (184), Cool Mint (181), Aqua Mint (179)
- Tentacles: Teal Green (60), Aqua mint (179), Cool shadow (178)
- Hat: Cardinal (244), English red (249), burgundy (247).
- Sandcastle and glaze on the hat: Clay (116), Rose Beige (97), Sand (107), and Leather (113).
- Bucket and scoop: Orange (23), Dark Yellow (31), and Deep Yellow (32).
- Ice cream yellow parts: Lemon Yellow (35), and Pastel Lemon (39).
- Ice cream pink parts: Rose Pink (08), Pale Pink (09) and Pastel Pink (17).
With these carefully chosen colour combinations, our octopus card comes to life. Let’s add the details to make the card shine.
Adding Playful Elements and Enchanting Highlights with paper glaze, glitter and gel pen.
No summer beach scene is complete without sandcastles, ice cream and sparkling sunbeams! Let’s give our card the finishing touch by adding a touch of magic to these elements:
Sandcastle: I used a white gel pen to add some white dots to the sandcastle, making it just a little more interesting.
Ice cream and band on the hat: Using paper glaze, I gave the strawberry ice cream and band on the hat a delectable sheen. It gives a delicious effect that is perfect for a summer treat.
Bucket and shovel: A little paper glaze was also applied to the bucket and shovel to make them look more realistic, as if they were fresh from the beach!
Sparkling sunbeams: Let’s not forget the sparkling sunbeams! I used a glitter pen to add a magical shimmer to the sunlit background, making our card really sparkle and shine.
Enchanting highlights: To give our octopus extra personality, I added white dots and highlights with a white gel pen. These little details really bring the octopus to life and give it that endearing charm we all love.
Let’s move on to the final steps.
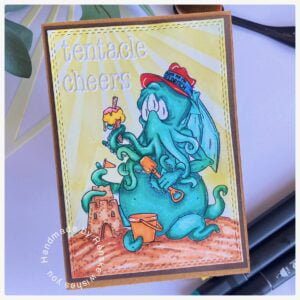
Assembling Our Octopus card: A Card Worth Cherishing
Now that all the creative elements have come together, it’s time to put our card together! I would like to have a dark brown border around my octopus panel. I use dark brown paper for this. We glue this together. Then we glue the panel onto a craft card base of 10.5 centimetres by 15 centimetres.
Adding the Finishing Touch: A Sentiment from the Heart
No card is complete without a nice sentiment! For this card, I wanted a sentiment to match the digital stamp. I decided to make the text Tentacle Cheers.
For this, I used my alphabet punch. I punched all the letters out of white paper. I decided to place the letters on the sunburst section.
To get the letters nice and straight on the card, I used my T ruler and placed the letters on it. I used my tweezers to hold the letters so that I could carefully put glue on them and carefully place them on the card.
The sentiment adds a bit of warmth and humour to our summer-themed card and perfectly complements the charm of our beach octopus. It’s a wonderful way to convey our sunny wishes to the lucky recipient!
Join the Challenge and Share Your Creativity
As our creative adventure comes to an end, I invite you all to join the CRAFT challenge blog! Make your own octopus card or card with a summer theme and submit it to share in this fun, creative challenge.
The theme of the challenge is “Summer”, so let your creativity run wild with a touch of sunshine and beach fun. Whether you are a seasoned crafter or just starting on this crafting journey, we welcome everyone to join us in spreading inspiration and creativity.
Let’s Sail on More Creative Adventures
With hearts full of joy and creativity, we have reached the end of our crafting journey! I hope this summer-inspired octopus card has brought a smile to your face and inspired you to get started with the summer theme too.
I would love to hear what you think and your versions of the summer-inspired octopus card.
Happy Crafting!
Please note that some of the links in this blog post are affiliate links, which means I may earn a small commission if you click on the link and make a purchase. This comes at no additional cost to you and helps support the work I do in bringing you creative inspiration and content. I only recommend products that I personally use and love. Thank you for your support!
Products with affiliate links
Blending brush 04 Nellie Snellen

Alfabeth typewriter little letters craftemotions

White gelly Roll 08


Products with no affiliate links:
I would like to enter my card in the following challenges:
- Fab n’ Funky Challenges: Summer fun
- Krafty Chicks Challenge: All occasions
- Allsorts challenge blog: Anything but square
- Kaartjes Inspiratie challenges: Zomerse kaart
Fun and Fabulous, what a great image! Thanks for sharing at Fab’n’ Funky.
Thank you so much
Fantastic summer card! Quite the fun process and worth the trouble in creating a beautiful background for the sea creature. Thanks for joining us at Krafty Chicks Challenge this past week for our Stamp Act theme :) Hope you join us again soon.
Diane – DT
Thank you so much for your lovely comment
A fun image and card, love the stenciling too. Thanks for joining us at Allsorts this time.
Lorraine
Wow, what amazing colouring on this fun card!! Thank you for joining in at Allsorts this fortnight. Sarah DT
Fab and fun card!
Thank you for sharing at Allsorts;-))m
Thank you
What a fun and colourful fellow on the beach, many thanks for sharing with us at Allsorts challenge.
B x
Thank you
Oh MY This is so FUN & Gorgeous, you SHOULD Really share on the Color Hues Challenge- Why not? Your main colors are Teal & Orange, it is such a SUPER card!!!! I love this FUN card!!!
Oh thank you so much. I will check this challenge out.
Marvelous stenciling and mask technique! I had not thought to do that with a digital image and it’s brilliant of course. A very playful, fun scene. Thank you so much for joining the challenge at Allsorts.
Ah thank you so much. I hope you will try it too. ❤️