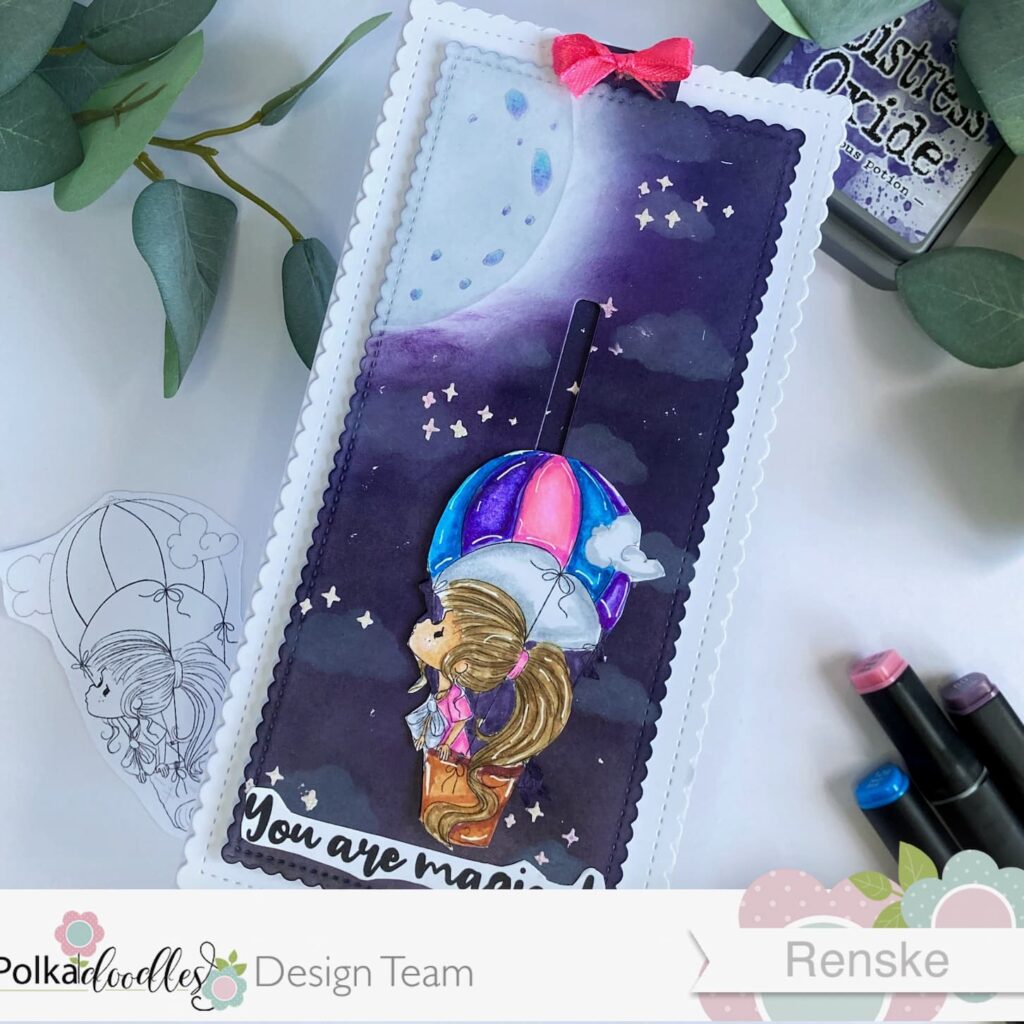
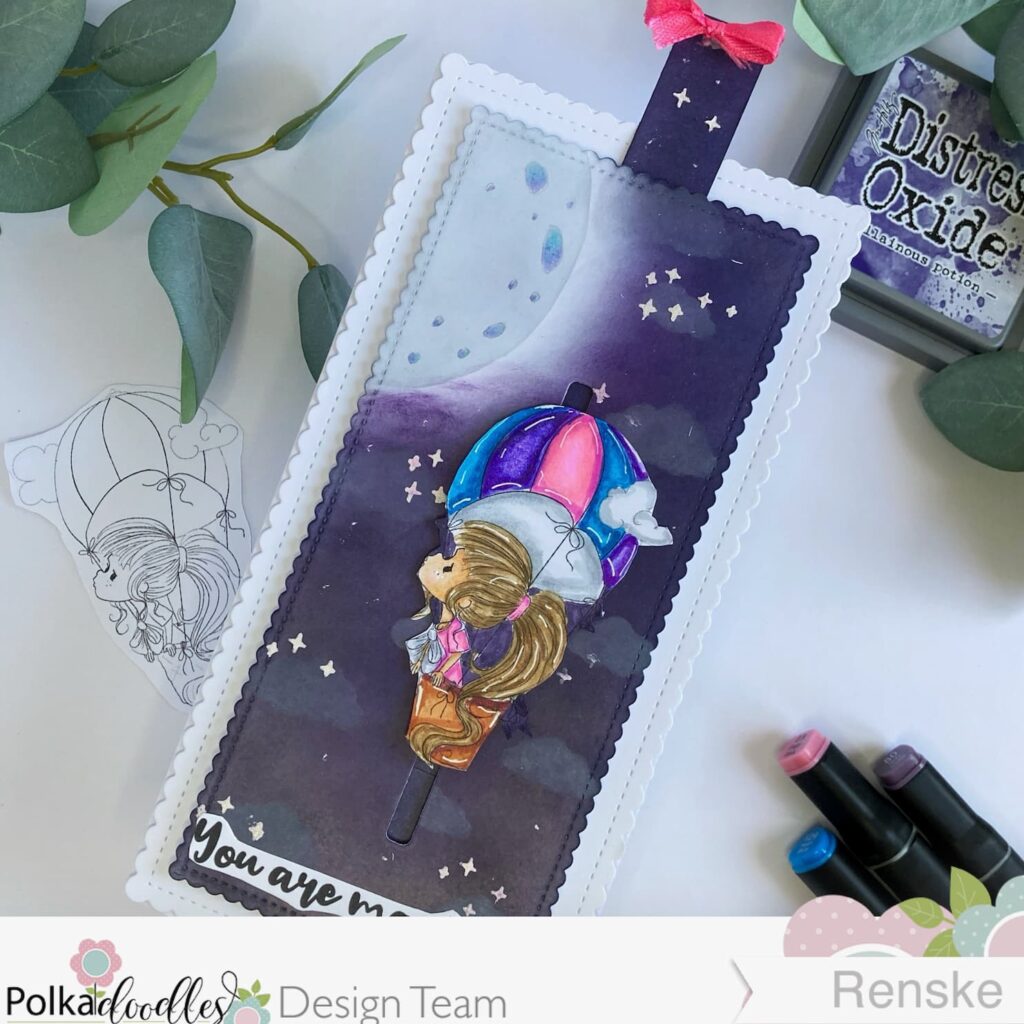
Get ready to learn how to make an enchanting Hot Air Balloon slider card. This interactive card adds a delightful and magical touch to your handmade creations.
Adding movement and surprise elements, slider cards are visually stunning and fun to make and receive. In this slider card tutorial, we will use high-quality products from Polkadoodles. These include the “Sky is the Limit” digital stamp and the “Panda Noodles” sentiment set. Our goal is to create a hot air balloon slider card for the new challenge on the Polkadoodles Challenge Blog.
This guide will cover everything from choosing and colouring your digital stamp. It will also help you master the slider mechanism. These steps aim to improve your card-making skills. At the end of the tutorial, you will be ready to craft interactive masterpieces and impress your friends and family.
Whether you’re an experienced card maker or just starting, this tutorial is designed for you. Gather your supplies. Get ready to create magic in the night sky with your hot air balloon slider card. We can’t wait to see your beautiful creations!
- Materials and Tools Needed for this slider card.
- Step-by-step instructions for this slider card tutorial
- Let's Get Creative Together
- Polkadoodles products in the spotlight
- I would like to enter my card in the following challenges:
Materials and Tools Needed for this slider card.
Here are all the materials and tools you need for this slider card tutorial. I will also provide alternatives for some materials. This way, you can start crafting even if you don’t have the exact items.
- Digital stamp Sky is the Limit from Polkadoodles: This delightful digital stamp features a whimsical hot air balloon. It includes a charming girl looking upwards. This makes it perfect for our magical slider card. You can get it here.
- Panda Noodles sentiment set from Polkadoodles: We’ll use the “You are magical” sentiment. It adds a heartfelt touch to our card. You can get it here.
- Alcohol markers: Essential for colouring the digital stamp. Choose your favourite brand and colours. If you don’t have alcohol markers, use coloured pencils, watercolour markers, or any other colouring medium you prefer.
- Distress ink: Black Soot, Chipped Sapphire, Weathered Wood. If you don’t have these exact colours, try using similar shades from other brands or any dark inks you have.
- Distress Oxide: Villainous Potion. Again, any similar colour will work if you don’t have this specific one.
- Coloured pencils: To add details to the moon.
- Acetate for stencils: Useful for creating custom stencils, like our moon stencil. If you don’t have acetate, you can use a sturdy plastic sheet or even a piece of cardstock.
- Crafting mousse: For adding texture and dimension with the stars stencil. An alternative is using embossing paste or any texture paste you have.
- Slimline dies: To cut the slimline card panel and other elements. If you don’t have slimline dies, you can manually cut your paper to the desired size. Use a ruler and a craft knife or paper cutter.
- Basic tools:
- Blending brushes: For smoothly applying ink. Makeup brushes or sponges can be used as alternatives.
- White gel pen: For adding highlights to your coloured images. A white paint pen or a fine brush with white acrylic paint can also work.
- Foam tape: To create dimension and enable the slider mechanism. You can use foam squares or layers of cardstock glued together as a substitute.
- Scissors: For fussy cutting the stamped images. Any sharp, fine-tipped scissors will do.
- Die-cutting machine: Necessary for using the slimline dies and creating the slider slot. If you don’t have a die-cutting machine, you can carefully cut slots with a craft knife.
- Ribbon: For decorating the pull tab of the slider. A ribbon, twine, or even a strip of paper can be used instead.
Gather your supplies, and let’s bring this magical hot air balloon slider card to life!
Step-by-step instructions for this slider card tutorial
We have gathered all our materials and tools. Now, it’s time to start the step-by-step process of creating this enchanting hot air balloon slider card. Follow these detailed instructions to bring your card to life, and remember to have fun with each step! Let’s get started!
Step 1: Printing and Coloring the Digital Stamp
In this step, we will print and colour the digital stamp, Miss Lily Hawaiian.
Choosing the Right Paper for Printing
To ensure that the digital stamp prints clearly, select a high-quality paper. The paper should be suitable for your colouring medium. For this tutorial, we’re using DCP paper, which works perfectly with alcohol markers. If you’re using a different medium, such as coloured pencils or watercolour, consider using paper that complements those materials.
Colouring Techniques Using Alcohol Markers
For colouring, I used the following colour combinations from my alcohol markers:
- Skin: Use Tanned Skin, Peachy Blush, Salmon Pink, and Pale Cream to create a smooth, natural-looking skin tone.
- Hair: Blend Buttercup Yellow, Brown Grey, and Walnut for rich, dimensional hair.
- Hot Air Balloon Basket: Combine Sand, Rose Beige, and Natural Oak to give the basket a warm, textured appearance.
- Girl’s Dress: Mix Vivid Reddish Purple, Rose Pink, Pale Pink, and Pastel Pink for a vibrant and playful dress.
- Bow: Apply Cool Grey 4, Cool Grey 3, and Cool Grey 1 for a subtle yet stylish bow.
- Blue Stripes on Balloon: Use Dark Sky, Indian Blue, Cerulean Blue, and Neon Blue for a striking blue effect.
- Purple Stripes on Balloon: Blend Dark Violet, Grey Violet, and Pale Lilac for a soft, magical purple hue.
- Pink Stripe on Balloon: Use the colours from the dress. These include Vivid Reddish Purple, Rose Pink, Pale Pink, and Pastel Pink. This ensures a cohesive look.
- Inside of the Balloon: Use Cool Grey 4, Cool Grey 3, and Cool Grey 1 to add depth and dimension.
Adding Highlights with a White Gel Pen
After colouring, use a white gel pen to add highlights and details to your image. Apply highlights to areas where light would naturally hit. Focus on the edges of the balloon. Highlight the girl’s hair and the basket’s woven texture. This step brings extra dimension and a professional finish to your coloured stamp.
Once your digital stamp is coloured and highlighted, carefully cut it out with sharp scissors and set it aside. You’re now ready to move on to the next step and start creating the background for your card!
Step 2: Creating the Night Sky Background
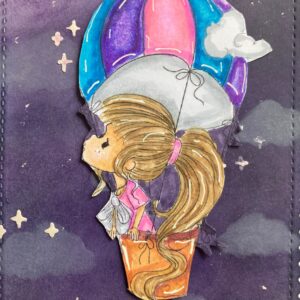
I imagined her gazing at the moon in the night sky. I thought of this when I saw the girl in the hot air balloon looking up. I was inspired by a tutorial from Nicole Spohr. I wanted to create a night sky with a moon, using stencils and Distress Oxides. I didn’t have a moon stencil. I also didn’t have the exact inks used in the tutorial. I improvised with the materials I had.
You can find her tutorial on her Friday Live on YouTube here.
Die-cutting the background panel and making an acetate stencil for the moon.
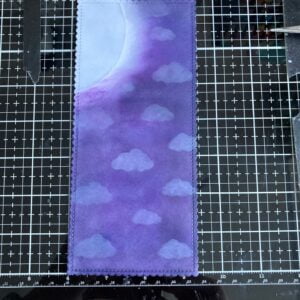
To create a slimline card, I first die-cut a panel from white cardstock, measuring 8.5 cm wide and 19 cm long. For the moon stencil, I used acetate with a circular cut-out.
Applying the Inks
- Creating the Moon:
- Start by placing the acetate moon stencil on your panel. I made the moon in the top left corner of the panel, so I only put a part of the circle cut-out of the acetate.
- Use Weathered Wood Distress Ink to colour inside the stencil, forming the moon.
- After colouring, remove the stencil and lightly blend the Weathered Wood ink around the moon’s edges to give it a glowing effect.
- Inking the Night Sky:
- Apply Weathered Wood Distress Ink to the panel, leaving a slight border around the moon.
- Layer Chipped Sapphire Distress Ink over the panel, blending carefully near the moon to create a gradient effect.
- Add Villainous Potion Distress Oxide over the Chipped Sapphire, blending seamlessly.
- Finally, use Black Soot Distress Ink on the outer edges for a deep night sky look. The combination of these colours creates a beautiful, mystical atmosphere.
Adding Clouds and Stars
- Creating Clouds:
- Use a cloud stencil and white ink to add soft clouds to your night sky.
- If you don’t have a clean blending brush for white ink, apply the ink to an acrylic block. Then, use a small brush to dab the ink through the stencil.
- Adding Stars:
- Position a star stencil over the panel and apply white crafting mousse through the stencil to create textured stars.
- Spread the mousse in multiple areas to create a starry sky effect.
- Allow the mousse to dry completely.
Final Touches
- Enhancing the Moon:
- Draw some craters and details on the moon using coloured pencils in blue and purple. Gently blend the colours for a realistic effect.
- Gently blend the colours for a realistic effect.
With your background complete, you have a beautiful night sky setting for your hot air balloon slider card. Now you’re ready to move on to the next steps and assemble your card!
Step 3: Building the Slider Mechanism
Here are the steps to build the sliding mechanism for the hot air balloon card:
Creating the Slot for the Slider
- Cutting the Slot:
- Select a die that can cut a slot into your background panel. I used a die meant for a birdhouse post. It was perfect for creating the slot in our card.
- Determine where you want the bottom of the slot to start, you’ll need space for a sentiment below.
- Lightly tape the die in place. Run it through a die-cutting machine to cut the first section of the slot.
- Move the die slightly upward and repeat the process until you get the desired slot length.
- Creating the Strip:
- Cut a strip of cardstock 2 centimetres wide. This strip will be the mechanism that moves the hot air balloon.
- Color the strip using the same inks as your background. Use the same techniques to ensure it blends seamlessly with the rest of the card.
- Add a few stars to the strip using the same crafting mousse and star stencil used for the background
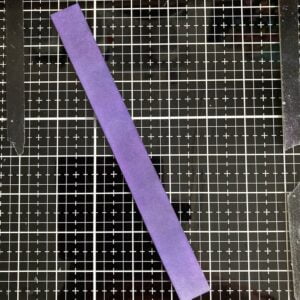
- Making the Slider Mechanism and Assembling the Mechanism
- Prepare a backing panel to hide the mechanics by cutting a piece of cardstock to 8 centimetres by 19 centimetres.
- Mark the spot where the backing will show through the slot. Pull up the strip. Colour this section to match the night sky background.
- Attach foam tape to the back of the background panel. Leave space for the strip to move freely. Then attach the backing panel to the background panel, with the strip sandwiched between them.
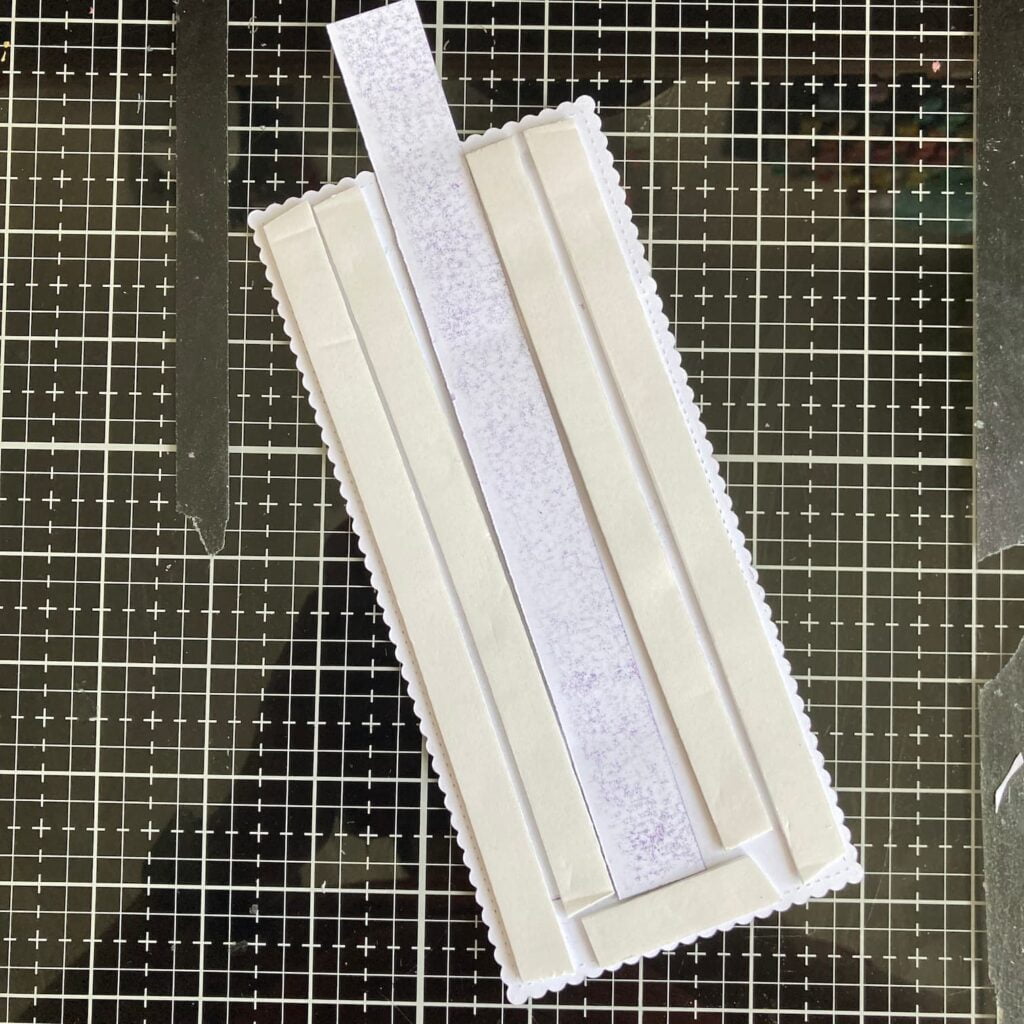
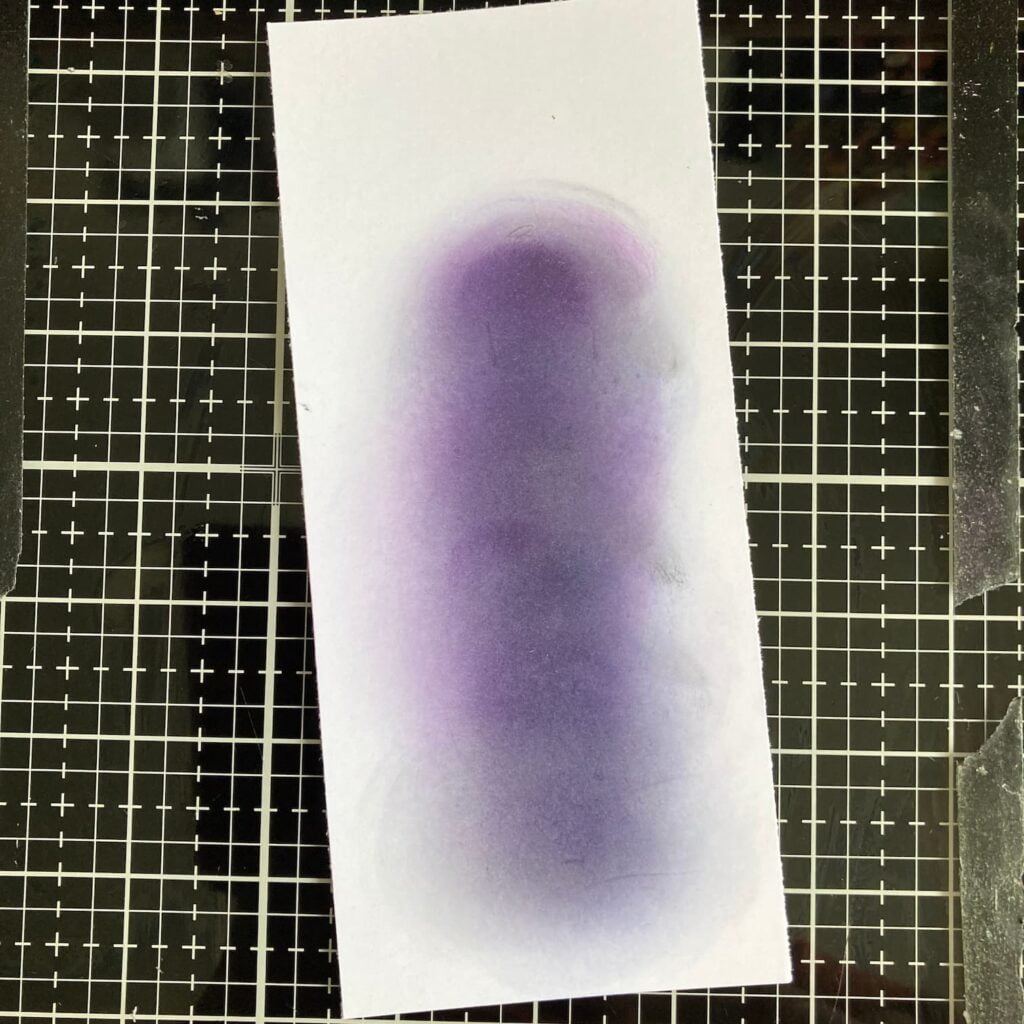
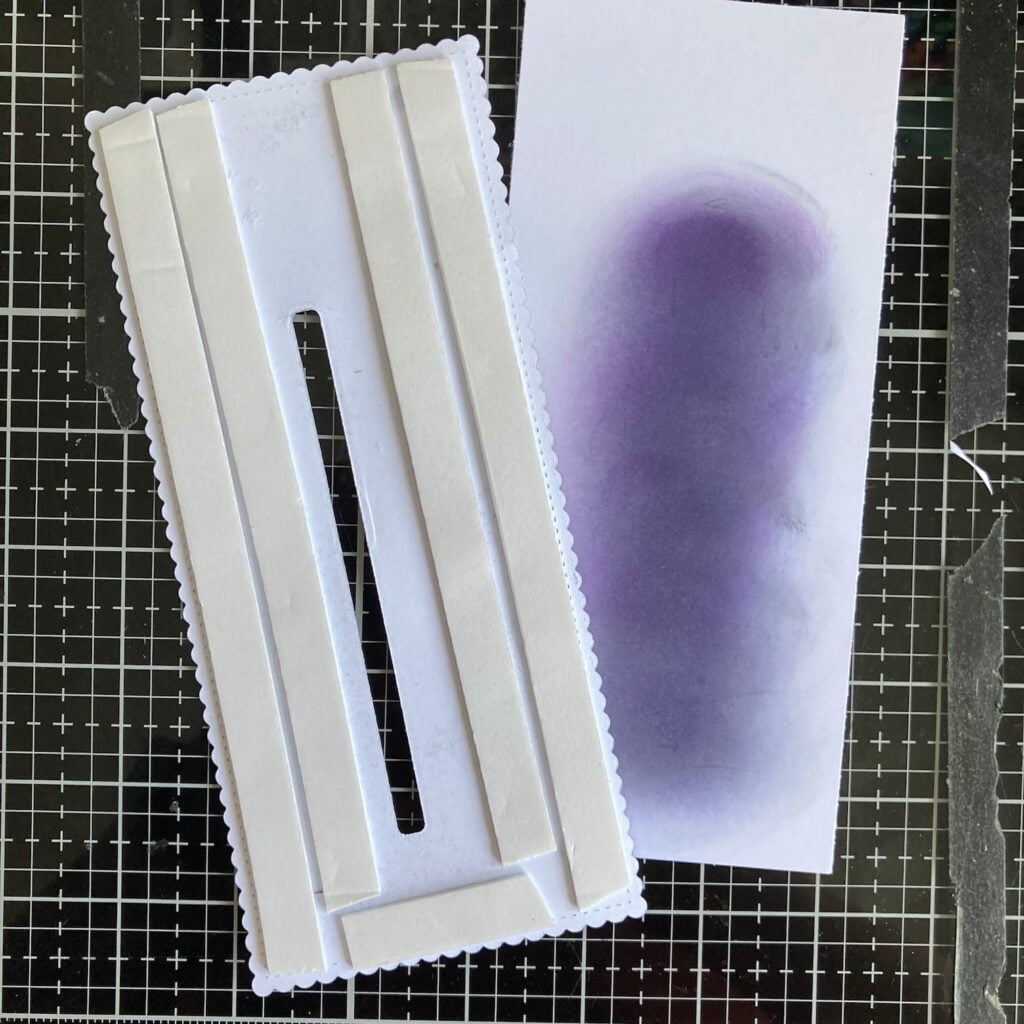
- Adding the Hot Air Balloon:
- Place thin foam tape at the bottom of the slot on the background panel.
- Attach the coloured hot air balloon image to the foam tape. Ensure it’s positioned to slide smoothly along the slot when the strip is pulled.
Once the slider mechanism is in place, your hot air balloon will effortlessly glide up and down. This movement adds a delightful interactive element to your card. Finally, you can add finishing touches and sentiments to finish your magical creation!
Step 4: Finishing Touches
Then it is now time for the final step, namely bringing all the elements of the card together.
Adding a Sentiment and Embellishments
- Adding the Sentiment:
- Choose a sentiment to place below the hot air balloon image. For this card, I selected the sentiment “You are magical.”
- Adhere the sentiment underneath the basket of the hot air balloon to create a cohesive design.
- Adding Embellishments:
- Attach a small pink bow at the top of the slider strip. This adds a charming finishing touch. It also provides a visual cue for the slider mechanism.
Assembling the Card Layers and Adhering to the Card Base
- Creating the Card Base:
- Cut a piece of cardstock to create your card base. A slimline card is typically 21 centimetres by 21 centimetres. Fold it in half to create a card that measures 21 centimetres by 10.5 centimetres.
- Score the cardstock in the middle and fold it to form a clean, crisp card base.
- Assembling the Card:
- Carefully centre the completed panel onto your card base. Ensure the edges are aligned and press down firmly to adhere to it securely.
By following these steps, your hot air balloon slider card will come to life. It will include interactive elements. You can also add personalized touches. Now, enjoy the satisfaction of your beautifully crafted card and share the magic with someone special!
Let’s Get Creative Together
In this tutorial, you have learned different techniques. First, we printed and coloured the “Sky is the Limit” digital stamp using alcohol markers. We created a beautiful night sky with Distress inks and oxides. We made our stencil from acetate to make the moon. And of course, you learned how to make a slider card. You can use it for any card you want to create.
The unique elements of this hot air balloon slider card make it truly special. The whimsical and interactive nature of the slider card brings joy to both the creator and the recipient. The creative use of stencils, distress inks, and the delightful digital stamp from Polkadoodles adds a magical touch. The dimensional elements created with foam tape add depth to the card. The seamless blend of colours in the night sky elevates it to a professional level.
Join the Polkadoodles Challenge
This card was specially created for the new challenge on the Polkadoodles challenge blog. The challenge encourages crafters to showcase their creativity using any product they like. It’s a fantastic opportunity to join a community of like-minded card makers, get inspired, and maybe even win prizes! Click the button below to join the challenge and start creating.
More Slimline Slider Card Inspiration
Explore more creative ideas and tutorials on making slimline slider cards. These projects offer additional techniques and designs to keep your crafting journey exciting and innovative. Click the links below to discover more inspiring projects.
Follow these steps to enhance your card-making skills. Join the Polkadoodles challenge to connect with a vibrant community of crafters. Happy crafting!
Polkadoodles products in the spotlight
Bella Bear Gift Fuzzy Pufs
Noodle Panda-themed messages

I would like to enter my card in the following challenges:
- Through The Purple Haze Challenges: Anything goes
- Craft Rocket Challenges: No design paper
- Lil Patch of Crafty Friends Challenge …: Anything goes
- A Perfect Time To Craft Open Challenge: Anything goes
- Crafts Galore Encore Challenge Blog; Anything goes
- Let’s Craft and Create: Anything goes + add ribbon


