
Hello, fellow crafting enthusiasts!
Welcome to a world of creativity and festive cheer! In this guide, I am thrilled to share a treasure trove of inspiration for crafting delightful holiday greetings. Today, we will be exploring Simple Christmas Card Ideas – effortless yet captivating designs perfect for the season.
Join me in uncovering the magic behind crafting beautiful cards without the fuss. From coordinating paper blocks to easy-to-follow steps, you will discover how to create stunning cards in no time. Whether you are a beginner or a seasoned crafter, these ideas will spark your imagination and bring joy to your card-making journey.
Discovering the Charm of Coordinated Paper Blocks
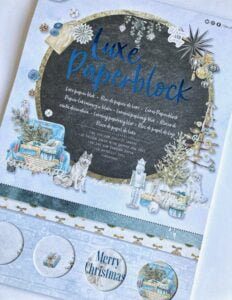
Let us dive into the enchanting world of coordinated paper blocks before we embark on our creative journey. These paper blocks are a great solution to make stunning cards effortlessly without the need to search for matching pictures and paper.
Coordinated paper blocks come with everything you need, including paper with matching pictures and texts. This makes it easy and quick to create beautiful cards. These blocks have different patterned papers that are coordinated with each other, making it easy for you to match different patterned papers. This is perfect when the patterned paper is coordinating the illustrations as well.
Crafting heartfelt messages for your loved ones becomes a breeze with pre-printed sentiments that beautifully convey this season, adding that personal touch to your cards. These blocks are available in different brands, and Luxe Paperblock from Decotimecrafts is one of my favourites. For my Dutch followers, this block can be bought at ActionNL. For foreign followers, there are a lot of other brands that make similar paper blocks. These blocks offer a diverse selection to let your creativity run wild, whether it is variations in designs, textures, or colour schemes.
These paper blocks are ideal for making cards quickly and easily. Although they are perfect for making Christmas cards, there are also blocks you can use for any occasion. So, let us get to work and make a beautiful Christmas card.
Essential Materials for Crafting this Beautiful Christmas Card
Before we delve into the crafting process, let us ensure we have all the necessary materials at our disposal. The best part about creating this card is that you do not need a lot of materials. Here is what you will need:
- Coordinated Paper Block: This is the most important item! Choose a paper block that suits your style and preferences. Whether it is Decotimecrafts or another brand, ensure that it offers a wide range of illustrations, papers, and sentiments.
- Sturdy Card Bases: Choose card bases of the desired size and colour to serve as the foundation for your cards. You can either start with a ready-made card base or create one yourself. For this card, the base card is 10.5 centimetres by 14.8 centimetres. In the step-by-step tutorial, I will explain how to make your card base yourself.
- Scissors and/or Paper Trimmer: These are essential tools for cutting out illustrations and papers.
- Adhesive: Opt for glue or double-sided tape to securely attach the layers of your card.
- Foam Tape: These add depth and dimension to your designs, elevating the visual appeal of your cards.
Now that we have gathered all the necessary supplies, let us go on creating our charming Christmas card!
Crafting Effortlessly this Beautiful Christmas Card
Now that we have gathered our crafting gear, we dive into the delightful process of making this beautiful but simple Christmas card.
Step 1: Creating the card base
To start, you will need white paper measuring 21 centimetres by 14.8 centimetres. Score it at 10.5 centimetres and fold it in half. This will create a card base measuring 10.5 centimetres by 14.8 centimetres.
Step 2: Create the paper layers for your card.
Now it is time to create the paper layers for your card. On my card base, I used two layers of paper. The first layer is shiny blue paper measuring 10 centimetres by 14.3 centimetres. On top of that, I added a layer of white paper measuring 9.5 centimetres by 13.8 centimetres. Stick these layers together and attach them to your card base.
Step 3: Choosing the illustrations
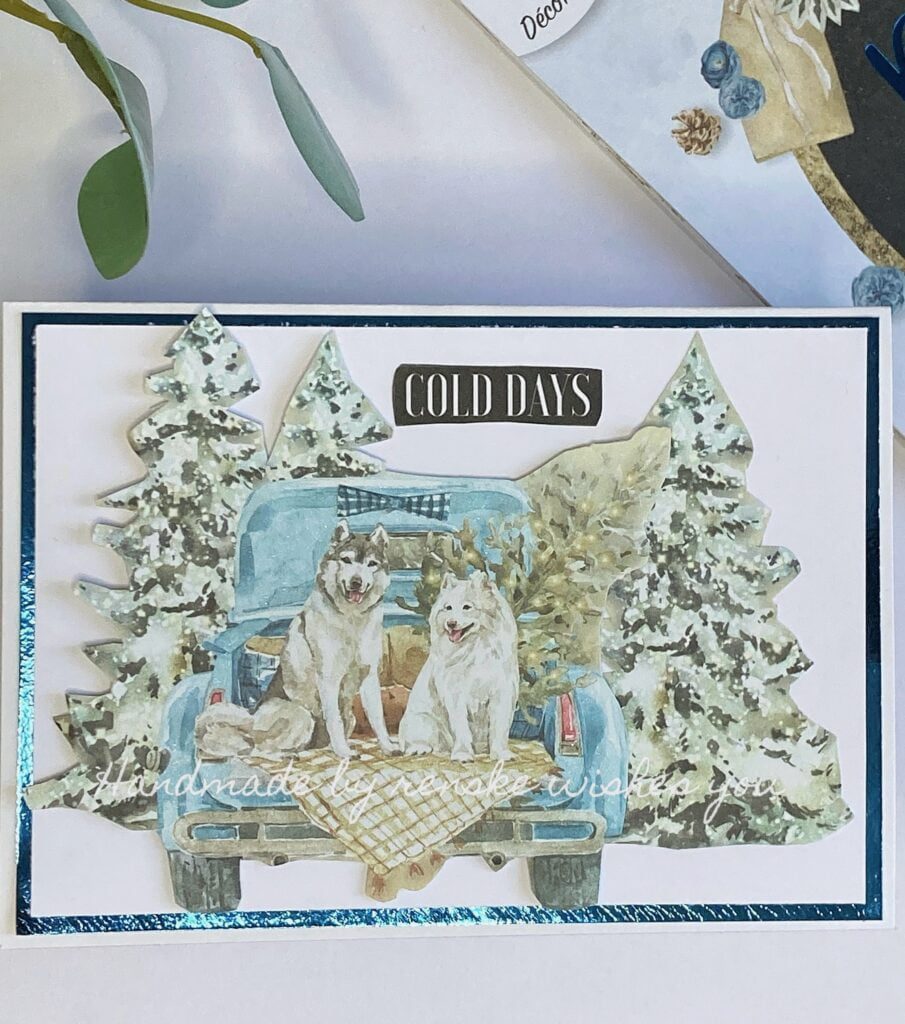
In these blocks, you have lots of choices for using images. Choose the illustrations that you like and that inspire you. I decided to start with the picture of a car with two dogs.
Step 4: Adding extra sparkle
Because our card is simple, it is nice to give the picture a little extra. I chose to add glitter to the blue car with my Aqua shimmer pen. I went over the blue part of the car with this pen so that it had a nice glittery effect.
Step 5: Assembling the Design
It is time to bring your card to life! The handy thing about these blocks is that you can press out the pictures. But the illustrations often still have a border around them, and you can sometimes see parts where the images have been attached. To make the image look more realistic, I cut off the edge.
I used the following pictures from the paper block:
- The car with the dogs and in the background two trees.
- A loose tree.
I glued the loose tree to the card base on the right side of the card. I attached the car and the two trees with foam tape, making sure the part of the car slightly overlaps the previously stuck-up tree.
Step 6: Adding the Sentiment
Give your card a heartfelt touch by incorporating a sentiment from your paper block. For this card, I chose the text “Cold Days”. I placed this sentiment between the trees.

Exploring Diverse Simple Christmas Card Ideas
In this section, I will show you more simple card ideas also made with a similar paper block as today. Hopefully, this will help you get even more ideas.
Create Your Own Magic: Easy DIY Holiday Cards and Universal Crafting Techniques
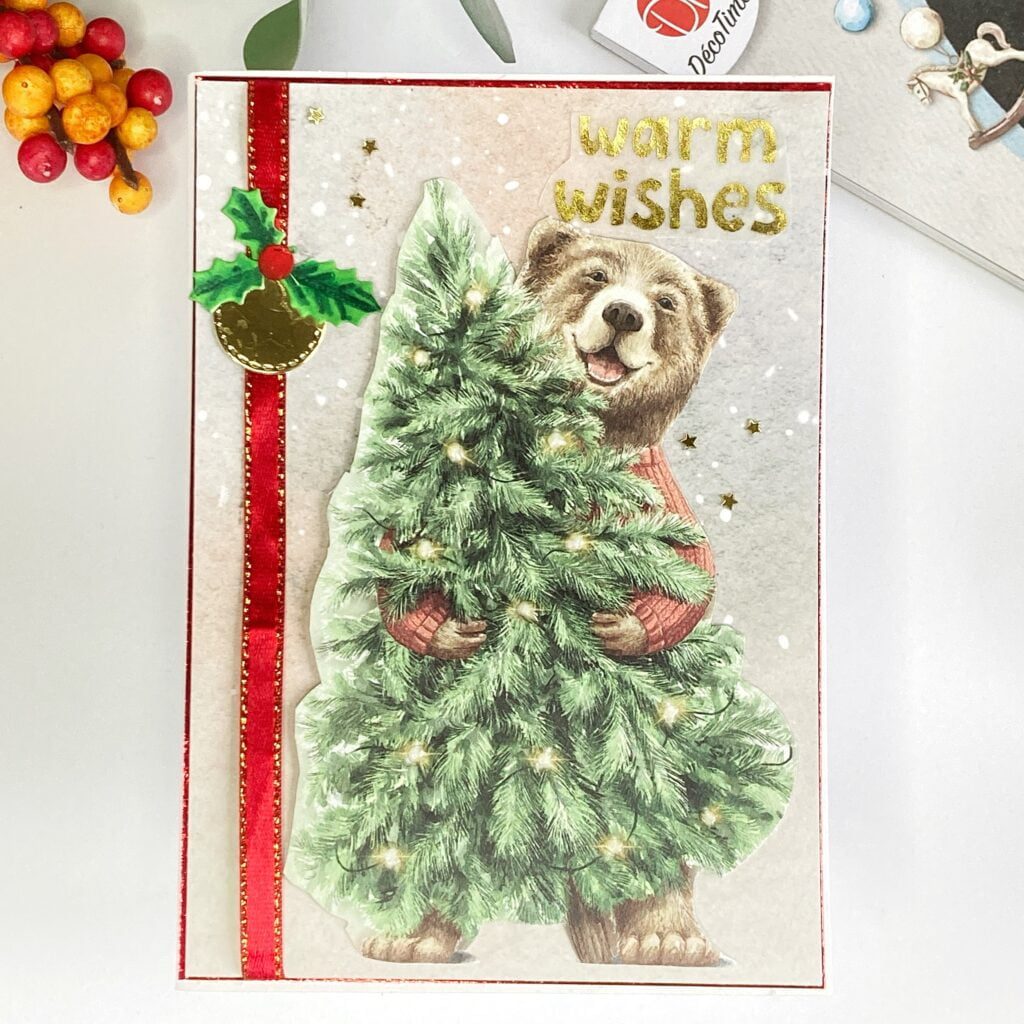
I also made this card with a luxury paperblock from Decotimecrafts. This time I used glossy highlights.

Bunny Christmas Card: Step by Step crafting guide
This card was made with another Paperblock from Decotimecrafts. This was also available in ActionNL stores this year. I have used more techniques for this card, but I can also inspire you on how you can create a beautiful card design by making your background yourself.
DIY Christmas Card: Quick and Easy Handmade Holiday Greetings
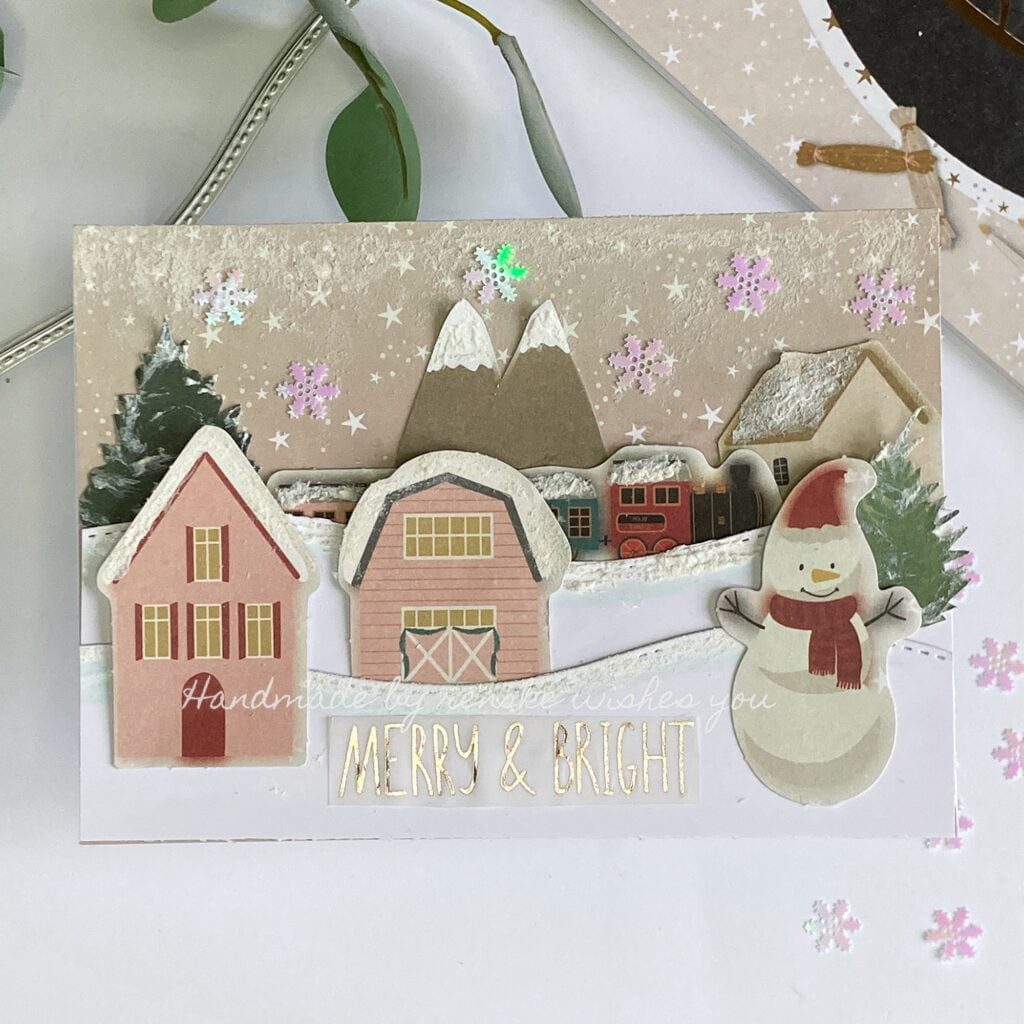
This card was made with another paper block from Decotimecrafts. This was also available in ActionNL stores this year. I added some extra texture to this card by using Deco snow.
I hope this has inspired you further to get started with these types of paper blocks.
Inspire, Create, Share, and More!
Thank you for joining me on this creative journey as we crafted this simple DIY Christmas card idea. I hope you have joined the process and feel inspired to create a handmade Christmas card yourself.
If you have any questions, need clarifications, or want to share your thoughts, I would love to hear from you.
Affiliate Disclosure: This blog post may contain affiliate links. This means I may earn a small commission if you purchase something through these links. This won’t cost you anything extra. If you choose to use these links, I truly appreciate your support as it helps me continue to create and share creative content. Thank you for your support!
Non-Affiliate Products I used:
- Luxe Paperblock from Decotimecrafts. You can buy this in the ActionNL stores.
- White card base, brand unknown.
- Sticky glue
- Paper trimmer
- Scissor
Affiliate products used:

Shop at Hobbyshoponline
I would like to enter my card in the following challenges
- Dream Valley Challenges: Occasions other than birthday
- Try it on Tuesday: Baby it is cold outside
- Unicorn Challenge Blog: Christmas
- Fab ‘n’ Funky Challenges: Blue Hues
- Crafty Catz: Anything goes
- My Time To Craft!: Got to be Christmas
- A Perfect Time To Craft Open Challenge: Anything goes
- Classic Design Challenge Blog: Anything goes
- Daisy Chain Challenges: Christmas/Winter
- Critter Crazy CHALLENGE BLOG: Anything goes + featured critter
Sorry I’m so late – I’ve been poorly. I do like this card and the scene you have created – there’s a very ‘masculine’ feel to it.
Thanks for sharing your card at the Dream Valley challenge.
Sharon – Dream Valley Challenge Designer
http://glittertastic.blogspot.com/ – Stop by and see me!!!
No problem. Thank you so much for your comment
A fantastic winter card, the dogs look so at home in the truck. Thank you for linking to our challenge at Try it on Tuesdays.
Yvonne
Thank you
Cold days, but a very cool card! ;-) Like the image!
Thanks for playing along with our Challenge at Critter Crazy and good luck!
Hugs and please come back soon!
Doris
Kleido’s BastelStüble
*Owner* Do-Al(l) Kreatives
*Owner*Critter Crazy Challenges
*DT* Sweet Sketch Wednesday 2
Thanks
I love those pups in the back of the truck Renske. I bet they are dogs who love the cold. This card is perfect for our challenge at TIOT. Thank you for joining us, and have a wonderful rest of your weekend. hugs-Erika
Thank you ❤️
A fantastic card. I love how you’ve played with the images to create the scene. Thanks for joining us at My Time To Craft. Hugs, María.
Thank you so much
A beautiful Christmas card using those lovely papers and images. Thank you for joining us at Fab ‘n’ Funky and at Crafty Catz Challenges.
Thank you