Hello everyone!
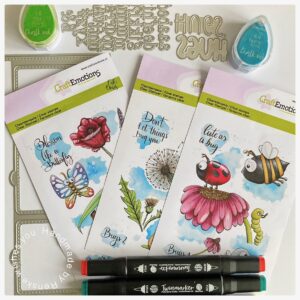
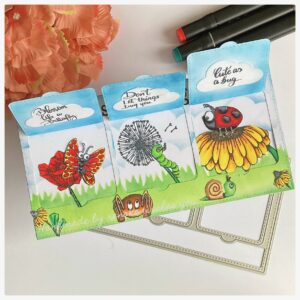
I made this sending bug hugs card a while ago and now it’s finally on my blog. I had the die for a while to make a Lift the Flap card. And besides, these bug stamps are perfect to combine it with this. Check out the rest of my post to see the inside of the flaps.
I will link all the products I used below.
Let’s get into it.
Measurements and products you need for this slimline card.
- The base of this slimline card measures 10,5 centimetres by 21 centimetres. To make the base yourself, you will need a piece of white cardstock measuring 21 centimetres by 21 centimetres. Score at 10,5 centimetres.
- A piece of white card stock measuring 10,5 centimetres by 21 centimetres.
- A piece of white card stock to die-cut the lift the flap piece from.
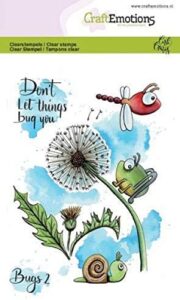
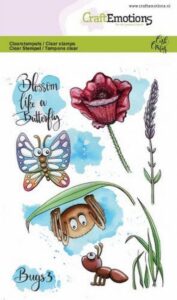
- Bugs clear stamps, but you can use any images/stamps you like.
- Grass and Cloud stencil.
- Ink. I used chalk ink.
- Black ink to stamp your images.
- Alcohol markers or another colour medium.
- Glue
- Dies to die-cut the letters.
- Cloud die.
- Black card stock.
- Red card stock.
- White card stock.

Making the background.
First, you need a piece of paper measuring 21 centimetres by 10.5 centimetres. You’ll need your two stencils. First, I applied the clouds on my panel. Then I made my grass with my grass stencil.
Now, you need the panel from which you will die-cut the flap. Before die-cutting, you need to make the background first. So, I do the same as the first panel.
I used the following colours:
- Cloud: Nautical Blue, Pastel Blue.
- Grass: Green Belt, The Hulk.
Now you can die-cut the flap panel. All you have to do now is ink the back of the flaps. I colored them with my blue ink.
Stamping the bug hugs and coloring them.
Now it’s time to stamp the images. I stamped the images on DCP paper and colored them with my alcohol markers.
- Big flower: Red Barn (245), Dark Yellow (31), Mustard (30) and Pastel Lemon (39).
- Lady bug and Red flower: Cardinal (244), English Red (249) and Burgundy (247).
- Dots and face of the lady bug: Black (120), Cool Grey 9 (CG9) and Cool Grey 7 (CG7).
- Bee: Black (120), Cool Grey 9 (CG9), Cool Grey 8 (CG8), Cool Grey 7 (CG7), Cool Grey 5 (CG5), Red Barn (245), Mustard (30), Dark Yellow (31) and Pastel Lemon (39).
- Caterpillar: Yellow Green (48), Weeds Green (162) Grass Green (47) and Vived Green (46).
- Butterfly and dragonfly: Dark Yellow (31), Pastel Lemon (39), Cardinal (244), Englishe Red (249), Burgundy (247) and Black (120), Cool Grey 9 (CG9) and Cool Grey 7 (CG7).
- Spider: Chocolate (118), Clay (116), Rose Beige (97) and Caramel (253).
- Snail: Olive Green (41), Grass Green (47) and Vived Green (46).

Sentiments
Now it’s time to make the sentiments. I have sentiments on the front, but also behind the flaps.
For the sentiment on the front, I need my dies. I wanted to make the sentiment “Sending Bug Hugs. I used two different dies for that. First, the words “sending hugs. I used a die who punches out the different letters. I chose to use black paper for that. And I have a die who cuts the word Hugs. From this die I can cut the separate letters and the shadow from the word hugs. I die-cut the letters in Red and the shadow from white paper.
On the back of the flaps, I wanted to stick the sentiments. First, I die-cut the clouds out of white paper. I stamp my sentiments in the clouds. I stick this on the back of the flaps.
Assembling the card.
First, I glue my background panel on the base of the card. Now it is time to glue my images onto this panel. To figure out to where to put them, I put my flap panel on top and place my images behind the windows. Now I can glue them to my background panel.
Now I have the images and letters left that I want to stick on the front. First, I stick my letters on the front where I want them. I do the same with my images. And the card is finished.
I hope you like it! Let me know in the comments.
Happy Crafting!
Let’s Get Creative Together
As we wrap up this tutorial, let’s reflect on the creative process. From choosing our materials to adding the final touches, we’ve carefully crafted a heartwarming bug hugs card step by step. We’ve explored stamping and colouring, creating the interactive flaps.
Now that the bug hugs card is finished, it’s your turn to get started.
Products used
Affiliate Disclosure: This article may contain affiliate links, meaning I may earn a small commission if you make a purchase through my links, at no additional cost to you. Thank you for supporting my work!
Products used with affiliate links
Bugs 1 by Craftemotions

Bugs 2 by Craftemotions

Bugs 3 by Craftemotions

Alfabeth typewriter die from Craftemotions

Memento nautical blue

Memento tuxedo black ink

Products without affiliate links
- Lift the flap die from Aveccreative.
- Sending Hugs Die from Scrapfever. (not available anymore sept 2025)
- Cloud and Grass stencil from Carlijn Design.
- Chalk in from Decotimecrafts.
- Twinmarkers (alcohol markers) from Decotimecrafts.
I would like to enter my card in the following challenges:
- Dream Valley Challenges: Anything goes
- Krafty Chicks Challenge: For all occasions
- Crafty Catz: Anything goes + flowers.
- Allsorts challenge blog: Use a stencil or anything goes
- Lil Patch of Crafty Friends Challenge …: Anything goes
- Stamping Sensations: Anything goes + add a stencil.
- 613 Avenue Create: Anything goes + say it with flowers.
- Crafter’s Cafe: animals
- Crafting Happiness Challenges: Anything goes + option flowers.


What a cute scene. Love it! Thanks so much for dropping it into our mailbox at 613 Avenue Create!
Hugz,
Chana Malkah, Owner
Thank you so much
What a wonderful design and your stencilling is perfect for Allsorts this week. Thank you for sharing. Sarah DT
Lovely details on this beautiful kinetic card design. Thank you for joining us at the Allsorts Challenge.
Lorraine
Adorable! These are the cutest hug bugs. Marvelous design to use the flaps. Thank you so much for joining the challenge at Allsorts and using your stencils :-)
Such a beautiful and detailed card. I couldn’t wait to see what was under the flaps! Thanks for taking part at Allsorts challenge.
How adorable! I know bugs aren’t suppose to be cute but these are just darling. Love the peek-a-boo flaps. I’m delighted to have you playing with the Krafty Chicks All Occasions Challenge this week. Hope you join us again soon.
Diane – DT
Het kaartje is geweldig! Had hem al in het echt gezien natuurlijk, maar het blijft gewoon net een klein cadeautje met al die flapjes!
Absolutely precious card Renske, love how it opens up.. I think I have a die hiding somewhere like this that opens up too.. x