Some links in this post are affiliate links. This means I may earn a small commission if you make a purchase, at no extra cost to you. I only recommend products I use and genuinely enjoy in my own cardmaking. Read more here.
Want to add a soft and playful feel to your next card? The Little Sailor digital stamp from All Dressed Up Stamps is a great place to start.
There’s something about nautical greeting cards I keep coming back to. They let you layer textures and techniques while keeping things clean and modern. That mix is what makes them fun to make.
This card is part of the newest release from All Dressed Up Stamps. Each month, we get to work with one of three new digital stamps. This time, I picked Little Sailor—it stood out to me right away. I loved the soft lines and the relaxed feel of this stamp. It fits the light and airy style I tend to go for.
In this tutorial, I’ll show you how I made this soft nautical card with the Little Sailor digital stamp. You’ll see how I use vellum, add subtle details, and colour with alcohol markers to keep things clean but still interesting
If you like trying out soft layers and subtle textures in your card-making, I think you’ll enjoy this one.
What You’ll Need to Make This Nautical Greeting Card
Here’s what I used to create this soft, nautical card with the Little Sailor digital stamp. Don’t worry if you don’t have everything—I’ve added a few alternatives too.
- Little Sailor digital stamp from All Dressed Up Stamps: The relaxed pose and gentle details give your card that soft, nautical feel. It’s an easy base to build on with layering and texture.
- Patterned paper from CraftSensations: I used a blue-toned pattern that complements the sailor vibe. Any paper with stripes, soft waves, or dots would also work well here.
- 13 x 13 cm square card base: This size offers a balanced foundation for layering different elements. You can swap this out for an A6 or 5 x 5-inch base—whatever works with what you’ve got on hand.
- Blue cardstock (12.5 x 12.5 cm): I selected a deeper shade of blue to add contrast. You could substitute this with navy, kraft, or even a soft grey depending on your color scheme.
- Window die (ship-style) by Avec Creative: This fun die adds a focal point and frames the character nicely. A circular or porthole-style frame would achieve a similar effect.
- Patterned vellum from DecoTime Crafts: Vellum introduces softness and texture without overwhelming the design. Go for plain, patterned, or even clear vellum—whatever adds the softness you’re after. Acetate can work too if that’s what’s in your stash.
- Bubble cluster die from Avec Creative: This die adds a playful detail that aligns with the sea theme. Any bubbly or dot-themed die can serve this purpose.
- Sentiment from a CraftSensations paper block: I used a pre-printed sentiment, but you can also use a stamped one or print a sentiment in a nice typeface.
- Foam tape: This is perfect for adding dimension between the layers. You can also use cardboard scraps or 3D glue dots if needed.
- Square edge die with heart detailing: I used a die that has cute little heart cut-outs along the border. While this detail is optional, it adds charm. Any decorative edge die would work as well.
- White flat-back pearls: These pearls finish the card with a clean, polished look. Enamel dots, sequins, or Nuvo drops work too—it’s up to the look you’re going for.
- Alcohol markers from DecoTime Crafts: I coloured the stamp using Twin markers, which blend well on printed digital images. If you don’t have alcohol markers, you could use water-based markers, coloured pencils, or light ink blending.
Don’t worry if you don’t have all the exact supplies listed. Feel free to use what you already have and adapt the design to your style. That’s the enjoyable part of card making – it’s all about putting your own spin on it. Use this list as a jumping-off point, it’s all about making it your own.
How to Make a Nautical Greeting Card with the Little Sailor Digital Stamp
Got a nautical card in mind? Let’s turn that idea into something you’ll love sharing. In this section, I’ll guide you through the process of making a card using the Little Sailor digital stamp from All Dressed Up Stamps. I’ll show you how I layered vellum, coloured with markers, and added dimension one step at a time.
We’ll walk through it together- no pressure, just some relaxed crafting.
Step 1. Printing and Coloring the Little Sailor Digital Stamp
First up, let’s get your image printed and coloured. The Little Sailor stamp is the star of this nautical greeting card.
I’ll walk you through sizing and printing the stamp, plus the colours I used to colour it with alcohol markers.
New to digital stamps? Grab my freebie about how to use digital stamps
Printing the Little Sailor Stamp
I opened the stamp in Word and set the height to 6.5 cm. Word automatically adjusts the width to maintain the proportions, so you don’t need to worry about that.
I printed it on DCP paper, which works great with alcohol markers as the ink blends well without bleeding. Don’t worry if you don’t have DCP paper, smooth cardstock works too.
Colouring with Alcohol Markers
I coloured the stamp with my Decotimecraft Twin Markers. Build up colour in layers, starting with the lightest shades and adding darker tones for depth. Here’ are the colour combinations I used:
- Skin: Tanned Skin (260), Peachy Blush (259), Salmon Pink (25), and Pale Cream (142)
- Hair: Pale Cream (142), Brown Grey (104), Walnut (100)
- Dress and Middle of Hat: Cardinal (244), English Red (249), and Burgundy (247)
- Hat Border, Bow, and Binoculars: Baby Boy (144), Midi Sky (190), Dark Sky (191)
I kept the layers soft and blended the colours gradually. If you’re using markers from another brand, look for similar tones. Don’t worry about matching my colours exactly; just use what you’ve got.
Cutting Out the Stamp
Once you’ve coloured the image, carefully cut around the edges with small scissors. I like to follow the outline closely, but if you prefer a small border, that’s fine.
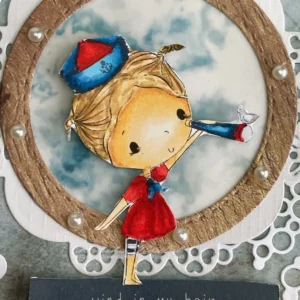
Once you’ve printed, coloured, and cut out your Little Sailor image, you’re all set for the next step!
Step 2: Creating the Base and Layers for Your Handmade Card
Now that the digital stamp is coloured, let’s move on to building the base and layers for your card. Here’s how to create the base and layers for your square card design measuring 13 cm x 13 cm:
- Card Base: Cut a piece of sturdy white paper to 26 cm x 13 cm. Score and fold it at 13 cm for a 13 cm x 13 cm card base.
- Adding Layers: Cut a 12.5 cm x 12.5 cm square of dark blue paper and stick it to the front. Then, cut a 12 cm x 12 cm piece of patterned paper with a compass design and adhere it on top of the blue layer.
These layers add depth and texture, setting up a strong foundation for your nautical theme. Once the layers are in place, we’ll move on to creating matching die-cuts.
Step 3: Creating the Die-Cut Elements for Your Nautical Card
Now, let’s create some fun die-cut elements to bring your nautical card to life. For this step, I’ve picked out a few dies that match the nautical theme perfectly:
- Bubble Die: Die-cut the bubble shape twice from white paper. These bubbles will add texture and movement to your design.
- Boat Window Die: Next, die-cut the boat window shape from patterned paper with a wood grain design. It’s a great die for enhancing the nautical feel.
- Heart-Edged Square Die: Die-cut a square with heart-shaped edges from white paper for a unique frame.
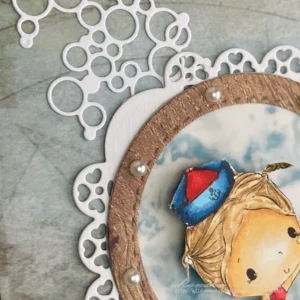
These die-cut elements will enhance the nautical theme, adding depth and making your card more dynamic. Let’s move on to the boat window next.
Step 4: Creating the Boat Window with Vellum and Pearl Accents
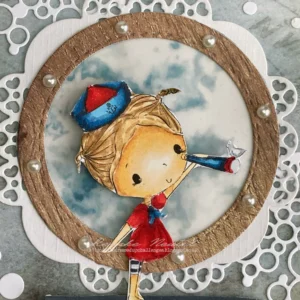
To create the illusion of sky or sea, I used patterned vellum with a soft blue sky and white clouds. I love how this vellum can also evoke the sea. I put it behind the boat window to give the feeling of looking out at the horizon.
To secure the vellum, I glued it along the frame of the boat window. Because the die-cut is patterned paper, I hid the adhesive behind the solid areas, keeping it invisible and the design clean.
To finish it off, I added white pearls around the holes of the boat window. These pearls add soft, dimensional detail that ties in with the nautical theme.
This step brings the boat window to life and adds dimension to your card with vellum. Let’s move on to the next step.
Step 5: Assembling the Nautical Greeting Card
Now that all the pieces are ready, it’s time to put the card together. This is where everything starts falling into place.
- Layout: Start by arranging the die-cut pieces on the card without glueing them. This lets you play around with the placement until you’re happy with the design. Place the square with heart-shaped edges in the centre and the bubbles beneath it.
- Glueing: Once you’re happy with the layout, glue the bubbles at the bottom of the square. Then, stick the square on top of the bubbles and position the boat window die cut on top.
- Finishing Touches: Now for the fun part—adding the coloured image of the girl with the spyglass. Place her on the boat window with the sentiment “Wind in my hair” underneath. Use foam tape on both the image and the sentiment to add some depth and dimension to the card.
- Filling in Corners: If the corners look a bit empty, here’s a simple trick: Take the leftover round die-cut pieces from the bubble die and pop them in the corners. These little details can pull everything together and add the perfect finishing touch.
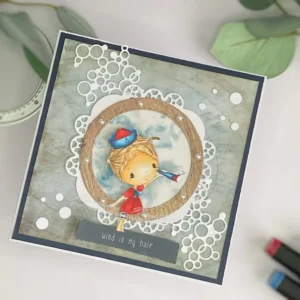
And just like that, your nautical greeting card is complete! It’s amazing how all these layers and little details can come together to make such a great design. Hope you enjoyed the process!
Let’s Get Creative Together
Now that your nautical greeting card is done, it’s time to add your personal touch and make it your own.
By combining layers, vellum, and die-cut shapes, you can create a fun little scene on your card. The girl with her spyglass really looks like she’s scanning the horizon.
I’d love to know which part of this card stands out to you the most. Take a moment to vote in the poll below:
Wich element do you like best?
- The digital stamp of the girl
- The use of vellum behind the boat window
- The colour choices and inky background
- The layered look with die-cuts
Your vote helps me see what inspires you most in your creative process.
More related blogposts
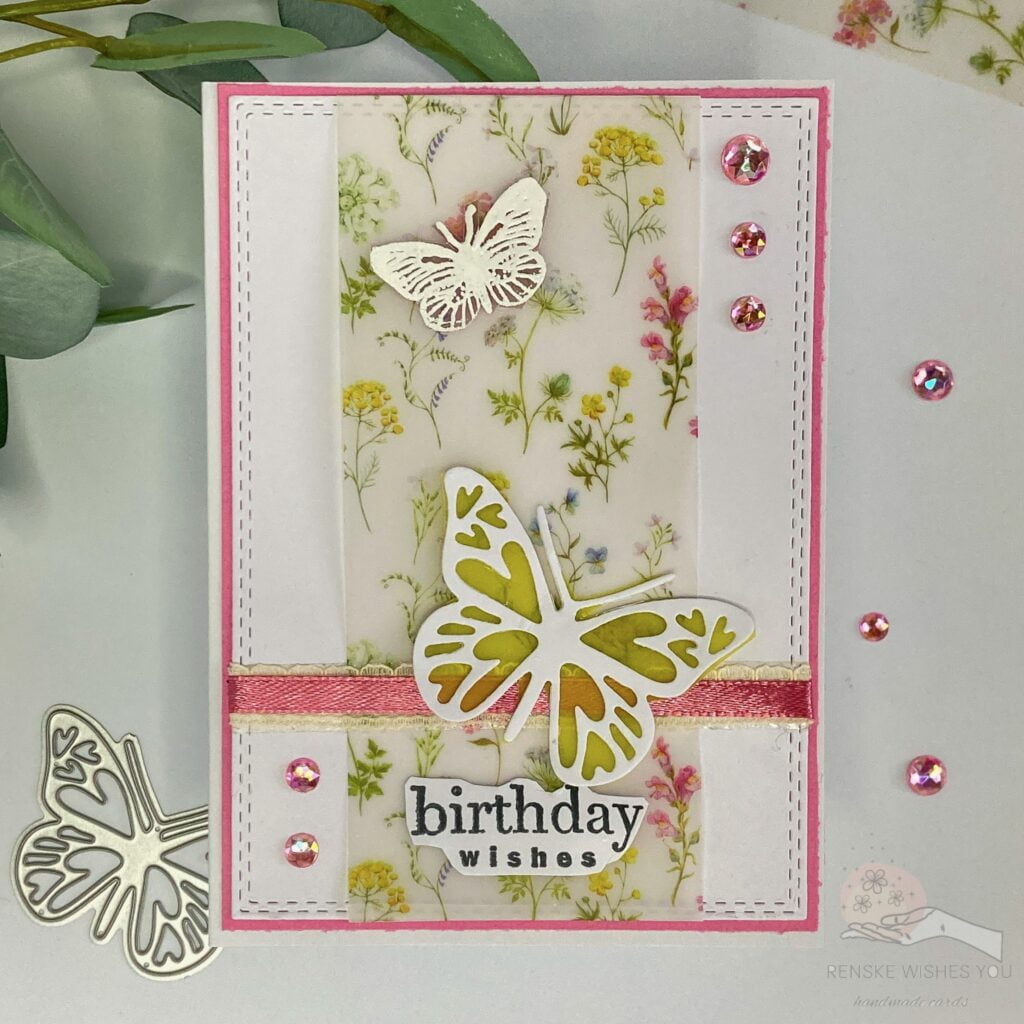
Vellum In Card-Making: Stunning Birthday Card Techniques
In this article, I discuss three ways to use vellum in your card-making.
Products used for the nautical greeting card
Affiliate Disclosure
This article contains affiliate links. This means I may earn a small commission if you purchase through one of these links at no extra cost to you. I only share products that I truly believe in and personally use or recommend in my card-making projects. Your support helps me continue creating content and improving my blog. Thank you for your support!
Products with affiliate links
I will mention here the 3 digital stamps from the new release in March.
Little sailor digital stamp
Little painter digital stamp
Bunny Hugs Digital stamp
Products without affiliate links
- Patterned paper with the nautical theme from a paper block from Craftsensations
- Blue cardstock (brand unknown)
- Boat Window die from Aveccreative
- Patterned vellum from Decotimecrafts
- Bubble Cluster die from Aveccreative
- Foam tape (brand Unknown)
- Alcohol markers from Decotimecrafts
I would like to enter my card in the following challenges:
- Unicorn Challenge Blog: Use dies
- Crafty Gals Corner: Fill in the blank: Adorable…..Little Sailor
- Seize the Birthday: Layer it
- Craft Rocket Challenges: Layer it up
- Crafty Catz: Anything goes
- Lil Patch of Crafty Friends Challenge …: Anything goes
- A Perfect Time To Craft Open Challenge: Anything Goes


super cute love the details. Thank you for joining us at Crafty Gals Challenges
Thank you so much. Glad you like it.