
Hello everyone!
Today we embark on a creative adventure following the latest challenge on the Polkadoodles Challenge Blog. We, members of the design team, were tasked with creating a shaped card with the theme of Halloween.
I saw the digital stamp, Boo Ghost Halloween Gnome, and quickly got the idea to make the card in a shape of a moon.
In this blog post, I hope to not only inspire you but also give you valuable ideas and techniques that you can apply when making your own cards. Whether you are a seasoned card maker or just starting out, there is always room to learn, explore and create.
Let’s get started making this “Handmade Halloween card in the shape of a moon” that is sure to put a smile on the recipient’s face.
Creating the Moon-Shape
Creating our “Spooky moon-shaped handmade Halloween card” starts with creating the signature moon shape. This unique card design adds another layer of creativity and enchantment to our Halloween project. Let’s delve into making this enchanting card shape step by step:
- Draw the Half-Moon Template: Use plain print paper and draw a half-moon, with the desired size. Make sure the curved edge of the moon is aligned with the long edge of the paper. This will be your template for the moon-shaped card.
- Position the Template: Place the moon template on top of the folded card base. Make sure the centre of the moon template falls just slightly over the fold of the card base. This alignment will preserve the fold in the card base.
- Trace the Moon Shape: Using a pencil, carefully draw the outline of the moon template on the folded card.
- Cut Along the Lines: Now that the moon shape has been traced on the card, it is time to cut out our moon-shaped card. Using scissors, carefully cut along the drawn lines. This will create a distinctive moon-shaped card base.

Mirroring the Digital Stamp
Let’s get started with our digital stamp. First, it needs to be printed out. I print out the stamp twice, and the second genome is mirrored from the first.
To achieve this, I used the familiar Microsoft Word program, where I mirrored the digital stamp “Boo Spook Halloween Gnome”. Namely, our gnome comes from behind our moon. So when you open the card, you look at a white back and I don’t like that. That’s why I printed it twice and mirrored it so that you also see the gnome when you open the moon.
I’m going to tell you how to mirror your digital stamp in Word:
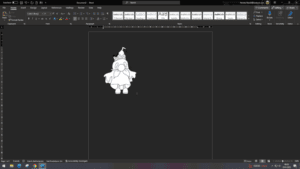
Past the digital stamp in Microsoft Word and adjust the size of your image to the size you want.
Right-click on the image and choose Copy. Paste this image into the same Microsoft Word file.


Select the second image with your mouse button.
Click on the top menu, on the menu Picture Format

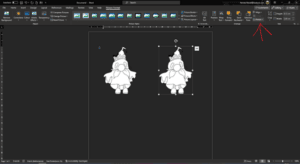
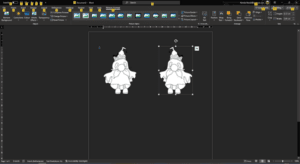
Click on the right for the option to Rotate and flip horizontally.
Now you have mirrored your digital stamp, and it is ready to print.
I print the digital stamp on DCP paper. Now it’s time to colour these guys.
Coloring the digital stamps
Now that our mirrored gnome stamp is done, it’s time to give life and character to our enchanted Halloween gnomes. I chose a greyscale colour palette to give them a spooky look, really bringing them into the Halloween spirit.
To give the card some extra Halloween vibes, I incorporated elements from the “Winnie Wednesday” digital stamp set. I used the pumpkins that come with this digital stamp. You can do this very easily by printing this image and cutting off the pumpkins, but you can also crop the image in Word so that you print out just the pumpkins.
I used the following colour combinations to colour these spooks and pumpkins:
- Spook Garment and Hat: Cool Grey 1 and Cool Shadow
- Interior of Spook Garment: Cool Grey 5, Cool Grey 4, and Cool Grey 1
- “Boo” Letters and Interior of Eyes: Black, Cool Grey 9, Cool Grey 8, Cool Grey 7
- Shoes: Black, Cool Grey 9, Cool Grey 8, and Cool Grey 7
- Moustache: Cool Grey 5, Cool Grey 4, Cool Grey 1
- Nose: Peachy Blush, Salmon Pink, Barely Beige
- Leggings: Black, Blue Grey Purple
- Pumpkins: Pastel Lemon, Lemon Yellow, Bittersweet, Yellow, Orange, and French Vermillion
For an extra touch, I applied shimmering glitter with my Aqua glitter pen to the gnome’s clothes, creating a magical and spooky effect and making them really stand out.
In the next section, we look at how I edited the Halloween sentiment in Microsoft Word to make it fit our creation perfectly.
Editing the Sentiment in Microsoft Word
Our Halloween-inspired card would not be complete without the perfect Halloween sentiment. To achieve the desired effect, I used the versatile capabilities of Microsoft Word, where I adapted the “EEK” sentiment to our spooky creation. The “EEK” sentiment comes out of the “Boo Halloween Printable Papers” from Polkadoodles.
Here’s how I transformed a simple sentiment into a captivating Halloween message:
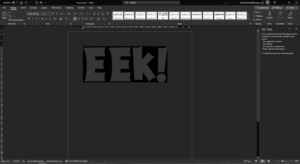
Paste the sentiment in Microsoft Word.
Select the second image with your mouse button. Click on the top menu, on the menu Picture Format
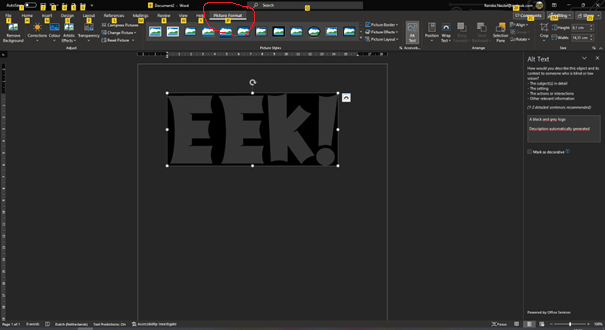
Go to the Colour section.
Choose the colour you want.


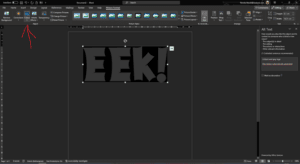
Go to artistic effects.
Choose the effect you want, and the sentiment is ready to print.

When the customising was done, I printed the sentiment in a larger size. I then carefully cut out each letter and made sure there was a black border around it. This careful detail not only made our sentiment more engaging but also emphasised the Halloween theme.
In the next section, we will add the paper to our card base.
Covering the Card Base with Black and Patterned Paper
Before we assemble our ” moon-shaped handmade Halloween card”, it’s time to put the finishing touches on the card base itself.
Here is how I transformed the card base:
- Covering with Black Paper: To create a striking backdrop for our moon-shaped canvas, I took a piece of black paper and positioned it over the card base. Using the moon template we created earlier as a guide, I carefully traced the moon shape onto the black paper, ensuring that the moon’s edge aligned with the edge of the card. After tracing, I cut out the moon shape, resulting in a black backdrop for our moon.
- Add patterned paper: To add colour and a pattern to our card, I decided to use purple patterned paper. I placed the moon template on the patterned paper, but this time, instead of drawing a line around the moon, I put my potbelly a bit more under the moon. This allowed me to create a slightly smaller moon shape with a black border.
- Adhering the Papers: With both the black and patterned papers ready, I carefully glued the black paper onto the front of the card base, aligning the moon shape precisely. Next, I added the purple moon shape onto the black moon, creating a beautiful contrast and ensuring that the moon-shaped canvas looked captivating both inside and out
This step not only improves the visual appeal of the card but also ensures that the moon-shaped canvas is perfectly framed, making it a striking centrepiece.
Now that our card base is decorated with black and patterned paper, we are one step closer to completing our handmade Halloween card. In the next part, we will bring everything together.
Assembling the Handmade Halloween Card
Now that all the enchanting elements are ready, it’s time to bring our “Spooky Halloween card in the shape of a moon” to life.
Here you can see how I put everything together:
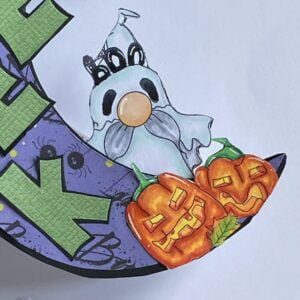
- Placing the Pumpkins: Our vibrant and festive pumpkins took their place on the lower part of the moon.
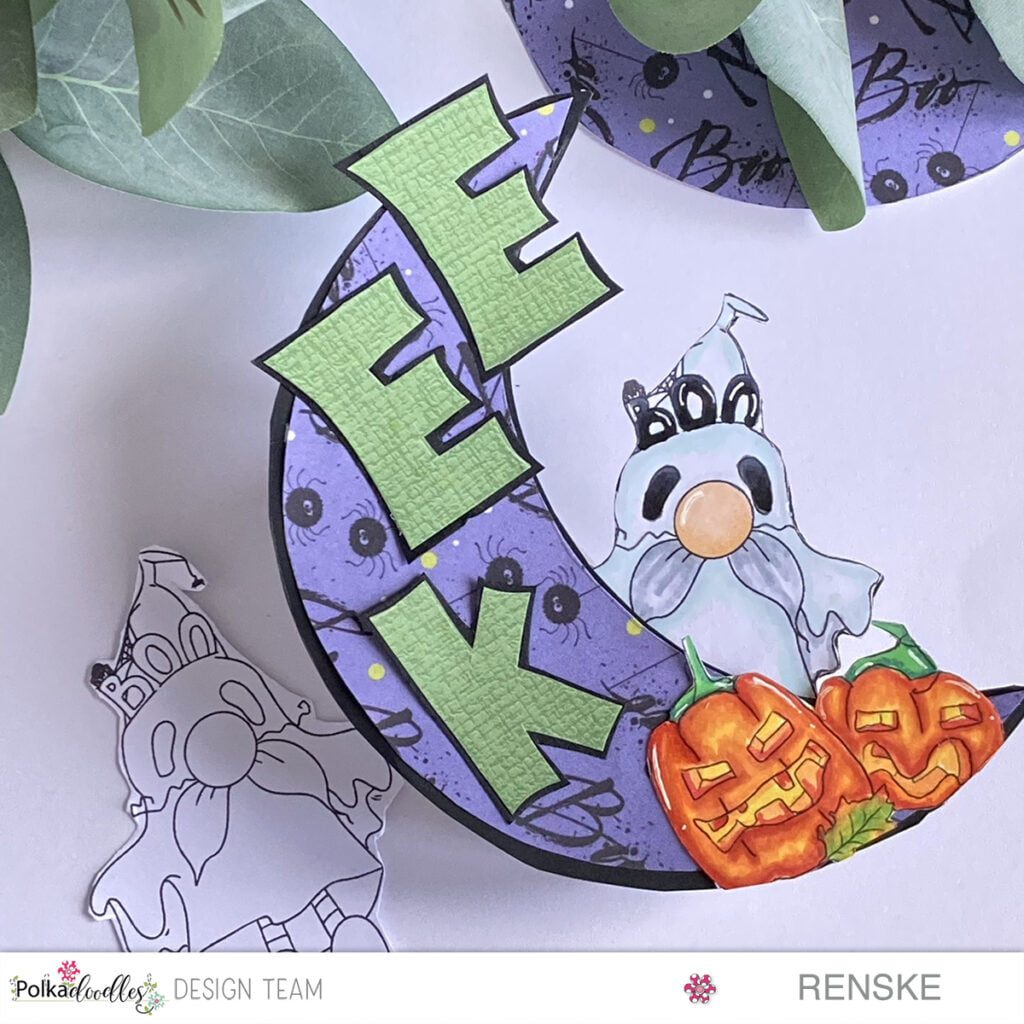
- Placing the ghost gnome: I placed the ghosts, now perfectly mirrored, on top of each other. I place the ghost just above the pumpkins, and pretend he’s coming out from behind the moon to shout “Boo.” I think that’s a funny effect.
- Adding the letters “EEK”: I added the letters of our EEK sentiment in a vertical line on our moon-shaped card. The letters go down and follow the shape of the moon.
Our “Spooktacular Moon-shaped Handmade Halloween Card” is now complete, ready to enchant and delight its lucky recipient.

Join the Polkadoodles Challenge!
Now that we have finished making this handmade Halloween card, I would like to invite you to participate in the Polkadoodles challenge.
How to participate:
Visit the Polkadoodles Challenge Blog to discover the latest challenge theme and guidelines. The theme is always “anything goes” and you don’t necessarily have to use Polkadoodles products to participate.
Make your own creation and add your creation to the blog.
By participating in the Polkadoodles Challenge you can not only show your creativity, but you also have a chance to win fantastic prizes and a mention on the challenge blog.
So don’t hesitate and participate! I can’t wait to see your creation in the Polkadoodles challenge.
If you also want to get started with these Polkadoodles products, that is possible. I have placed all the links below.
Explore More Halloween-Inspired Cards
If you are fascinated by the Halloween spirit and are looking for more handmade Halloween card ideas, I have two more Halloween cards for you.

Unique Halloween Gnome card, also made with Polkadoodles products.
Thank you for joining me on this creative Halloween journey, and I can’t wait to share more crafting adventures with you in the future. Until next time, happy crafting and have a spooktacular Halloween!
Happy Crafting!
Polkadoodles Products used
Affiliate Disclosure: This post contains affiliate links, which means I may earn a small commission at no extra cost if you purchase through these links. I only recommend products and services that I use and trust. Your support helps me continue to provide free tutorials and creative inspiration. Thank you for supporting my blog and helping me to keep sharing my passion for card making!
Boo Ghost Halloween Gnome Digital stamp

Boo Halloween Printable papers

Trick or Treat Sentiments

I would like to enter my card in the following challenges:
- The Sisterhood of Crafters: Shapes
- Krafty Chicks Challenge: All Occasions
- Classic Design Challenge Blog: Anything goes
- Creatalicious Challenges: Anything goes
- Crafting Happiness Challenges: Anything goes
- Most Magical Time of the Year!: Anything Halloween and Christmas goes
What an awesome Halloween card, Renske! Thanks for joining us at Krafty Chicks Challenge this week xoxo