
With summer’s long days and bright skies, it feels like the perfect moment to get creative. I thought it would be fun to capture a little of that summer magic by making a mermaid card. In this tutorial, I’ll show you how I made mine using a lovely digital stamp, “Splash” from All Dressed Up Stamps.
We’ll go through each step together: colouring the mermaid with alcohol markers, painting a dreamy watercolour ocean, and using masking paper to add some depth. I’ll share a few tips as we go to help your card turn out just the way you want.
Before we get started, I’d love to know—what makes a summer card feel magical for you? If you have favourite mermaid card styles or ideas, please share them in the comments. Your creativity could spark inspiration for someone else.
Mermaid Card Inspiration with the Splash Digital Stamp

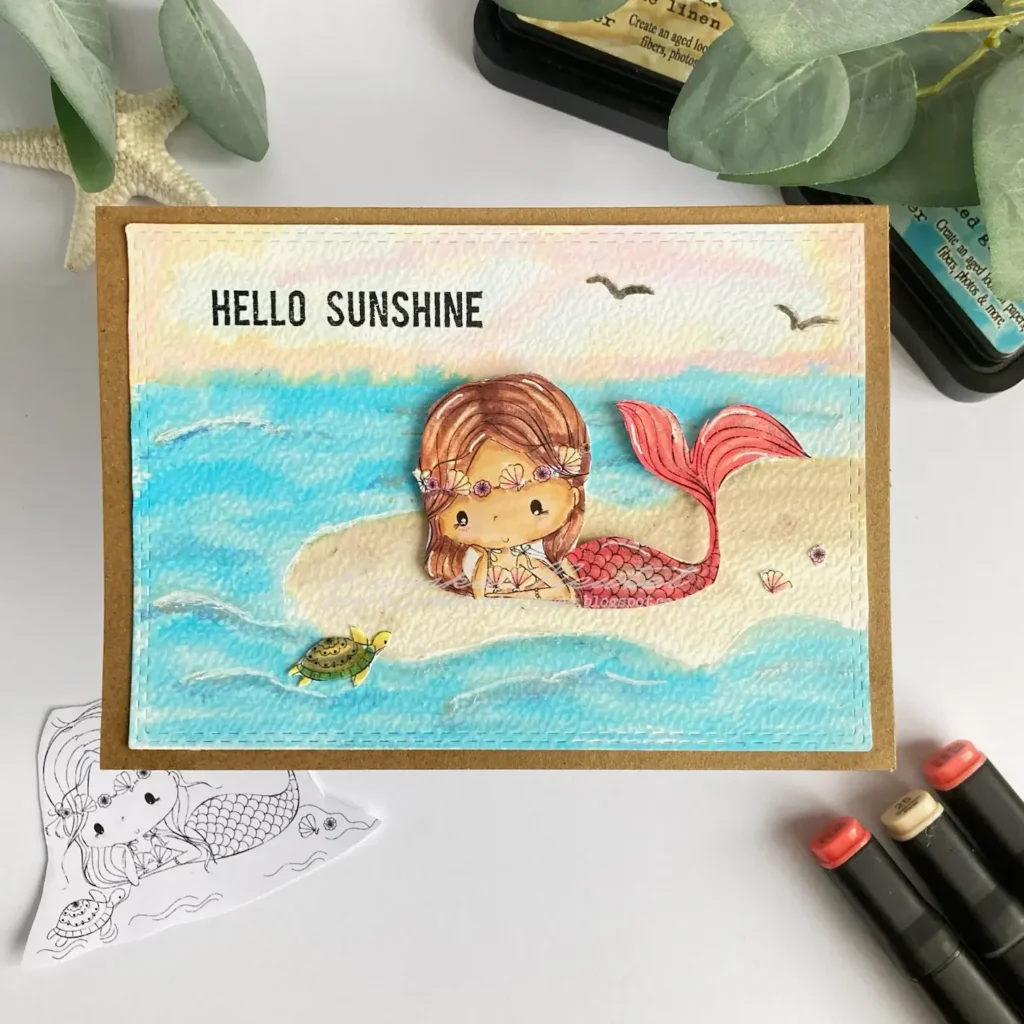
The Splash digital stamp from All Dressed Up Stamps is a new mermaid design that’s just right for a magical summer card. The mermaid is lying on her tummy, resting her head on one hand, with her tail curving up behind her. She has a headband made of shells and flowers, and a tiny turtle is looking up at her, which I think adds such a sweet, whimsical touch.
A mermaid digital stamp is simply a printable image you can colour, cut out, and layer onto your card. I find the Splash stamp looks lovely with soft pastels or brighter ocean colours—whatever feels right for your card.
This is my first time using the Splash digital stamp, and I’m so excited to share my creation with you. Grab your own Splash digital stamp, experiment with colours and techniques, and let’s craft and share our magical mermaid cards!
What’s your favourite mermaid stamp or summer colour palette? Share your ideas in the comments — your tips might inspire other crafters to add their own magical touches.
Check out more All Dressed Up Stamps inspiration cards for additional creative ideas.
Materials You’ll Need for This Mermaid Card
Before you start, gather your materials. I’ve suggested some alternatives so you can easily craft with what you already have at home. Please remember that the suggested quantities are approximate and can be adjusted based on your preferences.
Materials List with Uses & Alternatives
- Digital stamp: Splash from All Dressed Up Stamps – the main mermaid design.
Alternative: Any mermaid digital stamp or printed line art you love. - Alcohol markers: Decotimecrafts – for colouring the mermaid, shells, flowers, and turtle.
Alternative: Watercolour pencils, Copics, or any alcohol markers you already own. - Masking paper: Gina K – protects areas when creating the watercolour ocean and sandbank. Approximately a piece of 11 centimetres by 4 centimetres.
Alternative: Low-tack tape, Post-it notes, or scrap paper with removable adhesive. - Watercolour paper – smooth surface for blending inks, a piece of 13,8 centimetres by 9,8 centimetres.
Alternative: Heavyweight cardstock or any paper that handles wet media. - Distress inks:
- – Chipped Sapphire, Salty Ocean, Tumbled Glass – for ocean/sea areas-
- Antique Linen, Vintage Photo, Walnut Stain – for the sandbank
- – Picked Raspberry, Mustard Seed – for the sky/sunset areas.
- White gel pen – for adding highlights to the mermaid and shells.
Alternative: White acrylic paint with a fine brush. - Clear stamp: Hello Sunshine from Studiolight NL – for the sentiment.
Alternative: Any summer-themed sentiment stamp or handwritten message. - Black marker – to doodle small details like birds in the sky.
Alternative: Fineliners or any waterproof pen you have. - Craft paper for the card base – sturdy base for your panel. The base is 10,5 centimetres by 14,8 centimetres.
Alternative: Colored cardstock or recycled cardboard. - Die-cutting machine – for neat panel cuts.
Alternative: Scissors or craft knife with ruler
Now that you have your materials, let’s begin creating your card. Gather your tools and follow along at your own pace, step by step. You can find the links to the products I used in the final section of this post.
Step-by-Step Tutorial: Handmade Mermaid Card
With your materials ready, I’ll guide you through colouring the Splash stamp, creating a watercolour ocean background, and adding the finishing summer details.
Whether it’s your first handmade mermaid card or you’re trying new techniques, these simple steps will help you create a magical card. By the end, you’ll have a summer card full of charm and underwater enchantment — I’d love to see what you create.
Let’s start creating!
Step 1. Colouring the Mermaid Digital Stamp
Begin by printing your Splash digital stamp on DCP paper at a size that works for your card — I chose 7.5 cm wide. Then, have fun colouring it with your favourite markers or colouring tools. You can use alcohol markers, watercolour pencils, or whatever you enjoy — there’s plenty of room to experiment.
For my mermaid, I used these alcohol marker combinations:
- Skin: Tanned Skin (260), Peachy Blush (259), Salmon Pink (25), Pale Cream (142)
- Hair: Pale Cream (142), Sand (107), Rose Beige (97), Burnt Sienna (95)
- Flowers: Rose Pink (08)
I didn’t record all the colours I used for the mermaid’s tail, shells, or turtle, so this is your chance to get creative. Try pinks and purples for the tail, or choose shades from your own summer palette. Layering your markers will add depth and dimension, making your mermaid come to life in a vibrant, three-dimensional way.

Once your mermaid and other elements are coloured, carefully cut them out. I cut the turtle separately so I could place it creatively later, but you can also leave elements attached if that suits your design better. Choose the approach that feels right for your card and have fun experimenting with placement.
Step 2: Creating the Watercolour Ocean Background
The background really helps your mermaid card come alive. I placed my mermaid on a sandy bank with a flowing ocean behind her to capture a magical summer vibe. Using masking paper and Distress Inks lets you create a soft, natural-looking watercolour ocean — it’s fun to see how a few layers of colour can completely transform the scene.
Preparing Your Watercolour Panel
Cut your watercolour paper to the size you’d like for your card. I used a rectangle die with a stitched edge, but a simple cut with scissors works just as well. This panel will become both the sky and the sea, so keep it relaxed — it doesn’t need to be perfect to look beautiful.
Painting the Sky
Cover the bottom of your paper with Post-it notes to protect it and mark a gentle horizon line.

On a glass mat or palette, blend Picked Raspberry, Mustard Seed, and Dried Marigold. Mist lightly with water—just enough to dampen the surface, but not so much that the colours become too diluted. Use a brush to lift and apply the colours onto your paper, allowing them to merge softly into a sunset sky. To achieve a smooth gradient and avoid harsh lines, use a sweeping motion with your brush, lightly feathering the edges where colours meet. Pause to let each layer dry briefly before adding more colour, ensuring you prevent muddiness and maintain vibrant hues.
Creating the Ocean
Place masking paper over the sandbank area so it stays clean. Start by brushing Tumbled Glass across the ocean section as your base colour. Then gently add Salty Ocean and a touch of Chipped Sapphire in wavy strokes, building up layers to make the water look more natural and full of movement.

Adding the Sandbank
Begin your sandbank with a soft layer of Antique Linen to set the base. Gently blend in Vintage Photo and a little Walnut Stain, building up depth and texture as you go. Once you’re happy with the look, set the panel aside to dry completely before adding your mermaid and other details.

Tips & Alternatives
To separate the ocean from the sand:
- Masking: Place a strip of masking paper between the two areas. No masking paper? Low-tack tape or Post-it notes work just as well.
- Brush technique: Experiment with brush strokes—vary the direction, length, or pressure to create natural movement in the water.
- Have fun: There’s no right or wrong—play around until you find a look you love.
These steps help you create a soft, lively ocean that really makes your mermaid stand out. Once everything is dry, you can add your sentiment, tuck in those little details, and start bringing the whole summer card together. Take your time and enjoy the process—each layer adds a touch of magic.
Step 3. Adding the Sentiment and Magical Details
Now that your background is ready, it’s time for the little touches that make such a big difference. Add your sentiment and a few small details—these are what bring your scene to life and give your handmade summer card its unique, magical charm. Your choices here really make the card feel like yours.
Stamping the Sentiment
I stamped “Hello Sunshine” in the top left using a stamping platform. On textured watercolour paper, you may need to stamp a few times with Memento Tuxedo Black for a clear impression.
If you encounter any smudging or missed spots, here are some troubleshooting tips: First, ensure even pressure across the stamp to avoid smudges. If the image is unclear, gently lift the stamp and reapply ink for a crisp print. You can also use a fine-tipped black pen to touch up any areas that didn’t transfer perfectly.
Adding Highlights and Doodles
I like to add two tiny birds with a black marker and use a white gel pen for highlights on the mermaid, shells, and other little elements. These small touches add depth and make the whole scene feel more alive. You might enjoy trying your own details too—perhaps sparkles in the water or a starfish on the sand—to give your card that personal, creative twist.
Placing the Mermaid and Other Elements
I like to place the mermaid on the sandy bank with a bit of foam tape, which gives her a soft lift and makes the scene feel more alive. The tiny turtle looks sweet in front, almost like it’s climbing onto the sand, and I tucked a little shell and flower just behind her for extra charm. You can arrange your pieces however feels right to you—play around until the scene tells the story you want.
Finishing the Card Base
Cut a piece of craft cardstock to 21 × 14.8 cm, score at 10.5 cm, fold it horizontally, and attach your watercolour panel on top to complete your mermaid card.
You might like to sprinkle in a few extra touches, such as shells, glitter, or sequins, to give your card a little more sparkle and personality. Choose the details that feel most magical to you—it’s those personal touches that make your card truly one of a kind.

What little detail would you add to make your mermaid card feel truly your own?
Let’s Get Creative Together
We’ve coloured the Splash stamp, painted the watercolour ocean, added fun details, and assembled the card — each step adds charm and turns it into a magical summer keepsake. I’d love to see your creation, so share a photo, leave a comment, or pin your card to inspire others!
Handmade Summer Card Ideas for Inspiration
Here are a few ideas to spark your own summer card creations with All Dressed Up Stamps — feel free to make them your own.
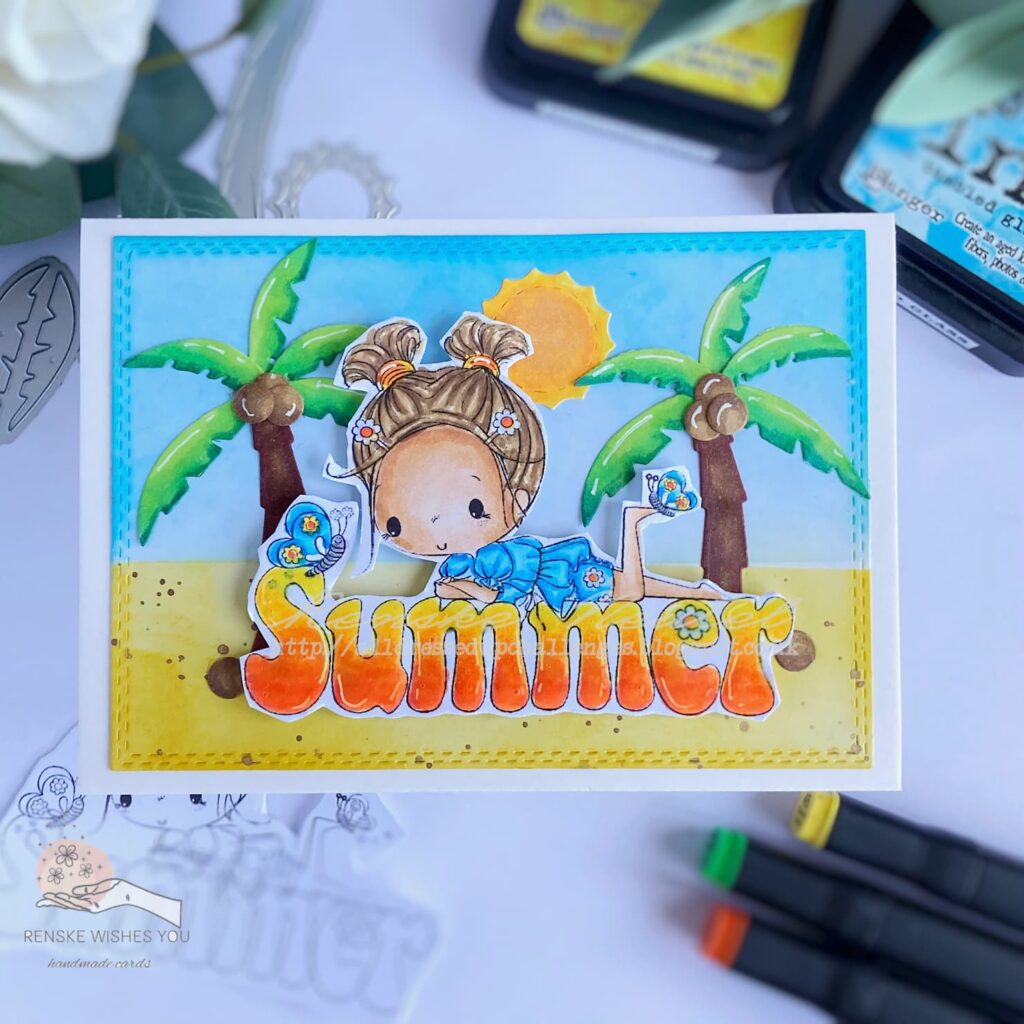

Feel free to mix and match colours, backgrounds, and embellishments to make your card truly yours. You can also explore more techniques in Watercoloring, Masking techniques, and other All Dressed Up Stamps inspiration cards for extra inspiration and creative ideas.
Links of products I used
Here I will link all the products where I have found links, so you can also buy them yourself. Some links are affiliate links. If you purchase something through one of these links, I may earn a small commission at no extra cost to you. I only recommend products I use or believe in.
If I haven’t linked a product here, unfortunately, I couldn’t find any shop links.
Products with Affiliate links
Splash digital stamp from All Dressed Up Stamps

Distress Ink Chipped Sapphire

Distress Ink Salty Ocean

Distress Ink Tumbled Glass

Distress Ink Antique Linen

Distress ink Vintage Photo

Distress Ink Walnut Stain

White Gelly Roll Pen 08

Products without affiliate links
Gina K. Masking Magic

Sunshine Sentiment Clear Stamp set StudiolightNL

I would like to enter my card in the following challenges
- Word Art Wednesday: Anything goes
- 613 Avenue Create: Anything goes + summer fun
- A Perfect Time To Craft Open Challenge: Anything goes
- Crafts Galore Encore Challenge Blog: Anything goes