
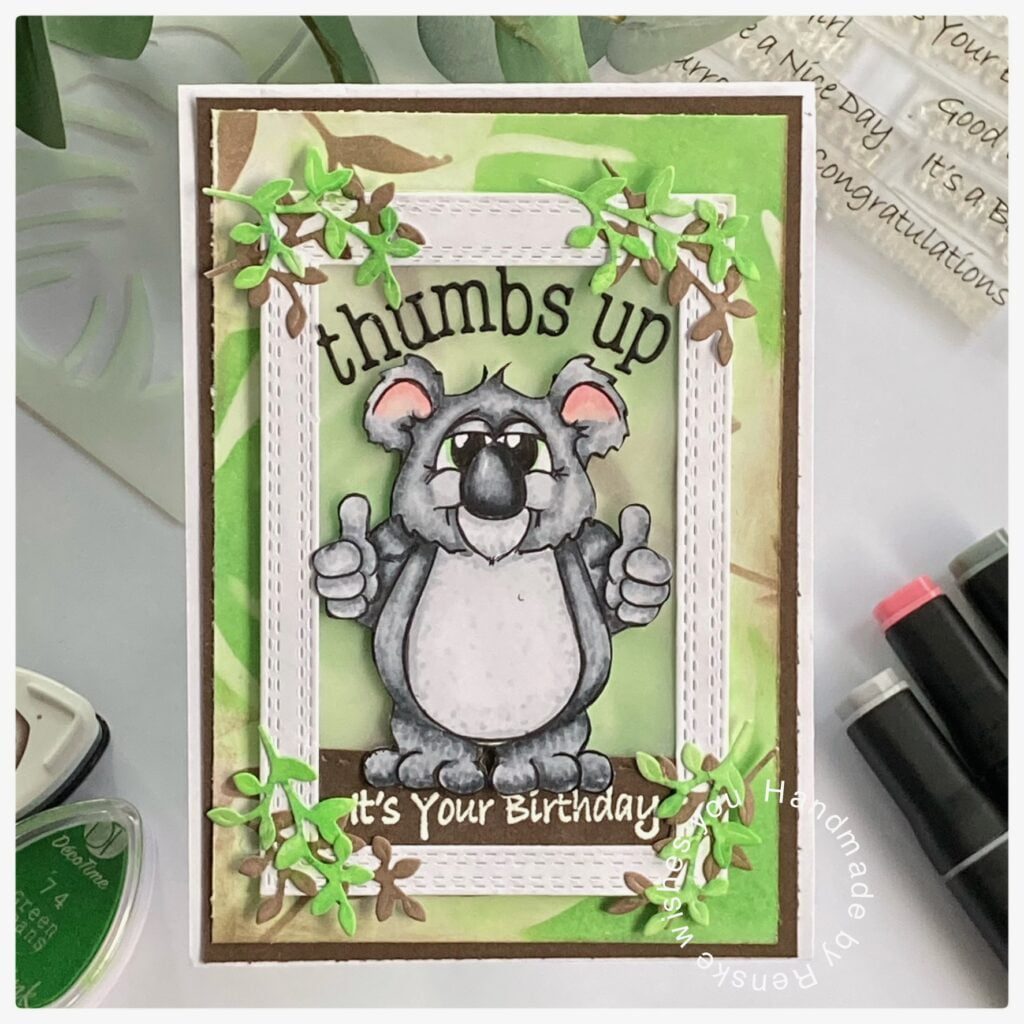
A while ago, my card in the DR. Digi’s Crafters ‘Card Facebook group became card of the week. In it, I was allowed to choose a digital stamp, and I chose “Keith the Cool Koala“. After all those Christmas cards, I finally had time to work with him. So, I made this cute Koala card with it.
So, let’s talk about this card.
Measurements from this Koala card
- I made a top-fold card. You need a piece of white card stock measuring 10,5 centimetres by 30 centimetres. You score at the long side at 15 centimetres.
- A piece of brown cardstock measuring 10 centimetres by 14,5 centimetres.
- A piece of white card stock measuring 9,5 centimetres by 14 centimetres.
- I piece of white card stock to die-cut this frame.
- A piece of vellum to put behind the frame.
- Some white cardstock to die-cut the leaves.
- A piece of brown cardstock to put your sentiment on.
- A piece of black cardstock to die-cut the letters from.
Digital stamp and coloring
I printed my digital stamp on DCP paper and colored it with my alcohol markers.
- Koala: Cool Grey (CG9), Cool Grey 8 (CG8), Cool Grey 7 (CG7), Cool Grey 5 (CG5) , Cool Grey 4 (CG4) , Cool Grey 1 (CG1) and the Colourless Blender (0).
- Nose: Black (120), Cool Grey 9 (CG9), Cool Grey 8 (CG8), Cool Grey 7 (CG7), Cool Grey 4 (CG4) and Cool Grey 1 (CG1).
- Inside of his ears: Pink Pale (09), Blush (136) and Blushed Skin (257)
I fussy cut the image out.


Having trouble editing or colouring digital stamps? Download my free guide for extra tips and tricks to help you perfect your digital stamps!
Making the background
For the background, I used a piece of white card stock measuring 9,5 centimetres by 14 centimetres. I used two stencils for this. On the first stencil, I used the banana leaf. I used the colours Green Beans and Green belt for that. On the other stencil, I used the thinner leaves. This time, I used the colour Rich cocoa for these leaves. After that, I used the access ink on my blender tool to leave some colour between the leaves.
Unfortunately, I did not take a picture of just the background.
Making the elements on the card
I die-cut the frame out of white cardstock.
I used a scrap of brown cardstock to put my sentiment on. I stamped my sentiment with my sticky embossing ink and embossed it with white embossing powder. I glued this behind my frame.
I die-cut some leaves from white cardstock. I colour them with the same ink I used for the background.
And for the words “thumbs up”, I die-cut the letters from black card stock.
Assembling the card
First, I glue my background on the brown cardstock. I glued them on my card base. Now it’s time to assemble the frame with the koala.
Behind the frame, I put my piece of brown cardstock with the heat-embossed sentiment. Behind that, I glued some vellum. I apply the koala with foam tape on top of my sentiment. I glue the black letters around the Koala. In the corners van my frame I glue the leaves.
Now I can put my frame on my card. I wanted to give the frame some dimension and put it with foam tape on my card.
And my card is finished. I hope you like it! Let me know in the comments.
See you next time. Happy crafting!
I’m listing the products I used below. I will link them when I can. Click on the link to go directly to the product. Where available I use compensated affiliate links which means if you make a purchase, I receive a small commission at no extra cost to you. Thank you so much for your support.
Products I used:
- Digital stamp “Keith the Cool Koala” from Dr. Digi’s House of Stamps.
- Two stencils from Craftsensations.
- Chalk ink from Decotimecrafts.
- Memento ink “Rich Cocoa“.
- Leaves die brand unknown.
- Twinmarkers (alcohol markers) from Decotimecrafts.
- Alphabet die from Craftemotions.
- White embossing powder from Ranger
I would like to participate in the following challenges:
- Crafting Happiness Challenges: Celebrations
- A Place To Start: Anything goes
- The Paper Shelter: Anything goes
- Craft Rocket Challenges: Not square
- Crafty Calendar Challenge: At a sentiment
- A Perfect Time To Craft Open Challenge: Anything goes
- Classic Design Challenge Blog: Anything goes
- Pearly Sparkles Challenge Blog: No design paper
- Critter Crazy CHALLENGE BLOG: Anything goes + featured critter
- Crafty Animals: Anything goes + must use an animal
Lovely work. Thank you for joining the Critter Crazy challenge. Hope to see you again.
I love using stencils to create backgrounds. Yours is so perfect with your image, design, and die cuts. Thanks for joining our Pearly Sparkles Challenge.