Imagine being transported to a sunny beach with the soothing sound of waves, warm sand between your toes, and the fragrance of saltwater and tropical flowers. In this upcoming tutorial, I will walk you through creating a beach-themed card that captures the essence of summer.
Our latest challenge on Penny’s Paper-Crafty Challenge blog revolves around using paper, and this DIY beach card is the perfect fit. We are excited to have two wonderful sponsors for this challenge: Odynetika and Polkadoodles. Their amazing products have made this project possible, and we can’t wait to see how you’ll add your personal touch.
For this card, I used a delightful digital stamp from Odynetika, the Miss Lilly Hawaiian stamp.
Let’s dive into this beach card tutorial and create something special!
Materials Needed for this beach card
Before creating our beach-themed card, let’s get all the materials and tools we need. Here’s a detailed list of what you’ll require:
- Craft Card Base: A sturdy cardstock to form the foundation of the card. Any sturdy cardstock will work if you don’t have a specific craft card base.
- Digital Stamps (Miss Lilly Hawaiian from Odynetika): This will be the main image on the card. You can use any digital stamp, clear stamp, or image you like.
- Alcohol Markers: To colour the digital stamp. You can also use coloured pencils, watercolours, or other markers.
- Distress Inks (Walnut Stain and Vintage Photo): This will add shadows to the die-cut craft paper elements. You can use any ink you like for this purpose.
- Die-Cut Elements and Die-Cutting Machine: To cut out shapes such as the frame, palm tree, sun, seashells, and starfish. You can also use pre-cut shapes, hand-cut shapes, or stickers for this.
- White Gel Pen: To add highlights and details.
- Sticky Glue: To adhere elements to the card. You can use any adhesive, such as double-sided tape or other strong adhesives.
- Foam Tape: To add dimension by raising elements off the card base. If you don’t have foam tape, stack pieces of cardstock or use thick glue dots.
- Paper Trimmer: For precise cutting of paper and cardstock. You can also use scissors or a sharp craft knife for this step.
Gathering these materials will prepare you to start crafting your stunning beach card. Next, we’ll move on to the step-by-step process of bringing this summery scene to life.
Step-By-Step beach card tutorial
Creating your DIY beach card involves several steps, each of which builds upon the previous one. Here’s a detailed guide to help you through the process.
I will break down the creation process into manageable steps, ensuring you can follow along easily and achieve beautiful results. Each step focuses on a part of the card-making process, from preparing your digital stamp to assembling the final card.
Step 1: Coloring and Printing the Digital Stamp
In this step, we will work with our digital stamp, “Miss Lili Hawaiian.”
Choosing the Right Paper and Printer Settings
- Paper Selection: rint your digital stamp on DCP paper. This paper is ideal for use with alcohol markers as it prevents bleeding and allows for smooth blending. If you use a different colouring medium, a different paper may be better suited.
- Printer Settings: Set your printer to high-quality print mode to ensure crisp and clear lines on your digital stamp. Adjust the size to about 8 centimetres in height to fit perfectly on your card
Colouring Techniques Using Alcohol Markers
I used the following colour combinations to colour the picture:
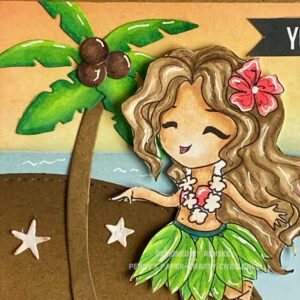
- Skin: Use a blend of Tanned Skin (260), Peachy Blush (259), Salmon Pink (25), and Pale Cream (142) for a natural look.
- Hair: Combine Buttercup Yellow (141), Brown Grey (104), Walnut (100), and Clay (116) to create depth and dimension.
- Flower and Bikini: Opt for Warm Fuchsia (206), Warm Coral (208), and Coral Pink (16) to add a vibrant colour.
- Necklace: Use Pale Cream (142) for a subtle touch.
- Skirt Leaves: Apply Apple Green (160), Weeds Green (162), and Grass Green (47) for a lush, tropical feel.
- Skirt Band: Forest Green (50) will give a nice contrast.
Following these steps’ll bring the digital stamp to life with rich colours and details, setting the stage for the rest of your beach-themed card. Next, we’ll move on to creating the card frame.
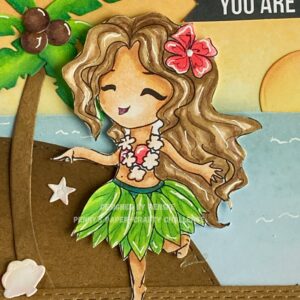
Step 2: Creating the Frame
In this step, we will be creating the frame for the card. To do this, we will utilize the partial die-cutting technique to make a frame.
- Selecting Dies:
- Select two rectangle dies – one with a double-stitched edge and another plain one.
- Die-Cutting the Frame:
- Start by die-cutting the larger rectangle with the double-stitched edge from craft paper to create the base rectangle.
- Then, use the smaller plain rectangle die to create an inner cut-out, which will form the frame. If your rectangle die is not large enough to make the frame the right size, you can use the partial die-cutting technique, which I will explain below.
Partial Die-Cutting Technique explained
- First, place the smaller rectangle die on the already-cut larger rectangle, positioning it where you want the frame to start on the left side.
- Next, lay the top plate of your die-cutting machine only over the area you want to cut, leaving the bottom part of the die exposed and uncut. Run this through your machine.
- Repeat the partial die-cutting process on the right side of the frame to complete the cut-out without extending to the bottom edge. This technique gives you control over where the cuts start and stop, giving you a custom-sized frame.
By mastering the partial die-cutting technique, you will be able to create intricate and precise frames that can add dimension and interest to your card design. After this, we’ll make the background for your beach scene.
Step 3: Making the Background
In this step, we will create a stunning background that evokes a beach scene with a beautiful sky and serene sea. We will use inks for blending and add details like waves with a white gel pen.
Blending Inks for the Sky and Sea
- Prepare Your Workspace:
- Place a piece of white cardstock on your work surface. This will be the base for your background.
- Creating the Sky:
- Masking: Use Post-it notes or masking tape to cover the area where you will create the sea. This ensures clean, straight edges and prevents the sea colours from blending into the sky.
- Ink Colours: Choose inks in shades of yellow, orange, and red to create a warm, gradient sky. The colours I used are Golden Retriever, Yellow Gold, Carrot Orange, Thistle Flower, and Lady Bug.
- Blending: tart with Lady Bug (red) at the top. Apply the ink using a blending tool in circular motions. Gradually blend into Thistle Flower (purple), followed by Carrot Orange, then Yellow Gold, and finally Golden Retriever (yellow) as you move down the panel. Blend the colours to create smooth transitions.
- Creating the Sea:
- Masking: Once the sky is complete, remove the post-it notes and mask the sky area to protect it while you work on the sea.
- Ink Colours: Select shades of blue distress inks for the sea. The colours I used are Bright Eyes, Cookie Monster, Blue Berry, and Pastel Blue.
- Blending: Start with the darkest blue, Bright Eyes, near the horizon. Blend this into Cookie Monster, then Blue Berry, and finally, Pastel Blue as you move down towards the bottom of the panel. Ensure smooth transitions between the colours to mimic the depth of the sea.
Adding Details with a White Gel Pen
- Creating Waves:
- Once the ink blending is dry, use a white gel pen to add wave details to the sea. Draw small, curved lines and dots near the horizon and along the sea to represent waves and foam.
- Add a few highlights to the water to give the sea a sparkling effect.
By blending inks and adding fine details with a white gel pen, you’ll create a vibrant and dynamic background for your beach-themed card. This step sets the foundation for the tropical scene and adds a realistic touch to your card. Next, we’ll move on to die-cutting and colouring the various elements to complete your beach scene.
Step 4: Die-Cutting and Coloring Additional Elements
In this step, we will be enhancing our beach-themed card by creating and colouring additional elements such as palm trees, seashells, and starfish to add depth and interest to the scene.
Stamping and Coloring Additional Elements
- Creating the Palm Tree:
- Die-Cutting: Use a palm tree die to cut the tree trunk from craft paper and the leaves from white cardstock.
- Inking the Trunk: Color the trunk with Distress Ink in Rich Cocoa and Espresso Truffle to give it a realistic bark texture.
- Colouring the Leaves: For the leaves, use alcohol markers in Grass Green (47), Weeds Green (162), and Apple Green (160) and blend the colours to create depth and variation.
- Seashells and Starfish:
- Die-Cutting: Use your dies to cut seashells and starfish from white cardstock.
- Colouring: Color the seashells with alcohol markers in Blush (136) and Pale Cream (142). For the starfish, use similar light and warm tones for a natural look.
- Sun:
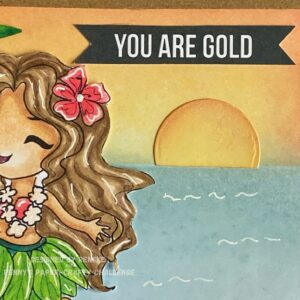
- Die-Cutting: Cut a small circle for the sun from white cardstock and cut the circle in half to create the effect of the sun disappearing into the sea.
- Inking: Color the sun using the same inks used for the sky to maintain a cohesive look.
By carefully crafting and colouring these elements, you’ll add rich details that enhance the beach scene. Next, we’ll move on to assembling the card.
Step 5: Assembling the Card
Now that we have our beautifully blended background, coloured digital stamp, and additional elements, it’s time to bring everything together to create a stunning beach-themed card.
Layering the Elements on the Card Base
- Placing the background and frame:
- Background Assembly: tart by adhering your ink-blended background to the card base using sticky glue or double-sided tape.
- Placing the Frame: Position the die-cut frame over the background and secure it with adhesive, ensuring it aligns perfectly with the edges of the card base.
- Adding the Scene Elements:
- Palm Tree: Attach the trunk of the palm tree to the left side of the card, slightly overlapping the frame. Then, adhere the leaves to the top of the trunk.
- Seashells and Starfish: Arrange the seashells and starfish at the bottom of the card, creating a natural, scattered look. You can place a seashell on the frame for added dimension.
- Sun: Place the die-cut sun to the right of the card.
Using Foam Tape for a 3D Effect
- Applying the digital stamp with Foam Tape
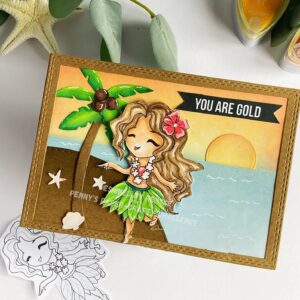
- Place foam tape on the back of the coloured digital stamp. Position the stamp so that the character stands on one leg, with the foot touching the frame for added interaction with the scene.
Final Touches
- Necklace and Flower Highlights: dd small highlights to the necklace and flower using a white gel pen to enhance the details and make them pop.
- Sentiment Banner: Attach a sentiment banner, such as “You Are Gold,” to the card using foam tape or adhesive. Position it in a way that complements the overall design without overshadowing the main elements.
By carefully layering the elements and using foam tape, you’ll create a dynamic, dimensional scene that brings your beach-themed card to life. This step completes the assembly process and adds the finishing touches to your beautiful card.
Let’s Get Creative Together
You’ve learned how to create a stunning DIY beach-themed card that captures the essence of summer. From colouring the digital stamp and blending inks for a beautiful background, to die-cutting intricate elements and assembling the final piece with a 3D effect, each step has brought you closer to mastering this delightful craft.
Now, it’s your turn to get creative and make your beach card. Use these techniques, add personal touches, and let your imagination run wild. I can’t wait to see the unique creations you’ll come up with!
Join the Challenge
I am excited to invite you to participate in the latest challenge on Penny’s Paper-Crafty Challenge blog. This challenge focuses on using paper to create beautiful projects, and your DIY beach card will fit right in. The theme is “Anything goes using Paper”. With wonderful sponsors like Odynetika and Polkadoodles, you can showcase your skills and maybe even win fabulous prizes! Click the button to join the challenge.
More Beach Card Inspiration
If you enjoyed making this beach-themed card, here are some related blog posts that might spark even more creativity:
I hope these projects inspire you to continue exploring and experimenting with your card-making skills. Happy crafting!
Products used for this beach card
Affiliate Disclosure: This post contains affiliate links, which means I may earn a small commission at no extra cost if you purchase through these links. I only recommend products and services that I use and trust. Your support helps me continue to provide free tutorials and creative inspiration. Thank you for supporting my blog and helping me to keep sharing my passion for card making!
Products with affiliate links
White Gelly Roll 08 Pen

Products without affiliate links
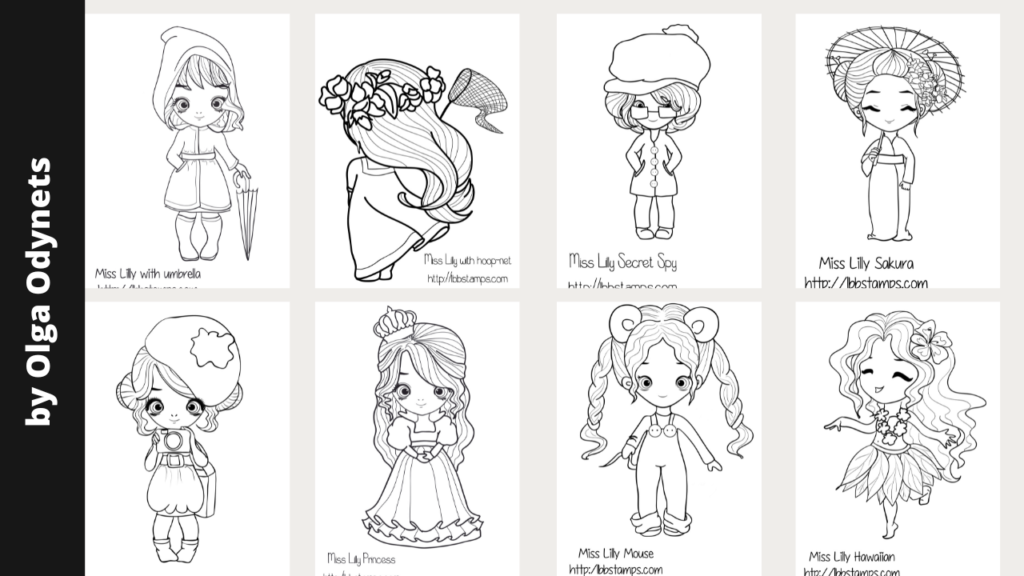
Line art, 48 colouring pages, Miss Lilly
Shop doesn’t exist anymore (noted September 2025)
- Rectangle dies from Card Deco
- Craft card base (brand unknown). Bought at ActionNL.
- Alcohol markers from Decotiecrafts.
- Beach dies from Aveccreative.
- Sticky glue (brand Unknown). Bought at ActionNL.
- Foam Tape (brand Unknown).
I would like to enter my card in the following challenges:
- 4-Season Swap Challenge Blog: Water
- Dream Valley Challenges: Summer Colours
- Make My Monday Challenge Blog: Outdoor Summer
- Passion for Markers: Summer
- Cardz 4 Galz: Summer fun
- Through The Purple Haze Challenges: Anything goes
- Craft Rocket Challenges: No design paper
- Lil Patch of Crafty Friends Challenge …: Anything goes
- A Perfect Time To Craft Open Challenge: Anything goes
- Crafts Galore Encore Challenge Blog: Anything goes


A gorgeous summer card – I love it (and your very comprehensive instructions!)
Thank you for sharing your card in our challenge at Dream Valley.
Sharon – Dream Valley Challenge Designer
http://glittertastic.blogspot.com/ – Stop by and see me!!!
Hello Sharon, thank you so much for your lovely comment.
Nice card, feels like summer!
Thanks for joining our water-challenge on the 4 Season blog.
grtz Colien
Thank you
Oh wow she looks stunning and great tutorial. Thanks for sharing with us at passion For Markers
Thank you so much
A fabulous fun beautifully coloured summer card,thank you for joining in at MMM
Thank you so much
Your colouring is wonderful and how you got her hair to look so real is amazing. A perfect summer card. Thanks for joining us at MMM, Johanna DT
Ah thank you so much for your lovely comment