

Some links in this post are affiliate links. This means I may earn a small commission if you make a purchase, at no extra cost to you. I only recommend products I use and genuinely enjoy in my own cardmaking. Read more here.
Hello Crafty Friends! Halloween is just around the corner — the perfect time to make a cute and spooky handmade card! In this tutorial, I’ll show you how to make a Halloween card step-by-step. We are creating a cute Halloween scene with Polkadoodles digital stamps and simple masking techniques.
You will learn how to build a background with distress inks. The steps are simple enough for beginners. You will also color the main images to add detail to your card.
By the end, you’ll have a finished Halloween card and new techniques to use in future projects.
What You’ll Need to Make Your Spooky-Cute Halloween Card
Before we jump into the creative process, let’s gather all our crafty supplies. Don’t worry if you don’t have everything on this list—card making is all about working with what you have and making it your own! Having everything ready makes the process much easier, so you can focus on creating your Halloween scene. Use this list as a guide for any Handmade Halloween card you are making.
Where to find the Polkadoodles products
All digital stamps and sentiments used here are on the Polkadoodles website. Physical Polkadoodles stamps can be used as an alternative, though they differ from the digital versions.
You can grab them here:
- Winnie Wednesday Bat Girl Halloween Autumn digital stamp
- Halloween Trick or Treat printable Greetings
(Affiliate links – at no extra cost to you, they help support Renske Wishes You!)
Tip: Using these stamps helps follow the tutorial, but any Polkadoodles stamps work. Physical stamp users: check Step 1 for masking guidance.
Prep Your Scene Supplies
- Cardstock – black and white for base layers, or any colored/patterned cardstock you already have at home, for a budget-friendly alternative.
- Cutting tools – scissors, die-cut machine, and stitched rectangle die for clean edges, or a craft knife and ruler as a budget-friendly alternative.
- Masking materials – masking paper to cover images while inking, or Post-it notes / low-tack masking tape as a budget-friendly alternative.
- Tree & grass stencils – for depth and texture, or use hand-drawn shapes / stencils you already have as an alternative.
Color Your Scene Supplies
- Background inks: Distress Inks & Oxides (Mowed Lawn, Pine Needles, Black Soot, Chipped Sapphire, Picked Raspberry, Villainous Potion) or any water-based dye/pigment inks.
- Blending tools: Blending brushes, sponge daubers, or even clean makeup brushes.
- Coloring tools: Alcohol markers, colored pencils, watercolor pencils, water-based markers, gel pens, watercolor paints, or ink pads with a water brush.
- White for highlights: White gel pen, white paint pen, or opaque white watercolor.
Finish Your Scene Supplies
- Paper & Tools – for assembling layers.
- Assembly & embellishments: Paper and tools for layering.
Pro tip: Budget or experimenting? Any of these alternative supplies works and lets you add your own twist.
Once your supplies are ready, start creating your Halloween card—or experiment with a few DIY variations!
Have fun experimenting with color palettes! Go classic with orange and black, or try a fresh twist like purple and teal. Each combination creates a distinct Halloween mood.
Planning Your Halloween Card Layout: Make Your Scene Pop!
Before inking and coloring, plan your layout:
- Decide where to place the digital stamp.
- Position the sentiment for balance.
- Do a quick sketch to check spacing and flow before moving on.
Deciding Where Everything Goes
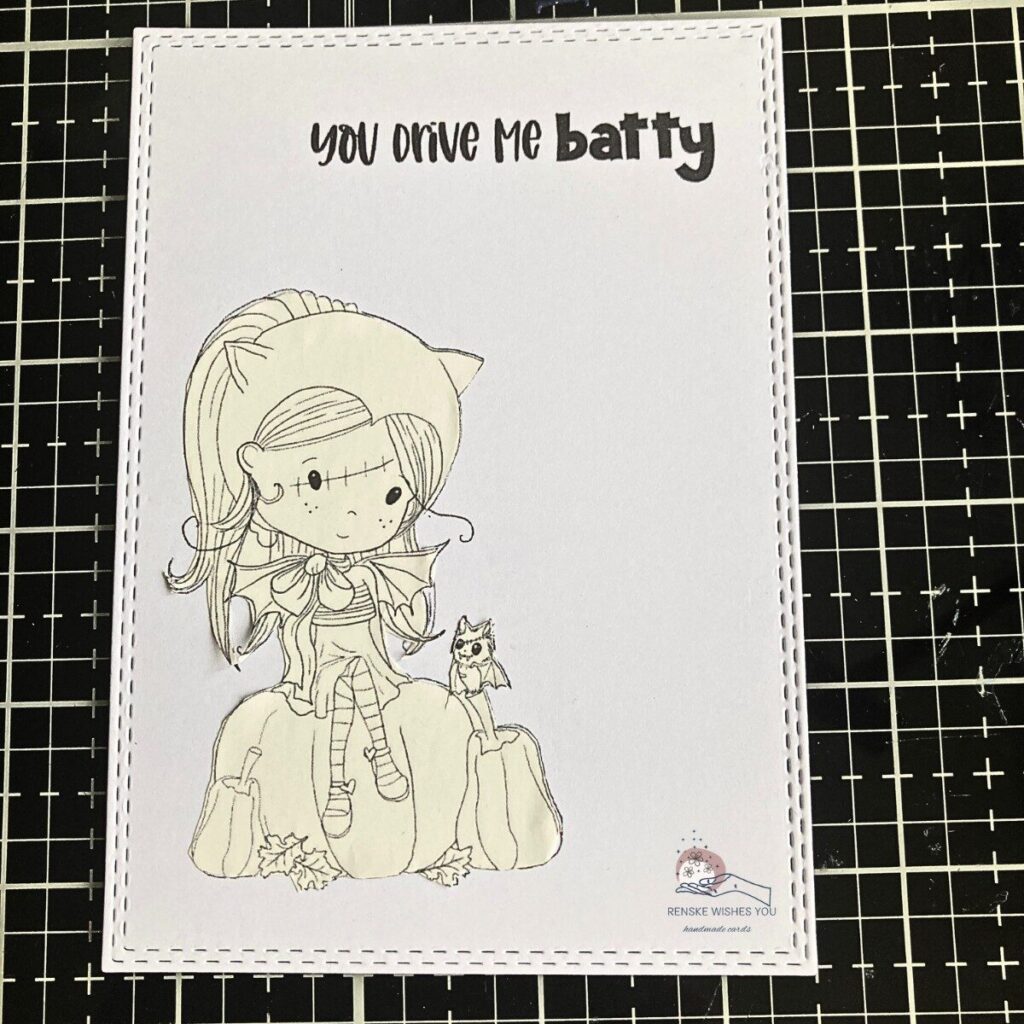
Think about where your digital stamp will sit on the card and where the sentiment will go. For my card, I placed Bat Girl in the bottom corner and let the sentiment float diagonally above her—it creates a nice flow and gives your eyes somewhere to travel across the scene.
Keeping the Frame in Mind
If you’re using a stitched rectangle die, make sure your stamp and sentiment fit comfortably within the frame and look visually balanced. Consider adding a few simple layers or small accents to complete your scene without overcrowding it.
Tips for Visual Balance
- Arrange your elements so your scene feels open and balanced—it helps each detail stand out and shine.
- Layer taller elements like trees or grass with smaller details like pumpkins or bats to create visual interest.
- Add a few small accents to fill empty spots, but don’t overdo it.
Example Layout
On my card, I placed Bat Girl in the bottom left corner and positioned the sentiment diagonally in the top right for visual flow. A few softly inked background trees add depth and keep the composition balanced
Would you rather fill your Halloween scene with lots of spooky details or keep it simple and clean?
How to make a Halloween card Step-by-step
Now it’s time to create your cute Halloween card! Follow this step-by-step tutorial to print and mask your digital stamps, blend a spooky distress ink background, and color your characters for a polished, festive scene.
This guide shows how to make a Halloween card step by step, with tips to ensure a great result. Even if you’re new to digital stamps or masking, you’ll create a spooky-cute scene to be proud of.
Step 1 – Prepare Your Stamp and Mask
The first step is to print or stamp your image and sentiment, then cut and apply a mask. This shields your main design while you blend and layer inks, keeping your card crisp and polished..
Printing Your Digital Stamp
Digital stamps are brilliant for card making because they’re so versatile! Unlike traditional rubber stamps, you can resize them to fit your project perfectly.
- Place your digital stamp in a Word document, thinking about where it will sit on your card.
- If using a stitched rectangle die, make sure there’s enough space around the stamp and sentiment to fit neatly inside.
- Position the main image in the bottom corner and the sentiment diagonally above for visual flow and room for the background.
- Adjust your stamp’s size or flip it in Word using the picture tools if needed.
- Print your design. Keep Word open, because we’ll use it again to create the mask.

Want to learn more about working with digital stamps? Download my free guide where I explain everything—from resizing and printing to creating masks and layering inks. It’s a handy reference for all your Halloween card projects!

Having trouble editing or colouring digital stamps? Download my free guide for extra tips and tricks to help you perfect your digital stamps!
Creating the Mask
The masking technique is brilliant for creating layered scenes where elements appear to be in front of or behind each other. It’s like magic for your Halloween card design!
For digital stamps
- Cut a piece of masking paper to cover your printed stamp. Peel off the release paper and stick it over the digital stamp.
- Print the stamp again onto the masking paper, so it matches the original size. Make sure you have the paper in your printer in the same way. (on photo 2 you can see I had it wrong the first time). Print it once more, and now the image will end up on the masking paper.
- Place the masking paper with the print back on the release paper.


For physical stamps
- Ink your stamp directly onto masking paper.
- Carefully cut it out to match the image.
- Place the mask back on the release paper—it will protect your stamped image just like a digital mask.
Masking Tips
- Press the mask firmly against the stamp so no ink sneaks underneath.
- Layer multiple masks to protect other areas and add depth.
- Practicing masking improves your card’s overall look and clean layering.
Troubleshooting Your Masking
- Mask shifts while inking: Secure it with low-tack tape or repositionable adhesive. Most good-quality masking paper stays in place, but if it moves, don’t worry—just reposition and continue.
- Mask tears or doesn’t stick well: If your mask tears, trim the edges carefully and reuse the intact part, or cut a new mask. Low-tack tape or a tiny bit of repositionable glue can help it stick. It’s okay if your first mask isn’t perfect—masking takes practice, and even imperfect masks can give great results!
Tip: Mistakes are part of the process. Every misalignment or tear teaches you a little more about masking, so keep experimenting and enjoy creating your Halloween scene.
Step 2 – Cutting and Preparing Your Card Base: Build the Perfect Foundation
Start by cutting and prepping your card base and layers. This gives you a solid foundation to build your Halloween scene.
Cutting the Background
Place your stitched rectangle die over your stamp and sentiment to make sure everything fits nicely. Once it looks good, run it through your die-cut machine to cut your background.

Making the Card Base
Cut a cream-colored cardstock base to fit your 14.5 × 10.5 cm stitched rectangle background.
To make it:
- Cut a piece of cardstock 21 cm by 14.5 cm.
- Score at 10.5 cm and fold in half.
Your card base is ready. Next, layer your mats and background pieces to start building your scene.
Adding the First Layer
Cut a black mat 14 cm by 10 cm. Place it behind your background layer to frame the scene. Set it aside with your card base.
Tip: Spend a few minutes planning and cutting your layers carefully. Once your base and mats are ready, you’re all set to start building your distress ink background.
Step 3 – Create the Background with Ink Blending: Bring Your Scene to Life
Get your background ready by blending distress inks with your masks and stencils. This adds depth, texture, and that perfect spooky-but-cute Halloween vibe to your card.
Masking Your Stamp
Before you start inking, stick your Step 1 mask over the digital stamp and press down the edges so no ink sneaks underneath.
Creating the Grass
Let’s start with the grass at the bottom of your scene. I like to use a grass stencil—place it where you want your grassy area. Then, with a blending brush, apply Mowed Lawn Distress Ink across the section. To add depth and shadow, lightly brush Pine Needles along the edges. This gives the grass more dimension and makes your scene feel more layered.
Once the grass is complete, remove the stencil. Flip it over and tape it down over the grass to mask it. This will protect the grassy area while you ink the sky.

Blending the Sky
Now use the grass stencil to mask the grass. Now place the grass on the grass area.
Place a tree stencil over your scene to mask the tree shapes, keeping the silhouettes crisp. Blend the sky colors from bottom to top, letting each shade melt into the next, creating a soft, moody gradient that evokes a spooky, autumn evening:
- Black Soot (Distress Ink)
- Chipped Sapphire (Distress Ink)
- Villainous Potion (Distress Oxide)
- Picked Raspberry (Distress Ink)
- Mustard Seed (Distress Ink)

Using your blending brush, apply the colors from bottom to top, gently overlapping each shade. Use soft back-and-forth strokes, moving slightly up and down, and repeat a few times until the transitions blend smoothly. Remember, ink blending takes practice, so don’t worry if your first attempt isn’t perfect! Each card is unique, and those little imperfections add character to your handmade creation.
Lightly spritz a few drops of water onto the inked background for extra texture, then carefully peel off all stencils and the stamp mask.

Tips & Tricks
- Practice gentle, circular motions with your blending brush for smooth gradients.
- Layering Distress Inks and Distress Oxides gives more depth and a richer color.
- Use this step to have fun experimenting with your Halloween scene! Try different distress ink backgrounds, mix colors, and play with layering—you’ll see how even small tweaks can add depth and make your card truly come alive. Don’t be afraid to try new ideas; every attempt teaches you something and brings your card closer to your perfect spooky scene.
Your background is done, and your Halloween scene is starting to come together.
Step 4 – Color the Digital Stamp: Bring Your Halloween Characters to Life
Now that your background is ready, it’s time to color your digital stamp and add some shading to the trees—this is where your Halloween scene really comes to life!
Coloring Your Digital Stamp
Grab your alcohol markers and start coloring your digital stamp—focus on the main character, her outfit, the pumpkins, and the little bat. Here’s a palette you can follow:
- Skin: Pale Cream, Salmon Pink, Peachy Blush, Tanned Skin
- Hair: Pale Cream, Brown Grey, Walnut, Clay
- Pumpkins: Lemon Yellow, Bitter Sweet, Orange, Cardinal
- Bat Hat & Dress: Cool Grey 5, 7, 8, 9, and Black
- Bow & Purple Stripes: Neon Violet, Ultra Marine, Violet Dark
- Bat: Cool Grey 5, 4, 3
Once your coloring is done, use a white gel pen to add highlights on the hat, dress, and pumpkins. This makes the colors pop and gives your scene a bit of extra depth.
Adding Depth to the Trees
After taking off the tree stencil, the trees will be white. Shade the edges with alcohol markers (Cool Grey 5, 4, 3) and blend inward with a colorless blender. This adds depth and makes the trees stand out. You can leave them white if you prefer a simpler look.
Tips & Tricks:
- Using alcohol markers is a fantastic way to learn how to use digital stamps for card making and create a polished, professional finish.
- Don’t rush the highlights—they add just enough sparkle for a cute Halloween card tutorial feel.
- Play with shading on the trees and characters to make your scene feel dynamic and layered.

With your background, trees, and digital stamp colored, you’re ready for Step 5. Start assembling the layers to finish your Halloween card.
Step 5 – Assemble Your Halloween Card: Bring Your Spooky Scene Together
Now it’s time to put your card together. Layer the background, digital stamp, colored trees, and grass, securing each piece so your Halloween scene comes together neatly. The little details can really make your handmade Halloween card stand out!
Layering Your Card
Stick the black mat onto the cream card base to frame the scene. Then attach the completed scene using glue for a flat finish or foam tape for dimension.
Adding the Finishing Touches
At this stage, you can add optional embellishments such as sequins, small Halloween accents, or a touch of shimmer to enhance your scene.
Tips & Tricks
- Using foam tape on certain layers adds depth and makes your scene more dynamic.
- Handmade Halloween cards shine because of their unique, personal touches.
- Show off your DIY Halloween cards and crafty skills with friends or online.

“Hooray! Your Halloween card is complete. All your layers, colors, and details are in place using digital stamps, masking, and ink blending. Even if it doesn’t look exactly like mine, celebrate what you’ve created—it’s unique, handmade, and totally yours!”
Let’s Get Creative Together!
Congratulations on creating your very own handmade Halloween card using digital stamps and masking techniques! I hope you’ve enjoyed this creative journey and are proud of what you’ve made. Remember, card making is about enjoying the process as much as the finished product.!
Now it’s your turn! Grab your digital stamps, inks, and markers, and bring your own Halloween card to life.
Have you tried making Halloween cards before? I’d love to hear about your experiences or see your creations!
Join the Polkadoodles Challenge
Want to share your handmade Halloween card and get inspired by other crafters? The Polkadoodles Challenge is the perfect place to do it!
How to join
- Create your card – you can use Polkadoodles stamps or any other supplies you love. Using Polkadoodles products is not required.
- The theme is always “Anything goes”.
- Take a clear photo of your finished card. It doesn’t need to be perfect; we just want to see your design.
- Click the button below to go straight to the Polkadoodles Challenge page.
- Upload your photo, add your details, and submit your entry.
By participating, you’ll connect with other crafters, get inspired, and your card might even be featured on the Polkadoodles blog!
More halloween card design idea
Want more DIY Halloween card ideas? Check out these tutorials for extra inspiration and simple, step-by-step tips.
Happy crafting, and remember—the most important ingredient in any handmade card is the joy you put into making it!
Polkadoodles products in the Spotlight
Affiliate Links: The products mentioned in this post are affiliate links. If you decide to purchase through these links, I may earn a small commission at no extra cost to you. These commissions help keep my blog running, so I truly appreciate your support!
Winnie Wednesday Bat Girl Halloween Autumn

This is the version I used for this tutorial. It is a black and white digital stamp for people like to colour.
Winnie Wednesday Bat Gril pre-coloured

This is the Pre-coloured version of the stamp. Perfect for people don’t like colouring
Halloween Trick or Treat printable Greetings

Lot’s of Halloween sentiments in this bundle.
I would like to enter my card in the following challenges
- Make My Monday Challenge Blog: Halloween colours
- A Place To Start: Anything goes
- Try it on Tuesday: Halloween
- Unicorn Challenge Blog: Autumn and/or Halloween
- Passion for Markers: Halloween
- Crafty Gals Corner: Fill in the blank: Spooky……
- The Paper Funday Challenges: Anything goes + cute or creepy
- CREATIVE INSPIRATIONS: Autumn something spooky
- Crafty Catz: Anything goes + halloween
- Creatalicious Challenges: Anything goes + Fall colours or Halloween
Great Halloween card! Thank you so much for entering our challenge at Try it on Tuesday. Looking forward to see you again next challenge.
Regards,
Mia
Designer for Try it on Tuesday
craftartista.blogspot.com {My Blog}
Thanks a lot.
What a fantastic card Renske. The image is adorable and your colouring is perfect. Your background is amazing. Thanks for sharing with us at Passion for Markers challenge. Hugs, Denise x
Thank you so much for your lovely comment.
Love the non-traditional Halloween colors! Beautiful card. Thank you for sharing with us @ Make My Monday. Tee DT
Thank you.
Such a spooky cute card! The tips and details you provided are amazing, especially for those of us who aren’t so comfortable with digital stamps. Thanks for sharing with us at the Paper Funday Challenge.
Oh thank you so much for your lovely comment. Glad you like it.