
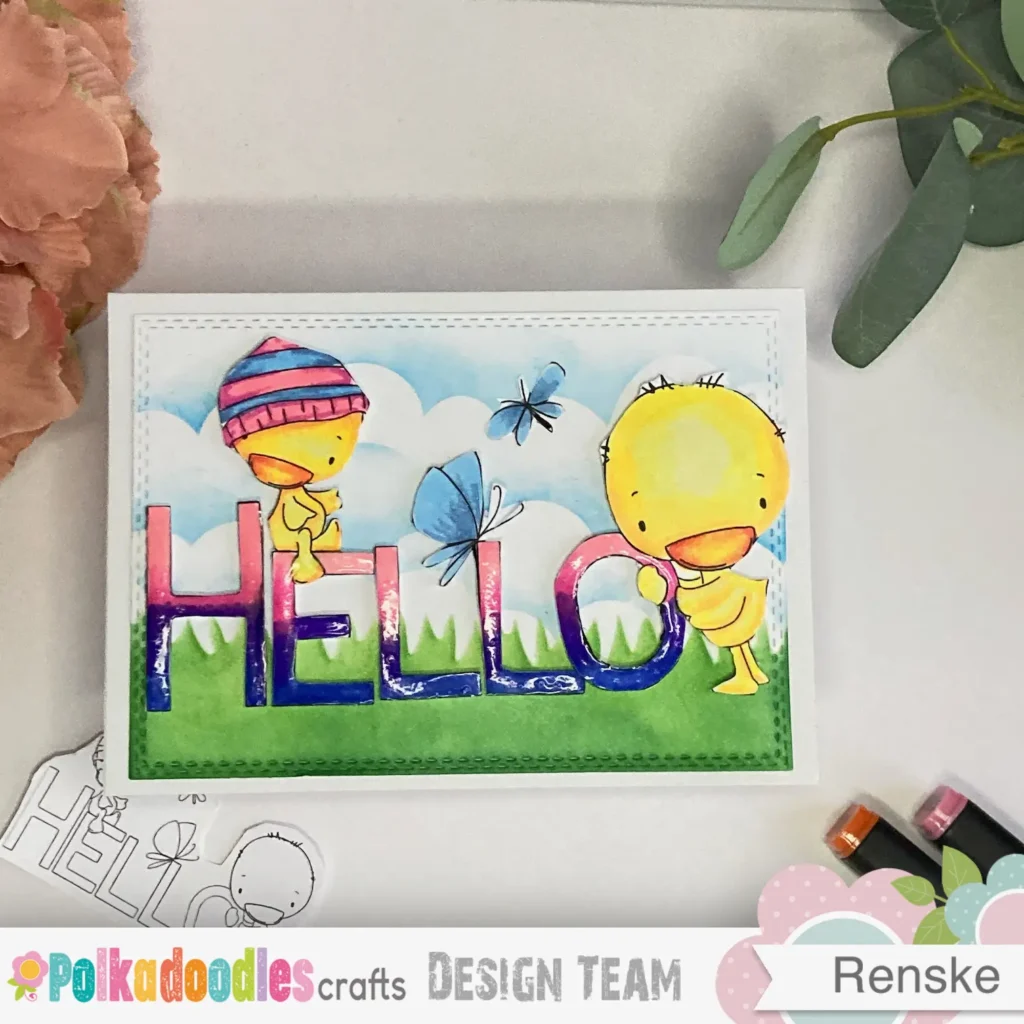
Spring might not be here yet, but we can bring a bit of that spring vibe into our craft rooms. This Hello Spring card has bright colours, simple techniques, and a cheerful design that’s easy to recreate. It’s a great way to bring a little bit of spring into your crafting
I created this sweet card for the new Polkadoodles challenge using the Hello Spring digital stamp from Polkadoodles. The stamp gives a fun and vibrant look, making it perfect for a spring greeting card. Using alcohol markers for smooth colouring and paper glaze for added texture gives this card a nice blend with a touch of shine.
Let’s go through the steps so you can make your version of this Hello Spring card.
Materials for Your Hello Spring Card
To make a bright and cheerful ‘Hello Spring’ card, picking the right materials is key. This design uses digital stamping, alcohol marker colouring, and soft ink blending to bring that fresh spring vibe. Whether you go for Distress Inks or want to try Paper Glaze, these supplies will help you create a fun and vibrant look.
Digital Stamp: A Simple Start with Endless Possibilities
The “Hello Spring” digital stamp from Polkadoodles makes it easy to design a seasonal card. Digital stamps let you resize, flip, and adjust the image to fit your card layout. Once printed, you can colour it however you want, making each card unique.
Shop the stamp here
Alcohol Markers: Smooth Blending for a Polished Look
Alcohol markers give you rich, vibrant colours with smooth blending. They are excellent for shading and adding depth to your stamped image, making it stand out.
If you don’t have alcohol markers, water-based markers or coloured pencils work too – just tweak your technique.
Background Details: Soft Blending with Inks and Stencils
To create a soft spring scene, you will need:
- Distress Ink Mowed Lawn, Salty Ocean, and Pine Needles: Perfect for blending a natural-looking grass and sky. Use whatever ink you have.
- Grass stencil and cloud stencil: great for adding depth and texture to your background.
- Blending brush: Helps apply the ink smoothly for a soft transition between colours.
Adding Shine: Paper Glaze for Extra Detail
For a little shine, add Paper Glaze to the letters of your sentiment This adds a subtle raised effect that makes the text stand out without overwhelming the design.
Basic Tools to Bring It All Together
- Rectangle die: an easy way to frame your card for a clean, finished look.
- Die-cutting machine: For die-cutting your rectangle shape.
If you’re new to digital stamps, this is a great opportunity to try them out. Feel free to swap out stencils for patterned paper or hand-drawn details if you prefer a different background style.
Spring Cards Tutorial: Make Your Own Hello Spring Card
Now that your supplies are ready, let’s bring your Hello Spring card to life. This step-by-step guide will take you through colouring, ink blending, and adding texture to create a bright, cheerful design. Let’s get started!
Step 1. Printing and Colouring the Hello Spring Digital Stamp
The Hello Spring digital stamp is the centrepiece of this card. Its bold design fills the space perfectly, so you don’t need extra embellishments. Start by printing and colouring the Hello Spring digital stamp to make it the focal point of your card.
Printing the digital stamp
I set the width to 13.5 cm, which automatically adjusts the height to maintain the correct proportions. Printing on DCP paper is great for alcohol markers, it gives smooth blends and vibrant colours.
How to Colour the Hello Spring Digital Stamp with Alcohol Markers
Once it’s printed, let’s get colouring. Here are the marker combinations I used:
- Duck’s body: Pale Yellow, Pastel Lemon, Lemon Yellow, and Orange
- Beak: Lemon Yellow, Yellow, Orange, and Vermillion
- Butterflies and blue hat stripes: Baby Boy, Sky Blue, and Midi Sky
- Pink hat stripes: Pale Pink, Rose Pink, and Peony Purple
- Gradient letters: Cobalt Blue, Ultramarine, Peony Purple, and Rose Pink
How to Create the Gradient Letters
or a smoother gradient, start with lighter shades and build up the darker colours gradually. This helps avoid harsh lines and creates a more fluid transition. Blend downwards, layering each subsequent colour as you go (Cobalt blue, Ultramarine, Peony Purple and Rose Pink).
To get a smoother gradient, work in small, circular motions to help the colours blend.” The key is to build the colour gradually and blend well.
Experiment with different colour schemes. You could go for soft pastel gradients or bold contrasts to make your card stand out.
Adding Paper Glaze to the letters
I added a thin layer of Paper Glaze to the letters to make them shine. It takes a while to dry, but the glossy finish is worth the wait.


If you’re new to this, apply a small amount and let it dry completely before moving on to the next step.

Having trouble editing or colouring digital stamps? Download my free guide for extra tips and tricks to help you perfect your digital stamps!
Step 2: Creating the Spring Background
Once your Hello Spring card image is coloured and dry, let’s move on to the background. Let’s create a simple spring background that’ll complement your ‘Hello Spring’ card. We’ll start with the grass and add some fluffy clouds next. This project is simple and great for beginners.
Make the Grass
- Place the grass stencil on your card panel and tape it down.
- Using Mowed Lawn Distress Ink and a blending brush, cover the bottom of your card with a smooth blend.
- Next, use Pine Needles Distress Ink along the grass edges to create a darker, more defined border.
Add the Clouds
- Place the cloud stencil above the grass area.
- Take Salty Ocean Distress Ink and gently apply it along the stencil edges to create soft, fluffy clouds
- Layer the clouds to your liking, the more layers, the more texture!”
For more texture in your clouds, try varying the pressure of your blending tool for different shades
No stencils? No problem! You can cut out cloud and grass shapes from plastic or thicker paper, and then use the same technique to get a similar look. Place these cutouts over your card and use the same technique to achieve a similar look.
This background is quick to make and sets the tone for a spring card. Let your creativity flow!
Step 3: Adding Special Touches for Extra Dimension
Now that the background and stamped image are ready, let’s add some special touches to make the card pop. In this step, we’ll assemble the card.
Assembling the Card
- Cut out the elements: Cut out the elements. Start by cutting the letters and duck image. This makes it easier to handle each piece separately.
- Add foam tape: Add foam tape to the back of the letters and duck. This will help them stand out and add depth to your card.
- Position the pieces: Place the letters and duck on the background first. This way, you can ensure everything fits perfectly before sticking them down.
- Stick them down: Once you’re happy with the placement, peel off the foam tape and stick the letters to the grass.
- Add a butterfly: Cut out the butterfly and place it in the sky without foam tape. This gives the card a layered look and adds dimension
Final Touches
Attach the panel to the base card using a 10.5 cm x 14.8 cm landscape card. Stick the background panel with strong adhesive.

Just like that, the card’s ready! Simple touches like these can elevate the design. Let your creativity shine and enjoy the process.
Let’s Get Creative Together
Now that you’ve learned the steps to create this Hello Spring card, let’s get crafting! You now know how to create fun spring cards with Polkadoodles Hello Spring digital stamp. Feel free to experiment with different colours and techniques. Try new things, and enjoy the process. Crafting is about self-expression and finding your unique style.
Join the Challenge
Want to share your creations? Join the Polkadoodles challenge and get inspired by others in the community. You don’t need to use Polkadoodles products to join the challenge. I’d love to see your cards, so tag me when you share them online!”
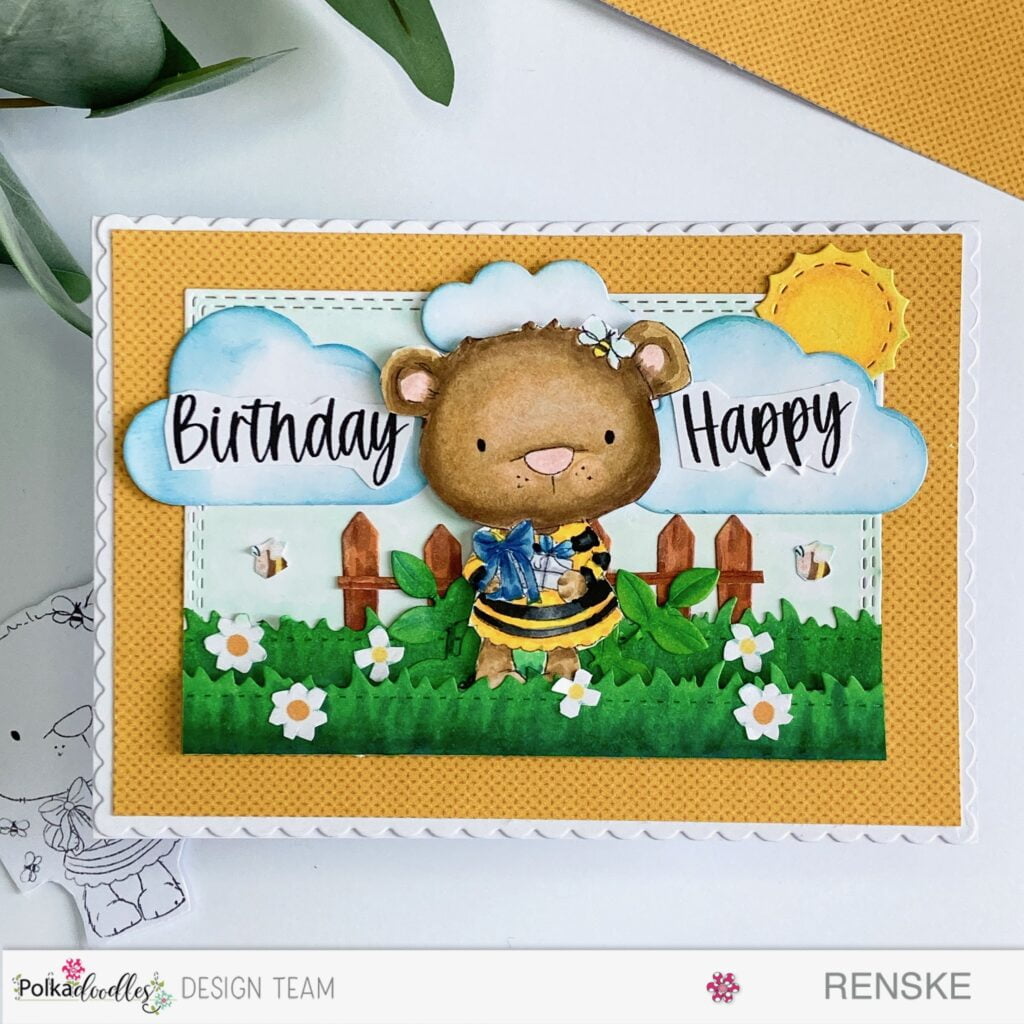
More Hello Spring card ideas
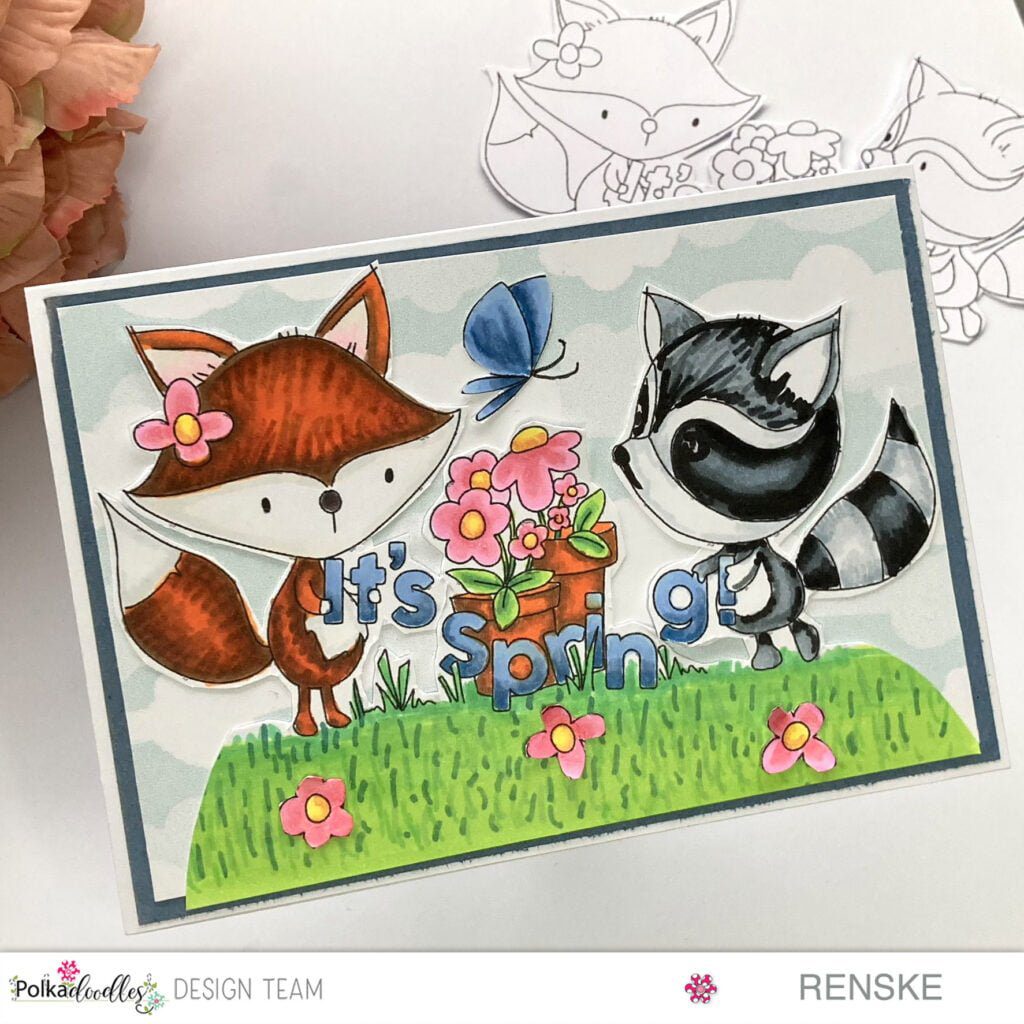
Spring animals card | Polkadoodles
Another Spring card with Polkadoodles products
Polkadoodles products in the spotlights
Affiliate Links: The products mentioned in this post are affiliate links. If you decide to purchase through these links, I may earn a small commission at no extra cost to you. These commissions help keep my blog running, so I truly appreciate your support!
Hello Spring Digital stamp

I would like to enter my card in the following challenges
- A Perfect Time To Craft Open Challenge: Anything goes
- Crafts Galore Encore Challenge Blog: Anything goes
- Creative Moments: Cute
- Critter Crazy CHALLENGE BLOG: Anything goes + featured critter
- Crafty Animals: Anything goes + must use an animal