
Hello everyone!
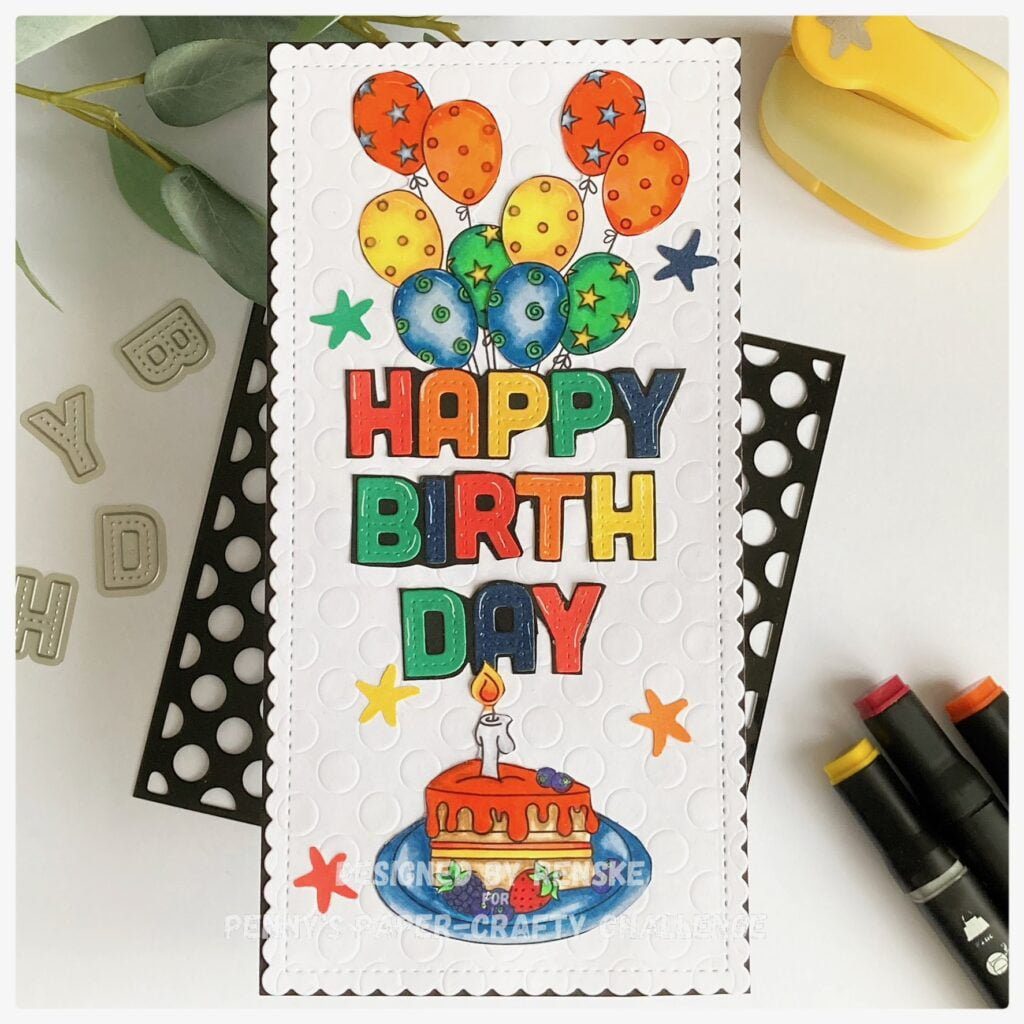
It’s time again for a new challenge on the Penny’s Paper-Crafty challenge blog. The theme is always anything goes. For this new challenge, I created a Happy Birthday slimline card featuring a cake and balloons.
For this challenge, I got to work with the digital stamp Happy Birthday slice by Mirtillamente.
Who wouldn’t want cake and balloons for his/her birthday? For this card, I wanted to use bright colours to make it nice and festive. In addition, I again used the dry embossing technique with your stencil.
So, let’s get into it.
Card recipe for this happy birthday slimline card
- The base of the card is the size of a slimline card. You will need a piece of white card stock measuring 21 centimetres by 21 centimetres. Score at 10,5 centimetres.
- A piece of white cardstock to use for your dry embossing with stencils on.
- Digital stamp.
- Letter dies.
- Stencil.
- Alcohol markers. But you can use any colour medium you like.
- Punch.
- Coloured cardstock.
- Black card stock measuring 21 centimetres by 10,5 centimetres. And scraps. Fi
- Slimline die.
- Die-cutting machine.
Coloring of the digital stamp.
I printed my digital stamp on DCP paper.
As you can see, I did not use the digital stamp as you buy it. I decided to separate the pastry and balloons. This time, I did so by simply cutting them apart after I printed them.
I coloured the image with my alcohol markers (Twin markers):
- Red Balloon: Cardinal (244), English Red (249) and Burgundy (247).
- Orange Balloon: Cardinal (244), Amber (266), Carrot Orange (269) and Orange (23).
- Yellow Balloon: Orange (23), Deep Yellow (32), Lemon Yellow (35) and Pastel Lemon (39).
- Green Balloon: Weeds Green (162), Grass Green (47) and Forest Green (50).
- Blue Balloon: Dark Sky (191), Midi Sky (190) and Light Sky (189).
- Flame: Cardinal (244), Orange (23), Deep Yellow (32) and Lemon Yellow (39).
- Candle: Cool Grey 4 (CG4) and Cool Grey 1 (CG1).
- Frosting and strawberry: Cardinal (244), English Red (249) and Burgundy (247).
- Cake: Buttercup Yellow (141), Caramel (253) and Walnut (100).
- Grapes and berries: Blue Grey Purple (158), Electric Purple (159) and Violet Dark (274).
I coloured the balloons twice.


On top of the balloons and the frosting, I applied Paper Glaze to give it some shine.
Dry embossing with a stencil.
I wanted dots in the background of the card. I don’t have these as an embossing folder, but I do have a stencil with dots. So, I decided to apply the technique of dry embossing with a stencil.
To use this technique, you do need a die-cutting machine. Take the bottom plate of the die-cutting machine. This is where you place your embossing mat on top. Spray your paper with water on both sides. Place the wet paper on top of your embossing mat. Place another sheet of paper on top and close with your transparent plate. Run this through your die-cutting machine.
Now you have these beautiful dots on your paper. I die-cut a slice of that with a slimline die.
Creating the sentiment.
On this card, I wanted to use rainbow colours. So, I decided to die-cut the letters for the text Happy Birthday in rainbow colours too.
I pasted the letters on black paper. I cut this out along the letters so that I would be left with a border of black as a shadow.

Assembling the card.
First, I glue the black slimline piece on top of my base card. I put all the elements on my card and glued it down. I punch some stars in the same rainbow colours and glue them on my card.
I glued my panel on top of the black cardstock, and the card is finished.

Thank you so much for visiting my blog. Check out my other team members’ creations on the Penny’s Paper-Crafty challenge blog. I hope to see you there with your creations.
Happy Crafting!
Inspiration Hub: Let’s Get Creative Together
As we wrap up this tutorial, let’s take a moment to reflect on the wonderful slimline birthday card we’ve created together. From colouring the digital stamp to embossing with stencils, we’ve embarked on a creative journey filled with joy and creativity. Now, it’s time for you, our readers, to unleash your creativity and craft your beautiful cards!
More birthday card inspiration
Looking for more easel card inspiration? Check out our previous articles for more creative ideas and projects. Whether you’re into floral designs, scenic landscapes, or whimsical characters, there’s something for everyone to explore and create.

I would like to enter this card in the following challenges:
- Here is a place to start: Anything goes
- Fab’n n’ Funky Challenges: Use a sentiment
- The Paper Funday Challenges: Anything goes + no squares allowed
- Cardz 4 Galz: Use dies/punches
- Craft Rocket Challenges: Use dies
- Lil Patch of Crafty Friends Challenges: Anything goes
- A Perfect Time to Craft open Challenge: Anything goes
- Classic Design Challenge blog: Anything goes
- Daisy Chain challenges: No design paper
- The Creative Crafters: Anything goes
Products I used:
- Slimline die from Aveccreative.
- Letter dies from Aveccreative.
- Stencil from Craftsensations.
- Digital stamp Happy Birthday slice by Mirtillamente.
- Punch brand unkown.
- Twin markers (alcohol markers) by Decotimecrafts.
Fun and festive card Renske! Thanks for playing along at The Paper Funday Challenge and we look forward to more of your lovely designs soon.
Donna xx
Paper Funday Challenge
Inspiration Station Challenge
Beautiful Blossoms Challenge
This is great card. I love how you cut the digi to get the look you wanted and your colouring is lovely. A fun slimline for sure. thanks for joining the fun at Cardz 4 Galz, Johanna DT
Thank you so much
Het is weer een prachtig kleurrijk kaartje!
Elke jarige zou hier heel vrolijk van worden!
Dat hoop ik! Haha dank je wel