
There’s something satisfying about opening a drawer and finding supplies you forgot. That’s what happened when I came across a floral stencil—still unopened—and a roll of gold self-adhesive foil. They had been sitting in my stash for ages, waiting for the right idea. The Monthly Discovery Hop on Instagram challenged me to use them.
In this step-by-step tutorial, I’ll show you how to create a handmade floral card using distress ink and a floral stencil. We’ll add a creative twist with self-adhesive foil for a touch of elegance.
You’ll learn:
- How to blend inks in layers for colour depth
- Ways to use foil without a machine
- Ideas for using a large stencil in a balanced composition
- Easy swaps if you don’t have the same tools
Let’s take a look at the materials and how to get started with this handmade spring flower card.
What You Need to Get Started
Here’s a quick look at the tools and materials I used to create this handmade spring flower card. You likely have similar items in your stash—and if not, I’ll give you easy swaps along the way.
Materials Used
- Floral stencil – Craftsensations – a large open design, great for layering colours
- Distress Inks – Picked Raspberry, Chipped Sapphire, Salty Ocean, Dusty Concord
- Finger daubers – for applying colour exactly where you want it
- Blending brush – StudioLightNL – smooths out large areas with ease
- Yellow metallic paint – adds a subtle shimmer to your flower centre
- White cardstock – thick enough to hold layers of ink and foil
- Rectangle die – Card & Deco – frames your card neatly
- Word die “lots of love” – Aveccreative – simple and easy to pair with many styles
- Gold self-adhesive foil – adds shine without needing a laminator or foil machine
- Fine paint brush – for controlled splatter and detailing

No Exact Matches?
- Swap Distress Inks for any blendable dye inks
- Use washi tape or metallic cardstock instead of foil
- Cut your rectangle by hand if you don’t have a die
These tools helped me build contrast, add shine, and keep the layers soft and dimensional.
Card Size and Composition
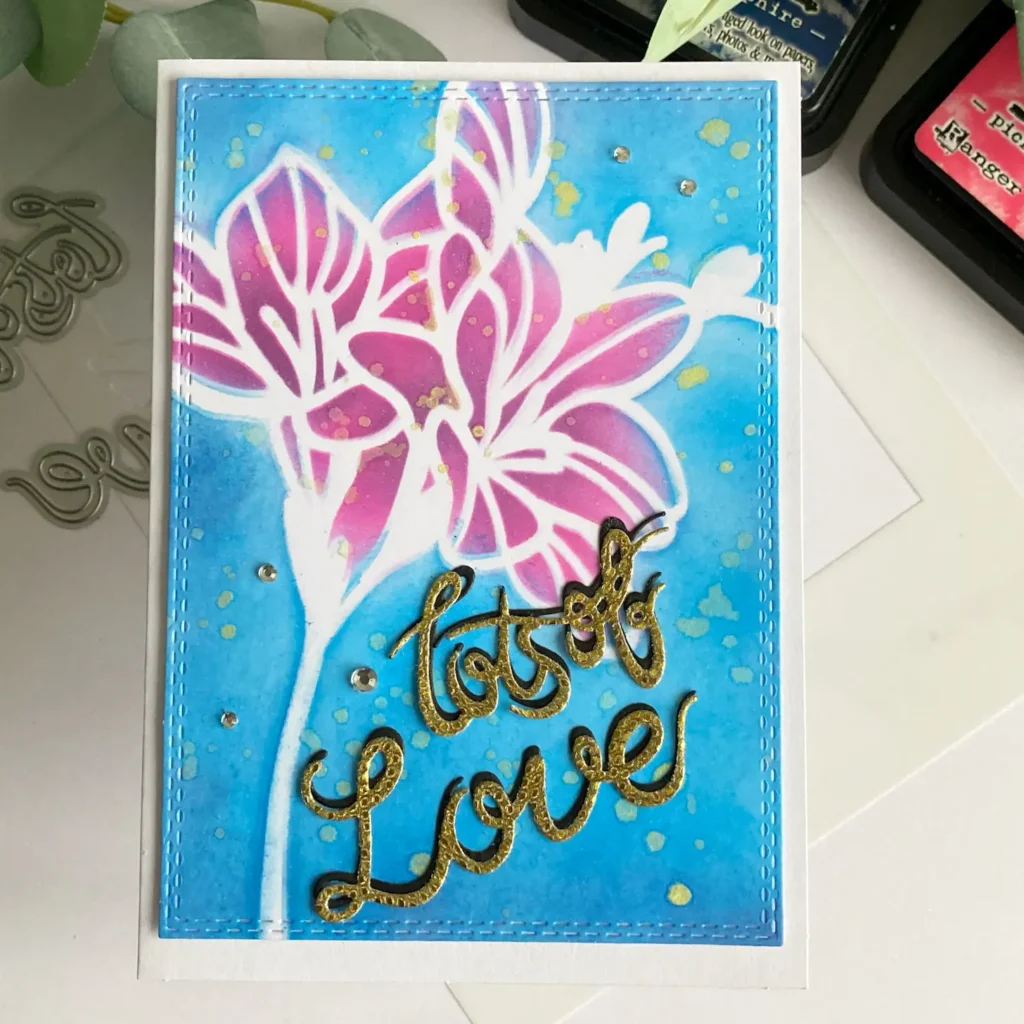
The card measures 10.5 cm x 14.8 cm (A6). It’s just the right size to let the floral stencil shine without overcrowding the design. The strong colour contrast between the flower and the background works well in this format.
Feel free to adjust the size based on your stencil or sentiment— keep the focal point balanced in the layout.
Bring Your Forgotten Stash to Life – Step-by-Step Tutorial
This card was created for the Monthly Discovery Hop, where we focus on using supplies we already own, especially those we’ve set aside or never used
For this project, I decided to use a floral stencil that had been tucked away for years. It felt great to finally open the packaging and give it a real try. With some layered ink blending and a touch of gold foil, the result turned out bold and fresh.
In the steps below, I’ll guide you through the entire process—from building colour depth to adding shimmer and contrast. Each step allows for experimentation and adaptation with the supplies you already have.
Let’s start by creating the background and build from there.
Step 1 –Using a Floral Stencil for Stunning Effects
This stencil had been sitting in my stash for years. I liked the bold flower design, but I never quite knew how to use it on a card.
The Monthly Discovery Hop gave me the push I needed. Once I tried it with layered ink blending, it became the highlight of this card.
This spring flower card design uses a flower stencil to add layers of colour and depth, creating a vibrant, eye-catching effect
Working with a Large Floral Stencil
Start by placing the stencil over a piece of white cardstock. Tape it down so it stays in place. Focus first on the flower, then move on to the background.
The size of this flower leaves a lot of space around the edges. That can be tricky. I wanted the flower to pop without letting the background overpower it.
- Use precise tools for control—finger daubers work well.
- Aim for contrast without hard edges.
- Keep the transition between flower and background soft and balanced.
I used finger daubers on the flower itself. A blending brush helped me softly fill in the background.
How to Ink Blend the Flower
Here’s how I built up the pink and purple tones:
- Use a finger dauber to blend Picked Raspberry across the petals.
- Add Dusty Concord near the petal edges and around the centre.
- Keep your blending light and circular to avoid harsh lines.
- Don’t aim for perfection—the layered look adds character.
I chose daubers to avoid bleeding under the stencil. Small blending brushes would also give great control.
How I Created the Background
Once the flower was done, I switched to a blending brush for the background:
- Start with Salty Ocean close to the flower.
- Blend outward using Chipped Sapphire towards the corners.
- For tight areas, go back to a finger dauber.
The goal is a gradual fade from light to dark. This gives the flower more depth and contrast.
Optional Detail – Add Metallic Splatters
While the stencil is still on:
- Mix yellow metallic paint with a bit of water.
- Flick tiny splatters over the design using a fine paintbrush.
This adds a soft shimmer and breaks up the background without overwhelming it.
Carefully remove the stencil and set it aside to dry.

This step brings the flower to life with colour, contrast, and texture.
Next, I’ll walk you through adding the sentiment.
Step 2 – Die-Cutting the Background Panel
Once the flower is blended and dry, it’s time to turn your background into a finished card panel.
I used a stitched rectangle die for this. The stitched edge adds a subtle detail that frames the design without taking attention away from the flower.
Here’s how to prepare the panel
- Place the stencilled background on your die-cutting platform.
- Use a rectangle die with stitching for a neat, balanced edge.
- Run it through your machine to cut the final panel.
No stitched die? That’s fine. A craft knife or paper trimmer works just as well. The stitching is nice to have, but it’s not a must.
Alt text: A stencilled card panel being die-cut with a stitched rectangle die to create a clean and even border.*
This simple step frames your design and makes it easier to build the next layers. Now, let’s move on to the sentiment.
Step 3 – Shiny Sentiment with Self-Adhesive Foil
This was the moment to finally use that roll of self-adhesive gold foil tucked away in my drawer. I hadn’t touched it in years, but it added just the right amount of shine to finish the card.
Self-adhesive foil is perfect for adding a metallic touch to any card, and in this step, we’ll explore how to use it for a sentiment. It is an easy way to bring in contrast and detail – no heat tools are needed.
How to Create the “Lots of Love” Sentiment

- Cut a small piece of smooth white cardstock.
- Peel back part of the foil’s backing and press it onto the cardstock.
- Smooth it down slowly to avoid bubbles or wrinkles.
- Trim away the extra foil once it’s fully adhered.
Now die-cut your sentiment:
- Place the “lots of” and “love” dies over the foiled cardstock.
- Run them through your die-cutting machine.
- Use a pokey tool to remove the die-cuts carefully—foil can stick a little to detailed dies.
For extra depth:
- Cut the same words from black cardstock.
- Layer the gold letters over the black ones, slightly offset to create a shadow.
")
Want a cleaner finish? You could use only the word Love. I chose the full sentiment for more balance and contrast with the floral background.
Step 4 – Finishing Touches and Assembly for this handmade Spring Flower Card
With all the parts ready, this final step brings the design together. It’s simple but adds that clean, finished look.
How to Assemble This Handmade Spring flower Card
- Start with a white card base measuring 10.5 cm by 14.8 cm.
- Use foam tape to attach the stencilled panel, placing it in the centre. This gives your card depth and makes the floral background pop.
Now for the sentiment:
- Position the gold-foiled sentiment at a slight angle across the lower part of the floral panel.
- The diagonal layout lets the flower stay visible while making the sentiment a focal point.
- It also contrasts well with the blue background and ties the whole card together.
Add a few embellishments to finish:
- Place two flat-back pearls in the top-right corner.
- Add three in the bottom-left for balance.
embellishments placed for visual balance.
These final details—raised layers, angled sentiment, and subtle embellishments—turn a simple stencil project into a well-rounded card. It’s proof that a few thoughtful touches can go a long way.
- Add three in the bottom-left for balance
- Use vellum for a soft overlay or muted background.
Small changes in colour or finish can completely shift the mood of your card. Keep experimenting to find what works best for you!

Let’s Get Creative Together
Some of the most inspiring cards come from using what you already own. Maybe a stencil or tool is hiding in your drawer—something you once loved but haven’t touched. Try bringing it out again and see what new ideas it sparks.
You don’t need to buy new supplies to create something original. Working with what’s on hand often leads to the most satisfying results. Permit yourself to experiment—you might be surprised by what you make.
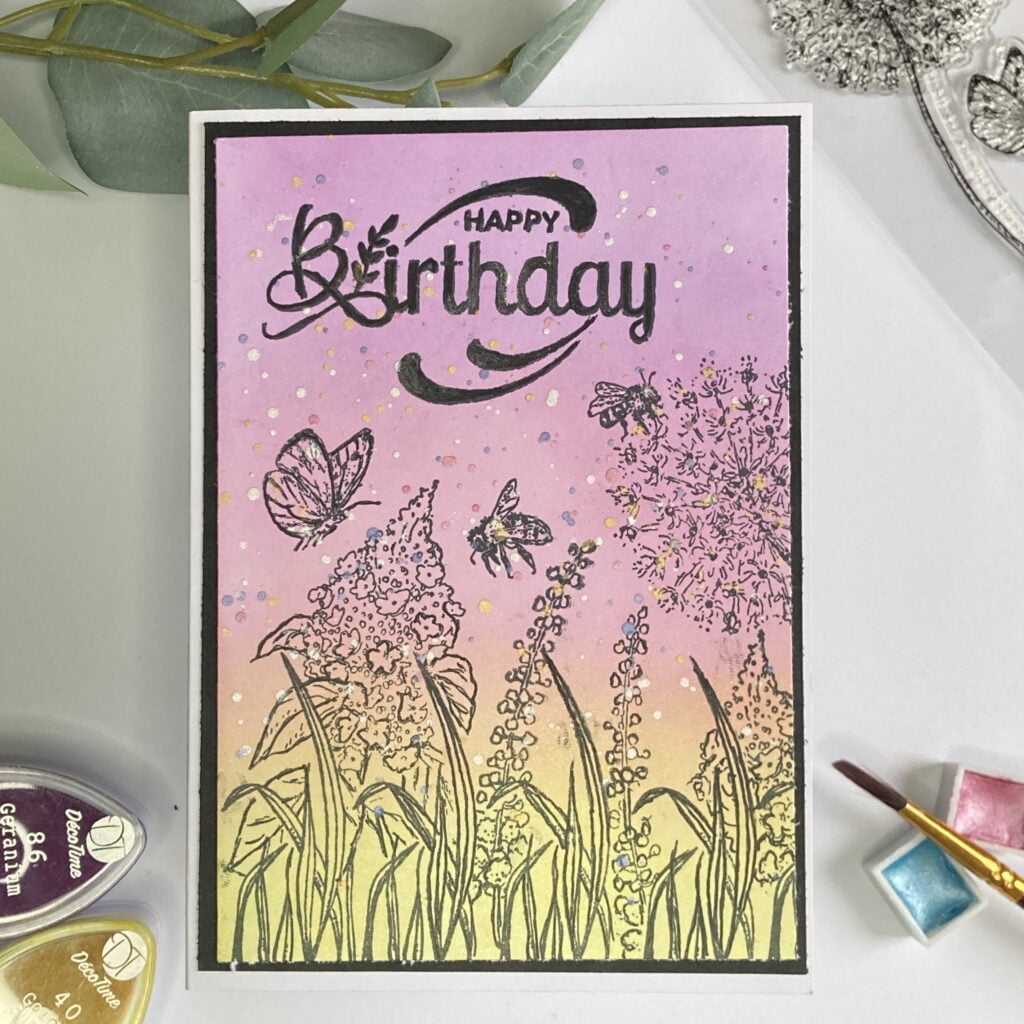
More Handmade spring flower card ideas
Products used for this handmade Spring Flower card
Affiliate Disclosure
This post contains affiliate links. That means I may earn a small commission if you choose to buy something through these links – at no extra cost to you. I only share products I genuinely use and love in my own cardmaking. Your support helps me continue to create tutorials and inspiration for you.
Products with affiliate links
Distress Ink Picked Raspberry from Ranger

Distress Ink Salty Ocean from Ranger

Distress Ink Chipped Saphire from Ranger

Distress Ink Dusty Concord from Ranger

Finger Dauber from Vaessen Creative

Not available anymore (sept 2025)
Blending brushes Studiolight NL

Products used without affiliate links
- Flower stencil from Craftsensations
- Metallic Paint (brand unknown).
- Rectangle die from Card & Deco
- Word dies from Aveccrative
- Self Adhesive Foil from Via Chassé
I would like to enter my card in the following challenges
- Simon Says Stamps Monday: Blooming Blooms
- Unicorn Challenge Blog: Use dies
- The Paper Funday Challenges: Anything goes + Begin with a B…… bloom
- Lil Patch of Crafty Friends Challenge …: Anything goes
- A Perfect Time To Craft Open Challenge: Anything goes
- Crafts Galore Encore Challenge Blog: Anything goes
- Let’s Craft and Create: Anything goes + add flowers