
Hello crafting friends! Today, I’m excited to showcase a lovely project that features the latest release from All Dressed Up Stamps. Together, we’ll create a delightful handmade spring card.
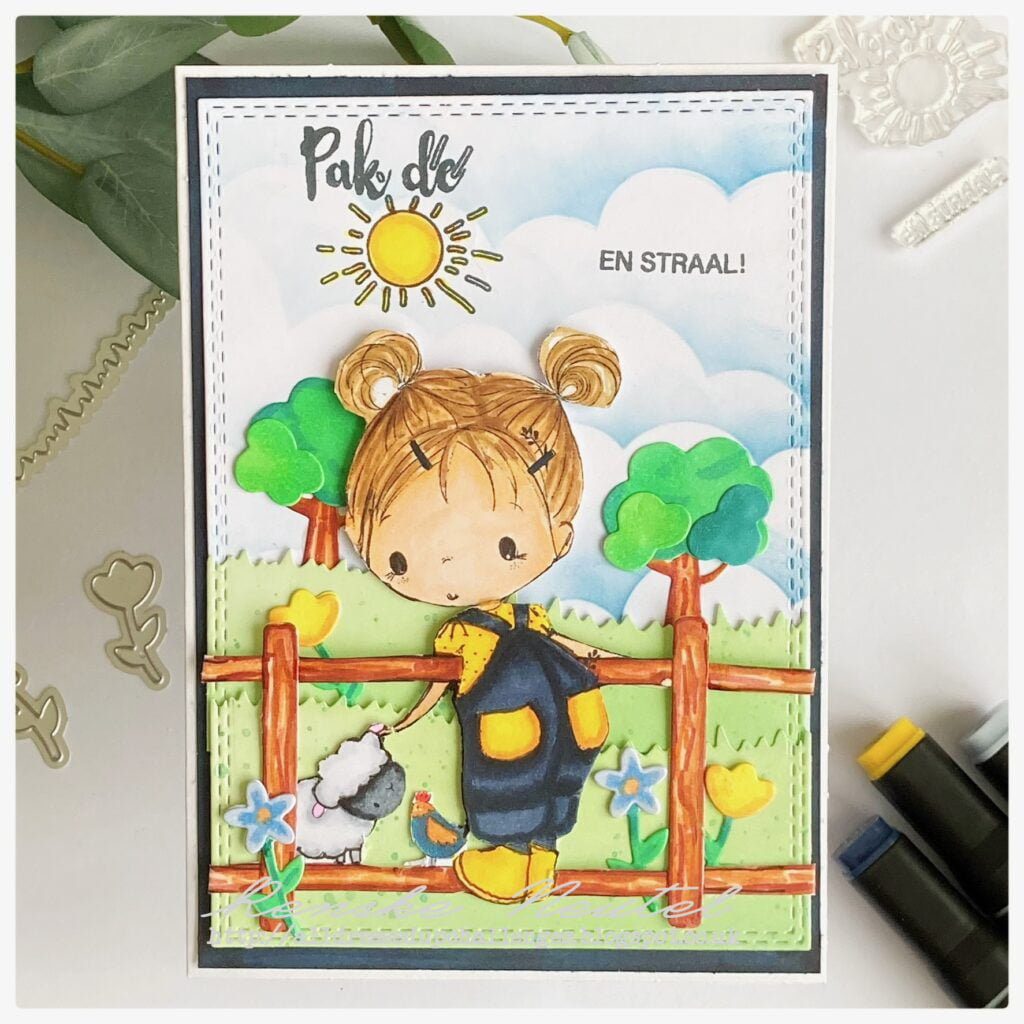
The new collection introduces us to three charming digital stamps:


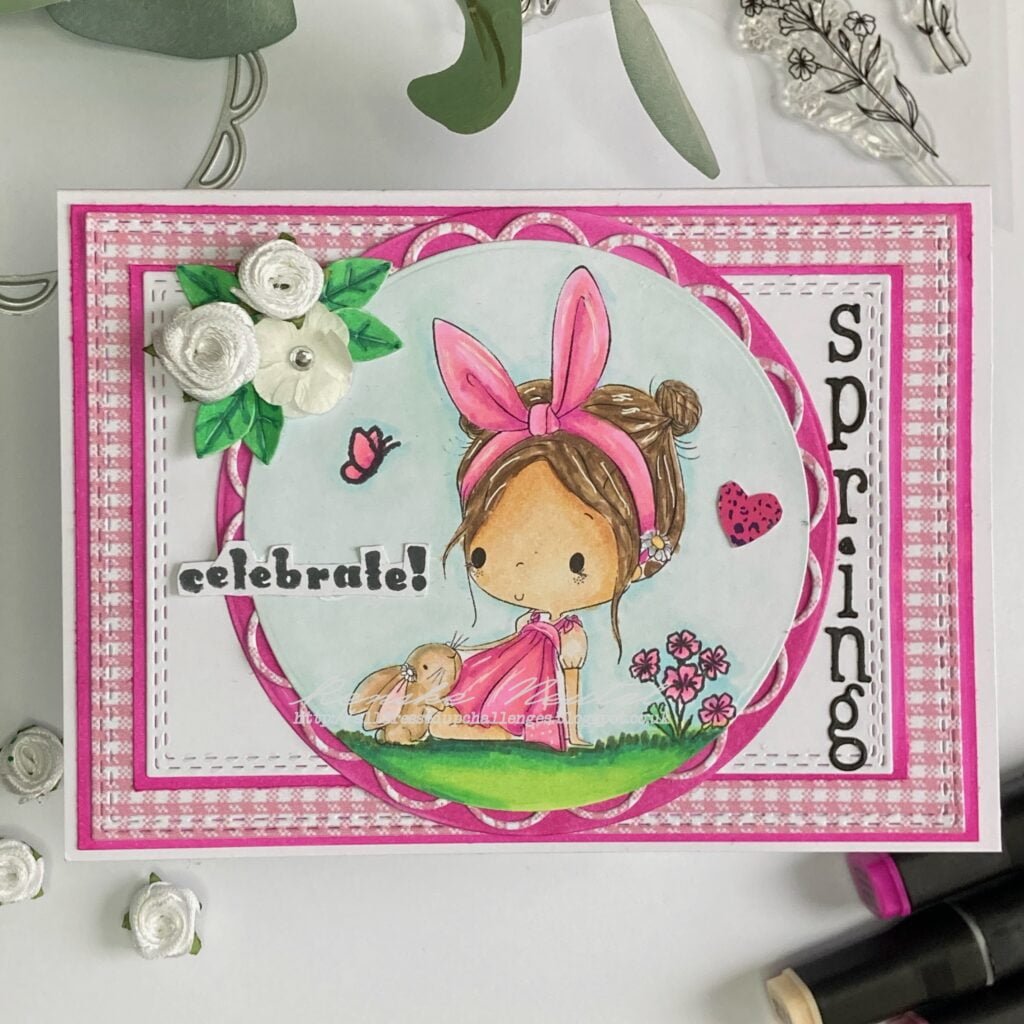
While all three stamps offer endless crafting possibilities, today’s project will focus on the adorable Bunny Hairband digital stamp. This stamp is perfect for creating a handmade spring card that is sure to put a smile on anyone’s face.
I’m eager to walk you through the step-by-step process of creating this adorable handmade spring card. Let’s get started!
Gather Your Supplies: Materials Needed
Before starting your creative journey, make sure you have gathered all the necessary supplies. Here’s a list of what you need to bring this handmade spring card to life:
- Sturdy white paper: A base of 21cm by 14.8cm, scored and folded at 10.5cm to create a landscape-oriented card.
- DCP paper: This is ideal for printing the digital stamp and colouring with alcohol markers.
- Colouring medium: For this project, alcohol markers work well. However, you can use any colouring medium you prefer.
- White gel pen: You’ll use this to create highlights.
- Circle die: This is used to die-cut the stamped image.
- Patterned paper: Use this as a layer on the background of the card.
- Flower and Butterfly clear stamps: These stamps complete the scene.
- Cardstock: Choose coordinating colours for layering and creating a visually appealing background. For this project, pink cardstock was used.
- Scissors: You’ll need these for cutting out paper elements and sentiments.
- Stamping ink: Black ink is ideal for stamping sentiments.
- Embellishments: For this card, white flowers and a heart sticker were used.
- Adhesive: You’ll need double-sided tape or glue for assembling the card layers.
- Die-cutting machine: You’ll require this to die-cut the circles.
With these supplies on hand, you’re all set to create a beautiful handmade spring card with the Bunny Hairband digital stamp.
Crafting Adventure: Handmade Spring Card Step-by-Step Tutorial
Join me as I guide you through the process of creating a stunning handmade spring card! In this step-by-step tutorial, I will walk you through each stage of crafting, from colouring the digital stamp to assembling the final card. This tutorial aims to inspire and empower you to craft something beautiful.
Get ready to unleash your creativity as we embark on this crafting journey!
Step 1: Creating the Card Base
Let’s start laying the foundation for our handmade spring card. Follow these simple steps to make the base:
- Take a sturdy white paper measuring 21cm by 14.8cm.
- Score the paper at the 10.5cm mark along the longer side.
- Carefully fold the paper along the scored line to create a landscape-oriented card.
This standard card size provides a perfect canvas for our spring card. Once the base is ready, we can move on to the next step of printing and colouring the digital stamp.
Step 2: Printing and Coloring the Digital Stamp
Let’s move on to the exciting part of bringing our digital stamp to life. Follow these simple steps to print the digital stamp on suitable paper and add vibrant colours using alcohol markers:
- Print the digital stamp on DCP paper, leaving enough space around the image for later die-cutting.
- Carefully colour the different elements of the digital stamp using your preferred alcohol markers, following the given colour combinations:
- Skin: Tanned Skin (260), Peachy Blush (259), Salmon Pink (25), Barely Beige (29)
- Hair: Barely Beige (29), Brown Grey (104), Walnut (100), Clay (116), Chocolate (118)
- Bunny: Baby Skin Pink (133), Hazelwood (108), Brown Grey (104)
- Inner Ears of Bunny: Midi Old Rose (199), Blush (136), Pale Pink (17)
- Dress and Hairband: Peony Purple (282), Rose Pink (08), Pale Pink (09), Pastel Pink (17)
- Blouse under the Dress: Baby Skin Pink (133), Hazelwood (10)
- To add depth and detail, use a white gel pen to create highlights on the hair, dress, and other selected areas.

Once you have beautifully coloured the digital stamp, it’s time to move on to the next step of die-cutting and completing the scene.

Having trouble editing or colouring digital stamps? Download my free guide for extra tips and tricks to help you perfect your digital stamps!
Step 3: Bringing the Scene to Life
Let’s bring our scene to life! Follow these steps to cut out the stamped image and add details to complete the scene:
- Use a circle die to carefully cut out the stamped image, making sure it fits well within the diameter of the die.
- Once the image is cut out, enhance the scene by colouring the background to create the illusion of grass and sky. Use alcohol markers in shades of Yellow Green (48), Grass Green (47), Forest Green (50), Pine Forest Green (241) for the grass, and Frost Blue and Cool Shadow (178) for the sky.
- Stamp flower images onto the grassy area using clear stamps. Only use the top portion of the flower stamp and wipe away the rest for a cleaner impression. Colour these flowers using the same colour combinations as the dress and hairband of the digital stamp: Peony Purple (282), Rose Pink (08), Pale Pink (09), and Pastel Pink (17).
- Add a butterfly stamp to the scene and colour it using similar colours as the flowers.
Voila! Your scene is now complete, and we can move on to the next step.
Step 4: Adding Decorative Elements
Let’s add some flair to our card by framing the circle scene and placing it on the card base. Follow these simple steps:
- Using patterned paper, cut out a slightly larger circle with a decorative border. Ensure that it’s big enough to frame the circle scene nicely.
- Once you have the patterned paper circle, adhere it to the back of the circle scene, creating a beautiful border around the scene.
- Take a piece of coordinating cardstock (pink) and cut it into a rectangle slightly larger than the circle scene. This will serve as the background layer for our scene. Do this twice. Also, for a slightly smaller rectangle and then on white paper. Assemble these two rectangles on top of each other.
- Attach the layered circle scene onto the cardstock background using adhesive, ensuring it’s centred and aligned.
With these decorative elements added, our card is starting to take shape! Let’s move on to the next step of adding layers to the card.
Step 5: Creating Layers for the Card
Let’s add depth and dimension to our card by creating layers! Follow these steps to layer coloured paper and create a visually appealing background:
- Cut a piece of dark pink cardstock to measure 10cm by 14.3cm
- Use a stitched rectangle die to cut out a rectangle from the patterned paper. Make sure this rectangle is slightly smaller than the first layer, measuring approximately 9.5cm by 13.8cm.
- Layer the two rectangles on top of each other, with the stitched rectangle centred on the larger pink rectangle. Adhere them together to create a visually appealing layered effect.
- Attach the layered rectangles, including those with the circle scene, to the card base.
With these layers in place, our card is really starting to come together! Now, let’s move on to the final steps of adding text and embellishments.
Step 6: Adding a Sentiment and Final Touches
Let’s put the finishing touches on our card by adding text and additional embellishments. Follow these steps to complete the card design:
- Stamp a sentiment onto white cardstock using black ink. For this project, I used the sentiment “Celebrate Spring” to complement the theme of our card. We stamp the word celebrate with black ink on white paper.
- Once the sentiment is stamped, use scissors to carefully cut it out, leaving a small border around the edges.
- Adhere to the sentiment of the circle scene using adhesive.
- To make the word spring I die-cut the letters out of black paper. I place the word spring to the right of the circle on the white rectangle vertically.
- Now, it’s time to add some final embellishments to enhance the card’s design. Add white flowers and a heart sticker for a touch of elegance and charm.
- Place the flowers in the upper right corner of the circle. I placed the heart sticker behind the girl’s head, ensuring they complemented the overall design of the card.
By following these steps, your handmade spring card is now complete and ready to brighten someone’s day!

Inspire, Create, Share, and More!
Let’s take a moment to admire the beautiful handmade spring card we just created together. We colored the stamp and made a nice cute scene in a circle. And with all the layers on the card, it has become a complete card.
More Spring Card Inspiration
If you’re looking for more spring-themed card ideas, check out these related articles for additional inspiration:

Each of these articles offers unique insights, techniques and design ideas to help you create stunning handmade cards that capture the spirit of the season. Dive in and explore, and let your creativity blossom!
Products used for this handmade spring card
Affiliate Disclosure: “Please note that this article contains affiliate links. This means that I may earn a commission if you purchase through these links, at no additional cost to you. I only recommend products that I have personally used and believe will add value to my readers.
Products used with affiliate links
Bunny Hairband digital stamp from All Dressed Up stamps

Alphabet typewriter little letter die from Craftemotions

White gelly roll pen 08

Products used without affiliate links
- Circle die from Card & Deco
- Circle die with edge border from Card & Deco
- Rectangle dies from Card & Deco
- Patterned paper brand unknown.
- Sticker from Aveccreative
- Alcohol markers (Twin Markers) from Decotimecrafts. (from ActionNL).
- Flower stamps from Craftsensations.
I would like to enter my card in the following challenges:
- The Paper Shelter: Pink and or Pearls
- Krafty Chicks Challenge: Anything goes
- Allsorts challenge blog: Spring
- Lil Patch of Crafty Friends Challenge …: Anything goes
- Stamping Sensations: Spring
- Dragonfly Dreams: Circles
- A Perfect Time To Craft Open Challenge: Anything goes
- Pearly Sparkles Challenge Blog: Celebrate
- SheepSki Designs Challenges: Anything goes
Gorgeous Spring card Renske! Love the image and the design. Thank you for sharing with us over here at Pearly Sparkles Challenge and best of luck with your entry. Love to see you join in each month. Thank you.
Gale DT for
http://pearlysparkleschallenge.blogspot.com/
Thank you Gale
Such a sweet card. Thanks for joining us at Lil Patch of Crafty Friends!
Thank you so much for your lovely comment
Fabulous spring time card.
Thank you for sharing at Allsorts.
What a lovely comment! I’m thrilled you enjoyed the springtime vibes of the card. Thank you for your kind words.
This is such a pretty and sweet card. Thank you for playing along with us at The Paper Shelter. We hope you’ll join us again next time. Have a wonderful day.
♥ Lena ~ DT
The Paper Shelter
Lena’s Creations
Thank you so much for your kind words, Lena! I’m delighted you found the card pretty and sweet. It was a joy to participate in The Paper Shelter challenge. Looking forward to joining again next time! Have a fantastic day!
Love the cute girly image so pretty in pink and love all the layers.Thank you for joining us at Dragonfly Dreams,Pearly Sparkles and Stamping Sensations.
Carol DT x
Thank you, Carol! I’m thrilled you enjoyed the girly image and the layers.
Very cute and adorable card. Many thanks for joining us at Allsorts this week.
Lorraine
Thank you, Lorraine! I’m delighted you found the card cute and adorable.
Love this super cute spring card. A wonderful design and beautifully coloured. Thank you for sharing at Allsorts. Sarah
Thank you so much, Sarah! I am glad you like it. Have a wonderful day
A really sweet card Renske. The image is adorable and I love your pretty papers and embellishments. Thanks for sharing with us at Krafty Chicks challenge this week. Hugs, Denise x
Thank you, Denise! I’m glad you enjoyed the card. The adorable image was a joy to work with, and I’m glad you liked the pretty papers and embellishments. Your kind words mean a lot. Sending hugs!
Such an adorable card, Renske. Love it all! Thank you for joining our challenge on The Paper Shelter Challenge Blog. Lori – DT
Thank you so much
A sweet colourful Spring card, many thanks for sharing with us at Stamping Sensations challenge. Feminine is our theme at We Love Stamping and would fit in perfectly.
B x
Thank you