
Some links in this post are affiliate links. This means I may earn a small commission if you make a purchase, at no extra cost to you. I only recommend products I use and genuinely enjoy in my own cardmaking. Read more here.
On chilly fall days, when the weather changes and the air feels damp, I always look forward to a warm drink after a long walk. That cozy moment with a mug of hot chocolate, tea, or coffee inspired the handmade fall card we are making today.
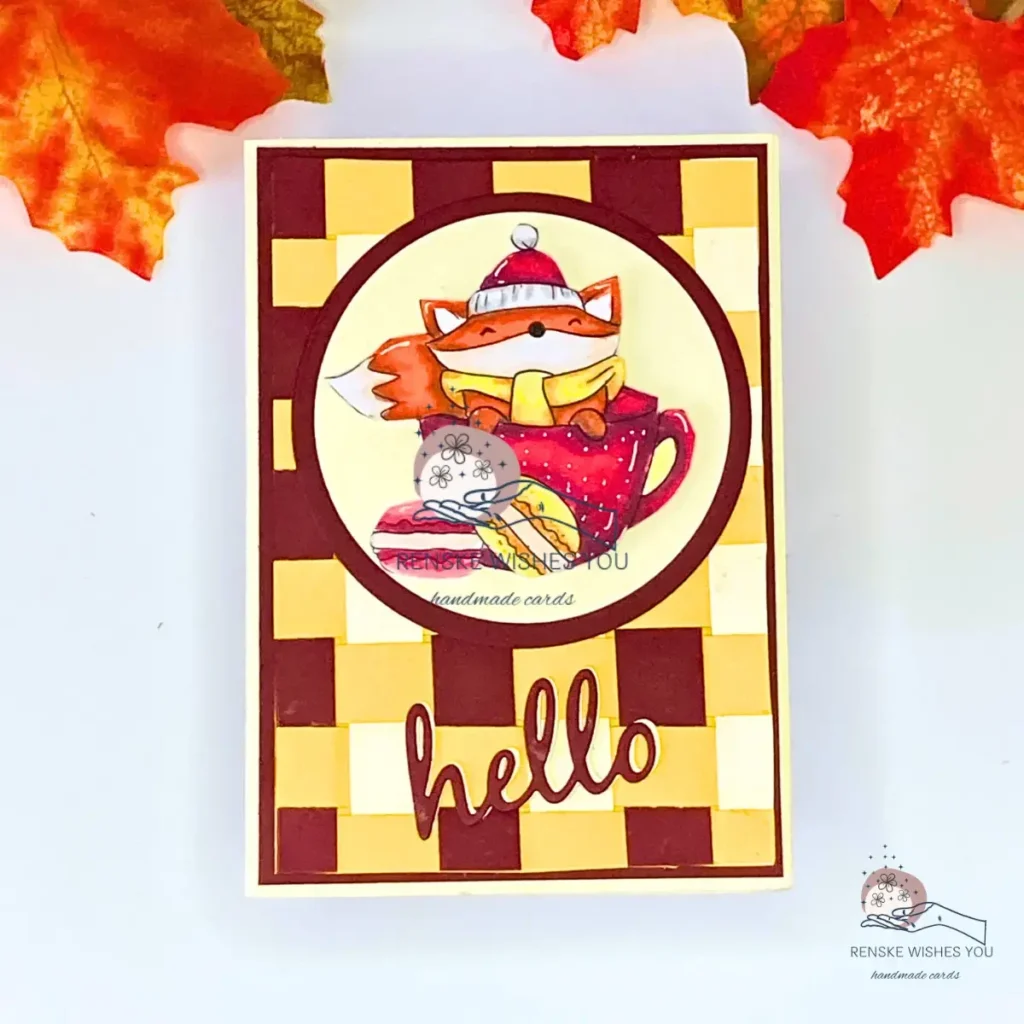
This cozy fall card features a playful fox and a background of woven paper. As a beginner, you can easily make this card too, as the steps are easy to follow.
Do you want to try weaving with leftover paper? Follow these steps to confidently create your full card. This tutorial is a follow-up to my article on 5 autumn backgrounds. In that article, I made a background by weaving paper from scraps.
Let’s turn this background into a complete card now.
Materials & Dimensions
Before you start the steps, gather all the materials and tools you’ll need. Having everything ready makes the process smoother and more enjoyable. These are the materials you need.
- Cardstock & Paper:
- Creme cardstock 21×14.8 cm for the card base
- Yellow paper 10×14.3 cm for the woven background base
- Strips of yellow, cream, and wine-red paper for weaving
- DCP paper for printing the digital stamp
- Wine red and light yellow paper for die-cutting circles and sentiment
- Digital Stamp:
- Hot Chocolate Cup Macaron Coffee Autumn Fall Fox from Polkadoodles
- Circles: Two circle dies from Deco & Craft: large wine red and small light yellow.
- Sentiment:
- “Hello,” alphabet die from Scrapfever.
- Other Materials:
- Alcohol markers for colouring the digital stamp
- Glue and double-sided tape for attaching pieces
- White gel pen for highlights
- Scissors
- Die-cutting machine for circles and sentiment
Alternatives
- You can use any alcohol marker-friendly paper instead of DCP, such as smooth cardstock that works well with your specific markers.
- Any colouring medium works if you don’t have markers, such as colouring pencils, watercolour pencils, or aqua markers.
- As a substitute for circle dies, use any circular object as a template to trace and cut out circles by hand, or try other geometric shapes if you prefer.
- Use other autumn-themed stamps if you don’t have the fox.
Creative Substitutions
- Use old magazine pages or newspaper clippings for a unique, colourful weaving effect.
- Try patterned gift wrap or scrapbooking paper to add fun textures.
- Incorporate fabric scraps or ribbons for extra dimension.
- Experiment with painted or watercoloured paper for a soft, artistic touch.
These materials make each card unique. Have fun and explore your creativity using whatever supplies you have.
Step-by-Step Tutorial for Your handmade fall card
Before we start, let’s get ready to make a cozy fall card with a playful fox and a woven background. You’ll build the card step by step, adding colour, layers, and text along the way. I’ve included tips and simple swaps so each step is easy to follow, even for beginners.
Step 1: Create the Card Base
Start by creating a sturdy base for your card.
- Cut creme cardstock to 21×14.8 cm and score at 10.5 cm.
- Fold the cardstock in half to create the base.
- Use a bone folder or scoring tool to make a sharp crease, ensuring the card lays flat.
Once your base is ready, you’ll move on to creating the paper weaving background in the next step.
Photo reference: Completed card base from above, ready for layering.
Step 2: Make the Paper Weaving Background
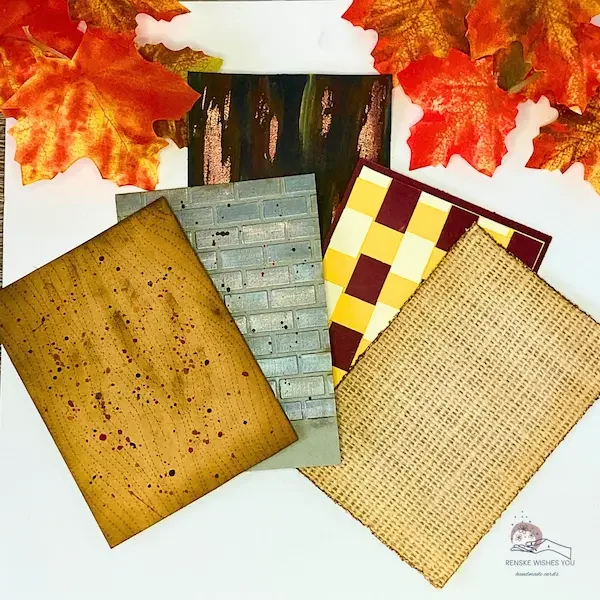
This paper weaving background technique adds warmth and a cozy fall feel. Using scraps not only gives leftover paper a second life, but also makes your craft projects more sustainable and creative.
- Gather yellow, cream, and wine-red scraps that are large enough to cut into strips.
- Cut strips about 1.5 cm wide. Lay the yellow strips horizontally and weave cream and wine red strips vertically. Don’t worry about precise alignment; slight variation adds charm.
- If strips shift while weaving, gently adjust them with your fingers or a ruler. You can also use a tiny bit of removable tape to hold tricky pieces in place.
- Cut a yellow paper piece (10×14.3 cm) to use as the backing and press it firmly against the woven strips.
- Trim the edges to 9.5×13.8 cm.
- Mount the woven piece on wine red cardstock to create a clean border.


Keep the strips a little loose for a natural look. Play with colors or leftovers to make your handmade fall card personal. If the weaving feels loose, gently press it with your hand before attaching the backing paper.
Step 3: Colour the Fox with Alcohol Markers
In this step, you’ll bring Freddy Fox to life with colour. Start by printing your digital stamp on DCP paper, a smooth, marker-friendly type suitable for alcohol markers, or another marker-friendly paper.
Gather your markers and colour the fox, cup, scarf, hat, and macarons. Use warm fall colours to reflect fall tones and create a cosy, inviting palette that complements the woven background.
When finished, Freddy Fox should look vibrant and warm, with smooth shading and subtle highlights. These details make him stand out and keep the fall look clear and consistent.
Here are the colour combinations I used with my twin markers from Decotimecrafts:
- Cup: Wine Red (01), Old Red (02), Cherry Pink (05)
- Scarf: Mustard (30), Lemon Yellow (35), Pale Yellow (38)
- Hat: Cherry Pink (05), Old Red (02), Wine Red (01)
- Yellow macaron: Mustard (30), Lemon Yellow (35), Pale Yellow (38)
- Pink macaron: Cherry Pink (05), Pale Pink (08), Rose Pink (08)
- Cream between macarons: Leather (113)
Add highlights with a white gel pen for extra dimension.
Tip: Work from light to dark shades, building gradually to create depth and shine.

Step 4: Prepare the Circles
The circles form a small base for Freddy, giving him height and adding depth to the card while keeping the fall scene cozy.
- Cut a large circle from wine red cardstock and a smaller circle from light yellow.
- Layer the light yellow circle on top of the wine red.
- Mount Freddy Fox on the light yellow circle using foam tape for dimension.
This layering creates a warm fall effect and helps the fox stand out.
Photo reference: Layered circles with Freddy Fox, ready for placement on the woven background.
Step 5: Add the Text
Time to add a sentiment! I chose a simple “Hello”.
- Die-cut “Hello” twice: once from wine red and once from light yellow.
- Layer the wine red piece slightly offset on the yellow for a subtle shadow.
- Position beneath the fox circles at a slight angle for a playful touch.
Tip: Try other greetings or seasonal phrases to personalize your card.

Step 6: Assemble the Card
Now it’s time to assemble the card. First, do a dry-fit rehearsal: place the fox circle on the woven background and add the “Hello” sentiment underneath. Adjust each element so it looks right, then glue everything to your card base.
- Place the fox circle on the woven background.
- Add the “Hello” sentiment underneath.
- Attach the full piece to your card base.
Tip: Use foam tape for extra dimension. Try slightly tilted or centred placements.
Photo reference: Completed card from above, showing Freddy, text, and woven background neatly layered.
Tips and Variations
Before exploring ideas, here are some ways to make your card uniquely yours.
Variations
Experiment with different step-by-step paper weaving patterns for your fall paper weaving card.
- Swap in other digital stamps or die-cuts for new scenes.
- Adapt the weaving for larger or smaller cards.
- Turn each variation into a mini challenge. Try a new colour combination. Swap in a different stamp. Playfully tweak Freddy’s accessories.
Sharing Options
Share your variations with others:
- Post photos online and tag me (@renske.wishes.you).
- Show your cards to friends or craft groups.
- Leave a comment below with your creations or questions.
Small changes make your card stand out with a clear fall personality. They also encourage others to experiment and try their own ideas.
Let’s Get Creative Together
Look back at what you made in this tutorial. You built a woven background, coloured Freddy Fox, added layers, and included a playful sentiment. Which part did you enjoy making most?
Now it’s your turn to try it yourself. Once your card is complete, share it on social media like Instagram (@renske.wishes.you) or Facebook. Leave a comment below with your creations or questions—I’m happy to help. Join a card-making challenge, get creative, and tag me so we can celebrate your fall inspiration together.
More fall card ideas to explore
5 Cozy Autumn Card Backgrounds You’ll Love To Create
Discover how to make 5 different autumn backgrounds.

Make A Charming Autumn Birthday Card For November
Another card with the same Freddy Fox digital stamp
products used
Affiliate Disclosure: This blog post contains affiliate links. When you purchase through these links, I may earn a commission at no extra cost to you. These commissions help support the creation for free, valuable content for you. I appreciate your support as it allows me to continue sharing crafting inspiration and tutorials.
Hot Chocolate Cup Macaron Coffee Autumn Fall Fox

White Gelly rol 08

I would like te enter my card in the following challenges
- Word Art Wednesday: Anything goes
- 613 Avenue Create: Anything goes
- A Perfect Time To Craft Open Challenge: anything goes
- Classic Design Challenge Blog: Anything goes + hug in a mug
- Crafts Galore Encore Challenge Blog: Anything goes
- Crafter’s Cafe: anything goes + use the colour yellow
- Crafty Animals: Anything goes + must use an animal
Beautiful autum colors! Love the little fox sitting in the cup♥♥ Thank you so much for playing along with 613 Avenue Create. Rosi x
Dream Factory Challenge Blog
Thank you so much for your lovely comment
Wonderful, happy Fall card, loving the weaved background. Thank you for joining us at the Crafts Galore Encore Challenge.
Thank you so much for your lovely comment
Sweet card!!! Thanks so much for participating in our 613 AVENUE CREATE challenge!!! I appreciate that you play along and I enjoy visiting your blog!! Have a happy crafty day!! Deanne at A Little Bit O’ Paper
Thanks a lot