

Some links in this post are affiliate links. This means I may earn a small commission if you make a purchase, at no extra cost to you. I only recommend products I use and genuinely enjoy in my own cardmaking. Read more here.
Hello everyone!
Today I am delighted to share the wonderful process of making a beautiful handmade cupcake birthday card. As a member of the Polkadoodles design team, we were asked to create a card with the theme “Sweet Treats.” What better way to celebrate a birthday than with a delicious cupcake-themed card? So, let’s get into the creative process and bring this sweet card to life!
Card Dimensions: Making this cupcake birthday card Just Right
Let’s start with the base of our handmade cupcake birthday card. This card is not difficult to make, and the results are beautiful.
- Base Card: 10.5 cm x 15 cm (4.13 inches x 5.91 inches). To make the base card yourself, you need a piece of card stock measuring 30 centimetres by 10,5 centimetres. Score at 15 centimeters.
- Black Paper Layer: 10 cm x 14.5 cm (3.94 inches x 5.71 inches).
- Piece of digital pattern paper: 9,5 cm X 14 cm(3.74 inches x 5.51 inches).
Creating the Sweet Background with Cherry Accents
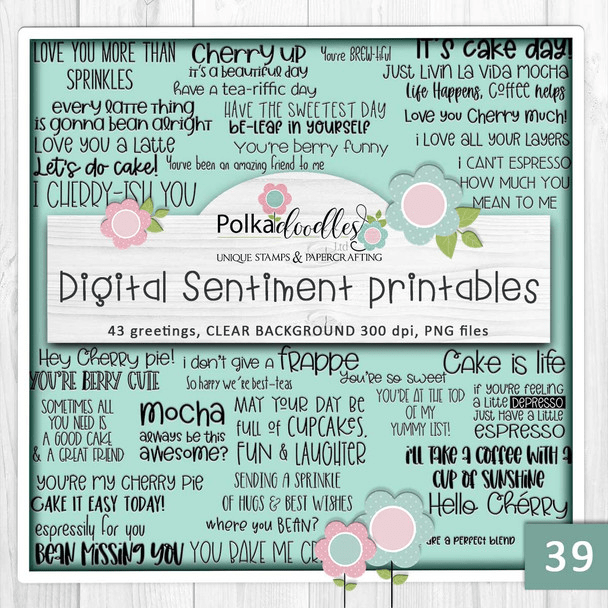
Before starting work on the card, I carefully picked out which digital paper I would like to use. I picked a pattern from the charming digital pattern paper set “Coffee Tea and Cake”. The paper featuring cherries in a circular design with mint, red, pink and green tones provided the perfect background for my cupcake creation. I used the colours of the digital pattern paper as an inspiration to colour the digital stamp. This way the digital stamp matches the digital background paper perfectly.
I like it when the different products fit with each other. Most of the Polkadoodles digital stamps have also matching digital paper and sentiment sets.
Bringing the cupcake to life with my alcolmarkers.
The digital stamp “Cherry Cream Cupcake” was printed on DCP paper. Now it is time to add some colour to the cupcake by colouring it in. For this, I use my trusty alcohol markers to apply the shades for each element of the cupcake.
I used the following colour combinations for the cupcake:
- The Cream: Clay, Caramel, Leather, and Pearl White.
- The Cherry and Bow: Cherry Pink, Old Red, and Wine Red.
- The Cake: Sand, Burnt Sienna, and Chocolate.
- The cup: Cool Mint, Mint Macaron, and Teal Blue.
After coloring I fussy cut the image out. I like a bold outline, so I ran my black fine liner over the black outlines.

Having trouble editing or colouring digital stamps? Download my free guide for extra tips and tricks to help you perfect your digital stamps!
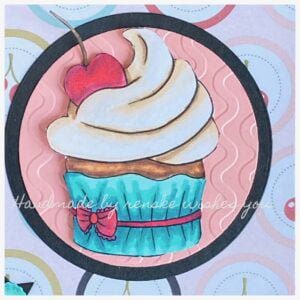
Framing the cupcake
To create depth and dimension, I decided to place my cupcake in an elegant circular frame. Using a circle die, I die-cut a circle out of black paper. For the pink paper, I used a step smaller circle die to die-cut a circle from that.
For the background of the cupcake, I still wanted to make it a little more interesting. I had an embossing folder lying around that makes kind of waves in the paper. I decided to work on my pink paper with it. To create this effect, you need to put the paper in your embossing folder and get it through your die-cutting and embossing machine.
Add birthday wishes
When I made this card, I wanted to make sure the recipient felt cherished and celebrated on their special day. I chose the sentiment “Let’s do cake” from the “Coffee Tea and Cake” set, and printed it on DCP paper. Beforehand, I had thought of cutting out the sentiment with a banner die. So keep that in mind when you want to print it out how big it should be.
After die-cutting the text with a banner die, I decided I wanted a black border around it. So using a step larger banner die, I die-cut this out of black paper too. I glued these two parts together. Now the sentiment is nicely framed with a black border, which also goes well with the black circle framing the cupcake.
Embellishing with Style
To give the design just a bit extra, I decided to add something in the top left corner of the banner. I decided to die-cut a star from black paper. I decided to add a button, created with a button die, to the black star. I coloured the button with the same shades as I used for the cup. It gives just a little something extra and draws your attention to the sentiment.
Glittering final
To give the card some sparkle, I decided to apply some glitter. I applied glitter by using an aqua glitter pen to add sparkle to the cream, cherry, bow and button. The shimmering details gave the finished card a cheerful element.
Inspire, Create, Share, and More!
Thank you for joining me in creating this handmade birthday card. I hope you enjoyed the process and found inspiration to make your birthday card.
If you have any questions, need clarification, or just want to share your thoughts, I’m here to listen and help. Crafting is more than a hobby; it’s a vibrant community, and I’m here to support you in your creative endeavours. Let’s continue to spread the joy of crafting and explore the endless possibilities together!
Join the Fun: Participate in the Polkadoodles Challenge
Remember, the beautiful cupcake birthday card was created to inspire you to participate in the Polkadoodles’ “Anything goes” challenge. I am excited to see your creative journey unfold! This is your chance to showcase your skills, so get your craft supplies ready and let your imagination soar. Show us the amazing projects you come up with! I strongly encourage you to join in this thrilling challenge, create your art, and share your work with our lively community. Your talent deserves recognition, and who knows? You might be our next winner!
More birthday card ideas with Polkadoodles products
IIn this section, you will find links to articles that may interest you. Here, you can find birthday cards that were created using Polkadoodles products. Click on the links to access the articles.

Polkadoodles products in the spotlight
Please note that some of the links in this blog post are affiliate links to Polkadoodles products, which means I may earn a small commission if you click on the link and make a purchase. This comes at no additional cost to you and helps support the work I do in bringing you creative inspiration and content. Thank you for your support!


I would like to enter my card in the following challenges:
- Try it on Tuesday: Pretty Papers
- Allsorts challenge blog: Anything but square
- A Perfect Time To Craft Open Challenge: Anything goes
- Classic Design Challenge Blog: Anything goes
- Crafts Galore Encore Challenge Blog: Anything goes
- Crafting Happiness Challenges: Anything goes
Sweet card and cupcake. Thank you for joining us at the Crafts Galore Encore Challenge.
Hugs
Danka
Twórcze pasje Danki {My Blog}
Thank you ❤️
Who doesn’t love cake! A fab card for our challenge this week at Allsorts, thank you for joining us.
Lorraine
I don’t know anybody who doesn’t love cake 😀. Thank you
Yum! Looks good enough to eat. Thanks for sharing with us at Allsorts.
Thank you
What a really happy and colourful Birthday card, thank so much for sharing with us at Allsorts challenge.
B x
Thank you so much