
Hello Crafty Friends, gather around as we embark on a new creative journey! Today, Penny’s Paper-Crafty Challenge blog is launching another exciting challenge. And guess what? I’ve created a lovely handmade ballerina card just for this occasion.
At Penny’s, we believe that every sheet of paper holds boundless potential. Our biweekly challenges embrace the theme: “Anything Is Always Possible with Paper.” Yes, you read that correctly—anything! Whether your heart flutters for intricate designs, whimsical scenes, or heartfelt sentiments, this theme grants you the artistic freedom to create without constraints.
As we set sail on this imaginative voyage, let’s give a round of applause to our generous sponsors. Please welcome All Dressed Up Stamps and Jan’s Digi Stamps! Their fantastic digital stamps continue to inspire our design team and elevate our crafty endeavours.
All Dressed Up Stamps

Jan’s Digi Stamps

So, fellow creators, get your cherished paper, dust off those markers, and let the magic unfold as we embark on this homemade ballerina card adventure.
Are you ready? Let the crafting enchantment begin!
- Overview of the Handmade Ballerina Card
- Step-by-Step Process: Crafting the Handmade Ballerina Card
- Inspiration Hub: Let's Get Creative Together
- Products used for this card
- I would like to enter my card in the following challenges:
Overview of the Handmade Ballerina Card
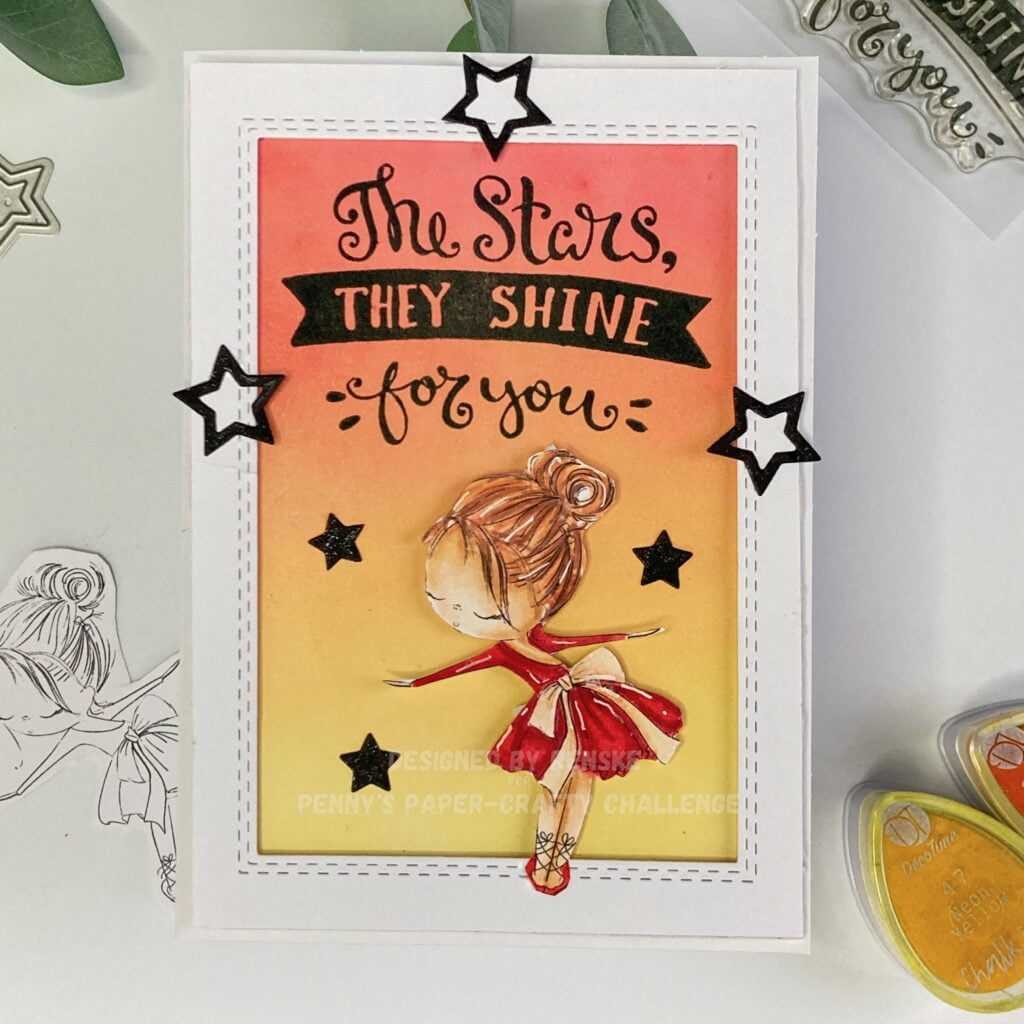
Step into the enchanting world of our handmade ballerina card, where delicate ballet slippers, twirling tulle, and dreams set in ink await.
The Take a Bow Image
At the heart of this creation lies a charming digital stamp from All Dressed Up Stamps. The delicate ballerina, gracefully poised to take a bow, adds a touch of elegance and whimsy to the design. With intricate details and graceful lines, she captures the essence of the dance in a single image.
Materials Used
- DCP Paper: The choice of paper matters, and DCP (Digital Color Printing) paper is our canvas. Its smooth surface allows alcohol markers to glide effortlessly, creating vibrant hues.
- Alcohol Markers: The ballerina was carefully coloured using alcohol markers.
- White Gel Pen: Highlights were added with a white gel pen, adding depth and dimension to the image.
- Frame: A handcrafted frame, adorned with a double-stitched edge, provides the perfect backdrop for our ballerina.
Techniques Applied
- Ink Blending: The background, ink blended with a blend of red, orange, and yellow colours, sets the stage for her performance.
- Stamping Platform: For the sentiment “The Stars They Shine for You,” we used a stamping platform. Precise alignment ensures a crisp, black impression that dances across the upper part of the background.
- Embellishments: Black star die-cuts twinkle around our ballerina. We will die-cut this from black paper.
Together, these elements combine to create a handmade ballerina card that’s as enchanting as it is delightful. Whether it’s for a birthday, a thank-you, or just to brighten someone’s day, this card is sure to bring joy to whoever receives it.
Step-by-Step Process: Crafting the Handmade Ballerina Card
In this section, we’ll break down each stage of our creative journey. From choosing the right materials to adding those final embellishments, you’ll discover how to bring our ballerina to life.
Now, let’s dive into the creative process and begin with Step 1: Determining the card size and creating the base.
Step 1: Crafting the card base
Before we get into the intricate details of our handmade ballerina card, let’s first lay the foundation by determining the card size and creating the base.
Choosing the Card Size
The size of your card plays a significant role in its overall presentation. For our handmade ballerina card, I’ve opted for a standard size of 10.5 centimetres by 14.8 centimetres (approximately 4.1 inches by 5.8 inches). This size provides ample space to showcase our ballerina and allows for easy mailing or gifting.
Creating the Base
Now that we’ve determined our card size, it’s time to create the card base. You have two options here: you can either use a pre-made card base or craft one from scratch using sturdy white paper. To create a custom base, simply take a sheet of white paper measuring 21 centimetres by 14.8 centimetres (approximately 8.3 inches by 5.8 inches) and score it at the halfway point, which is 10.5 centimetres (approximately 4.1 inches). Then, fold the paper along the scored line to form a crisp fold, and voila! Your card base is ready for embellishment.
By carefully determining the card size and creating a sturdy base, we’ve laid the groundwork for our handmade ballerina card. With this foundation in place, we can now move on to the next step: bringing our ballerina to life with a charming digital stamp and vibrant colours. Stay tuned for Step 2!
Step 2: Printing and Coloring the Digital Stamp
Now that we’ve laid the foundation with our card base, it’s time to bring our ballerina to life with the magic of colouring. In this step, we’ll print and colour the enchanting digital stamp from All Dressed Up Stamps.
Printing the Digital Stamp
Begin by printing the digital stamp onto DCP (Digital Color Printing) paper. This high-quality paper provides a smooth surface that allows alcohol markers to glide effortlessly, ensuring crisp and vibrant colours. Adjust the size of the stamp as needed to fit your card design, and print it.
Colouring the Take a Bow digital stamp
Now comes the fun part—colouring our ballerina! Grab your favourite alcohol markers and let your creativity soar as you bring her to life.
I used the following colour combinations:
- Skin: Tanned Skin (260) Peachy Blush (257), Salmon Pink (25), Baby Skin Pink (133).
- Hair: Leather (113), Buttercup Yellow (141), Sand (107), Burnt Sienna (97).
- Dress: Cardinal (244), English Red (247), Burgundy (247).
- Bow: Buttercup Yellow (141). Pale Cream (142).
Adding Highlights
Grab a white gel pen. This little hero will create highlights on the ballerina’s dress and hair. A touch of white brings our dancer to life!
Add subtle strokes to the folds of her dress and the strands of her hair. These highlights make her shine like a star on stage.
By printing and colouring the digital stamp with care and attention to detail, we infuse our handmade ballerina card with personality and charm. With our ballerina beautifully coloured, we’re one step closer to completing our masterpiece. Stay tuned for Step 3, where we’ll create the perfect frame to showcase our creation!


Having trouble editing or colouring digital stamps? Download my free guide for extra tips and tricks to help you perfect your digital stamps!
Step 3: Crafting the Background and Text
Our ballerina needs a stage, and that’s where the frame comes in! Let’s create a beautiful backdrop that sets the scene for her graceful performance.
Crafting the Frame
Take a piece of white paper (10 cm by 14.3 cm) and use it to form the frame, let’s add a touch of elegance. Use a rectangle die-cut with a double-stitched edge to create a frame. This inner rectangle will be our window to the enchanting background. By layering the two rectangles, we achieve depth and visual interest. The outer frame provides stability, while the inner frame adds sophistication.
Choosing the Background Colors
Our ballerina deserves a magical backdrop. Let’s blend colours to create a soft gradient. I recommend using red, orange, and yellow inks. Start with red ink at the top third of the frame, blend it downward, then transition to orange, blending it over the red section. Finally, apply yellow ink at the bottom, blending it seamlessly into the orange. Imagine the warm glow of stage lights illuminating the scene.
Stamping the Sentiment
Our ballerina dances in the spotlight, so let’s add a poetic touch. Stamp the sentiment “The Stars They Shine for You” on the background. Use a stamping platform for precise alignment. This ensures a crisp, black impression that dances across the upper part of the background. Position the sentiment so that it gracefully flows beneath the frame, like a whispered promise to our ballerina.
With the frame in place and the background set, our ballerina is ready to take centre stage. In the next step, we’ll add extra embellishments to make her shine even brighter. Stay tuned for Step 4!

Step 4: Assembling the Card
Our handmade ballerina card is almost complete, and now it’s time to put the pieces together. Let’s assemble our card with care and attention to detail.
Attaching the Frame to the Background
Remember the frame we crafted earlier? It’s time to attach it to the background. Apply foam tape to the back of the rectangular frame. This will create depth and dimension, making our ballerina stand out. Position the frame on the background, ensuring it aligns perfectly. Gently press it down to adhere.
Placing the Ballerina
Our ballerina takes centre stage! Her feet should rest on the lower edge of the frame. To bridge the gap between her and the background, use foam tape on the rest of her body. This subtle elevation adds movement and realism. Carefully position her within the frame, as if she’s about to leap into the spotlight.
With the frame securely in place and our ballerina poised for her final bow, our card is almost ready to dazzle. In the next step, we’ll add those extra embellishments that will make her performance truly magical. Stay tuned for Step 5: Adding Extra Embellishments!
Step 5: Adding Extra Embellishments
Our handmade ballerina card is almost ready for her grand performance. However, we want to make her shine even brighter by adding some stardust! In this step, we’ll be adding some delightful finishing touches to the card.
Die-Cut Black Stars
To create celestial embellishments that twinkle around our ballerina, use a star-shaped die-cut to cut black stars. Position two stars near her face, as if they’re following her graceful movements. Place another star just behind her head, like a guiding star.
Frame Embellishments
Our frame deserves a touch of magic too! Remember the inner rectangle we created earlier? It’s time to adorn it! Cut stars with only their outlines from black paper, and place one star in the centre of the upper edge. This star will shine like a spotlight on our ballerina. Arrange the other stars along the sides, aligning them with the words “for you.” These stars frame our sentiment beautifully.
Now that all the elements have been added to the card, the card is ready to be sent or given to someone.
")
Inspiration Hub: Let’s Get Creative Together
Welcome to my Inspiration Hub, where creativity knows no bounds! Let’s take a moment to reflect on the journey we’ve embarked on together and celebrate the artistry that’s unfolded along the way. In this section, I invite you to dive deeper into the world of card-making inspiration and creativity. Let’s explore together and unleash our creativity!
Join the Challenge
Are you ready to take your crafting skills to the next level? Dive into the vibrant world of Penny’s Paper-Crafty Challenge blog, where creativity reigns supreme. Our biweekly challenges provide creators of all levels a platform to showcase their talent and connect with like-minded enthusiasts. As we navigate each challenge, we are supported by our wonderful sponsors, this time All Dressed Up Stamps and Jan’s Digi Stamps. Join us today to take on the challenge and unleash your creativity!
More Handmade Card Inspiration with All Dressed Up Stamps
Here’s an extra treat! Check out another stunning handmade ballerina card that might pique your interest. Discover new techniques, colour palettes, and design ideas. Let your creativity soar!
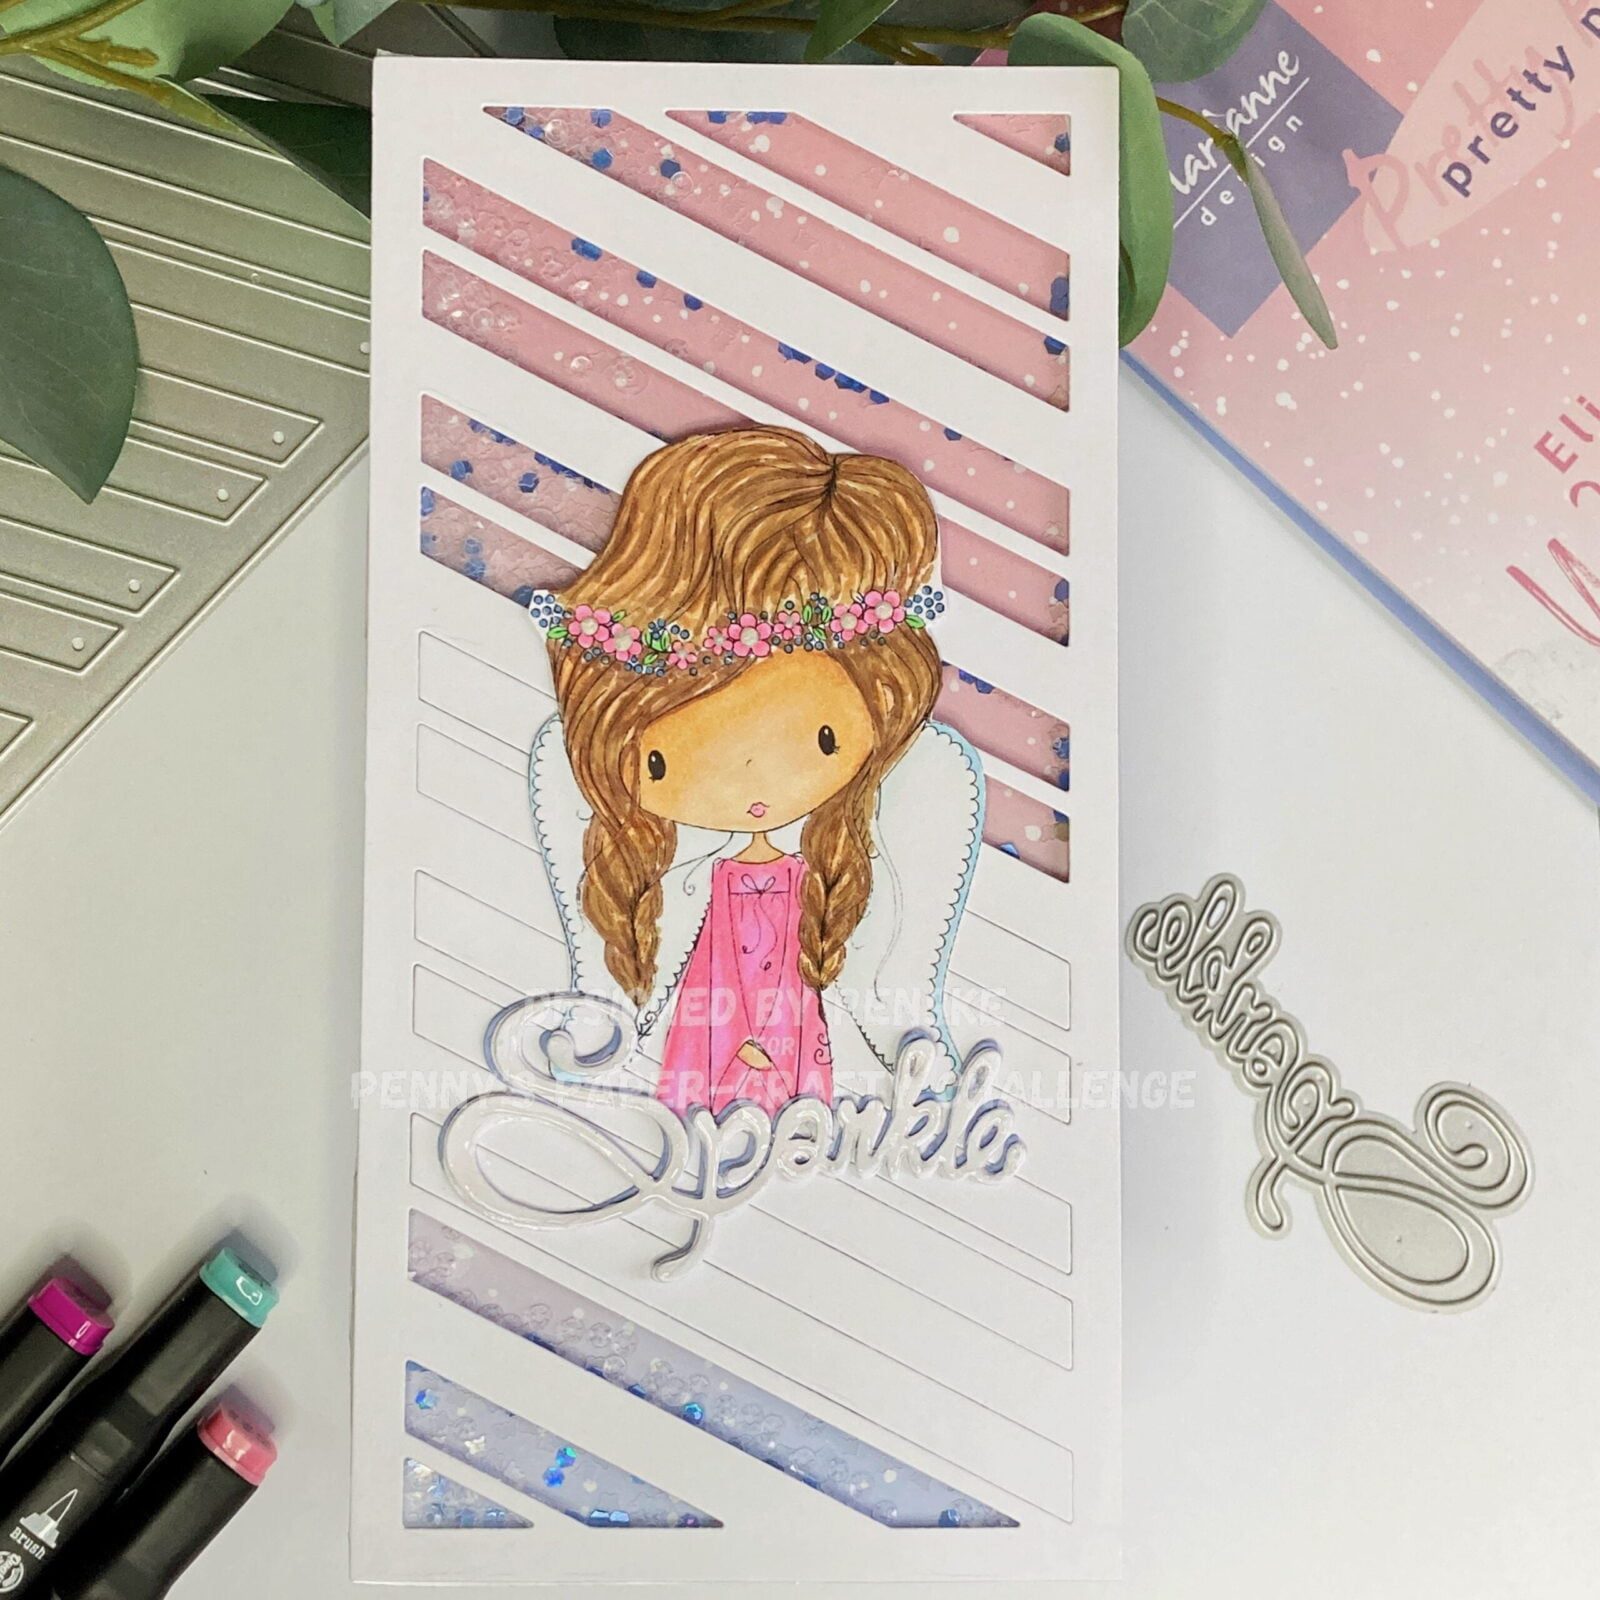
Step-by-Step: Crafting an Amazing Shaker Slimline Card Tutorial
Another card for someone to sparkle
With my Inspiration Hub as your guide, let’s ignite our imaginations and craft a world filled with beauty, wonder, and endless possibilities. Together, we’ll inspire, create, and share our love for handmade cards. Join me on this extraordinary journey of creativity and let your imagination soar!
Products used for this card
Affiliate Disclosure: Please note that some of the links in this article may be affiliate links. This means that I may earn a commission if you click on the link and make a purchase, at no additional cost to you. I only recommend products or services that I believe will add value to my readers. Your support helps keep this blog running and allows me to continue providing valuable content. Thank you for your support!
Products with Affiliate links
Take a bow digital stamp

White gelly roll pen 08

Memento Lady Bug red ink

Memento Tuxedo Black ink

Products used without affiliate links
- Twin markers (Alcohol markers) from Decotimecrafts. You can buy this with the Action Stores.
- Regtangle die from Aveccreative
- Star dies from Aveccreative
- Chalk ink from Decotimecrafts
- Clear stamp sentiment from Craftsensations.
I would like to enter my card in the following challenges:
- Unicorn Challenge Blog: Use dies
- Through The Purple Haze Challenges: Anything goes
- Lil Patch of Crafty Friends Challenge …: Anything goes
- Stamping Sensations: Anything goes
- Dragonfly Dreams: Use a die
- A Perfect Time To Craft Open Challenge: Anything goes
- SheepSki Designs Challenges: Anything goes
Beautiful card. Thanks for joining Stamping Sensations challenge. Anesha
Thank you
A sweet image and pretty frames design, many thanks for sharing with us at Stamping Sensation challenge.
B x
Thank you
Very cute – I like the image set back from the front frame. Thanks for sharing with us at Dragonfly Dreams :)
Thank you so much