
Some links in this post are affiliate links. This means I may earn a small commission if you make a purchase, at no extra cost to you. I only recommend products I use and genuinely enjoy in my own cardmaking. Read more here.
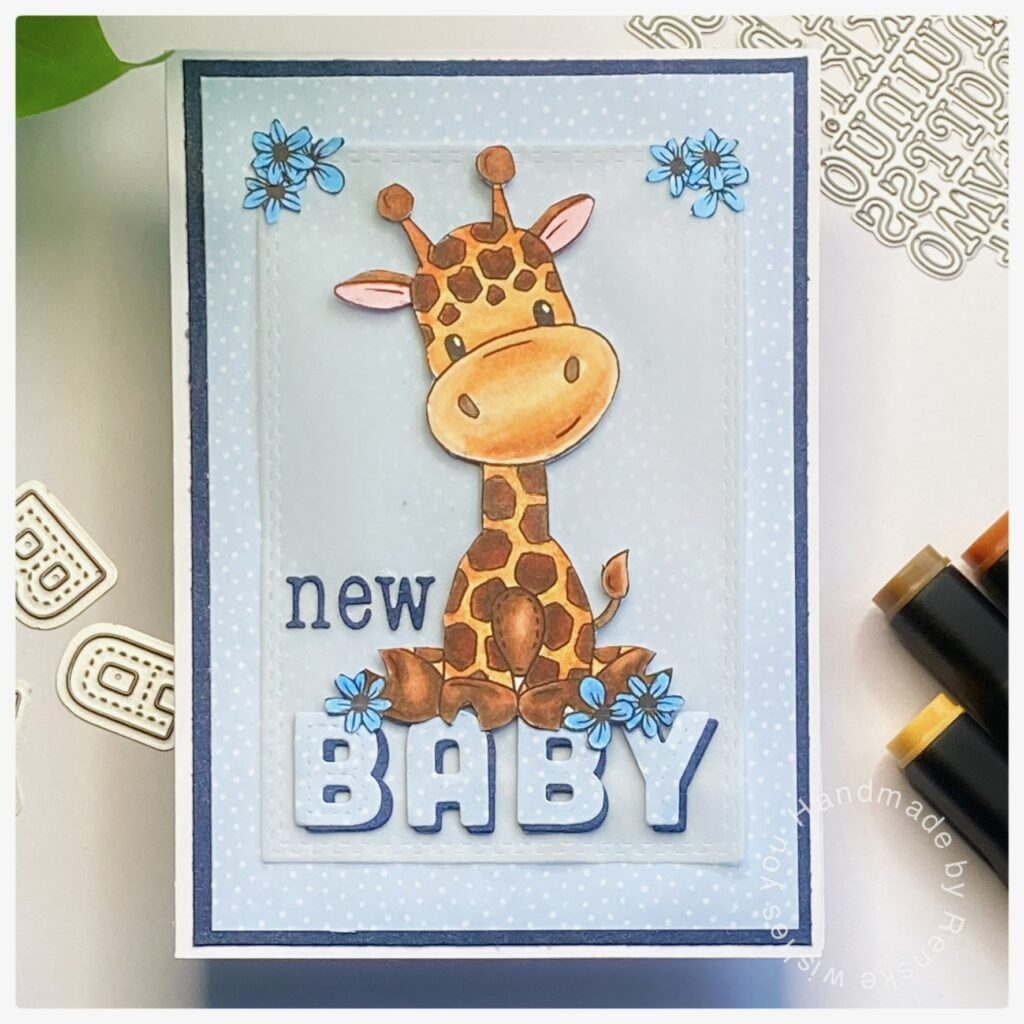
Today I have this cute giraffe baby card to share with yo. Isn’t he adorable. I had been walking around with the idea of making this card for a while, but because of all those Christmas cards, it didn’t materialize. So now finally this baby card. I downloaded this cute giraffe from the Papercrafter Magazine‘s website. It is provided by Hunkydory. You can download the image here.
Let’s talk about this card.
Measurements from this Giraffe baby card
- You need a piece of white card stock measuring 30 centimeters by 10,5 centimeters. Score at the long side at 15 centimeters. Now you have your base card.
- A piece of blue card stock measuring 10 centimeters by 14,5 centimeters.
- A piece of patterned paper measuring 9,5 centimeters by 14 centimeters.
- A piece of vellum
- Patterned paper to die-cut from
- Blue card stock to die-cut rom
- A piece of DCP paper to print your image on.
Coloring the digital stamp
I printed my image on DCP paper and colored it with my alcohol markers.
- Giraffe: Terra cotta (278), Dark Yellow (31), Cantaloupe (276), Light Cantaloupe (275), Hazelwood (108) and Pale Yellow (38)
- Spots: Rose Beige (97), Walnut (100) and Clay (116).
- Hooves: Walnut (100) and Rose Beige (97).
- Top of his ears: Clay (116).
- Inside of his ears: Pink Pale (09) and Blush (136).
- Flowers: Baby Boy (144), Sky Blue (76) and Sweet Dreams (272).

Die-cutting
For this card I did some die cutting. First, I die-cut a stitched rectangle out of vellum. I want to place my giraffe on that. Since the giraffe is sitting, I thought it would be fun to have him sit on the word baby. I die-cut the stitched letters from the same patterned paper as I used on the background. I also die-cut the letters 4 times out of the blue cardstock. I wanted to give the letters some shading and dimension. I glued the blue letters together and after that I can glue the letters from the patterned paper. I didn’t glue them straight on top of the blue letters, I place the letters something to the left, so I have this dark blue shadow around the letters.
From a different letter die I die-cut the letters to make the word new out of the blue card stock.
The finishing touch
Now its time to assemble the card. First, I glue all the elements on the vellum. I placed my letters and the giraffe and glued them down. Now you can glue all the layers on the card. Put glue on the back of the vellum in the places where the different pictures are stuck. This way, you won’t see any glue through your vellum.
I printed out the giraffe twice more and used the flowers to stick in the corners on the vellum.
And the baby card is finished. I hope you like it. Let me know in the comments.

More inspiration needed for baby cards?
I made the following baby cards you can visit also:
I’m listing the products I used below. I will link them when I can.Click on the link to go directly to the product. Where available I use compensated affiliate links which means if you make a purchase I receive a small commission at no extra cost to you. Thank you so much for your support.
Products I used:
- Digital stamp Giraffe freebie on the Papercrafter Magazine’s website.
- Stitched letter dies from Aveccreative.
- Patterned paper from the Writers paperblock from Decotimecrafts
- Twinmarkers (alcohol markers) from Decotimecrafts.
- Letter die from Craftemotions.
- Vellum from Card Deco essentials.
I would like to participate in the following challenges:
- Lil Patch of Crafty Friends Challenge …: Anything goes
- Dragonfly Dreams: Anything but Christmas
- A Perfect Time To Craft Open Challenge: Anything goes
- Classic Design Challenge Blog: Anything goes
- The Creative Crafters: Anything goes
- Crafter’s Cafe: Anything goes
So cute Renske. Thank you for sharing with us over at The Creative Crafters (creativecrafterschallenge.blogspot.com).
Wendy DT