
Some links in this post are affiliate links. This means I may earn a small commission if you make a purchase, at no extra cost to you. I only recommend products I use and genuinely enjoy in my own cardmaking. Read more here.
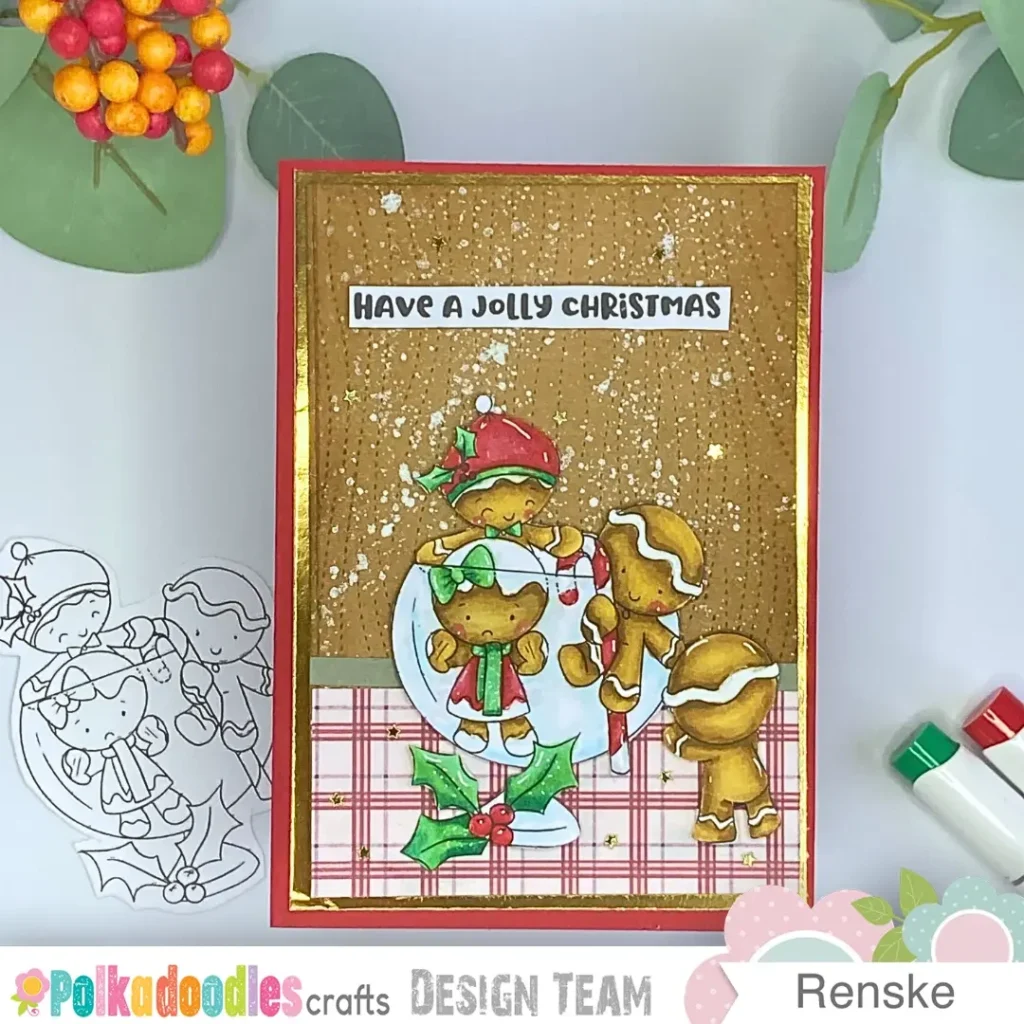
Imagine a cheeky gingerbread face peeking out of a glass, while friends join in the festive fun. That playful scene instantly brings a smile and captures the joy of the holidays. Adding a touch of humour like this can make your Gingerbread Man Christmas cards stand out.
Even if gingerbread isn’t common where I live, Polkadoodles stamps like these always make me smile with their mischievous expressions. For this tutorial, I’m using the Escape Gingerbread Holly digital stamp, created for the latest Polkadoodles challenge. I loved combining traditional Christmas colours with a whimsical, fun scene.
In this guide, I’ll show you how to craft your own playful gingerbread man card. You can swap materials, experiment with colours, and make the design uniquely yours.
Gather Your Supplies for a Whimsical Gingerbread Card
Here’s everything you’ll need. I’ve split the list into Polkadoodles products and other materials to keep it clear. Don’t worry if you don’t have exactly the same items. This is your chance to get creative and put your own spin on the card.
At the end of this section, you can also read about possible alternatives for certain materials.
Polkadoodles Products
- Escape Gingerbread Holly digital stamp – The star of the card. Link
- Elvis Wesley Moose patterned paper – Checkered design for the “tablecloth.” Link
- Gingerbread Holly printable Greetings/Sentiments – Perfect finishing touch. Link
Other Materials
- Kraft cardstock: for the background
- Red cardstock: for the card base, approx. 21 cm x 14.8 cm
- Gold cardstock: to frame the background, approx. 10 cm x 14.3 cm
- Grey cardstock: thin strip (0.5 cm x 9.5 cm) for the table edge
- Woodgrain die: to emboss the kraft paper.
- Distress inks (Vintage Photo, Walnut Stain): to add depth to the kraft background
- Metallic paint: for the “powdered sugar” splatter effect
- Ohuhu alcohol markers : to colour the digital stamp
- Foam tape : to raise the main image and text
- White gel pen: for highlights
- Gold star embellishments: for extra sparkle
- Glue or double-sided tape: to assemble layers
Tips & Alternatives
- No woodgrain die? Use a stencil or patterned paper with a similar texture.
- No foam tape? Layer paper scraps to create dimension.
- Don’t have Ohuhu markers? Try coloured pencils, watercolours, or any colouring medium you like.
- Any brown ink may be substituted for Distress Inks if needed.
- White metallic paint can be substituted with any white paint for the splatter effect.
With your supplies ready, we’re all set to bring your gingerbread card to life.
Create Your Fun Gingerbread Man Christmas Card Step by Step
In this guide, I’ll take you step by step to craft your own playful gingerbread card. It’s perfect for beginners and gives more experienced crafters room to add their own touches. By the end, you’ll have a cheerful Christmas card ready to make someone smile, and I hope you enjoy every moment of creating it.
Step 1: Print and Prepare Your Digital Stamp Escape – Gingerbread Holly
Before you start colouring, let’s get your digital stamp ready. This ensures your images are the right size and layout for your card.
Printing the image
- Place your digital stamp on paper suited to your colouring medium. I usually choose DCP paper when using alcohol markers, but any good-quality paper works.
- Drag the stamp into Word or similar software and resize it. For this card, I set it to 9 cm tall by 7.5 cm wide, but feel free to experiment with different sizes.
- Print the stamp and check the size. Making a few variations can add playful interest to your card.
Printing the sentiment
- Add your chosen sentiment to the same document. For this tutorial, I used “Have a Jolly Christmas” from the Gingerbread Holly Greetings/Sentiments set.
- Set the width to around 7.5 cm; the height will adjust automatically.
- Print everything out and get ready to colour.
Step 2: Colour Your Gingerbread Characters
Bring your gingerbread characters to life with your chosen colours. I used Ohuhu alcohol markers, which blend beautifully and give a smooth, vibrant finish. You can, of course, use whatever colouring tools you prefer.
Colouring with Ohuhu markers
- Start with a light base and gradually build up midtones and shadows. This adds warmth and makes your gingerbread figures look more three-dimensional.
- Here are the Ohuhu marker colours I used for reference:
| Element | Ohuhu Colour Combination |
|---|---|
| Gingerbread | Straw (Y39), Fawn (Y413), Sand Storm (Y415), Golden Brown (Y416) |
| Shadows on white areas | Cloud Grey (CG01), Light Grey (CG02) |
| Red details | Deep Blush (R210), Deep Vermillion (R014), Chili Red (R016), Prune Juice (R514) |
| Green details | Sea Glass Green (G44), Grass Green (G410), Green (G313) |
| Glass | Cloud Blue (BV31), Pale Sky Blue (BV32), Frost (B03) |
| Cheeks | Deep Blush (R210) with a tiny white dot added using a gel pen |
Adding highlights
- Use a white gel pen to add small dots, streaks, and fine lines on holly leaves, bows, hats, and gingerbread faces.
- These little highlights bring extra charm and make your characters pop.
Cutting out your images
- Carefully cut around the coloured stamps with sharp scissors.
- You can cut right along the lines or leave a small white border for a fun, whimsical touch.

Now that your gingerbread figures are ready, let’s build the cozy background for your card
Step 3: Create a Cozy Background with Kraft Cardstock and Woodgrain Texture
With your gingerbread characters coloured and cut out, let’s set the scene. Kraft cardstock works beautifully, giving a warm, cozy feel that complements gingerbread figures perfectly.
Woodgrain Panel
- Run a piece of kraft cardstock through your die-cutting machine with a woodgrain die.
- Trim the panel to roughly 9.5 cm by 13.8 cm.
This simple textured panel instantly adds interest and warmth to your card.
Blending ink and adding metallic splatters
To make the background feel more realistic, I apply Distress Ink to the top two-thirds of the panel.
- Apply Distress Ink to the top two-thirds of the panel
- Use Walnut Stain around the edges for depth.
- Blend Vintage Photo toward the centre, leaving the middle natural kraft for a cozy effect.
- Mix a small amount of white metallic paint with water.
- Tap gently on the brush handle to create splatters resembling powdered sugar or falling snow.
This creates small splatters that look like powdered sugar or snow falling behind your scene. I love how this adds a playful touch and brings the card to life.
Adding the patterned paper
Next, add a patterned paper to enhance the festive scene. I chose a red and pink plaid, but feel free to pick a pattern you love. Mixing patterns can make your card even more fun.
- Cut a strip of your chosen patterned paper (I used a red and pink plaid) 4 cm by 9.5 cm.
Glue it to the bottom of the kraft panel. - For extra depth, cut a narrow grey strip 0.5 cm by 9.5 cm and place it above the patterned paper to suggest a table edge.
Next, we’ll place the gingerbread characters onto the scene to bring your card to life.
Step 4: Build the Card Base and Layer Panels
Now that the background is ready, it’s time to assemble the foundation of your card.
Card base
To make the classic Christmas colours pop, start with a bright red card base.
- Cut your red cardstock to 21 cm x 14.8 cm.
- Score at 10.5 cm along the long edge and fold in half for a sturdy base.
This creates a sturdy base while keeping the layering of panels simple and fun.
Gold mat layer
- Cut gold cardstock to 10 cm x 14.3 cm.
- Attach your background panel to the gold mat, then adhere the whole layer to the red card base.
The gold frame adds festive shine and highlights your gingerbread scene beautifully. Play with different mat colours or layer combinations to make your card uniquely festive.
Now we can assemble the card and bring all the elements together. This is where your gingerbread scene truly comes to life.
Step 5: Add Sentiment, Image, and Embellishments for Dimension
Here’s where your gingerbread scene really comes to life.
Placing the image and sentiment
- Cut your printed “Have a Jolly Christmas” sentiment.
- Use foam tape to lift both the image and sentiment for dimension.
- Position the gingerbread figures on the tablecloth so they appear part of the scene.
- Place the sentiment above the characters.
Layering your panels like this adds fun and makes your funny Christmas card really playful.
Adding embellishments
To match the gold mat, sprinkle a few small gold star embellishments across the background and patterned paper. These little touches add festive sparkle and help tell the story of your gingerbread scene.

With your image, sentiment, and embellishments in place, your gingerbread man Christmas card is finished. Take a moment to admire your cheerful Christmas card. It’s ready to bring a smile and brighten someone’s holiday.
Let’s Get Creative Together
You’ve now coloured your gingerbread characters, created a cozy background, and layered your card panels. Your card combines traditional Christmas colours with humour and charm.
Now it’s your turn. Make your own version of this funny christmas card!
Try these variations:
- Mix up colour combinations for your gingerbread men.
- Experiment with patterned paper or different embellishments.
- Add unique details to make each card your own.
Make it playful, unique, and completely yours!
Join the Polkadoodles Challenge
This card was created for the latest Polkadoodles Challenge. Remember: you don’t need Polkadoodles products to enter. The theme is always Anything Goes.
Upload your card to the Polkadoodles Challenge and you could win a voucher for the shop. It’s a fun way to share your creativity and connect with other crafters.
More Gingerbread Christmas Card Ideas
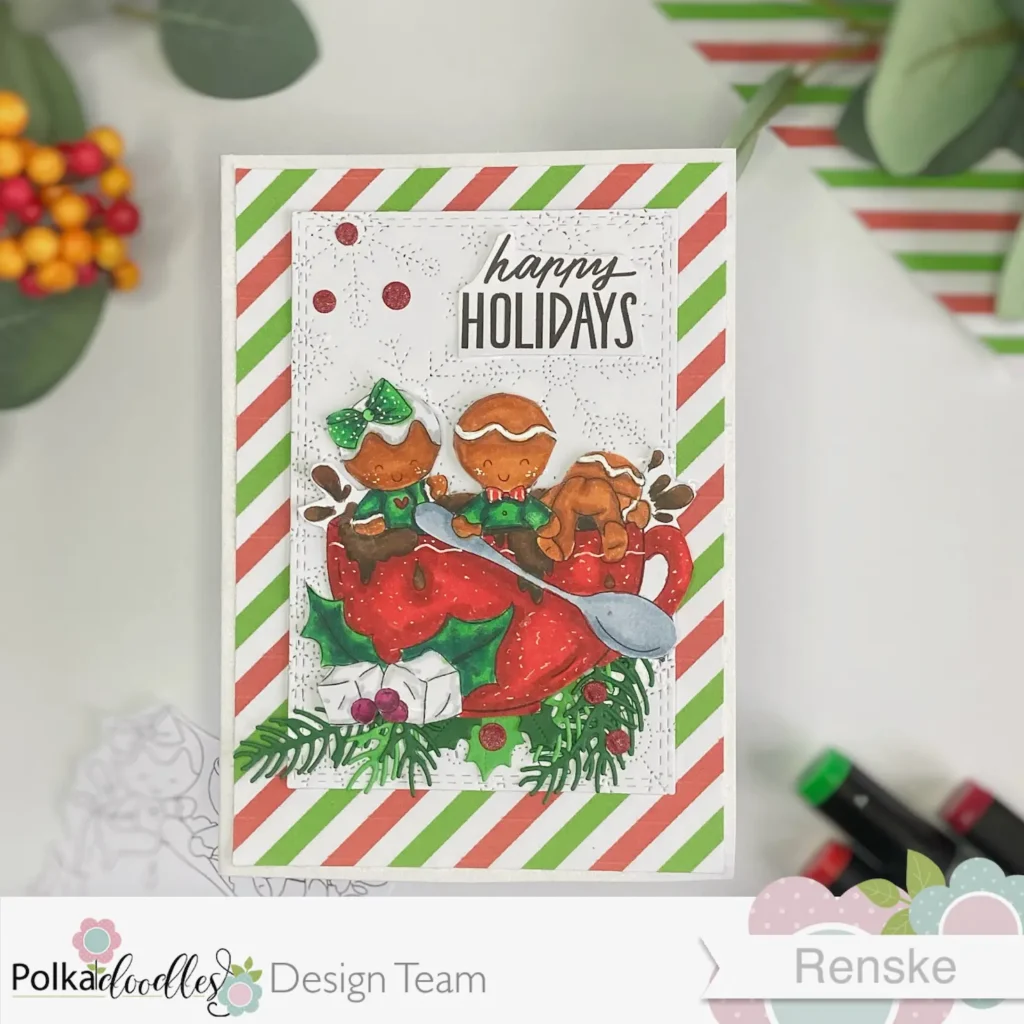
Gingerbread Christmas Card Tutorial With Polkadoodles Stamps
Another Christmas card with a fun Gingerbread digital stamp.
If you make a gingerbread man card, I’d love to see it! Show your festive card on Instagram or Facebook, or email me a photo. Don’t forget to tag me so I can feature your design.
Happy crafting!
Polkadoodles Product Links
I’ve shared all the materials I used to create this Gingerbread Christmas card below, including affiliate links. If you choose to buy through these links, I earn a small commission at no extra cost. Thank you for supporting my work and creativity!
Escape – Gingerbread Holly digital stamp

Elvis Wesley Moose patterned paper

Gingerbread Holly Greetings/Sentiments

I would like to enter my card in the following challenges:
- Try it on Tuesday: Get ready for Christmas
- Unicorn Challenge Blog: Christmas/winter
- Passion for Markers: Christmas
- Crafty Gals Corner: Tis the season
- The Paper Funday Challenges: Anything goes + merry and bright
- Craft Rocket Challenges: Christmas Winter
- Allsorts challenge blog: Christmas cards
- We Love Stamping: Anything Christmas
- A Perfect Time To Craft Open Challenge: Anything goes
- Daisy Chain Challenges: Christmas/winter
- Creatalicious Challenges: Anything goes + Christmas traditional colours