
Are you looking for funny Christmas card ideas to brighten up your holiday season? Welcome to my crafting world where I aim to sprinkle some joy and creativity into your festivities! As a proud member of Penny’s Paper-Crafty Challenge design team, I’m thrilled to dive into a new challenge with you. Like always, the theme is “Anything goes,” and we’re backed by the creative process of Mirtilliamente and Sheepski Designs as our sponsors.

Prize: 3 Digi images of
the winner’s choice

Prize: 2 Digi images of
the winner’s choice
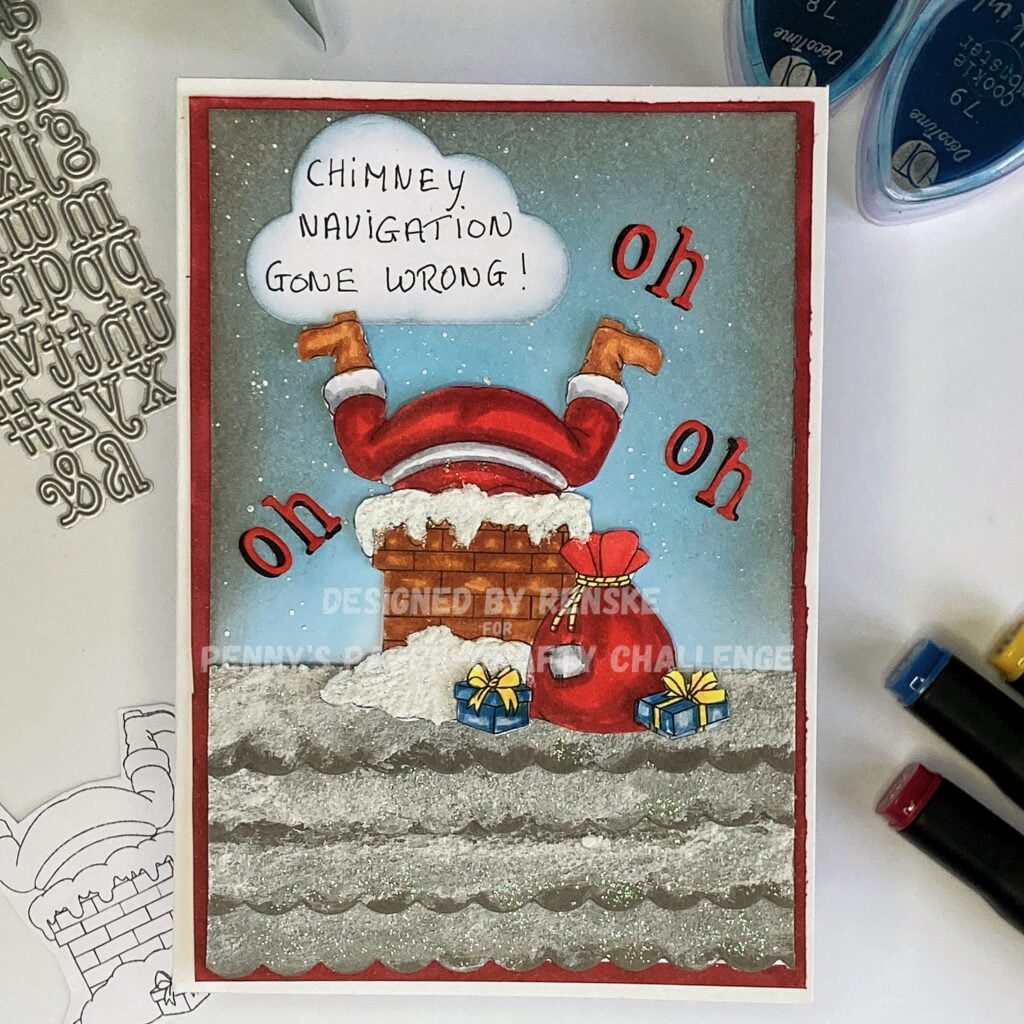
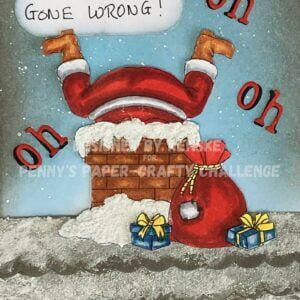
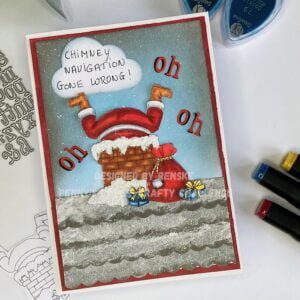
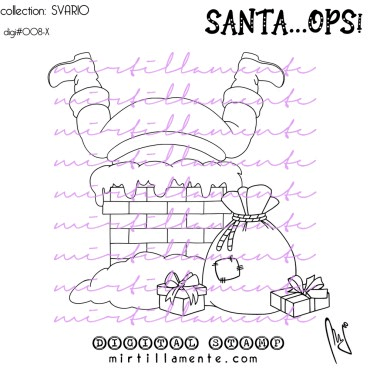
In this blog post, I’m excited to share the story behind this creation I’ve crafted using the digital stamp “Svario Santa Ops.” This image of Santa stuck in a chimney sparked my inspiration, leading to creating this humorous Christmas card that’s sure to bring smiles.
Expect an insightful journey through the art of crafting a unique and laughter-filled holiday greeting. We’ll explore the process step by step, unveiling techniques, materials, and a sprinkle of creative secrets along the way. Let’s embark on this merry adventure together and uncover the magic of crafting a hilarious Christmas card!
Materials and Preparations
To craft our funny Christmas card, we need to gather all the necessary materials. Below is a complete list of items along with their dimensions that will enable you to prepare your crafting space quickly.
- Digital stamp Svario Santa Ops: the heart of this card, the Svario Santa Ops digital stamp, adds a whimsical touch. Ensure a high-resolution print for crisp details.
- Alcohol markers or any colour medium of your choice: Select a range of colours to bring life to your creation, from the bold reds of Santa’s suit to the subtle hues of the wintry background.
- Ink Pads: Chalk or pigment inks work wonders for creating atmospheric backgrounds or blending colours seamlessly.
- Additional Embellishments: Consider glitter, deco snow, or any embellishments that enhance the festive vibe of your card.
- White card base: You need a white card base for this card. The card base we use measures 10,5 centimetres by 14,8 centimetres.
- 2 pieces of white paper: For the first layer we need white/or red paper measuring 10 centimetres by 14,3 centimetres. The paper for the background measures 9,5 centimetres by 13,8 centimetres.
- Grey card stock: You need grey card stock to die-cut the pieces for the roof.
- Edge die: You need a die to die-cut the edges for the roof. Alternatively, you can choose to cut them yourself.
- Alphabet die or alternative supplies: To create the “oh oh oh” letters, you will need a die to cut the letters, or you can use stickers or stamps to create them.
- Cloud die: A cloud die is used to create a cloud in the sky. Alternatively, you can cut it yourself.

Now that we have gathered all our materials, we can make the card.
Tutorial: Creating a Humorous Christmas Card Step-by-Step
Let’s get started with creating our festive Christmas card. In this tutorial, you will learn how to create a comical and playful Christmas card. I will guide you through the steps to bring our humour concept to life using colours and paper.
Step 1: Make the base of the card and the first layer of the Card.
To create a beautiful card, we need to create layers. Start with a solid base card measuring 10.5 centimetres by 14.8 centimetres. Then, add layers of complementary paper to create the backdrop for our cheerful scene.
For this card, the first layer of paper should be slightly smaller than the base, measuring 10 centimetres by 14.3 centimetres. This layer should have a charmingly coloured border that sets the tone for the card.
If you don’t have matching red paper, don’t worry. You can cut white paper to the appropriate size and use an alcohol marker in burgundy colour to create a red border that matches the colours we will use for the digital stamp.
Step 2: Preparing the Scene Panel
To create the scene panel, cut or trim the white paper to 9.5 centimetres by 13.8 centimetres.
Then, use chalk ink in a gradient pattern to create a subtle but immersive background that resembles the enchanting winter night. Start with deeper shades on the outer edges and gradually move toward lighter shades toward the centre.
For this card, I used the following colours:
- Cookie Monster
- Berry Blue
- Oh my love
- Black Tulip.
You can use any ink you have, but the colours should blend well together to create a nice transition. To complete the background, I used metallic paint to apply some white splashes over the scene panel to create a snowy sky that matches well with the snow on the digital stamp.
Step 3: Coloring the Digital Stamp
Now, let’s bring our whimsical Santa in the chimney to life! Grab your alcohol pens or the colour medium you want to use, and start colouring. For this card, I used Twin markers and the following colour combinations:
- Santa’s clothes and Santa’s sack: Cardinal (244), English Red (249) and Burgundy (247).
- Chimney and shoes: Sand (107), Barn Red (245), Rose Beige (97).
- The Bond: Cool Grey 5 (CG5), Cool Grey 4 (CG4), Cool Grey 1 (CG1).
- The Presents: Light Grey (189), Midi Sky (190), Dark Sky (191).
- The Bows: Golden Yellow (222), Lemon Yellow (35), Pastel Lemon (39).
It’s best to start with the lightest colours and finish with the red colours to prevent any colour mixing.
Start with Santa’s clothes and use grey tones to create shadows. To make it look white, leave some white space.
Continue with the brown shades to colour the mantelpiece and shoes. You can shape the structure of the chimney by using different shades.
Finally, colour Santa’s clothes and bag using different shades of red to create depth and vibrancy. Now that we have coloured our digital stamp, we can move on to making some parts in 3D.
Step 4: Adding 3D Elements
In this step, we will create 3D elements of the gifts for the digital stamp, which will add extra depth to the image. To do this, you can print out an extra picture and cut out the presents. Then, colour them according to the colours indicated in the previous section and attach them to the other presents with foam tape.
Step 5: Creating the roof of our scene
Now we will create the roof of the scene where Santa Claus is stuck in the chimney. Using a die-cutting machine, you can start by making grey paper roof tile sections. If you don’t have a die-cutting machine or a die to create this effect, you can cut it yourself or use other materials to create the same effect.
Apply a layer of decorative snow to these paper roof tiles and use glitter glue to create a shimmering effect that mimics the glittering snow of the holidays. Extend this snow decoration to the area around the chimney in the stamped image to make it a whole and pull the part of the roof near the chimney.

Step 6: Creating Humorous Details
Now let’s inject humor into our Christmas card by adding playful details and funny elements that enhance the comical charm.
You can use alphabet dies or other materials to create the “Oh Oh Oh” sentiment.
I die-cut the letters in red and black. I attach the red letters to the black letters so that it appears that there is a shadow around the letters.
Place the letters spread out over the background so that you also have room for the cloud. This puts a comical twist on the traditional ‘Ho Ho Ho’ as a playful nod to Santa’s misfortune.
Create a speech bubble or cloud-shaped piece from white paper and write the phrase “Chimney navigation went wrong” in this element with a black fine liner or marker. Place this above Santa Claus.
These fun additions not only add humour but also serve as focal points that draw attention to the delightful naughtiness of our card, guaranteeing a smile from everyone who receives it.
Step 7: Finalising and Assembling
We have collected all the elements for a beautiful presentation.
Now attach all parts to the card. Start on the background panel with the roof. Place the roof tile at the bottom of the paper, and let them fall over each other. The deco snow can make it a bit difficult to get them stuck. Place something heavy on it and let it dry.
Place the digital stamp with foam tape on top of the roof. Place the words ‘oh oh oh’ around him and place the cloud above him.
Once everything is in place, the card is ready to be gifted to someone special.
Unleash Your Creative Spirit!
Making this Christmas card was a wonderful journey full of creativity, laughter and the joy of sharing a piece of creativity. Creativity is a wonderful way to spread cheer and connect with loved ones during the holidays.
I hope this guide, with step-by-step instructions, has encouraged you to start your creative journey.
Join the challenge
Remember this card was designed to inspire you for the new challenge on Penny’s Paper-Crafty Challenge blog. I’m genuinely excited to see your creations. This is your moment to shine, so get your crafty gears in motion, and let’s see what amazing projects you can come up with.
I encourage you to participate in the challenge. Craft, Create, and share your projects. The crafting community is waiting to celebrate your talent, and who knows, you might win a prize!
You can find the challenge blog here.
More Funny Christmas card ideas
Non Affiliate Products used:
Svario: Santa Ops! from Mirtillamente
- Deco Snow from Decotimecrafts
- Chalk ink from Decotimecrafts
- Alcohol markers (Twin Markers) from Decotimecrafts
- Glitter glue from Craftsensations
- Cloud die from Aveccreative
- Edge die from Aveccreative
Affiliate Products used:

I would like to enter my card in the following challenges
- Unicorn Challenge Blog: Christmas
- Passion for Markers: Occasions other then birthday
- Crafty Catz: Anything goes
- My Time To Craft! : Got to be Christmas
- Allsorts challenge blog: Christmas Time
- Stamping Sensations: Get ready for Christmas
- We Love Stamping: Christmas Characters
- A Perfect Time To Craft Open Challenge: Anything goes
- Classic Design Challenge Blog: Anything goes
- Pearly Sparkles Challenge Blog: Christmas/Winter
- The Creative Crafters: Anything goes
- The Cutie Pie Challenge Blog: Digi’s and die-cuts
Haha, this is a real fun card with a great sentiment too! Thanks for joining us at Stamping Sensations this month.
Pinky
Thank you
So much fun! a great design. Thank you for sharing with us at Stamping Sensations.
Thank you so much ❤️
Funny and lovely card.
Thank you for sharing at Allsorts and at
We Love Stamping.
DT Mervi
Thank you so much ❤️
What a great card and I love the humour. Thanks for sharing such a detailed description of your process. Thanks too for sharing it with us at we love stamping xx
Thank you ❤️
Love this, what a fun card! Thank you for joining in the Allsorts Challenge this week using the Christmas Time option.
Liz xx
A fabulous card
Thank you for joining us at Crafty Catz Challenge Blog good luck Ginny DT for Crafty Catz Challenge Blog
My Blog
Your card is tremendous fun, thanks so much for sharing at Allsorts, Stamping Sensations and We Love Stamping challenges.
B x
Fun card with a lot of details, hope that the chimney isn’t mine… LOL :D
Thanks so much for joining us at WE Love Stamping monthly challenge!
😂 thank you.