
Some links in this post are affiliate links. This means I may earn a small commission if you make a purchase, at no extra cost to you. I only recommend products I use and genuinely enjoy in my own cardmaking. Read more here.
Welcome to another creative journey on my blog! Today, we will make a beautiful flower bouquet card. As a fellow card-making enthusiast, I understand the joy and satisfaction of crafting a handmade card. There’s something special about taking a few simple materials and transforming them into a heartfelt piece of art. One of my favourite tools to enhance my card-making projects is digital stamps. They offer endless possibilities and can turn the simplest cards into stunning masterpieces.
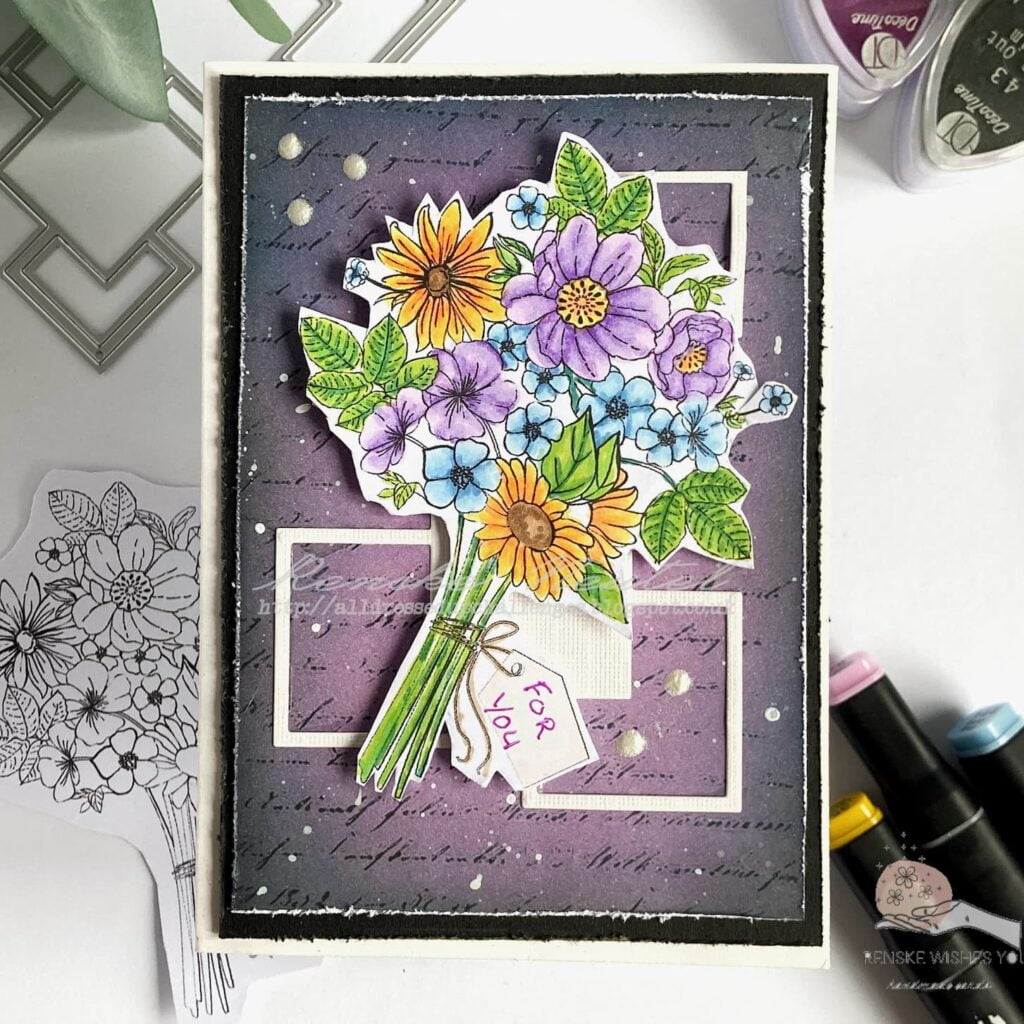
Let me introduce you to All Dressed Up Stamps, a treasure trove of unique digital stamps that bring a delightful charm to any project. Each month, Wendy releases three new digital stamps, adding fresh inspiration to our crafting repertoire. This month we have the following new digital stamps: “Thanks a Bunch,” a beautiful bouquet, “Tool Box,” featuring a boy with a toolbox and a cute dog, and “Wash Day,” depicting a girl hanging up the laundry. For today’s tutorial, I chose to work with the “Thanks a Bunch” stamp to create a gorgeous flower bouquet card.

Thanks a Bunch (not available anymore oct. 2025)

Tool Box ) not available more in the shop Jan 2026)

I’ll guide you through each step in this article to create your stunning flower bouquet card. From selecting the right materials to adding those perfect finishing touches. So, grab your supplies, and get crafting with All Dressed Up Stamps!
Materials Needed
To create a beautiful flower bouquet card, you’ll need the following materials.
- Digital Stamp from All Dressed Up Stamps (“Thanks a Bunch”): This digital stamp showcases a detailed bouquet for the card’s focal point. You can use any floral digital stamp or stamp of your choice.
- Colouring Tools: Alcohol Markers: Alcohol markers blend smoothly and offer vibrant, rich colours that enhance the digital stamp. Alternatively, you can use watercolour pencils, coloured pencils, or water-based markers.
- Pattern Paper: Beige patterned paper with written letters is recommended. You can use any patterned paper you prefer.
- Tools for Distressing, Cutting, and Gluing: Distressing tools create a textured, vintage look by roughening paper edges, while a paper trimmer ensures precise measurements and sticky glue ensures strong adhesion.
- Decorative Elements: 3D Paint Drops, Metallic Paint: 3D Paint Drops, Metallic Paint: 3D paint drops add dimension and interest, while metallic paint provides an elegant touch with subtle white splatters. Alternatively, you can use enamel dots, glitter glue, or sequins for similar effects.
Understanding the purpose of each material and considering alternatives will help you customize your card-making experience according to your preferences and available supplies. Let’s now proceed with the step-by-step guide to creating your flower bouquet card.
Step 1: Print and Color the Digital Stamp “Thanks a Bunch”
To create a stunning flower bouquet card, start by printing and colouring the “Thanks a Bunch” digital stamp.
Choosing the Right Paper
Choosing the right paper is crucial. I used DCP paper for its smooth texture and ability to prevent ink from bleeding when using alcohol markers. If you’re using a different colouring medium, it’s best to choose a different type of paper.
Printing the Digital Stamp
download the digital stamp from the All Dressed Up Stamps Shop and paste it into Microsoft Word. Adjust the measurements as needed. For a prominent focal point, print the image large, keeping it around 11 centimetres in length. Ensure your printer settings are adjusted for a high-quality print on your chosen paper.
Colouring with Alcohol Markers
When using alcohol markers for colouring, you can achieve rich, vibrant colours and seamless blending. Here is the colour combination I used:
- Stems and Leaves: Apple Green (160), Grass Green (47), and Forest Green (50)
- Yellow Flowers: Pastel Lemon (39), Lemon Yellow (35), Yellow (34), Orange (23)
- Purple Flowers: Pale Lilac (147), Neon Violet (148), Violet (281)
- Blue Flowers: Mint Blue (143), Baby Boy (144), Phthalo Blue, Midi Sky (160)
- Inside Yellow Flowers: Ochre Yellow (101), Clay (116)
- Tag: Leather (113), Pale Cream (142)
After colouring, carefully cut out the image. For a personal touch, use a purple gel pen to write “For you” on the tag attached to the flowers.
By taking your time and using these techniques, your coloured digital stamp will be a vibrant and captivating focal point for your card. Now, let’s move on to creating the background.


Having trouble editing or colouring digital stamps? Download my free guide for extra tips and tricks to help you perfect your digital stamps!
Step 2: Create the Background
The background of your card sets the stage for the focal point and adds depth and interest. Here are the steps for creating a custom background using pattern paper and chalk ink, along with distressing techniques for added texture.
Using Pattern Paper
Start with pattern paper to add visual interest without much effort. If the original colour or design does not fit your project’s theme, you can customize it.
Adding Color with Ink
To make the pattern paper more suitable for your project, use chalk ink to give it a different colour. Here’s how I did it:
- Inking the Paper: I used purple and black chalk ink. Start with the black ink on the outer edges and gradually blend in purple ink as you move towards the centre. This creates a gradient effect with darker edges and a lighter centre, adding depth to the background.
- Blending Tips:: Apply the ink in circular motions using a blending tool or sponge. Layer the colours gradually until you achieve the desired look.
Distressing for Texture
Distressing the edges of your paper can add a vintage, textured look that enhances the overall design.
- Distressing Tool: I used a distress tool to roughen the edges of the inked pattern paper. Simply run the tool along the edges to create a worn, ruffled effect.
- Alternatives: If you don’t have a distress tool, you can use the edge of a pair of scissors to achieve a similar effect. Be careful to avoid cutting the paper.
Adding splatters of Metallic Paint
- Splatter Technique: Use white metallic paint to add subtle splatters to the background. This technique adds a delicate shimmer and enhances the overall texture without overwhelming the design.
- Controlled Splattering: Dip a small brush into the paint and gently tap it to create splatters. Cover any areas you don’t want to be splattered with scrap paper to control where the paint lands.
By customizing your pattern paper with chalk ink or any other ink and adding distressed edges, you can create a unique and textured background that complements the focal point of your card. This step not only personalizes your card but also helps tie together all the elements for a cohesive and beautiful design. Now, let’s move on to constructing the card base and adding layers.

Step 3: Prepare the Card Base and Layers
When making a card, it’s important to start with a sturdy and well-layered base. Here’s how to create the base and add the first layer:
- Creating the Card Base:
- Card Dimensions: The finished card size is 10.5 cm by 14.8 cm.
- Cutting the Cardstock: Begin with a piece of sturdy beige cardstock measuring 21 cm by 14.8 cm.
- Scoring: Score the cardstock along the 21 cm side at 10.5 cm.
- Folding: old the cardstock along the scored line to create a crisp fold. You can use a bone folder or a similar tool to reinforce the crease for a professional look.
- Adding the First Layer:
- Layer Dimensions: To create a frame around your patterned background, cut a piece of black cardstock to 10 cm by 14.3 cm. This slight reduction allows for a small border around the edges, adding depth and a finished look to your card.
By carefully measuring, cutting, and scoring your cardstock, and by layering thoughtfully, you can create a sturdy and visually appealing card base that sets the stage for the rest of your design. Next, we’ll add decorative elements to enhance the overall look of your card.
Step 4: Add the Decorative Elements and assembling the card
To enhance the visual appeal of your card, decorative elements like foam tape, and 3D paint drops can be used to add texture and dimension. Here’s how to create texture by using foam tape for dimension incorporating 3D paint drops and adding a frame on the background of the flowers.
Creating texture on the background
- Creating the Textured Squares:
- Die-Cutting: I used a die that cuts several parallel squares connected. The outer squares are frames, while the inner ones are solid.
- Material: For a unique texture, I cut these squares from a sample of wallpaper. This adds a beautiful and tactile element to the card. Using wallpaper samples is a great way to introduce interesting textures and colours to your projects.
- Positioning the Squares:
- Placement: Arrange the die-cut squares behind the flower bouquet to add depth. Experiment with the positioning to find the most visually pleasing arrangement.
- Foam Tape: Apply foam tape to the back of the flower bouquet stamp. This will lift it off the background, creating a shadow effect that adds dimension to the card. Place the bouquet at a slight angle to allow parts of the squares to peek out from behind.
Tips for Using 3D Paint Drops
- Application: Add 3D paint drops to enhance specific areas of your design. For this card, apply drops to the lower right and upper left corners of the visible squares. This adds a touch of elegance and draws the eye around the card.
- Consistency: Ensure that the drops are consistent in size and shape for a polished look. Practice on scrap paper before applying them to your card.
By carefully incorporating these decorative elements, you can elevate your card from simple to stunning. The texture from the wallpaper squares, the dimension from the foam tape, and the elegant touches from the 3D paint drop all contribute to a beautifully finished card. Now, let’s move on to assembling the final pieces of your card.
Assembling the card
Now it’s time to put all the elements together and add the final touches to complete your stunning flower bouquet card.
- Take your prepared purple patterned paper with black text and layer it onto the black cardstock piece. This creates a striking contrast and frames your background beautifully.
- Use a strong adhesive to secure the layered background onto the beige card base you prepared earlier. Ensure the edges are aligned neatly for a professional finish.
By following these steps, you’ve created a stunning flower bouquet card using All Dressed Up Stamps’ digital stamp “Thanks a Bunch”. The combination of textured squares, dimensional elements, and thoughtful design choices makes this card a true work of art. Now, your card is ready to be shared or gifted, showcasing your creativity and craftsmanship in card making.

Let’s Get Creative Together
In this tutorial, you have learned different techniques. First, we printed and coloured the “Thank a bunch” digital stamp using alcohol markers. We enhanced patterned paper with chalk ink in the colours we wanted. We learned that by adding elements, you can create dimension and texture on the card. Now it’s your turn to craft. Let’s get creative together.
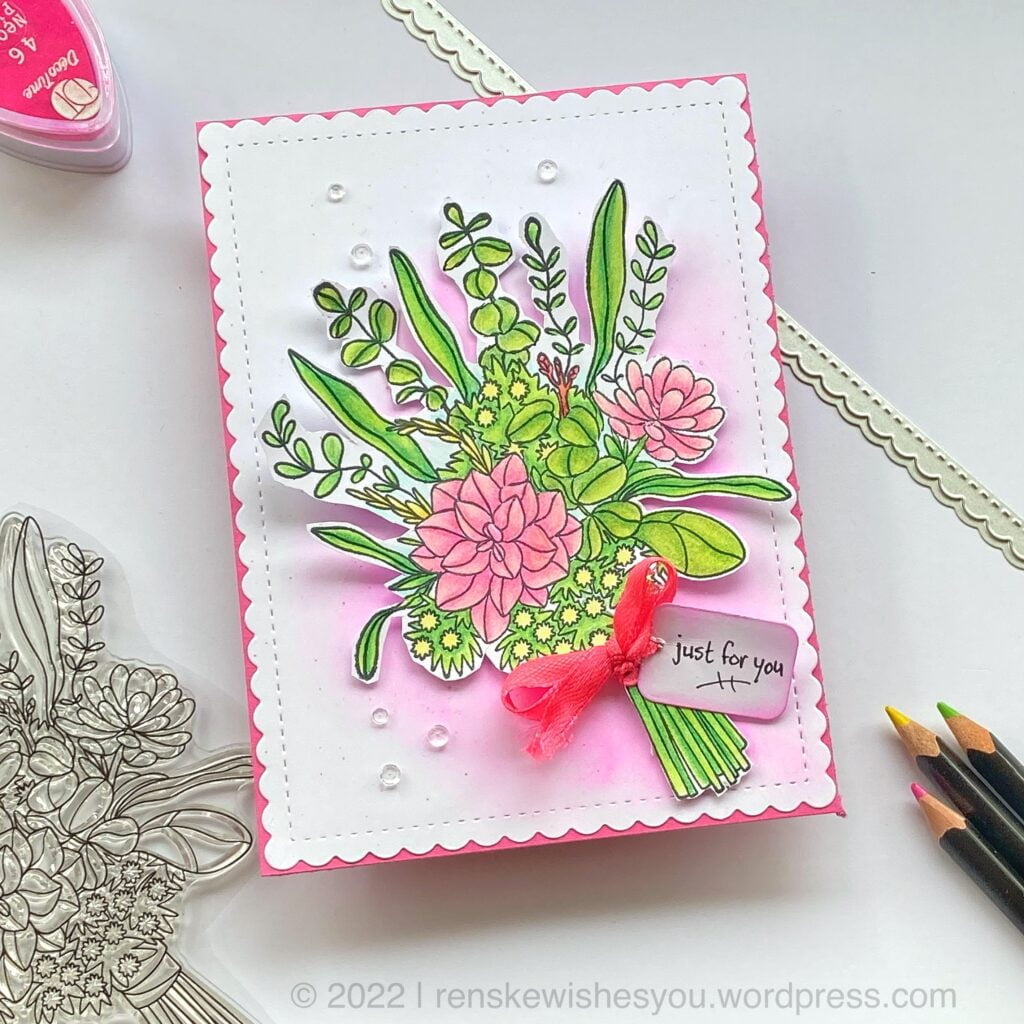
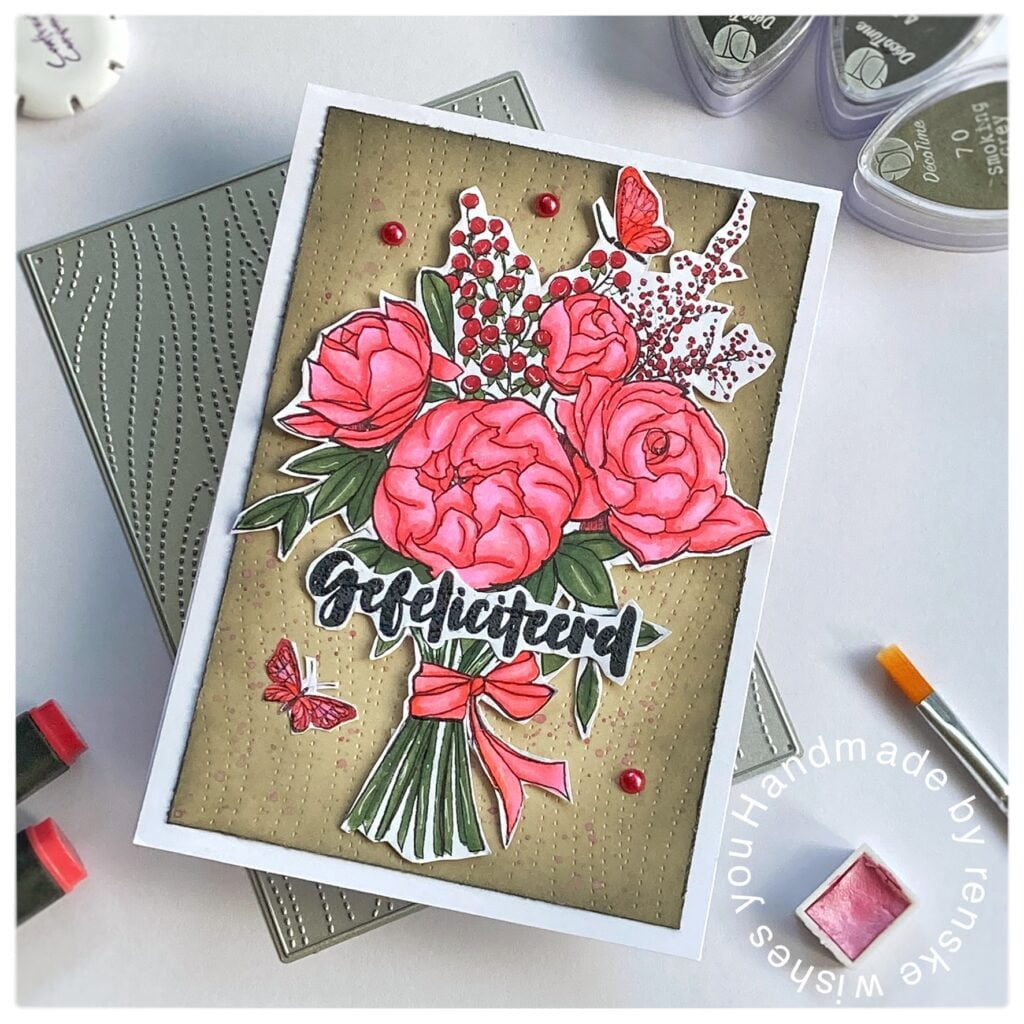
More flower bouquet card inspiration
Explore more creative ideas and tutorials on making flower bouquet cards. These projects offer additional techniques and designs to keep your crafting journey exciting and innovative. Click the links below to discover more inspiring projects.
By following these steps and, you’ll not only enhance your card-making skills but also connect with a vibrant community of crafters.
Happy crafting!
Products Used for this Flower Bouquet Card
Affiliate Disclosure: This post contains affiliate links, which means I may earn a small commission at no extra cost if you purchase through these links. I only recommend products and services that I use and trust. Your support helps me continue to provide free tutorials and creative inspiration. Thank you for supporting my blog and helping me to keep sharing my passion for card making!
Products used with affiliate links
Thanks a Bunch digital stamp from All Dressed Up Stamps (oct. 2025 not available anymore)

Distress tool from Crafter’s companion.

Products without affiliate links
- Patterned Paper from Craftsensations
- Chalk ink from Decotimecrafts
- Twin Markers (alcohol markers) from Decotimecrafts.
- Black card stock (brand unknown).
- Metallic paint (brand unknown). Bought at ActionNL.
- Square frame die from Aveccreative.
- 3D Paint drops from Craftsensations.
I would like to enter my card in the following challenges:
- Allsorts challenge blog: Blooms, Bees, and Butterflies
- Lil Patch of Crafty Friends Challenge …: Anything goes
- We Love Stamping: Fabulous flowers
- A Perfect Time To Craft Open Challenge: Anything goes
- SheepSki Designs Challenges: Anything goes
Beautiful design and colours. So glad you’re joining us in this A Perfect Time To Craft Open Challenge. All the best!
— DT Gina Ang —
A Perfect Time To Craft Open Challenge for June, #6-2024
Thank you
A stunning creation. Thank you so much for sharing your lovely creation with us at We Love Stamping.
Hugs
Cathy
xxxxx
hi Cathy, thank you for your lovely comment.