
Are you planning to create a relaxed beach-themed card with a subtle boho twist? This card design combines soft colours, sunlit textures, and layered details. You’ll use masking, Distress Ink blending, and alcohol markers to build the card step by step.
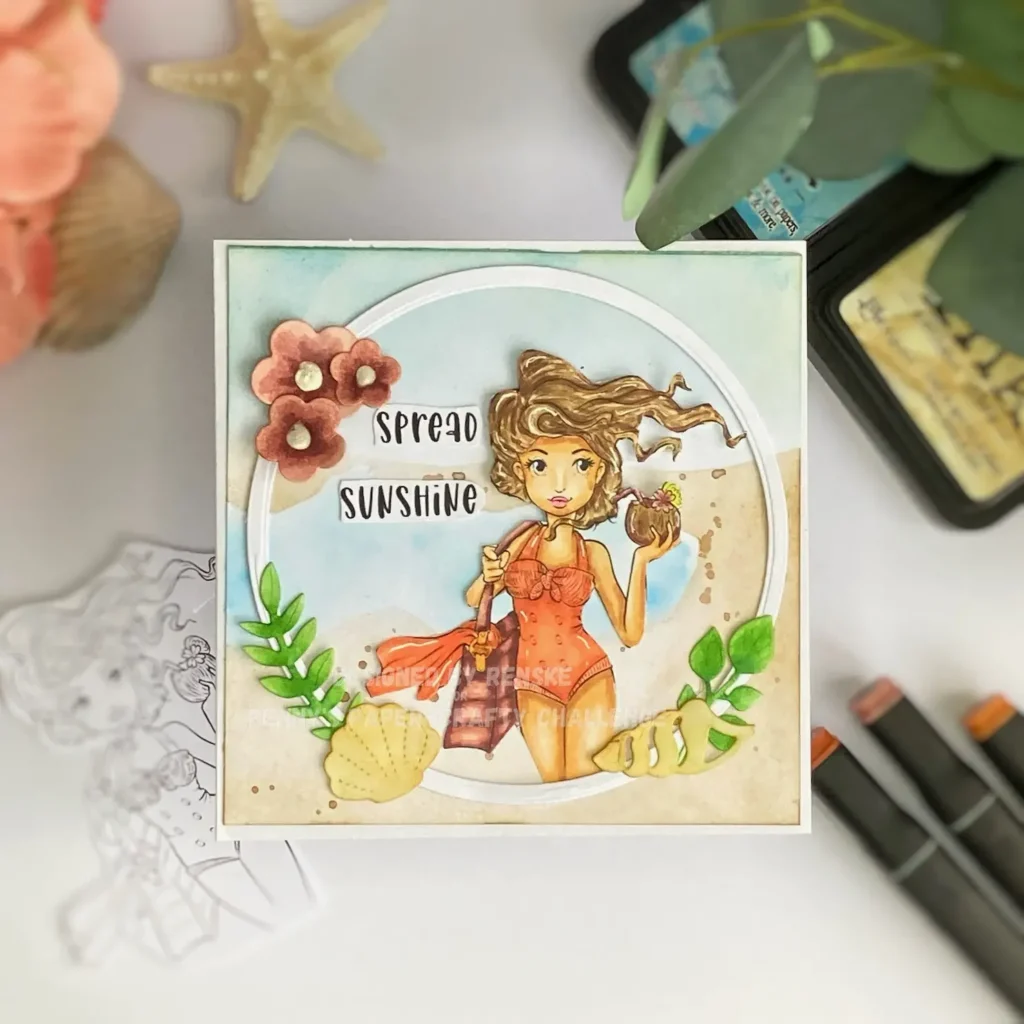
I used a digital stamp from The Paper Shelter to set the scene. The colours, textures, and layered details contribute to its easy-going boho style—natural, gentle, and a bit playful. It’s a great choice for handmade summer cards.
This card is part of my inspiration for the Penny’s Paper-Crafty Challenge Blog. The theme is “Anything Goes” using paper. We are sponsored this round by The Paper Shelter and Fred She Said. You can find their logos and links just below to check them out.

I’ll guide you through each part of the process so you can create your own version of the card.
What Makes a Boho Beach Card Work
Boho style in cardmaking focuses on natural colours and relaxed layering. Think earthy tones, soft textures, and organic details that feel easy-going and calm. It’s about setting a mood rather than following strict design rules—just like summer.
Beach themes blend naturally with this style. Soft sandy tones, faded blues, warm corals, and light peach shades capture that beach-day feeling. Combined with ink blending and layered die cuts or stamping, they create a calm, handmade boho beach card.
This is the first time I’ve worked in a full boho style. It gave me a new way to explore colour and texture, and I hope it inspires you to try your version.
I used a digital stamp from The Paper Shelter to build the scene. The sky is softly blended, and the main image is coloured with alcohol markers. I’ve kept the layout simple and will walk you through it step by step.
Materials You’ll Need for Your Boho Beach Card
Below is a full list of materials I used to create this boho beach card, along with easy alternatives so you can adapt with what you have.
- Digital stamp: Coconut digital stamp from The Paper Shelter. This is the main focal image.
- Masking paper: Masking Magic Sheets from Gina K Designs. This paper is perfect for layering the scene. If you don’t have it, any low-tack masking paper or even Post-its notes can work as substitutes.
- Distress inks: These inks help create a soft, layered background with gentle colour blending. Use similar dye-based inks if you don’t have these exact shades.
- Salty Ocean
- Tumbled Glass
- Dried Marigold
- Antique Linen
- Mowed Lawn
- Pine Needles
- Alcohol markers: Decotimecrafts markers in coordinating colours are great for colouring the digital stamp with smooth shading. Any alcohol markers, aqua markers, or coloured pencils will work for blending and shading.
- Ink blending tools: StudiolightNL blending brushes in 3 mm and 1 mm sizes are perfect for applying ink smoothly. Sponges or foam applicators can serve as good alternatives.
- Card base and cutting tools: Use your preferred cardstock along with circle dies or punches to create layered shapes.
- Metallic Paint: Adds a subtle shimmer to the background. You can use mica powders, shimmer sprays, or even a glitter pen as alternatives.
- Leaf dies: These are used to cut out delicate foliage shapes for layering. If you don’t have dies, you can hand-cut leaf shapes, use stamps, or opt for leaf stickers.
- Shell dies: These are great for adding beach-themed accents to your card. Alternatives include beach-themed stickers, stamps, or punch shapes.
- 3D pearl paint: From Craftsensations, for adding small pearl effects that bring texture and shine. If you don’t have pearl paint, consider using glossy accents, enamel dots, or tiny adhesive pearls.
- Sentiment stamp: I used the “Spread Sunshine Rebel” sentiment set from Polkadoodles to finish off the card with a cheerful message. You can replace this with any sentiment stamp or even handwritten sentiments.
💡 Tip: You don’t need all the same tools or products. The techniques can work with a variety of materials. Masking can be done with sticky notes or washi tape, and inks can be replaced with watercolours or coloured pencils for a different look.
Step-by-Step Tutorial – Create Your Boho Beach Card
Ready to make your own boho beach card? I’ll walk you through each step using techniques like masking, distress ink blending, and alcohol marker colouring.
This tutorial is clear and relaxed—ideal for handmade summer cards or when you want to give your design an easy-going beach feel.
Step 1 – Print and Colour the Coconut Digital Stamp
Start by preparing the main image. When you buy this digital stamp from The Paper Shelter, you get three versions: a black-and-white line drawing, a pre-coloured version, and a background. I chose the black-and-white version so I could colour it myself and give it a personal boho beach feel.
Materials Needed for Step 1
- Coconut digital stamp from The Paper Shelter
- DCP cardstock for smooth printing
- Alcohol markers (I used Twinmarkers)
- White gel pen
Printing Your Digital Stamp
I printed the image at about 9 centimetres tall. That size makes it the focal point of the card. It’s slightly larger than usual, but for this relaxed beach design, it helps set the tone.
Colouring Tips and Colours Used
Once printed, it’s time to colour. I chose shades that match the relaxed boho style. Here is the boho colour palette I used with my Twinmarkers (alcohol markers):
- Skin: Tanned Skin (260), Peachy Blush (259), Salmon Pink (25), Pale Cream (142)
- Hair: Pale Cream (142), Brown Grey (104), Walnut (100), Clay (116)
- Swimsuit and towel: Bright Apricot (214), Terra Cotta (21), Cotta (20)
- Bag, straw, and flower: Midi Old Rose (199), Old Rose (201), Dark Old Rose (200)
- Coconut: Brown Grey (104), Burnt Sienna (95), Natural Oak (91)
Add small white gel pen highlights on the swimsuit, towel, and hair to bring out the details.

Once your image is ready, you’re set to build the background and layer the scene.
Step 2 – Use the Masking Technique to Layer the Scene
You’ll build a soft background that gives the card its relaxed boho look. Masking helps you layer the colours cleanly while keeping the edges defined. In this section you will learn the masking technique.
Materials Needed for Step 2
- Masking Magic Sheets from Gina K Designs or any masking paper (post-its work too)
- White cardstock cut to 12.5 cm by 12.5 cm
Preparing Your Background Panel
Cut your white cardstock to 12.5 by 12.5 centimetres. This will be your base.
How to Use Masking Paper
Masking paper blocks certain areas while you ink others. For this scene, you’ll create a bay with water in the centre and sand on both sides.
- Tear a piece of masking paper to form a rough edge that mimics a shoreline.
- Place it across the panel where you want the water to be. Don’t stretch it edge to edge.
- Tear another strip to cover the top of the panel. Make the top edge straight and the bottom torn—this forms the upper sandy area where it meets the sky.
This setup lets you ink each area—beach, water, sky—without the colours blending where they shouldn’t.
Why Masking Adds Depth
Masking adds crisp edges and structure to your scene. It keeps the inks clean and soft, which fits the calm, earthy style of a boho beach card.
Step 3 – Blend Your Background Using Distress Ink
Now it’s time to bring the beach scene to life with soft, layered colours. A boho palette adds that relaxed, sun-kissed feel.
Creating the Sandy Beach
Start by blending Antique Linen around the torn masking edge. This forms the base of the beach. Cover the sky area with extra paper so you don’t get ink splatters where you don’t want them.
Next, use Vintage Photo and Walnut Stain to deepen the edges. Blend these slightly inward to build shadow and depth. Keep Antique Linen as your lightest shade for contrast.
Leave the masking in place and add texture:
- Mix water into metallic brown paint
- Flick tiny splatters using a brush
- Tap gently to create natural, uneven speckles
Let the panel dry before removing the masking.
Blending the Water and Sky
I didn’t use masking for this part—you can if you prefer more precision.
For the water:
- Use Salty Ocean
- Leave white space at the shore for a natural fade
- Tap off excess ink first to avoid harsh lines
Don’t over-blend—the uneven look works for water.
For the sky:
- Use a larger brush
- Start with Salty Ocean at the top
- Fade into Tumbled Glass
- Add a soft glow with Dried Marigold around the edges

The beach scene now features soft transitions and a warm, boho finish.
Step 4 – Create a Raised Frame for Your Boho Beach Scene
The woman in the Coconut digital stamp isn’t fully visible—only part of her legs shows. Adding a frame draws the focus and finishes the card with a clean edge.
Use two circle dies—one slightly smaller than the other—to cut your frame. Line them up on white cardstock with even spacing between them. Tape them down and run them through your die-cutting machine.
To raise the frame, use foam tape. If you don’t have any, stack several frames for height. I used square foam pads and trimmed them lengthwise to fit the narrow border. Then I placed them along the back of the frame.
Remove the release paper and position the frame over your background. This adds height and helps spotlight your coloured image.
")
Now you’re ready to place your coloured stamp inside the frame.
Step 5 – Add Beachy Elements to Enhance Your Boho Card
To evoke a calm beach atmosphere, I added a few details around the circle frame. These enhance the layered texture of your boho card.
Making the leaves
Cut two types of leaves and two types of shells from white cardstock. For the leaves, blend Distress Ink in Pine Needles and Mowed Lawn. Use a small blending brush—apply Pine Needles in the centre and Mowed Lawn on the edges to create a soft gradient.
Making the shells
Start with a base layer of Antique Linen Distress Ink. Then apply Dried Marigold over the top, focusing on the edges. Finish with Vintage Photo around the edges to create depth.


Making the flowers
Cut three flowers in different sizes from white cardstock. I coloured them with Twinmarkers in soft rose tones:
- Midi Old Rose (199)
- Old Rose (201)
- Dark Old Rose (200)
Add three small dots of 3D pearl paint to each flower centre. Let them dry before adding them to your card.
These elements pull the design together and support the relaxed, beachy look of your boho card.
Step 6 – Assemble Your Boho Beach Card
Now it’s time to bring all the pieces together and finish your boho beach card. This step focuses on layering and clean placement.
Create the Card Base
Cut a piece of cardstock to 26 by 13 centimetres. Score at 13 centimetres and fold to create a 13 by 13-centimetre card base.
Attach the Background
Glue the inked background panel to the card base. Centre it and press it flat.
Add Dimension with Foam Tape
To add depth to the Coconut digital stamp, use foam tape in layers. Adhere the legs directly to the background. Place a thin layer of foam tape behind the midsection. Use a thicker layer behind the head to bring it forward.
Decorate with Leaves, Shells, and Flowers
Add the leaf and shell die-cuts to the circle panel. Cluster the flowers in the top left corner.
")
Add the Sentiment
Use the “Spread Sunshine” sentiment from the Rebel sentiment set by Polkadoodles. Cut out the words and stack them vertically near the figure’s head.
")
Your boho beach card is now finished—ready to share with someone who loves a relaxed summer vibe.
Creative Tips for Designing Beach-Themed Cards in Boho Style
Add your personal touch to a beach-themed boho card to make it more unique. Here, I share simple ways to personalise your card and ideas for using this tutorial on other boho card projects.
Use elements like feathers, lace, or kraft paper to evoke the relaxed, earthy feel of the boho style. These details add texture and warmth without overwhelming your design.
To explore other boho card ideas, use this tutorial as a foundation. Swap the digital stamp for different beach or nature scenes, try your favourite colour palettes, or experiment with layering materials. This keeps the boho feel while giving each card a fresh look..
Personalising your cards makes crafting rewarding—it shows your creativity in every detail.
Let’s Get Creative Together
Making this boho beach card gave me a chance to slow down and enjoy the crafting process. Blending inks, layering elements, and colouring the digital stamp was calming and rewarding.
I encourage you to try this—create something that reflects your style and mood. If you make a card like this, share it and tag me. Seeing your creations adds a little extra joy to my day.
Join the Challenge
Share your boho beach card in Penny’s Paper-Crafty Challenge. It’s a great chance to showcase your work and connect with fellow crafters. You could also win digital stamps or gain extra exposure.
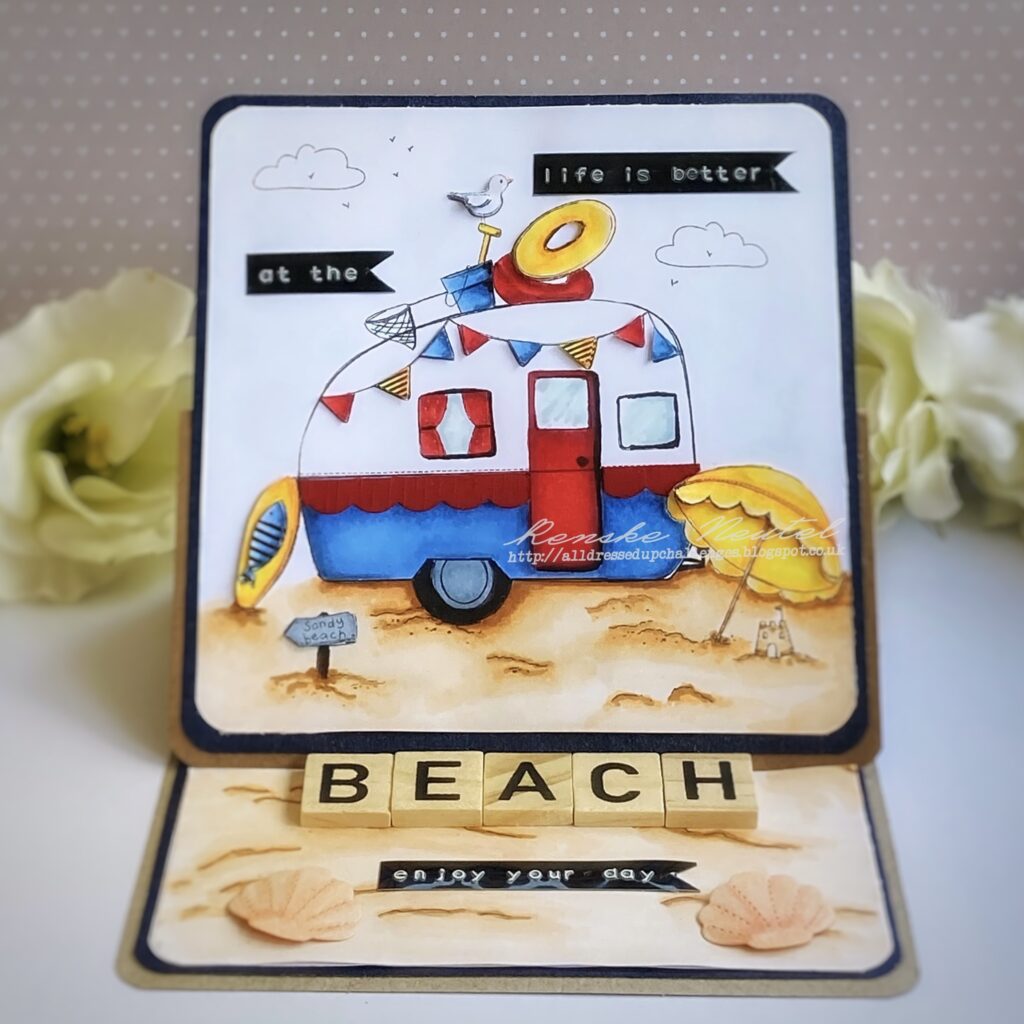
More Beach-themed card tutorials

Products used for this boho beach card
In this post, I list all the products I used to create the card. Some have affiliate links, and others don’t.
Affiliate links help support my blog at no extra cost to you. If you buy through these links, I earn a small commission that keeps my creative work going.
Please note: Some materials mentioned in the ‘Materials’ section at the start of the tutorial don’t have shop links because I couldn’t find them with affiliate options or official stores. That means they won’t appear in the product list below.
This keeps the list clear and only includes what’s available to purchase online.
Thanks for your support, and happy crafting!
Products with affiliate links
Salty Ocean Distress ink

Tumbled Glass distress ink

Antique linen distress ink

Mowed Lawn Distress ink

Pine Needles Distress ink

Dried Marigold Distress ink

Blending brushes StudiolightNL

Rebel messages with attitude, Polkadoodles

Products with non-affiliate links
Bella Bear Gift Fuzzy Pufs

Spring Gnomes Digital Paper set

Birthday sentiments and Greetings

I would like to enter my card in the following challenges
- A Place To Start: Anything goes
- The Sisterhood of Crafters: Fun in the Sun
- Word Art Wednesday: Anything Goes
- Craft Rocket Challenges: No design paper
- Crafty Catz: Anything goes + hot colours
- We Love Stamping: Nature or anything goes
- A Perfect Time To Craft Open Challenge: Anything goes
- Classic Design Challenge Blog: Anything goes + vacation holiday
- Crafts Galore Encore Challenge Blog: Anything goes
Wow, very pretty card! I absolutely love your coloring! Thank you for the tutorial too!
Thank you for joining us at the Crafts Galore Encore
Challenge.
~ DT Dagmara
Thank you so much for your lovely comment.
Fabulous beach card! I love what you have done here! Thanks for the excellent tutorial! We appreciate you sharing with us at A Place to Start!
Hugz,
Chana Malkah, Owner
Thank you so much for your lovely comment. And great to hear you love the tutorial too.
I love this!! Your card is absolutely fabulous and I super appreciate how you teach others who are new to cardmaking, how to create the look!! Where were you when I was starting in 2009?! Bravo to an amazing card and being a fantastic teacher in the crafting community! I’ll be following your blog for sure, now! :) Thank you for joining us at Classic Design Challenge! We look forward to seeing more of your future creations! ~ Amanda
Ah thank you so much Amanda. It is great to hear your loving my tutorials. Glad to welcome you as a new follower.
What a lovely card. It really invokes a summers day on the beach. Thanks for the details instructions and for sharing it with us at we love stamping this month xx
Thank you, glad you like it.
A lovely summery card with so many wonderful details. Thanks for sharing with us at Allsorts challenge.
Thank you so much for your lovely comment.
Such a FUN card. Thanks so much for sharing with us at Word Art Wednesday. I’m very grateful to have you share this sweet design with us and I hope that you will return soon to share more of your wonderfully creative designs in our challenges. have a blessed and creative week.
Thank you so much
Renske, this is such a nice card! I love the watercolor effect. It’s perfect for summer. I can really appreciate all the work that went into this and all the detail in the tutorial. Thanks so much for linking it up with us over at Word Art Wednesday. We really appreciate your work!
Thank you so much and I am glad you like it.