Looking for a fun, easy, and adorable birthday card idea? In this tutorial, I’ll walk you through creating a playful elephant birthday card with a stack of doughnuts, perfect for any celebration.
I created this card for the latest Penny’s Paper-Crafty Challenge Blog, sponsored by All Dressed Up Stamps and Colour of Love.

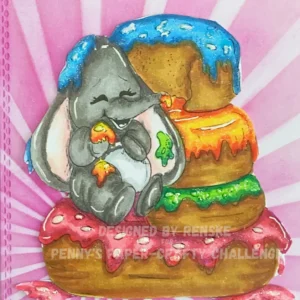
I used the “Li’l Ellie’s Donuts Li’l Bellyfull” digital stamp. This playful image of an elephant enjoying a bellyful of doughnuts makes it an ideal choice for a fun, party-ready card.
In this tutorial, you’ll learn how to use ink blending, digital stamp colouring, and stencils to create your own version of this card.
Let’s get started!
- Products You Need to Make This Elephant Birthday Card
- Step-by-step tutorial for creating a fun elephant birthday card.
- Let's get creative together.
- Products used
- Products without affiliate links
- I would like to enter my card in the following challenges
Products You Need to Make This Elephant Birthday Card
To create this fun elephant birthday card, gather the following materials. Below are the materials I used for this card, along with some alternatives if you don’t have the exact supplies.
Materials for this card
To create this fun elephant birthday card, here’s what you’ll need:
- Digital stamp: “Li’l Ellie’s Donuts Li’l Bellyfulls” by Colour of Love.
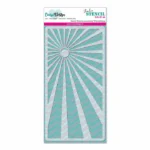
- Stencil: I used the Sunbeams stencil from Carlijn Design to create the pink sunbeams in the background.
- Ink: Distress Ink in Picked Raspberry.
- Markers: Alcohol markers from Decotimecrafts to colour the image.
- Dies: Rectangle dies from Card & Deco for the background panel.
- White gel pen: For adding fine details and highlights.
- Sentiment strips: Two sentiment strips from the “Tons of Love Greetings” set by Polkadoodles.
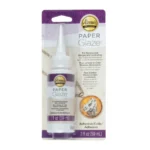
- Paper glaze: From Aleene’s to add a glossy finish.
- Foam tape: To add dimension to the elephant, doughnuts, and sentiment strips.
- Card base: For the foundation of the card.
- Aqua shimmer pen: To add a shimmering effect to different elements
Tools
- Blending Brush: For smooth ink blending in the background.
- Scissors: For cutting out the digital stamp and sentiment strips.
- Die-cutting machine: For cutting the background panel.
Alternative suggestions
- Inks: If you don’t have Distress Inks, any ink brand can work for a similar effect.
- Markers: you can use any alcohol markers or even coloured pencils to colour the image.
- Blending brushes: Any blending tool, such as makeup sponges, will do the job.
- Dies: No rectangle die? Freehand cutting works just fine too.
With these materials and tools, you’re all set to create your elephant birthday card. Let’s move on to the step-by-step tutorial!
Step-by-step tutorial for creating a fun elephant birthday card.
Now that you’ve gathered your materials, let’s start creating this fun elephant birthday card.
This tutorial will guide you through colouring the digital stamp and stencilling a playful background. You’ll find simple techniques and creative ideas to make your card stand out.
Step 1: How to Colour the Digital Stamp with Alcohol Markers
In this step, we’ll bring the digital stamp to life with colour, making it the focal point of your card.
Materials needed
- Digital stamp “Li’l Ellie’s Donuts Li’l Bellyfulls” by Colour of Love.
- Alcohol markers
- White gel pen
- Paper Glaze
- DCP paper
- Printer
- Nuvo Aqua Shimmer pen
Printing the digital stamp
Print the image at the right size. I suggest pasting it into a Word document so you can easily adjust the dimensions. I set the height to 8.5 cm, which adjusts the width to around 8 cm. Once satisfied, print it on DCP paper.
Colouring the digital stamp Li’l Ellie’s Donuts Li’l Bellyfulls”
After printing, it’s time to colour! I used Decotimecrafts alcohol markers, but you can also use coloured pencils or watercolours. Here are the colour combinations I used for the doughnuts and elephant:
- The Donut: Mustard (30), Yellow Ochre (101), Sand (107), Rose Beige (97), and Clay (116).
- glaze bottom doughnut: Old Red (02), Cherry Pink (05), Rose Pink (08), and Pale Pink (09).
- Green glaze doughnut: Yellow Green (48), Grass Green (47), and Forest Green (50).
- Yellow glaze doughnuts: Vermillion (14), Orange (23), Deep Yellow (32), Lemon Yellow (35), pastel Lemon (39).
- Top glaze doughnut: Baby Boy (144), phthalo blue (183), Midi Sky (190).
- The Elephant: Warm Grey 2 (WG2). Warm Grey 4 (WG4), Warm Grey 5 (Wg5), and Warm Grey 8 (WG8)
- Ears of the Elephant: Pale Pink (09), Blush (136), Midi Old Rose (199)
Feel free to experiment with different colours for the doughnuts or add more details to the elephant’s background. The possibilities are endless.
Adding highlights and details
Once you’ve finished colouring, add highlights with a white gel pen. Apply paper glaze to the doughnuts’ spots for a glossy accent. Let it dry, then add a delicate shimmer with the Nuvo Aqua Shimmer Pen.
Cutting out the image
After everything has dried thoroughly, you can cut the image out using scissors. It’s an easy image to cut, so there’s no need to leave a white border around it.
This step focuses on adding personality to your design through colour and special touches. Colouring can really make this design pop, giving it that extra flair.
Now it’s time to create the background of the card.

Having trouble editing or colouring digital stamps? Download my free guide for extra tips and tricks to help you perfect your digital stamps!
Step 2: Ink Blending Techniques for a Fun Background
Now, let’s create a fun background to complement your elephant and doughnut design.
Materials needed
- Stencil Sunbeams
- Rectangle die
- Distress Ink Picked Raspberry
- Blending brush
- Purple Tape
- White card stock
Create the background panel.
Use a rectangle die to cut a panel from white cardstock. This will be the background of your card. Run the die through your die-cutting machine to create the rectangle.
Creating the sunbeams
To create the background, I’ll use my slimline stencil with sun rays from Carlijn Design along with the Distress Ink in Picked Raspberry.
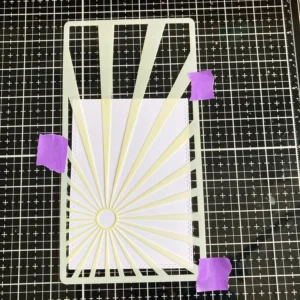
- Secure the paper to your surface: Secure the cardstock to your surface using purple or low-tack tape. Position the Sunbeams stencil on top of it and tape it down.
- Place the stencil over the paper: Position the stencil over the secured paper and tape it down as well to prevent any movement.
- Apply the ink: Using your blending brush, apply the Distress Ink until you achieve a satisfactory blend.
- Add ink to the white parts: After removing the stencil, apply some pink ink over the white areas to create a light pink colour.
Now that the background is ready, we can move on to the next step: adding the text to the card.
Step 3: Creating the sentiment of the birthday card
Let’s add a fun sentiment to your card!
Materials needed
- The tons of love greetings set from Polkadoodles
- Distress Ink Picked Raspberry
- Blending Brush
- Scissor
Print the sentiment
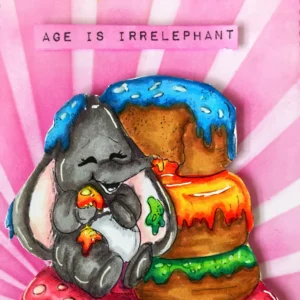
The “Tons of Love Greetings” set has three A4-sized pages of sentiment text. I chose the “snippable white” option and selected the sentiments “Age is irrelephant” and “Enjoy the big celebrations.
Print the sentiment page and cut out the strips you’ll use.
Add Ink to the Sentiment
Add some Distress Ink in Picked Raspberry to the sentiment strips to enhance their appearance.
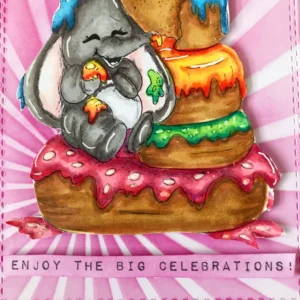
Now that we have the text ready for the card, we can move on to the next step and assemble the entire card.
Step 4: Final Touches for Your Donut-Themed Birthday Card
We’re almost there—let’s finish up your card with some final touches!
Materials needed
- Foam tape
- Glue
- Base card or card stock to make one
Attaching the digital stamp
First, we will attach the image to the background.
Add foam tape to the back of your coloured image to give it some dimension. Attach it to the background panel.
Adding the sentiments
Place “Age is irrelevant” above the image and “Enjoy the big celebrations” at the bottom. Use foam tape on the back of each strip for added dimension.
Making the base card.
Now that the entire panel is ready, we can attach it to the base card.
I chose a white base card that measures 10.5 centimetres by 14.8 centimetres. You can use a pre-made card base or create your own.
If you’re creating your base card, take a piece of white paper (21 cm x 14.8 cm), score it at 10.5 cm, and fold it in half. Attach the completed background to the base, and your card is ready to go!
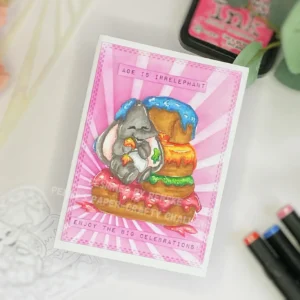
Let’s get creative together.
Creating this elephant birthday card was an enjoyable and simple process. I hope this tutorial has inspired you to give it a try.
Let me know in the comments what you found helpful or what you’d like to try out from this tutorial. I love hearing about your experiences and ideas.
Joining the Challenge
Ready to showcase your creativity? This card was inspired by the current theme at Penny’s Paper-Crafty Challenge.
It’s a great chance to share your designs, connect with other crafters, and maybe even win a prize!
Enter the “Anything Goes Using Paper” Challenge and share your creations.
Discover More Birthday Card Tutorials and Tips
I can’t wait to see what you create! If you enjoyed this tutorial, don’t forget to share your card with me in the comments below or on social media. Let’s keep crafting together.
Products used
Affiliate Disclosure: Some of the links to products in this blog post may be affiliate links. This means that if you purchase through these links, I may earn a small commission at no additional cost to you. I only recommend products that I use and believe are suitable for the projects I share. Thank you for your support!
Products used with affiliate links
Distress Ink Picked Raspberry from Ranger

Spring Tons of Love Greetings from Polkadoodles

Aqua Shimmer Pen

Tim Holtz Media Mat

Ink Blending Brushes StudiolighNL
White Gelly Roll Pen 08

Products without affiliate links
Li’l Ellie’s Donuts Li’l Bellyfulls Digital stamp
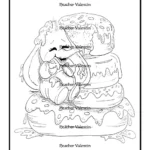
Stencil Slimline Sunbeams from Carlijn Design
Paper Glaze from Aleene’s
- Rectangle die from Card & Deco
- Foam tape (brand unknown).
- Alcohol markers from Decotimecrafts
I would like to enter my card in the following challenges
- Unicorn Challenge Blog: Birthday
- Fab ‘n’ Funky Challenges: All things bright and beautiful
- Cardz 4 Galz: Use stencils
- Crafty Catz: Anything goes
- My Time To Craft!: Use a sentiment
- A Perfect Time To Craft Open Challenge: Anything goes
- Daisy Chain Challenges: No design paper
- Let’s Craft and Create: Anything goes + cheers to you
- Critter Crazy CHALLENGE BLOG: Anything goes + featured critter
- Crafter’s Cafe: Anything goes + birthday
- Crafty Animals: Anything goes + Must use an animal


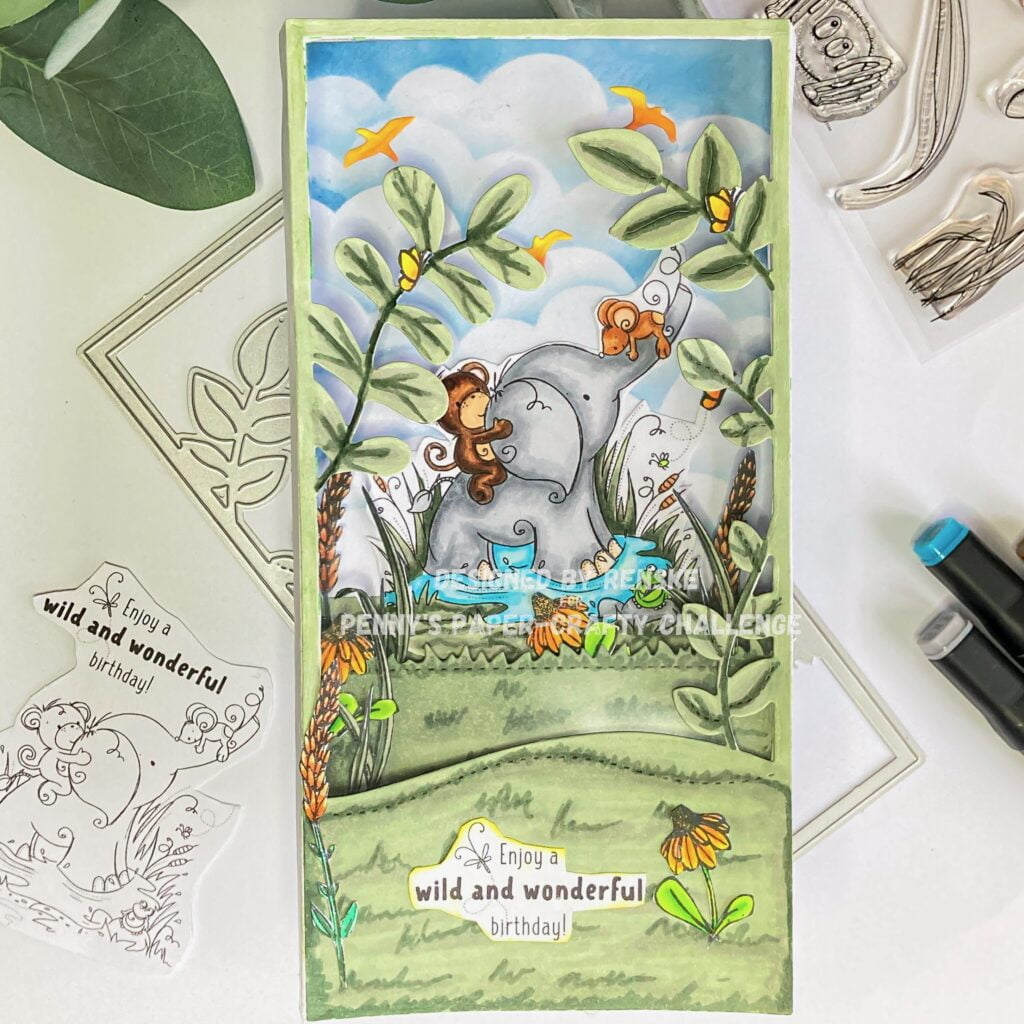

This elephant is so stinking cute! I love his stack of donuts. Wonderful card! Thanks for joining us for the Cardz 4 Galz challenge. I hope to see you in the gallery for our next challenge. Sue – DT
Thank you
Wow, great birthday card and absolutely perfectly made. I love the motif. It just made me smile, but there is a lot of truth in the statement. And this elephant is just so cute. Fantastic choice of colors. The background alone gives a very happy feeling.
Thank you for taking part in the current Critter Crazy Challenge.
Hugs, Uschi
Thank you so much. I am glad to hear it gave you a happy feeling.