Some links in this post are affiliate links. This means I may earn a small commission if you make a purchase, at no extra cost to you. I only recommend products I use and genuinely enjoy in my own cardmaking. Read more here.
Think you’re missing the perfect tool, only to spot something useful already on your desk?
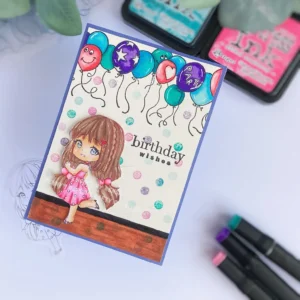
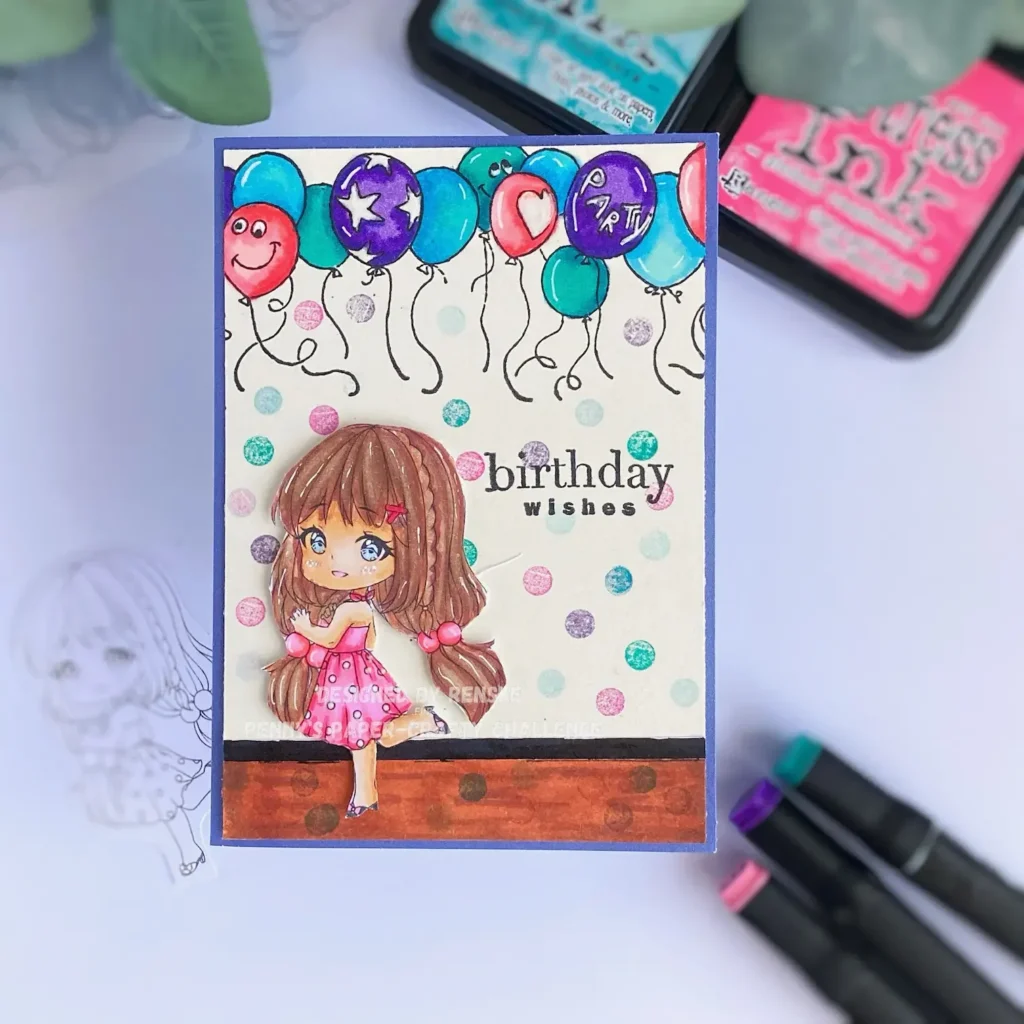
This tutorial shows you how to make a handmade birthday card using easy, creative techniques. I used the eraser on the back of a pencil to stamp the confetti on the background; no stencil or stamp needed. This playful, textured result is a great way to try ink blending and other card-making techniques, especially if you’re starting.
This card is part of my inspiration project for Penny’s Paper-Crafty Challenge blog. Our generous sponsors for this round are Leann’s World 101 and Dochter Digi’s.


I worked with the lovely digital stamp, Azalea New Dress from Leann’s World 101. This cheerful design is perfect for female birthday cards and combines alcohol marker techniques with a layered, handmade feel.
Let’s start crafting together.
What You Need for This Handmade Birthday Card
This card uses basic supplies and a few smart alternatives you likely already have. It keeps things simple and affordable, ideal for beginners.
| Material or Tool | Used for |
|---|---|
| Azalea’s New Dress digital stamp (Leann’s World 101) | The main image |
| Alcohol markers (Decotimecrafts) | Colouring |
| White gel pen | Adding highlights |
| Paper Glaze (Aleene’s) | Adding shine |
| Clear stamp balloons (Marianne Design) | For the confetti in the background |
| Distress Ink Tumbled Glass | For the confetti in the background |
| Distress Ink Dusty Concord | For the confetti in the background |
| Distress Ink Picked Raspberry | For the confetti in the background |
| Distress Ink Peacock Feathers | For the confetti on the background |
| Memento tuxedo black ink | Stamping balloons and sentiment |
| Stamping tool or acrylic block | For stamping |
| Pencil with eraser | DIY confetti stamping |
| Light yellow cardstock | Background panel |
| Purple-blue card base | Card base |
| White DCP paper | For the confetti in the background |
| Birthday Wishes clear stamp | Sentiment |
Alternatives to try
- No distress inks? Try dye-based inks or watercolours instead.
- No alcohol markers? Coloured pencils or water-based markers work well too.
- No balloon stamp? Use any small stamps—or draw your balloons.
- No Paper Glaze? Glossy Accents or a clear embossing pen can add shine.
Using what you have keeps your card fresh and playful, without extra cost. Mixing inks and markers lets you personalise your handmade birthday card and explore your style.
Step-by-Step Tutorial – Make This Handmade Birthday Card
Making handmade birthday cards is easier when you use simple techniques that add interest and texture.
In this tutorial, you’ll combine stamping, alcohol marker colouring, and layering to make a playful, textured. Each step is beginner-friendly, so you can feel confident using these simple card-making techniques.
Step 1: Print and Colour the Digital Stamp – Create Your Focal Image
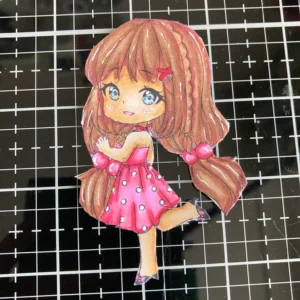
Start with the star of the card, the digital stamp Azalea’s New Dress from Leann’s World 101. In this step, you’ll print and colour the image to set the tone for your design.
Printing the digital stamp
Download the stamp and paste it into a Word document. Resize the image to 8 centimetres high. The width will adjust automatically.
When you’re happy with the size, print it on smooth DCP paper. It works well with alcohol markers. Using a different colouring medium? Pick a paper that suits your tools.
Need help with digital stamps? Download my free guide here.
Colouring the digital stamp with alcohol markers
Next, colour your image. I used Decotimecrafts alcohol markers, but feel free to use your preferred medium. I used these colour combinations:
- Skin: Pale Cream (142), Salmon Pink (25), Peachy Blush (259), Tanned Skin (260)
- Blush: 136
- Hair: Yellow Ochre (101), Rose Beige (97), Burnt Sienna (95), Natural Oak (91)
- Dress and hair balls: Warm Fuchsia (206), Rose Pink (08), Pale Pink (09), Pastel Pink
- Hair clip: Cherry Pink (05)
- Eyes: Frost Blue

Adding highlights and shine
Add highlights with a white gel pen. I focus on the hair and add small dots to the cheeks. For extra shine, apply Paper Glaze on the dots of the dress and hair accessories. Allow it to dry completely before moving on.
Fussy cutting the image
When dry, carefully cut out the image. I cut right up to the edge for a clean look, but you can leave a white border if you want.

Your coloured focal image is ready, it’s time to build the background.
Step 2: Create the Background – Build a Playful Setting for Your Focal Image
For this card, I envisioned a festive and cheerful background that adds warmth and fun. Here’s how I built it step by step.
Cut your background panel
Start with a light yellow cardstock panel. I picked yellow to give it a warm base—more playful than plain white. Use smooth cardstock to ensure that stamping and colouring work well.
Stamp and colour the balloons
Using a clear stamp from Marianne Design, stamp the balloons with Memento Tuxedo Black ink. This ink works effectively with alcohol markers. Use a stamping tool for even pressure and better placement on the yellow panel.
Next, colour the balloons with alcohol markers. Here are the colour combinations I used:
- Pink balloons: Cherry Pink (05), Rose Pink (08), Pale Pink (09), Pastel Pink (17)
- Blue balloons: Frost Blue (182), Baby Boy (144), Neon Blue (129)
- Purple balloons: Neon Violet (148), Violet (281), Dark Violet (274)
- Mint balloons: Cool Mint (181), Turquoise Green Light (57), Peacock Green
Tips for colour placement and depth
- Use lighter colours (like the blue tones) in the background.
- Place darker shades like purple and pink in the front or overlap them for extra depth
- Avoid placing the same colour right next to itself
Use a white gel pen to highlight the stars, hearts, and the word ‘party’. This brings those details forward. Then, apply Paper Glaze to add shine to the balloon decorations, such as stars and hearts.
Create the floor
To create a floor for the girl to stand on, follow these steps:
- Cut a 2 x 10 cm piece of white paper.
- Colour it with alcohol markers. I used Rose Beige (97), Burnt Sienna (95), and Natural Oak (91).
- Cut a thin black strip (0.5 x 10 cm) as a skirting board. Glue this along the top edge of the floor.
Add confetti with a pencil eraser
Stamp confetti on the background and floor with a pencil eraser and distress inks. No stencil needed. Be sure to clean the eraser between colours for crisp dots.
I used the following distress ink shades
- Peacock Feather
- Picked Raspberry
- Dusty Concord
- Tumbled Glass

Stamp in random spots so the colours blend more naturally. The confetti on the floor should be lighter, but it will still add a subtle party vibe.
Step 3: Stamp the Sentiment – Add a Clear Birthday Message
With the background ready, you can now add the sentiment. I picked the ‘Birthday Wishes’ stamp to turn this into a birthday card.
- Place your coloured image on the background first to find the best spot for the sentiment.
- Place the background in your stamping tool and align the sentiment stamp next to the girl.
- Use Memento Tuxedo Black ink for a crisp impression.
This step makes sure your handmade birthday card says exactly what you intend, with just a few thoughtful touches.
Step 4: Assemble the Card – Bring Everything Together
All your elements are ready, it’s time to put the beautiful birthday card together.
Attach your coloured image to the background.
Start by attaching your colored image to the background. I used foam tape to add dimension and help the character stand out. If you prefer a simpler look, you can also glue it flat. Place the image on the left, leaving room for the sentiment on the right.
Create the card base.
Attach the background panel to your card base. I used a premade card in a soft blue-purple, 10.5 by 14.8 cm. To make your own card, cut cardstock to 21 by 14.8 cm. Score at 10.5 cm on the long side and fold in half.
The inside of the card
Add a piece of matching light yellow cardstock inside. Cut it to 10 by 14.3 cm to create a neat space for your message.

Your handmade birthday card is finished, layered, bright, and ready to give.
Let’s Get Creative Together
You don’t need fancy tools to make something festive. I used a pencil eraser to stamp my confetti. It’s a reminder you can get creative with what’s already on your desk.
Next time you’re crafting, take a look around. You might already have everything you need for that creative twist.
Join the Challenge
Would you like to share your interpretation of this idea? Join us at Penny’s Paper-Crafty Challenge blog! It’s a great way to find inspiration and connect with other crafters.
More Handmade birthday card Designs

Another card with the clear stamp Balloons from Marianne Design.

Create an Amazing Birthday Shaker Card with The Paper Nest Dolls ‘Birthday Owen’ Digital Stamp
A festive shaker birthday card idea.
Products used for this handmade birthday card
Disclosure: This post contains affiliate links. I only share products I use and recommend. If you buy through these links, I may earn a small commission at no extra cost to you.
Products with affiliate links
Bella Bear Gift Fuzzy Pufs

Spring Gnomes Digital Paper set

Birthday sentiments and Greetings

Bella Bear Gift Fuzzy Pufs

Spring Gnomes Digital Paper set

Birthday sentiments and Greetings

I would like to enter my card in the following challenges
- A Place To Start: Anything goes + for a child
- Crafty Catz: Anything goes
- Lil Patch of Crafty Friends Challenge …: Anything goes
- A Perfect Time To Craft Open Challenge: Anything goes
- Let’s Craft and Create: Anything goes + No Patterned paper
- Crafter’s Cafe: Anything goes + no squares


Renske your card turned out fabulous. That little girl was a lot of fun to colour. Thank you for creating and sharing over at Crafter’s Cafe challenge. Best of luck and see you soon! DT~Jana
Thank you so much for your lovely comment.
Love your card and the fantastic tutorial! Thanks for sharing both with us at A Place to Start!
Hugz,
Chana Malkah
Thank you so much, and glad to hear you love the turorial.
Hi Renske, a beautiful card and wonderful tutorial, love the hand drawn flooring and inked confetti. Thank you for sharing with us at Lil Patch of Crafty Friends, good luck in the prize draw… Megan DT LPoCF
Thanks a lot. Glad you like the tutorial, that is great to hear.
A super fun and colourful card. The colouring is fantastic and the girl is adorable. Thanks for joining us at A Place To Start. Hugs, María.
Thank you María – that means a lot!
I really enjoyed building the scene around her.
So glad I could join in with your challenge!
Just GORgeous! I LOve the scene you’ve created. She’s such a sweetie.
Thank you so much for sharing her with us at Crafty Catz.
Chrissyxx
Thanks so much Chrissy! I had such a good time creating this little birthday scene – she really is the sweetest digi to colour.
Always happy to join Crafty Catz!