
Some links in this post are affiliate links. This means I may earn a small commission if you make a purchase, at no extra cost to you. I only recommend products I use and genuinely enjoy in my own cardmaking. Read more here.
The festive season is almost upon us, filled with warmth, joy and the age-old tradition of exchanging Christmas wishes through handmade cards. Join me as I take you through the step-by-step process of creating your own enchanting easy DIY holiday cards, unleashing a world of creative possibilities.
I must admit, I love making holiday cards. It always puts me in a festive mood. In this blog post, I’ll guide you through the art of creating a simple yet captivating Christmas card. But it’s not just about one card; it’s about learning universal techniques and igniting creative sparks that can elevate every card you make.
So grab your craft supplies and join me on this wonderful journey. Together, we’ll not only create a beautiful Christmas card but also uncover a wealth of craft techniques and ideas that will inspire your creativity. Are you ready to add some magic to your DIY Christmas cards? Let’s dive in!
Effortless Crafting with Paperblocks: Unveiling the Ease of Card Making
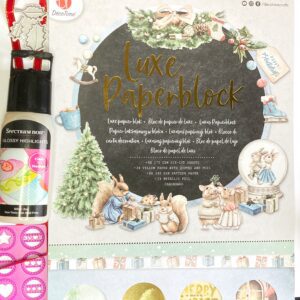
The world of card-making is truly enchanting. If you’re new to it, the paper blocks I used for this card are ideal. They serve as a great guide to help you create beautiful cards.
The best thing about these blocks is that everything in them matches perfectly. You’ll find pictures, patterned paper, and sentiments that are all coordinated. So, you don’t have to think about which paper fits your picture, everything is already coordinated. All you need to do now is match everything you like and what you think suits the card best.
When I first started my creative journey, I used only these types of blocks. As I progressed, I began to add more and more techniques to my handmade card-making. This way, you can experiment with making your own backgrounds, for example, while still having the option to use the paper in the block.
I still love using these blocks for my cards. In this case, I used it to make a quick and easy Christmas card.
Let’s begin and see how you can use these blocks to make your own quick and easy Christmas card.
Materials needed
Are you excited to create your very own magical DIY holiday card? Well, let me share with you the crafting essentials that will make your creative journey delightful and fun. Here’s what you will need:
- Themed Paper Block: Explore a themed paper block that embraces the holiday spirit. You can use a Christmas-themed paper block like the one I used from Decotimecrafts or any other similar paper block that captures your imagination.
- Sentiment on Vellum: Find the perfect sentiment on vellum that resonates with your festive wishes from your paper block.
- Card Base and Layers:
- White Card Base: 10.5 centimetres by 14.8 centimetres.
- Red Paper for the First Layer: 10 centimetres by 14.3 centimetres.
- Design Paper for the Second Layer: 9.5 centimetres by 13.8 centimetres. Choose a design paper from the paper block you’re using.
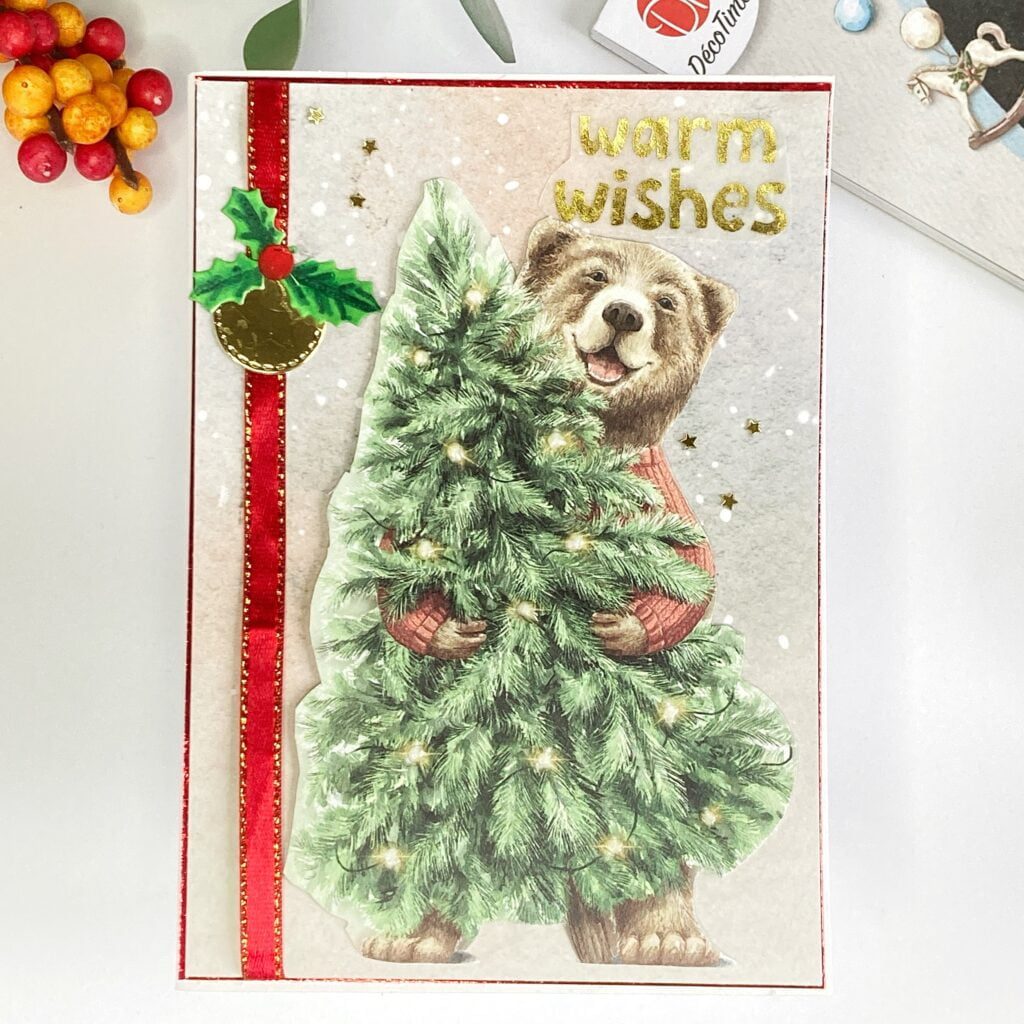
- Charming Image: Choose an image that captures the essence of the season, such as a bear and a Christmas tree, or any imagery that speaks to your holiday joy.
- Glistening Accents: Add a touch of radiance with Glossy Highlights or your preferred glitter gel to accentuate the sparkle on your creation.
- Dimensional Adhesive: Utilize foam tape to add depth and dimension to your elements.
- Ribbon Embellishment: Consider a vibrant red ribbon with golden edges or any ribbon of your liking to grace the side of your card with elegance.
- Embellishments for Festivity: Buttons and holly leaves serve as delightful embellishments. While I utilized dies, feel free to explore stickers or alternative materials from your stash.
Remember, these are guiding suggestions rather than strict requirements. You have the freedom to explore your own collection or experiment with alternatives. The true magic lies in selecting materials that resonate with your artistic vision.
If a specific paper block isn’t available, you can use festive patterned paper from your stash to infuse your card with seasonal charm.
Ultimately, the essence lies in relishing the creative journey. So, gather your chosen materials, let your imagination run wild, and embark on this enchanting crafting expedition!
Universal Crafting Techniques
Designing a Christmas card opens up endless creative possibilities for you. Not only for this particular design but for countless other projects. You can use the card design as a template and create your own card using different images and paper. In this section, I will share several techniques that you can use to explore the possibilities of creating a quick and easy Christmas card with an extra touch of creativity.
- Layering and Dimension: Use different layers on your card to add depth and dimension. You can raise various elements on the card using foam tape to create a three-dimensional effect. This technique works wonders by adding depth to any card design, allowing you to play with perspectives.
- Embellishments and Accents: Embellishments such as buttons, ribbons or die-cut shapes breathe life into a card. Discover different embellishment options to add personality to your creations. You can even use everyday items found in your home to add something extra to your card. This versatile technique applies to a variety of card designs and offers endless possibilities for creativity.
- Incorporating Sentiments: The sentiment is the heart of every card. There are often a lot of text options available in these types of paper blocks. Experiment with the placement of your sentiment to see where it looks best.
- Glistening Details: Adding shine and glitter to your card can make it more festive. You can use different materials such as a glitter pen, glitter glue, or just plain glitter to add sparkle to your card.
By experimenting with these techniques, you can take your card to a new level. You can try new techniques and products and experiment with what you like to do. This way, you can create unique and personalized cards that will surely bring joy to your loved ones during the holiday season.
Step-by-Step Guide
Follow along as we embark on the joyful journey of creating your magical DIY holiday card. Let’s dive into the steps:
Step 1. Choose your card base
Start with a card base. I used a white card base measuring 10.5 cm by 14.8 cm. Feel free to choose any colour or size that suits your design. You can also make the card base yourself. You will need white paper measuring 21 centimetres by 14.8 centimetres. Score at 10.5 centimetres and fold in half. Now you have the correct size.
Step 2. Prepare the Layers
Then prepare two layers of paper. The first layer is a red paper cut to 10 centimetres by 14.3 centimetres. The second layer is the design paper from the block, cut to 9.5 centimetres by 13.8 centimetres.
Step 3. Cut Out the Image
Remove the image of the bear and the Christmas tree out of the paper pad, or whatever image you are using. When you remove it from a paper block, the image often has some bulges where the image was attached. Cut this off. I also often cut off an edge of the picture. At least in the paper block I use there is often a border around the picture. I like it better if I either cut along the edge of the picture or a small edge around it. This is of course a personal preference.
Step 4. Add Some Sparkle
To make the image stand out more, I added shiny highlights to the tree’s Christmas lights. This adds a bit of dimension and shine to the image. You can do this with materials such as glossy highlights, glitter pen or just glitter. Just what you have at home.

Step 5. Assemble the Card
Now comes the fun part: putting it all together! Attach the image to the design paper with foam tape for some extra dimension. To make the design a little different than usual, I decided not to place the picture completely in the middle, but a little more to the right. It is important to attach the ribbon to the design paper before sticking the design paper to the red paper. Place the ribbon where you want it, and attach double-sided tape to the back of the paper. Fold the ribbon over the edges of the design paper so, it is glued to the back. Stick the design paper on the red paper and attach it to the card base.
Step 6. Add Embellishments
To add more interest to the card, I like to use embellishments. These can be either pre-made or hand-made. In my case, I used a combination of both. I had two dies to work with – a button punch and a holly leaf punch. I punched the buttons out of gold paper and chose the one with an embossed heart on the front. The holly leaves were die-cut out of white paper and then coloured with alcohol markers in shades of:
- Weeds Green (162)
- Grass Green (47),
- Forest Green (50).
I also die-cut a berry and coloured it using:
- Cardinal (244)
- English Red (249)
- Burgundy (247)
To assemble the card, I attached the gold button to the ribbon at the height of the bear’s head. Then, I attached three holly leaves on top of the button and placed the berry in the middle. To complete the card, I added gold stars by attaching three of them together in the top left corner and three more near the bear’s head.
And there you have it! A beautiful, easy DIY holiday card. Remember, this is just a guide. Feel free to mix things up and add your own personal touch. After all, the best part about DIY is making something that’s uniquely yours.
Alternative Ideas and Creative Exploration
Crafting a holiday card is not just about following a set path—it’s an adventure of creative exploration. Here are some alternative ideas and encouragements to ignite your imagination:
- Materials Exploration: Don’t limit yourself to the suggested materials. Feel free to experiment with different textures, patterns and colours. For example, try using patterned washi tapes, scraps of fabric, or even recycled materials like old maps or magazines. Look at what you have at home that you can use and make your card unique in this way.
- Uniqueness in Designs: Your card is your unique creation. Try things out there. Experiment with other shapes or an interactive element. It’s your chance to create something that stands out.
- Embracing Imperfections: Remember, imperfections add character! Cardmaking is a journey of learning and growth. Making mistakes is allowed. Sometimes the unexpected twists make for the most memorable cards.
- Personalized Touches: Give your cards a personal touch from yourself or something for the recipient. Handwritten messages, doodles, or small mementoes can add an intimate charm to your creation.
- Creative Outlet: Enjoy the process more than the result. For example, I enjoy the process. This has a therapeutic effect. It is my moment of relaxation and joy. And this can be anything, whether it’s a few minutes of drawing or a longer craft session, cherish the therapeutic aspect of card making.
Remember that your creative journey is as unique as your fingerprint. Embrace the process, experiment and unleash your creativity.
Inspire, Create, Share, and More!
Thank you for joining me on this creative journey as we made a quick easy Christmas card using the Decotimecrafts luxe paper pad. I hope you feel inspired to create your unique handmade cards.
I hope that I have shown you in this article that it does not have to be difficult to make beautiful personal cards.
If you have any questions, need clarification or would like to share your thoughts, I would love to hear from you. Crafting is not just a hobby; it’s a great community and I’m here to support you in your creative endeavours.
More Easy DIY Holiday cards for you to read about
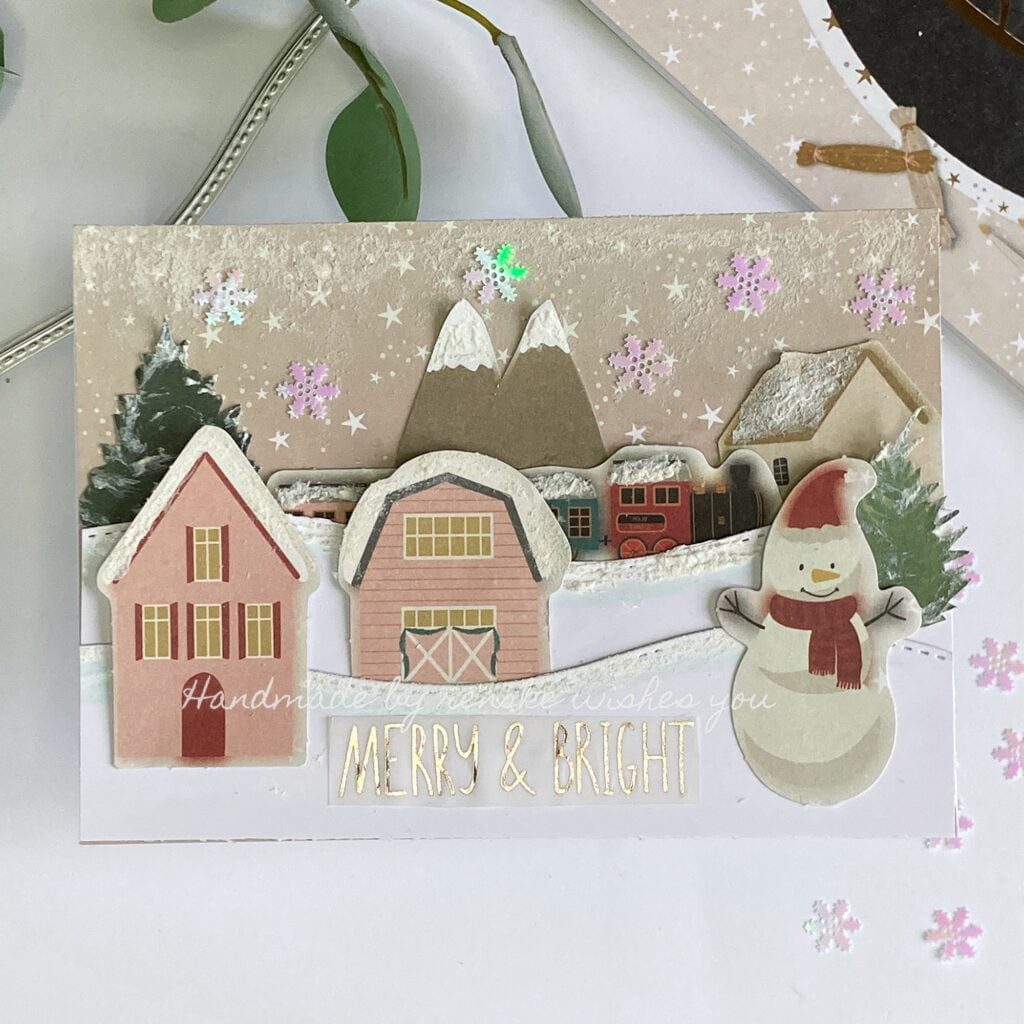
This is also a card made with a luxurious paper block from Decotimecrafts. On this card, I added texture using deco snow.
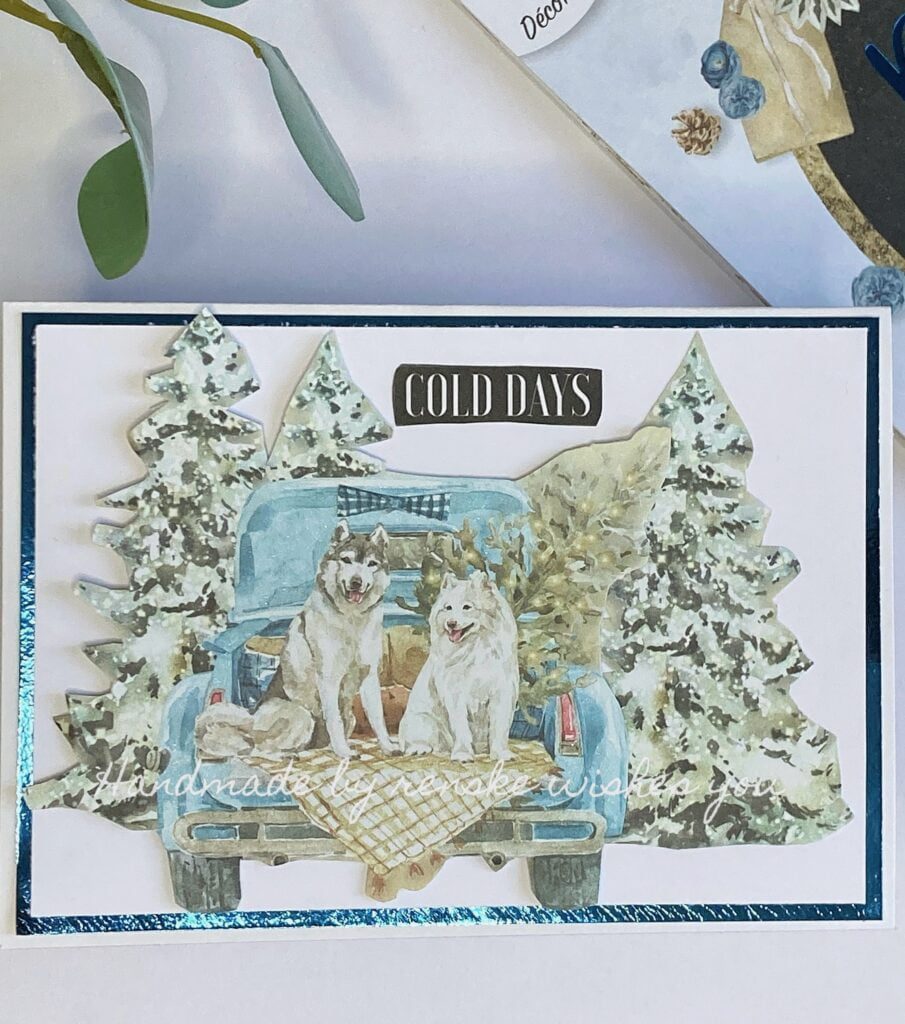
Simple Christmas Card Ideas DIY
This is also a card made with a luxurious paper block from Decotimecrafts. On this card, I added glitter to the image with a glitter pen to give it some extra shine.
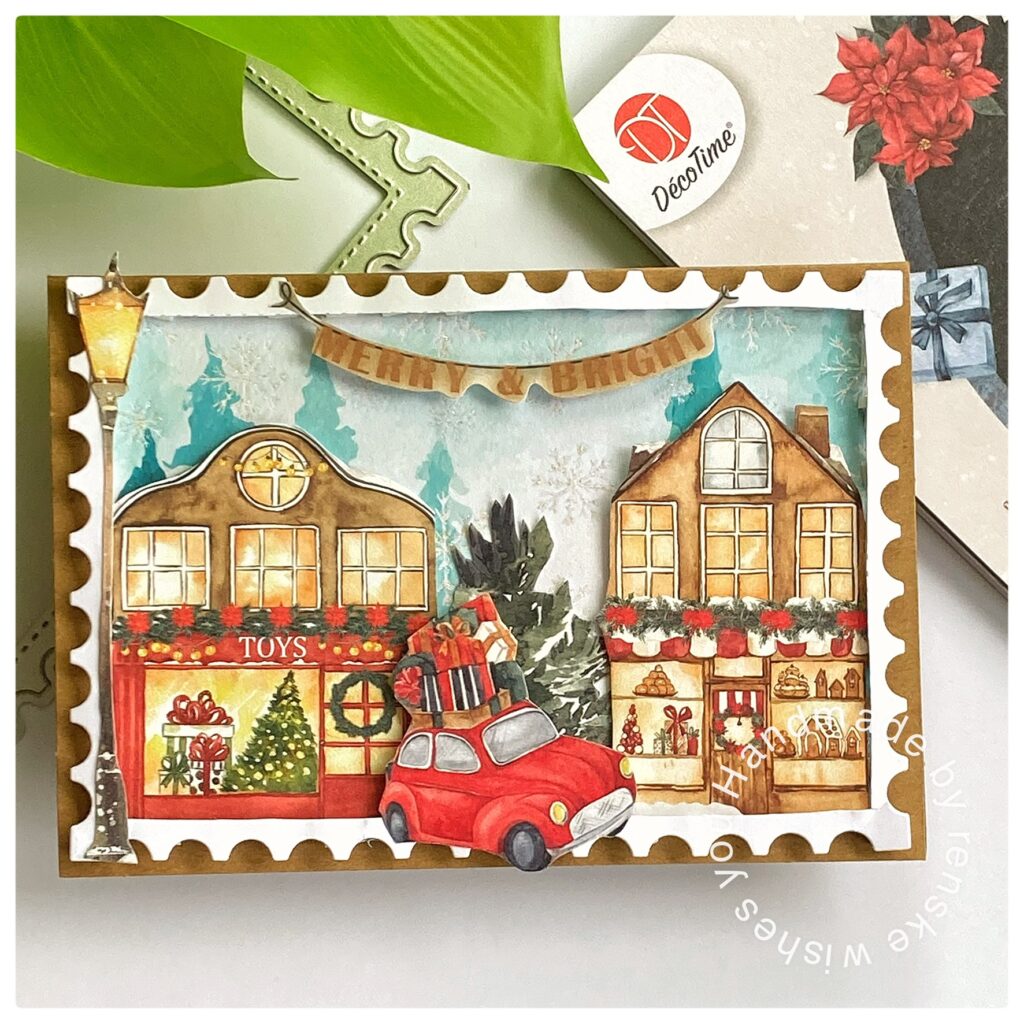
For this card I made a frame to use the pictures inside to create an attractive scene.
Products used
- Luxe Paperblock from Decotimecrafts
- Ribbon Brand Unknown
- The button dies from Joy! Crafts
- Dies of holly leaves from Aveccreative
- Golden Star embellishments brand unknown.
- Twin markers (alcohol markers) from Decotimecrafts
I would like to enter my card in the following challenges!
- Krafty Chicks Challenge: Anything goes
- Crafty Catz: Anything goes
- A Perfect Time To Craft Open Challenge: Anything goes
- Classic Design Challenge Blog: Anything goes
- Crafts Galore Encore Challenge Blog: Anything goes
- Critter Crazy CHALLENGE BLOG: Anything goes
A really cute card – love the image you’ve used.
Thanks for joining us at the Crafts Galore Encore Challenge.
Helen x
DT
Thank you
7 This is a fab project!
We do love to see all the entries at Classic.
Thank you for sharing in our challenge at Classic Design Challenge so
We really appreciate you joining in.
Jackie DT
Thank you.
Lovely Christmas card and thanks for sharing at crafty catz
Thank you