Some links in this post are affiliate links. This means I may earn a small commission if you make a purchase, at no extra cost to you. I only recommend products I use and genuinely enjoy in my own cardmaking. Read more here.
Hello and welcome, fellow crafters! I am thrilled to share an inspirational handmade Easter card that I created as a design team member of Polkadoodles. This card is my contribution to the upcoming challenge on the Polkadoodles challenge blog, where the theme is always Anything goes. follow this Easter card tutorial to create your own charming Easter card.
As part of the design team, I was asked to create a card with an Easter theme and an Easter shape.
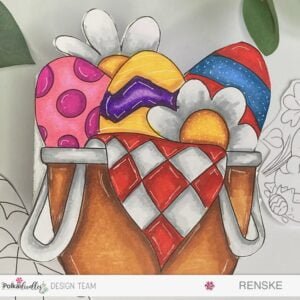
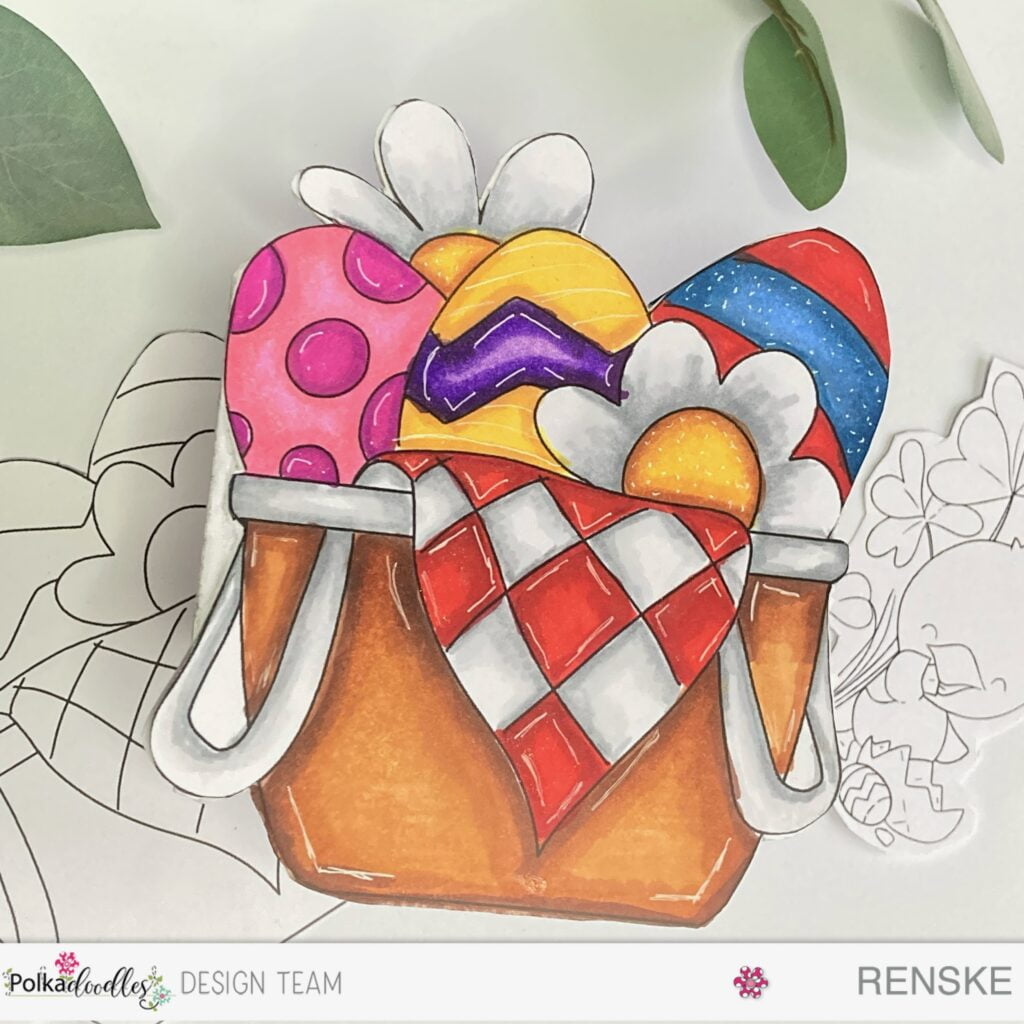
Inspired by the adorable digital stamp Cute Easter Egg Basket from Polkadoodles, I made a card in an Easter Basket shape. So, I will walk you through the steps of creating this delightful card.
The Polkadoodles Challenge is an exciting opportunity for crafters to showcase their creativity. I am delighted to share my inspiration card with you all, and I hope it inspires you to create your Easter-themed cards. Let us dive into the creative process and see how we can bring this Easter-themed card to life!
Materials Needed for this Easter Basket Card
Let us gather all the materials and tools required to make this card.
First, we need to collect the Polkadoodles products required for this project:
- Polkadoodles digital stamp: For the shape of the card, we will use the Cute Easter Egg Basket digital stamp.
- Polkadoodles digital stamp: For the inside of the card, we will use the digital stamp Chocolate Time Chick Spring into Easter.
- Polkadoodles sentiment set: For the sentiment, on the inside of the card, we will use a sentiment from the set Easter Greetings, quotes and sentiments.
These are all the Polkadoodles products we will use for this card. You can find all the product links at the bottom of the blog post to get started with them.

Having trouble editing or colouring digital stamps? Download my free guide for extra tips and tricks to help you perfect your digital stamps!
In addition to the Polkadoodles product, you’ll also need the following materials:
- White DCP Paper: We will be printing our digital stamps on this paper.
- White card stock: This provides the base of our card and ensures durability.
- Printer: We will use a printer to print the digital stamps and sentiments.
- Colouring medium: We will use alcohol markers for this card, but you can use any colouring medium you like.
- Scissors or a craft knife: These will be used for cutting out the card base and any additional elements.
- Glue or adhesive tape: We need these materials to assemble the card and attach all the elements.
Now that we have gathered all the necessary materials, we are ready to create our Easter basket card.
Step-by-Step Easter Card Tutorial
Now that we have all the necessary materials, let’s start our DIY Easter card tutorial and make this cute easter basket card. In this step-by-step tutorial, I will guide you through the process of making this charming card, from printing and colouring the digital stamp to assembling all the elements.
Step 1: Printing and Preparing the Digital Stamp
To create a card with a particular shape, we need to print the digital stamp correctly. Follow the steps given below for printing and preparing the digital stamp:
- Visit the Polkadoodles website and download the Cute Easter Egg Basket digital stamp.
- Paste the digital stamp into a new Word document.
- Adjust the height of the digital stamp to 14.8 centimetres to fit the size of your card. The width will adjust proportionally.
- Duplicate the resized digital stamp and paste it to create another basket for the back of the card.
- To ensure proper alignment, rotate the second basket horizontally to mirror the first.
- Finally, print the baskets on white paper.
Now that we have printed our Easter baskets, we can start making the base of the card.
Step 2. Creating the Base Card: Cutting and Shaping Your Easter Basket Card
Now that we have our printed Easter baskets, it’s time to make the card base. Follow these simple steps to create the card base for your Easter basket card:
Cutting and Preparing the Cardstock:
- Start by selecting a white cardstock for the base of your card. This provides stability and ensures that your card stands upright.
- With a basic card of 15 centimetres by 15 centimetres, you can easily cut the shape of the baskets. To make this size you will need white paper measuring 30 centimeters by 15 centimeters.
- Fold the cardstock in half to create a crease down the centre. Use a bone folder or the back of a spoon to ensure a crisp fold.
Tracing and Cutting Out the Basket Shape
- Place the printed Easter basket digital stamp on the front of the folded cardstock.
- Carefully trace around the edges of the basket shape using a pencil. Make sure to leave enough space around the edges for a clean cut.
- Once traced, use scissors or a craft knife to cut out the basket shape along the pencil lines.
- For the back of the card, repeat the same process with the duplicated digital stamp.

Step 3: Adding Color and Highlights to Your Easter Baskets
Let’s move on to the next step which is adding color to our Easter Basket Card. Follow these simple steps to bring your Easter baskets to life:
To begin with, pick the colouring medium of your choice. For this project, I recommend using alcohol markers as they offer vibrant colours and smooth blending, making them ideal for creating colourful and eye-catching Easter designs.
To colour the Easter baskets, I used the following colour combinations:
- Basket: Sand, Rose Beige, Burnt Sienna
- Handles: Cool Grey 5, Cool Grey 4, and Cool Grey 1
- Egg with Dots: Pastel Pink, Pale Pink, and Rose Pink. Dots: Magenta Deep and Peony Purple
- Middle Egg: Golden Yellow, Pastel Lemon, Primary Yellow. Edge: Violet, Peony Deep, and Pale Lilac.
- Egg with Band: Cardinal, English Red, Burgundy.
- Flowers: Cool Grey 5, Cool Grey 4, and Cool Grey 1. Centre of the Flower: Barn Red, Golden Yellow, Lemon Yellow, Pastel Lemon.
- Mat: Red Squares: Cardinal, English Red, and Burgundy. White Areas: Cool Grey 5, Cool Grey 4, Cool Grey 1.
Now that the Easter baskets are coloured, I apply highlights with a white gel pen. I apply this to the basket, the cloth to the eggs. I also use an aqua shimmer pen to apply some glitter. I apply glitter to the red squares of the doily and the stripes and dots on the eggs.
By following these colouring techniques, using the recommended materials and colour combinations, you can create a vibrant and cohesive colour scheme for your Easter basket card.
Step 4: Attaching the coloured Easter baskets to the base of the card
Now that we have beautifully coloured Easter baskets, it’s time to attach them to the base of the card.
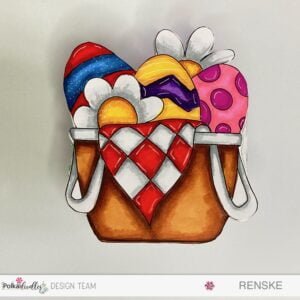
Start by carefully placing the coloured Easter baskets onto the front and back of the card base. Make sure they are centred and aligned properly.
Next, use sticky glue or adhesive tape to securely attach the baskets to the card base. Apply the adhesive around the edges and corners of the baskets to ensure they stay in place.
Finally, press down gently to adhere the baskets to the card base and smooth out any wrinkles or air bubbles.
Step 5: Creating the Inside of the Card
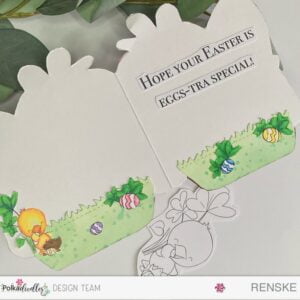
Let’s move on to creating the inside of our Easter basket card. This step will add an extra layer of detail and charm to our card, making it even more Easter-themed. Follow these steps to complete the inside of the card:
Printing the Digital Stamp
- Download the “Chocolate Time Chick Spring” digital stamp from Polkadoodles.
- Print the digital stamp onto white DCP paper. Additionally, print multiple copies of the leaves and Easter eggs separately. You can easily crop images in Word to print specific elements multiple times.
Die-cutting Grass Shapes
- Use a grass-shaped die to cut out grass layers for the bottom of the Easter baskets.
- Ink the grass layers with various shades of green ink to create a natural grass effect.
- Add green splatters using metallic paint for extra dimension.
- Attach the grass layers to the bottom of the baskets.
Colouring the Digital Stamp
- Print the “Chocolate Time Chick Spring” digital stamp in a smaller size.
- Colour the images using alcohol markers. Here are the colour combinations I used:
- Chick: Orange, Yellow, Lemon Yellow, Pastel Lemon, and Primary Yellow.
- Chocolate: Walnut, Clay, and Chocolate.
- Heart Leaves: Weeds Green, Grass Green, and Forest Green.
- Yellow Easter Egg: Lemon Yellow and Pastel Lemon.
- Purple Easter Egg: Pale Lilac.
- Blue Easter Egg: Sky Blue and Midi Sky.
- Pink Easter Egg: Pink Rose and Pale Rose.
Assembling the Inside Elements
Once all the elements are coloured, cut them out and arrange them on the grass layers inside the baskets. Adhere to the coloured elements using adhesive, making sure they are securely attached.
Step 6: Adding a Sentiment to Your Easter Basket Card
Now that our Easter baskets are securely attached to the card base, it’s time to add a heartfelt sentiment to complete the card. Follow these simple steps to add the perfect finishing touch:
Choosing and Printing a Suitable Sentiment
Select a sentiment from the “Easter Greetings, Quotes, and Sentiments” set by Polkadoodles. This set offers a variety of Easter-themed sentiments to choose from, allowing you to find the perfect one for your card.
Print the chosen sentiment onto white DCP paper using a printer. Adjust the size and font of the sentiment to complement the design of your card.
Placement and Positioning of the Sentiment on the Card
- Carefully cut out the printed sentiment using scissors or a craft knife, ensuring clean edges.
- Decide on the placement of the sentiment on the inside of the card. Position it in a central location or wherever it complements the design best.
- Use sticky glue or adhesive tape to attach the sentiment to the inside of the card. Press down gently to ensure it adheres securely.
With the sentiment added, your Easter basket card is now complete and ready to be shared with your loved ones!
Inspire, Create, Share, and More!
As we come to the end of this tutorial, I hope you feel inspired to create your own charming Easter basket card. This project has been a delightful journey, and I’m thrilled to have shared it with you.
More shaped card inspiration
Discover more card-making ideas with these articles featuring shaped cards and Easter designs using Polkadoodles products. Let me inspire you with unique card shapes and Easter-themed inspiration.
Thank you for joining me on this creative journey. I am excited to see what beautiful creations you’ll come up with. Happy crafting!
Polkadoodle Products used
“Disclosure: Some of the products mentioned in this tutorial may contain affiliate links, which means I may earn a small commission if you purchase through these links. This comes at no extra cost to you and helps support the creation of more content like this. Thank you for your support!
Easter Egg Basket digital stamp

Chocolate time Chick spring into eastger
Easter greetings, quotes and sentiment set

I would like to enter my card in the following challenges:
- Simon Says Stamp Blog Wednesday: Anything goes
- The Paper Funday Challenges: Anything goes + No patterned paper
- Through The Purple Haze Challenges: Anything goes
- Krafty Chicks Challenge: Anything goes
- A Perfect Time To Craft Open Challenge: Anything goes
- Classic Design Challenge Blog: Anything goes
- The Creative Crafters: Anything goes

Sweet card!!! Thanks so much for participating in our CREATIVE CRAFTERS challenge!!! I appreciate that you play along and I enjoy visiting your blog!! Have a happy crafty day!! Deanne at A Little Bit O’ Paper
hank you so much, Deanne! Your kind words mean the world to me.. Wishing you a wonderfully crafty day filled with inspiration and joy!
Oh Resnke, this is so adorable and I love the bright colors. Thanks for entering your card in The Paper Funday Challenge.
Donna xx
Paper Funday Challenge
Beautiful Blossoms Challenge
Inspiration Station Challenge
Thank you so much glad you like it