

Hello everyone!
Today I’m happy to share a crafting adventure that revolves around a special occasion: anniversaries, and I made this Vintage Anniversary card as an inspiration to you.
As I delved into the theme of “anniversary cards” for the CRAFT Challenge Blog, I couldn’t help but feel a rush of inspiration. There’s something profoundly beautiful about crafting a card that encapsulates the love, dedication, and memories shared by a couple on their journey together.
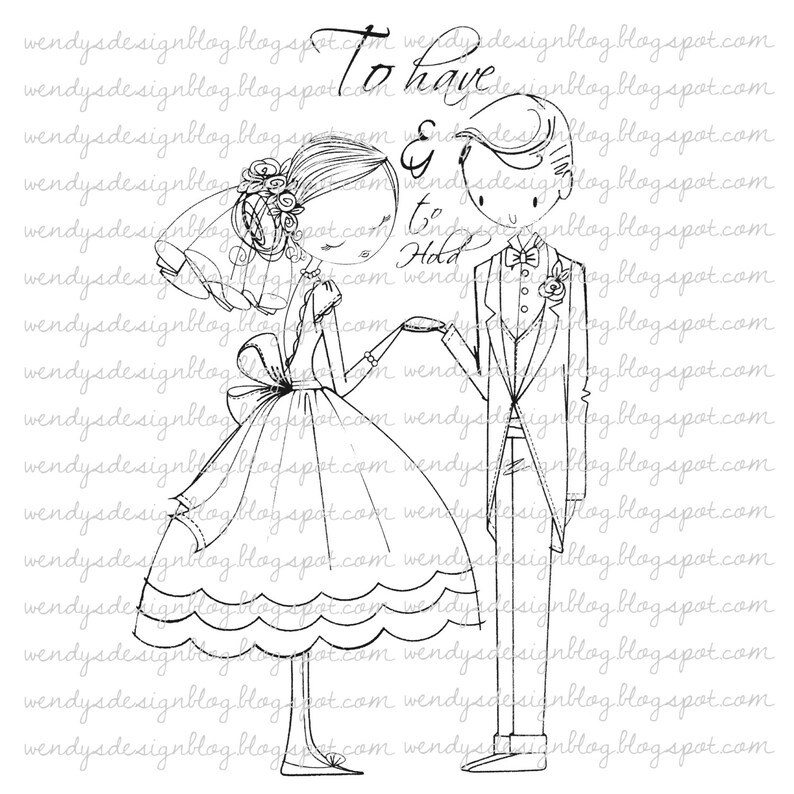
But that’s not all. I had the opportunity to work with the digital stamp, “To Have & To Hold, ” from our sponsor, All Dressed Up Stamps. It’s a delightful image that beautifully captures the essence of timeless love – the kind that deserves to be celebrated especially.
So, buckle up, fellow crafters! In this journey, we’ll explore the art of crafting a vintage-inspired wedding anniversary card that’s not just visually captivating but also filled with heartfelt sentiments. Together, we’ll discover the magic of paper, colours, and creativity, as we craft a romantic masterpiece that’ll leave your loved ones in awe.
Shall we begin?
Meet our sponsor- All Dressed Up Stamps
Before we get started on our card, let’s take a moment to highlight our wonderful sponsor, All Dressed Up Stamps.
As card makers, we are always looking for images that we can use on our cards. All Dressed Up Stamps is a reliable source for super fun digital stamps. That’s why I’m part of the design team at All Dressed Up Stamps because I love Wendy’s digital stamps.
The digital stamp we will be working with today is called ‘To Have & To Hold’. The image of a bride and groom perfectly sets the tone for our vintage anniversary card.
Shall we craft this card together?
Crafting our Vintage Anniversary Card
We are ready to start making our vintage anniversary card. It’s time to bring our vision to life.
Step 1. Creating the card base and background
Let’s first create the basis of this card. In this section, we will create the base and background of this card.
Crafting the card base
To start, we need a solid foundation. You can buy a ready-made 13 x 13 cm kraft card base from a store, or you can make your own. To do this, you will need a piece of kraft paper measuring 26 x 13 cm and score it at the 13 cm mark. This foldable base makes the perfect canvas for our card.
Choosing the background paper
Now let’s select the background paper that will set the tone for our vintage card. After some thought, I chose a paper with a soft pink shade decorated with faintly depicted roses. I cut the paper the size 12 centimetres by 12 centimetres.
However, I decided to give it a slightly weathered and rustic look to enhance the vintage charm. To achieve this, I used a distress tool to gently distress the edges of the paper. If you don’t have a distress tool, you can use the sharp edge of a pair of scissors for a similar effect.
To further enhance the vintage atmosphere, I used red ink to give the paper a touch of warmth and character. I also added some brown ink along the edges to create a subtle and aged edge.
Layering for a Vintage Frame
To create an attractive vintage frame for our selected patterned paper, I needed a slightly darker background. Since I didn’t have any brown paper on hand, I improvised. I cut a piece of white paper measuring 12.5cm x 12.5cm and used a dark brown alcohol marker to add colour to the edges, achieving the desired vintage effect. I also used the distress tool on this paper, to give it the same effect as the pattern paper we used.
Assembling the Layers
With our beautifully distressed patterned paper and the brown framed paper, it’s time to put the layers together. I adhered the patterned paper to the paper with the brown edge. This combined layer is then adhered to our kraft card base so that our vintage background is ready.
Now that we have the background ready for our card, we can get started with the details. Our card now features a beautifully aged background that will perfectly complement the romantic charm of our digital stamp.
Shall we continue our creative journey and bring our vintage anniversary card to life?
Step 2: Bringing the Digital Stamp to Love & To Hold to Life with alcohol markers.
Now that we have our vintage background, it’s time to turn our attention to the heart of our card: the “To Have & To Hold” digital stamp.
Printing the Digital Stamp
First, we have to print out our digital stamp. I printed the digital stamp “To Have & To Hold” on DCP paper, this is paper that works well if you use alcohol markers. This paper provides a smooth surface for colouring, allowing the colours to blend seamlessly.
Colouring the Digital Stamp
It’s time to bring the bride and groom to life. Using Twin Markers, I began the joyful task of colouring. Here are the colour combinations I used for different elements:
- Skin Tones: Peachy Blush (259), Salmon Pink (25), and Barely Beige (29)
- Bride’s Hair: Leather (113), Brown Grey (104), and Walnut (100)
- Groom’s Hair: Clay (116), Chocolate (118), and Walnut (100)
- Groom’s Suit: Chocolate (118), Clay (116), and Walnut (100)
- Shirt: Cool Grey 4 (CG4), Cool Grey 5 (CG5), and Cool Grey 1 (CG1)
- Bride’s Dress: Cool Shadow (178), Mint Macaron (180), Cool Mint (181)
- Flowers: Dark Old Rose (200), Old Pink (202), and Old Rose (201)
- Leaves: Grass Green (47)
These carefully chosen colour combinations bring out the details of the digital stamp.
Fussy cutting the digital stamp
Once our bride and groom were coloured, I cut them out individually. This step gives us the creative freedom to determine their placement on our card. By cutting them separately, we can arrange them exactly as we envision, determining the perfect positioning and spacing between them.
Now that our beautifully coloured bride and groom are ready for their moment in the spotlight, our card becomes even more captivating. The real magic happens when we merge these elements with our carefully crafted background.
Shall we continue our artistic journey and complete our card?
Step 3: Completing the vintage scene and adding the finishing touches.
With our beautifully coloured bride and groom in hand, it’s time to create the vintage scene that will make our card truly special. This is where all the elements come together.
A Touch of Nostalgia with a Round Serviette
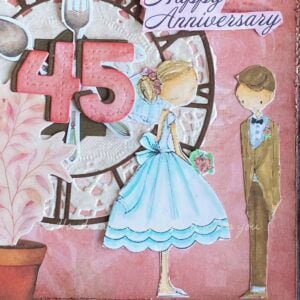
We start by adding a subtle touch of nostalgia. I decided to use a round napkin, reminiscent of the napkins on coffee saucers. Placing it in the top left corner of our card creates a charming vintage effect.
The Timeless Symbolism of a Clock
I wanted to add a clock to this card. So I die-cut this clock out of brown paper. It is a clock with Roman numerals. Time plays no role in love. It reminds us that it is not the hours and minutes that matter, but the enduring love the couple shares. I stuck this clock on top of the napkin that I placed in the top left corner.
Clever Die-Cuts Add Depth
Adding depth and dimension to our card makes the card more interesting. I take a plant pot and a plant from a paper block with pre-punched pictures. By carefully cutting an opening in the top of the flower pot and placing a paper image of a plant in it, we create the illusion that the plant is growing out of the pot. I placed this plant at the bottom left of the card. The plant will then fall nicely over the bell.
Crafting Clock Hands with Crossed Utensils
Now let’s introduce a unique element that doubles as hands. Two-punched utensils (a fork and a spoon) cross each other to form the hands. I stick this in the middle of the clock.
Personalisation with “45” for a Special Anniversary
Our card contains a special message for the 45th anniversary. To make this milestone clear, I cut out the numbers “4” and “5” from the same designer paper we used for our background. These numbers find their place in the centre of our clock and serve as a beautiful and personal tribute to 45 years of love and dedication.
Placing the Bride and Groom
I place the digital stamp “To Have & To Hold” in the lower right corner of the card. The groom stands opposite her. They represent the love of the couple the card is being sent to.
Placing the Happy Anniversary wishes
Now it’s time to place the sentiment. I chose to keep it simple and use the sentiment Happy Anniversary. I place the sentiment above the couple’s heads. To make it stand out a little more, I attached the sentiment to the card with foam tape. To make the sentiment match the card, I used my blending tool, which still has some remnants of the red ink, to go over the sentiment. This gives it a slightly pink/red tint.

Join the Anniversary Card Crafting Challenge
When creating the card, we embarked on a creative journey full of love and nostalgia. As we wrap up this crafting adventure, I invite you to take the next step: take part in the Anniversary Card Crafting Challenge!
Now it’s time for you to get started. Whether it’s for an anniversary, a wedding celebration, or just to say, “I love you,” creating your own special anniversary card allows you to share a piece of your heart with your loved ones.
Participating in the challenge is easy. Create your card matching the theme, whether it follows the vintage style or gives it your own unique twist. Then share your creation with us on the CRAFT Challenge Blog. Your card can inspire others and become a cherished memory for someone special.
But the creativity doesn’t stop here! Explore more inspiring ideas and techniques in my other blog posts:
- Craft a Shabby Chic card: a card with vintage vibes
Thanks for reading my article and I can’t wait to see your beautiful creations!
Happy Crafting!
Affiliate Disclosure: This blog post may contain affiliate links, which means I may earn a commission if you click on the link and make a purchase. While clicking these links won’t cost you any extra money, they will help support this blog and allow me to continue sharing creative content with you. I only recommend products and services that I personally use and believe in. Your support is greatly appreciated!
Product with affiliate links
Products use without affiliate links
- Twin markers (alcohol markers) from Decotimecrafts.
- Pattern paper from Craftsensations.
- Die cuts from a luxe paper block from Decotimecrafts.
- A Clock die, brand unknown.
- Napkin brand unknown.
- Sentiment brand unknown.
I would like to enter my card in the following challenges
- Unicorn Challenge Blog: Layer it up
- Scrapping4funChallenges: Vintage
- A Perfect Time To Craft Open Challenge: Anything goes
- Classic Design Challenge Blog: Anything goes
- Crafting Happiness Challenges: Anything goes
Beautiful and so many details written on your blog. Fantastic All Dressed Up image coloured perfectly xx
Je bent wel lekker bezig zeg, met al die mooie kaartjes!
Weer een heel andere, maar niet minder mooi!
Ah lief dank je wel. Haha ja ben wel lekker op dreef. Hihi.