Are you struggling to present cash gifts in a special way? Transform that cash into a memorable gift with a DIY money roll box!
A money roll box creatively packages cash for birthdays, weddings, and graduations. Instead of handing over a card with money, this unique presentation adds a personal touch, making your gift stand out.
Crafting your money roll box offers endless opportunities for personalization. You can choose colours, patterns, and embellishments that resonate with the recipient’s personality or the event’s theme.
This fun and engaging project allows you to express your creativity while providing a practical gift. Let’s explore how to create your DIY money roll box and make your next gift-giving experience unforgettable.
- Understanding the DIY Money Roll Box
- Materials Needed for Creating a Money Roll Box
- How to make a Money Roll Box
- Let's Get Creative Together
- Products used for this money roll box
- Products without affiliate links
- I would like to enter my card in the following challenges
Understanding the DIY Money Roll Box
A money roll box is a creative and thoughtful way to present cash or gift cards for various occasions. Designed to hold rolled-up bills, this unique gift packaging elevates the traditional envelope and adds a personal touch to your gifting experience.
I recently crafted a money roll box for my nephew’s twelfth birthday. He asked for cash, so I wanted to present it in a special way. Instead of simply handing over a card, I used a digital stamp of a fun character from All Dressed Up Stamps, adding a playful flair that perfectly suited a birthday boy.
The money roll box has a simple but effective structure, usually featuring a sturdy base and a decorative outer layer. You can choose materials that reflect the recipient’s style or match the event’s theme. The money roll box is an ideal choice for various occasions, offering a stylish alternative to ordinary envelopes while making your gift stand out.
Personalising gifts shows thoughtfulness and consideration for the recipient’s preferences. A money roll box achieves this beautifully, allowing you to customise it with colours, patterns, and embellishments that resonate with the occasion.
For my nephew, creating the money roll box transformed his cash gift into something memorable and fun. Instead of just a card with cash, the money roll box added an element of excitement and anticipation, making the gift-giving experience truly special.
Materials Needed for Creating a Money Roll Box
Crafting a money roll box is a fun and rewarding project that requires some essential materials. Below is a list of items you’ll need, along with their descriptions and possible alternatives to help you get started.
| Material/tools | Description | Alternative |
|---|---|---|
| Digital stamp “Dude” from All Dressed Up Stamps | Adds a playful character to your design. | Other digital stamps or clear stamps that fit the theme. |
| Alcohol markers | Used for colouring the digital stamp | Coloured pencils or watercolour markers. |
| White gel pen | Ideal for adding highlights and details. | White acrylic paint or a white Sharpie. |
| Blue-coloured cardboard | Provides a sturdy base for the money roll box. | Any sturdy cardstock or cardboard in a preferred colour. |
| DCP paper | For printing the digital stamp. | Other paper is good for alcohol markers or papers fitting other colouring mediums. |
| Pattern paper (Jeans with white stars) | Decorative element to enhance the box’s visual appeal. | Decorative elements to enhance the box’s visual appeal. |
| Pattern paper. | Another decorative layer for added style. | Solid-coloured paper or different patterns. |
| Star dies | Used to create decorative star shapes. | Star punches or hand-cut stars or maybe you have stickers. |
| Clip die | Adds a fun clip element to the design. | Alternative shapes or embellishments. |
| The clear stamp set “Happy Birthday” | Perfect for adding a cheerful sentiment to the box. | Handwritten text or other birthday stamps. |
| Die for creating the slit | Creates the slot for inserting money. | Craft knife for manual slitting. |
| Distress Ink Chipped Sapphire | Used to stamp the “Happy Birthday” text. | Any blue ink pad or similar colour. |
| Stamping tool | Makes stamping easier and more precise. | Clear acrylic block for manual stamping. |
| Glue | Essential for assembling the box. | Double-sided tape or hot glue. |
| Double-sided tape | For secure attachment of various elements. | Regular tape or glue dots. |
With these materials, you’re all set to create a unique and stylish money roll box. Now that we’ve covered the essentials, let’s move on to the exciting part: the step-by-step guide for crafting your very own money roll box!
How to make a Money Roll Box
For my nephew’s twelfth birthday, I wanted to give him money in a fun and creative way. So, I made a birthday money roll box featuring the ‘Little Dude’ digital stamp from All Dressed Up Stamps. This project combines colouring, die-cutting, and crafting techniques to create a memorable birthday gift.
Step 1: Print and Colour the Digital Stamp
To start, print and colour your digital stamp. I used the ‘Little Dude’ digital stamp, resizing it in Word to about 8 cm tall. I printed it twice: once on DCP paper, perfect for alcohol markers, and once on regular copy paper for a paper-piecing technique.

Colouring the Stamp
Grab your alcohol markers for vibrant, smooth shading. Here are the combinations I used:
- Skin: Tanned Skin (260), Peachy Blush (259), Salmon Pink (25), and Pale Cream (142)
- Hair: Brown Grey (104), Walnut (100), and Clay (116)
- Overalls: Dark Indigo (188), Dark Sky (191), Midi Sky (190), and Light Sky (189)
- Orange Stripes (Shirt and Pocket): Yellow (34), Amber (266), and Orange (23)
- White Stripes (Shirt): Cool Grey 3 (CG3) and Cool Grey 1 (CG1)
- Dog: Sand (107), Rose Beige (97), and Burnt Sienna (95)
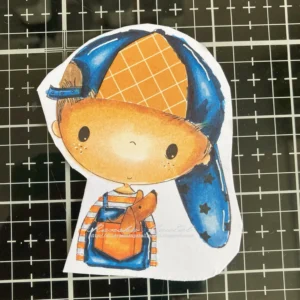
Paper-Piecing the Cap
In the original stamp, the cap reads ‘Little Dude’. Since my nephew wouldn’t appreciate that, I used the paper-piecing technique to customize it.
I printed the stamp on copy paper and cut out the middle part of the cap. I traced that section onto orange patterned paper with white stripes (a favourite colour of my nephew) and cut it out.
I then glued it onto the digital stamp, covering the text. Lastly, I added white highlights to the cap and overalls for extra dimension before cutting out the coloured image.

With your digital stamp coloured and ready, let’s start working on the base of your money roll box.

Having trouble editing or colouring digital stamps? Download my free guide for extra tips and tricks to help you perfect your digital stamps!
Step 2: Create the Base of the Money Roll Box
Next, let’s create a sturdy base for your money roll box I used dark blue cardboard to make the box sturdy. The kraft cardstock serves as the primary material for the box shape.
Cutting and Scoring the Kraft Cardstock
- Cut the cardstock to 7.5 inches by 9.5 inches.
- Score on the 9.5-inch side at 1 inch, 2 3/4 inches, 6 3/4 inches, and 8 1/2 inches.
- Rotate the cardstock and score on the 7.5-inch side at 1 3/4 inches, 3 1/2 inches, 5 1/4 inches, and 7 inches.
Folding and Cutting
- Once you’ve scored the lines, trim away the sections you don’t need (just follow your score lines).”
- Fold along all the lines to form the box shape. Make sure the folds are clean for a neat finish.
Now that your box base is ready, let’s make the slit where the money will be pulled through
Step 3: Create the Money Slit
For the money to roll out, you’ll need to create a slit in the box. I used a die intended for a birdhouse pole to achieve this.
How to Extend the Slit
- Partial Die-Cutting: Place the die on the front panel of the box, where the slit should be.
- First Cut: un the die through your machine to cut the initial part of the slit.
- Adjust for Length: Move the die slightly to the right and align it with the first cut. Run it through again to extend the slit.
This will give you a neat, custom-sized slit, perfect for pulling the money through
With the slit in place, it’s time to start decorating the box and adding your sentiment.
Step 4: Cover the Box and Add Text
Once the slit is done, it’s time to decorate the box. I chose a fun jeans pattern paper with white stars to cover the front and sides.
Covering the Box
- For the front, cut the patterned paper to 3 3/4 inches by 1.5 inches.
- For the sides, cut two squares measuring 1 5/8 inches by 1 5/8 inches.
- Adhere the patterned paper to the corresponding areas on the box.
Adding the Sentiment
- Cut out a frame from the patterned paper and stamp ‘Happy Birthday’ using Distress Ink in Chipped Sapphire. I used a stamping tool to ensure a clear, crisp impression.
- Attach the sentiment frame to the front of the box.
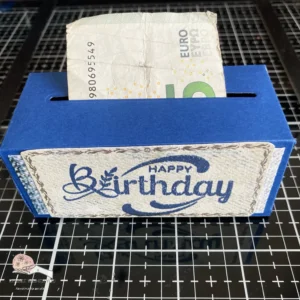
Now that the box is decorated, it’s time to put it together and prepare the money roll.
Step 5: Assemble the Money Roll Box
Now that the pieces are ready, it’s time to assemble the box.
Steps to Assemble
- Add double-sided tape to the flaps of the box.
- Fold the box together, pressing firmly to secure the sides.
- Keep the bottom flap open – this is where the money will go.
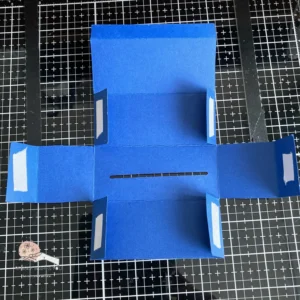
how to roll money into a roll
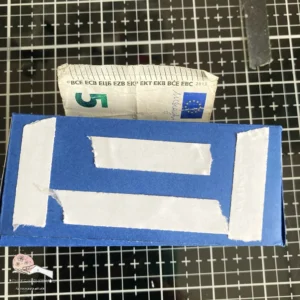
- I used three banknotes and taped them together using purple tape. To avoid damaging the money, I first pressed the tape against my trousers to reduce its stickiness. Then I taped the banknotes together, forming a continuous strip.
- Roll up the money and insert the first banknote through the slit, leaving a small portion out. Close the bottom flap to keep the money roll secure.

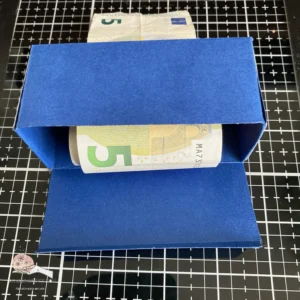
Now that the box is assembled and the money is ready, let’s work on creating the background.
Step 6: Create the Background
For the background, I used the same jeans-patterned paper as on the box.
Layering the Background
- Cut dark blue cardboard to 4 inches by 6 inches.
- Cut the jeans-patterned paper to 3 3/4 inches by 5 3/4 inches.
- Adhere the patterned paper to the blue cardboard, then attach it to the back of the box using double-sided tape.
With the background done, we’re now ready to add the final decorative elements.
Step 7: Add Extra Elements and Final Touches
To complete the look, I added some extra elements, including stars and a clip for the money roll.
Die-Cutting the Elements
- Die-cut a large star from the orange patterned paper you used for the cap
- Die-cut small stars from the dark blue and orange patterned paper
- Die-cut a clip from blue paper for the money roll.
Decorating the Box
- Place the large star on the top-left corner, letting it extend slightly for a playful effect.
- Attach the digital stamp of the boy with foam tape to add dimension. Position him over the large star.
- Surround the boy with the small blue stars.
- Attach the clip to the money so it can be pulled easily.
- Add the small orange stars around the sentiment ‘Happy Birthday’.
And with that, the money roll box is complete – a fun, personalized gift that’s perfect for any occasion!


Let’s Get Creative Together
Creating a money roll box not only adds a personal touch to gift-giving but also makes the experience more memorable for your loved ones.
By using a combination of digital stamps, paper-piecing techniques, and vibrant alcohol markers, you can design a unique gift that reflects your creativity and care.
This project is an excellent opportunity to explore your crafting skills and perhaps even try new techniques along the way.
More money roll box ideas

How to Make a Jungle Money Roll Box for Birthdays and Special Occasions
Another Money roll box idea with a jungle theme
Products used for this money roll box
Affiliate Links: Some of the products mentioned in this post are affiliate links. If you decide to purchase through these links, I may earn a small commission at no extra cost to you. These commissions help keep my blog running, so I truly appreciate your support!
Decotime twin markers (alcohol markers) XXl SET 300 PIECES
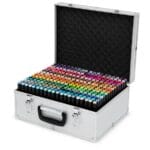
Only on the webshop with ActionNL for €69,95
Digital Stamp Dude from All Dressed Up Stamps

Gelly roll pen 08

Spring Gnomes Digital Paper set

Products without affiliate links
I use some products from ActionNL. You can only buy them in the Action Store. I can show you how they look and on their website you can mark them also a favourite.
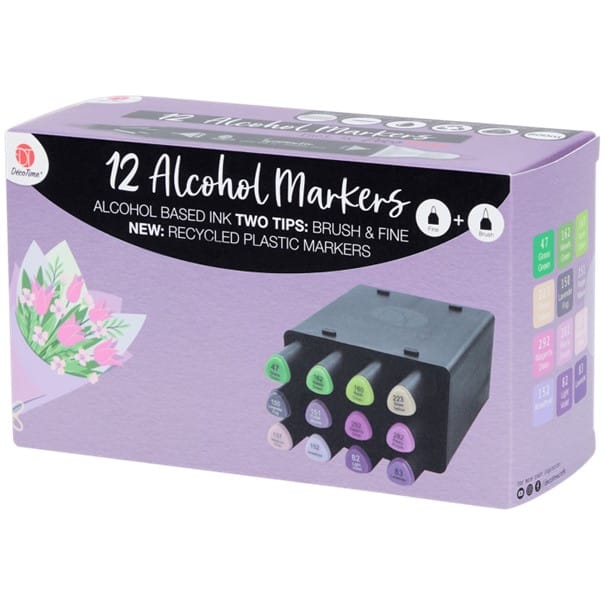
Twinmarkers 12 pieces
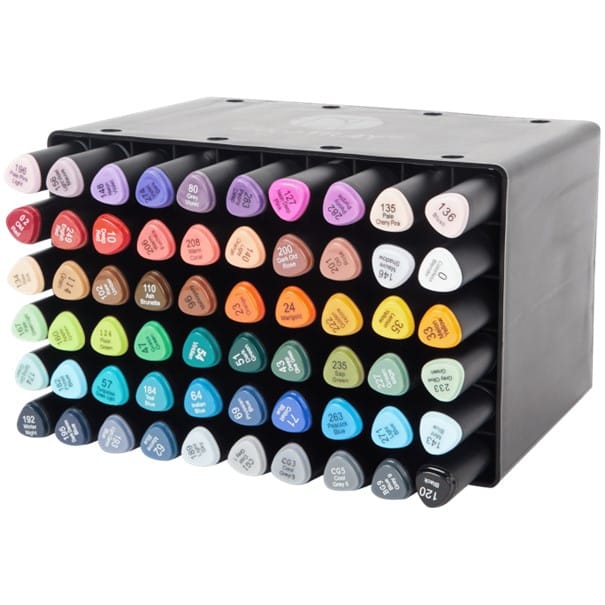
Twinmarkers 60 pieces
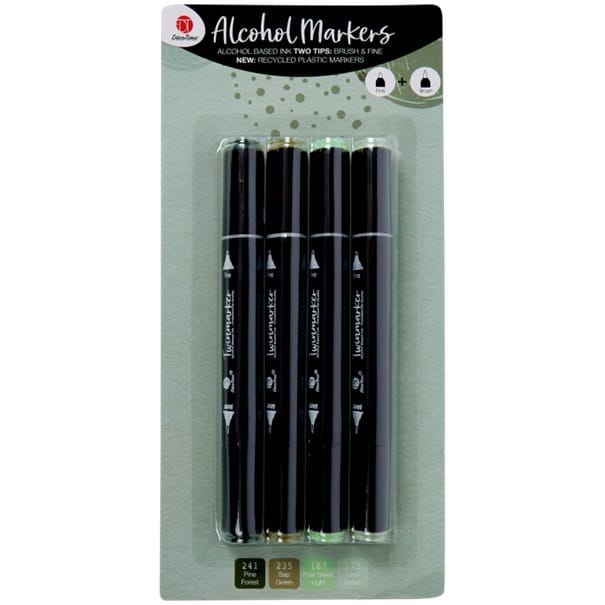
Twinmarkers 4 pieves
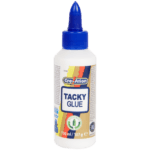
Tacky Glue
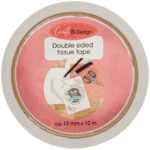
Double sided tape
- Pattern paper Jeans with white stars Autentinque
- Pattern paper orange with white line Craftsensations
- Star dies from Aveccreative
- Clip die from Aveccreative
- Stamping tool (brand unknown).
- Blue Coloured Cardboard from Via Chasse
I would like to enter my card in the following challenges
- Dragonfly Dreams: Anything but a card
- A Perfect Time To Craft Open Challenge: Anything goes
- Classic Design Challenge Blog: Anything goes + anything but a card


Oh so cute!!! Thanks so much for participating in our DRAGONFLY DREAMS challenge!!! I appreciate that you play along and I enjoy visiting your blog!! Have a happy crafty day!! Deanne at A Little Bit O’ Paper
Thank you so much