Masculine birthday cards can be tricky to make. You want them to feel personal but not too fancy or busy. I like joining the Monthly Discovery Hop because it’s all about rediscovering supplies you already own, like my trusty Decotimecrafts paper die-cut book.
This tutorial is beginner-friendly and has simple techniques, such as distress ink backgrounds, to create a clean, masculine look. Have you ever looked through your craft supplies and wondered how to turn them into a card for the men in your life? If so, this step-by-step guide is for you.
Why Make a DIY Masculine Birthday Card?
Making cards for men can be tricky. Masculine cards often avoid frills or bright colours, so finding the right balance can be tough. That’s why a DIY masculine birthday card works well; it lets you create something personal that fits his style.
Handmade birthday cards for men show you’ve put time and care into the design. Masculine card-making ideas don’t have to be complicated. Using simple themes like beer and BBQ makes the process easy and enjoyable, and you still end up with a card he’ll like.
Materials You’ll Need to Make This DIY Masculine Birthday Card
I looked through my craft supplies to find materials for a masculine birthday card.”I found an older Decotimecrafts paper die-cut book and a newer one I hadn’t used for over six months. “I combined images from both to make this card.
Here’s what you’ll need:
- Paper die-cut book from Decotimecrafts: I used die-cuts of beer glasses, a barbecue, a hamburger, and a spatula. If you don’t have these, any masculine-themed die cuts or stickers work.
- Luxe paper block from Decotimecrafts: added a “cheers” sticker and vellum letters spelling “BEER.” You can swap these for similar vellum or stickers you have.
- Stencil from Craftsensations: Used to create the distress ink background. Any stencil with a subtle pattern works.
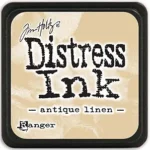
- Distress inks: Antique Linen, Vintage Photo, Walnut Stain — this helps build a layered, aged look. If you don’t have these exact colours, choose similar warm browns or neutral inks.
- Blending brush (Nellie Snellen): Adds dimension to die cuts and layers. Double-sided tape or craft foam strips work as alternatives.
- Foam tape: This adds dimension to your die cuts and layers. Double-sided tape or craft foam strips can be good alternatives.
- Craft cardstock: Use for the card base. It should be sturdy and a neutral colour. Any thick kraft or brown cardstock works.
- White cardstock: Use for the layer with inked edges. Any dark brown marker works.
- Alcohol marker (colour 119): Use to colour the edges of the white cardstock for a finished look. Any dark brown marker works.
- Glue: Use to stick your elements together, especially vellum, which can be tricky to adhere.
- Paper trimmer: Helps make neat, precise cuts. Scissors work too, take care to keep edges straight.
If you don’t have all these exact materials, don’t worry. Making DIY masculine birthday cards is about using what you have and making it your own. Rediscover your stash and find what works for your next project.
Step-by-Step: How to Make This DIY Masculine Birthday Card
I’ll guide you through making this card. It’s beginner-friendly and uses basic tools, a few stash items, and simple techniques. If you like masculine card-making ideas, without hours or fancy equipment, this project is for you.
You’ll make a distress ink background, layer die-cut images from Decotimecrafts books, and build a DIY masculine birthday card with depth and texture—without making it complicated.
First, we’ll start with the background.
Step 1 – Create the Background with Distress Ink
Making your own background adds a personal touch to your DIY masculine birthday card. This simple guide will help you do it in just a few steps.
What you’ll need
- White smooth cardstock, 9.5 x 13.8 cm
- Stencil from Craftsensations
- Distress Ink: Antique Linen, Vintage Photo, Walnut Stain
- Blending brush
Blend your base colour
Place the stencil over the white cardstock. Use Distress Ink in Antique Linen to softly blend the ink across the entire panel. This creates a light, textured foundation.
Add depth with darker shades
Next, apply Vintage Photo ink around the edges, blending it slightly inward. Then use Walnut Stain ink along the outer border to add a deep, finished look. This layered ink effect gives your background a rustic feel, perfect for a card for men.
Tip: If you don’t have Distress Inks, any brown-toned inks will work. The key is to use what you have.
Step 2 – Build the Focal Point with Die Cuts and Vellum
Once your background’s ready, bring in your theme. For this DIY masculine birthday card, I chose a classic combination: beer and BBQ. It’s a fun combo that fits a card for men—and gives me a reason to use older die cuts from my stash.
What you’ll need
- Paper die-cut book from Decotimecrafts
- Luxe paper block from Decotimecrafts
- Foam tape
- Glue
Find images that match your theme
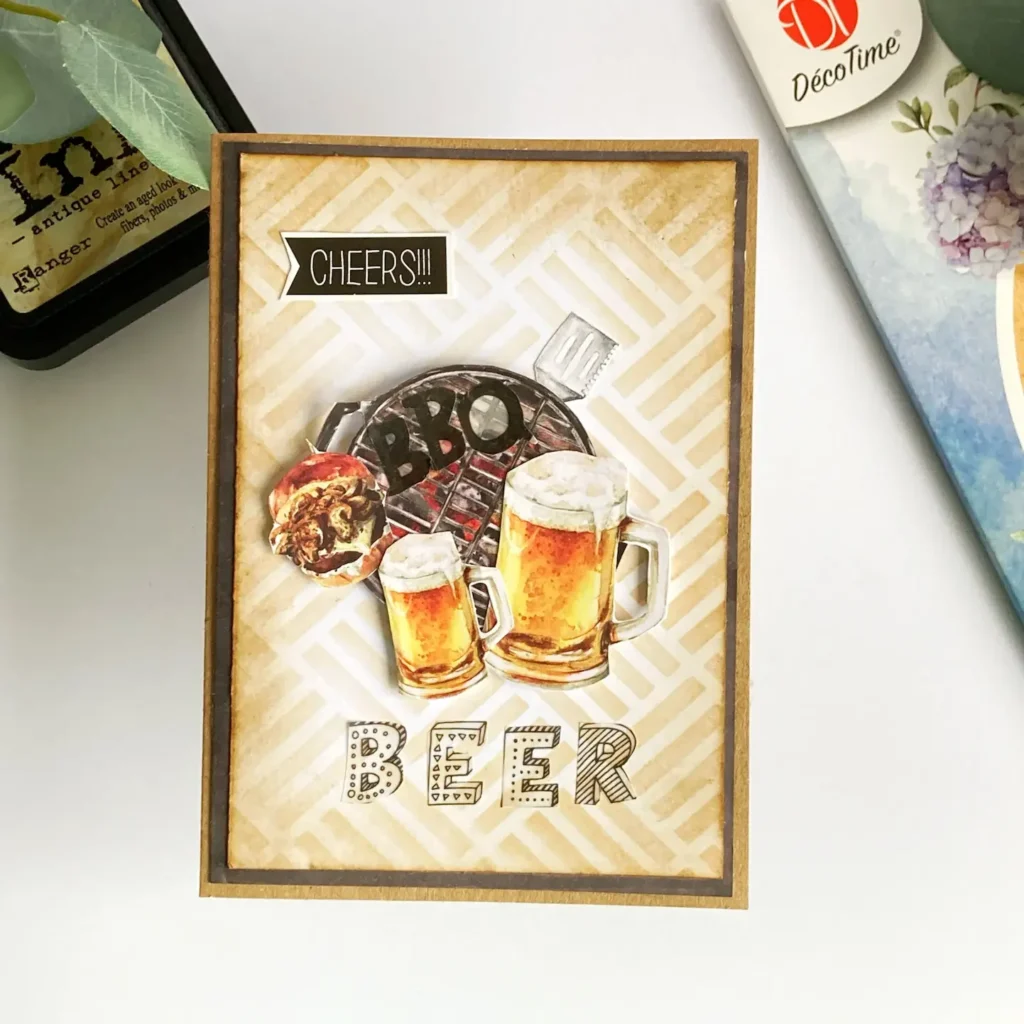
When I’m unsure what to make, I flip through what I already have. For this card, I combined older vellum pieces with newer die cuts from Decotimecrafts. I selected images of a BBQ, beer glasses, a hamburger, and a spatula—perfect for a masculine birthday vibe.
Layer the images with depth
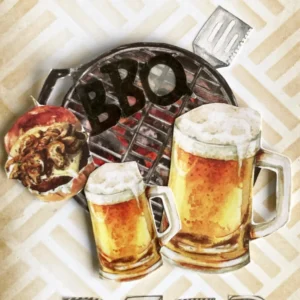
Start by placing the BBQ in the centre of the background and elevating it slightly with foam tape. Position the spatula just behind it at the top. I cut out the vellum letters “BBQ” and glued them directly onto the grill. Let this dry, vellum and slick surfaces take a little longer.
Then add the hamburger and beer glasses—let them hang off the BBQ edge for extra dimension. Use foam tape for the parts that hang off and glue for the portions that sit directly on top of the BBQ. This layering gives your handmade beer card extra depth—without the bulk.
Add text with vellum and stickers
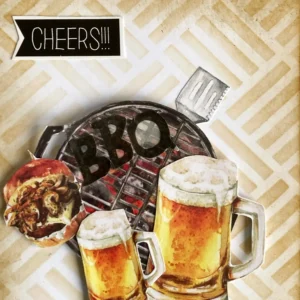
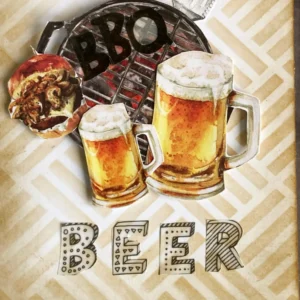
Below the BBQ, I added the vellum letters to spell out “BEER.” tick the letters down by adding glue behind the printed parts so the glue won’t show through. Complete the layout with the sticker “cheers” placed in the top left corner.
Tip: Don’t hesitate to mix old and new supplies. Mixing old and new supplies can spark fresh ideas.
Step 3 – Layer and Finish Your Masculine Card
Now it’s time to bring everything together. This step is all about simple layers that make your DIY masculine birthday card look clean and finished. It’s a small step, but it makes a big difference—no fancy tools are needed.
What you’ll need
- Craft cardstock (for your card base)
- White cardstock (for the first layer)
- Alcohol marker in dark brown
- Paper trimmer
Make your card base
- Cut your craft cardstock to 21 x 14.8 cm.
- Score on the long side at 10.5 cm and fold it. Now you’ve got a landscape A6 card base. This creates a standard A6 card base in landscape format. It’s sturdy, neutral, and perfect for a card for men.
Add the dark ink border
- Cut your white cardstock to 10 x 14.3 cm.
- Use a dark brown alcohol marker to colour the edges. No need to be perfect—just make sure the edges are covered. That brown edge will show around your background piece.
Glue everything in place
- Glue your decorated background panel (with the die cuts and vellum) onto the white cardstock with the brown edge.
- Then attach that layered piece to the card base.
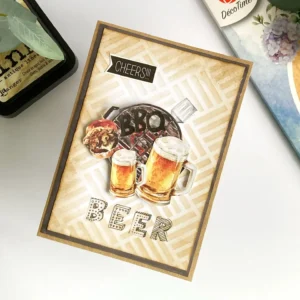
And that’s it! Your handmade birthday card for him is ready. Clean layers, strong colours, and a fun theme make this an easy go-to when you need masculine card inspiration.
Easy Techniques to Make Your Masculine Cards Stand Out
You don’t need fancy tools or loads of supplies to make a great DIY masculine birthday card. Sometimes, it’s the small techniques that give your design a clean, finished look. In this section, I’ll walk you through a few methods that are simple enough for beginners but versatile enough to use repeatedly.
Distress ink backgrounds
Distress ink backgrounds are one of my favourite ways to start a masculine card. With just a blending brush, a stencil, and a few neutral shades, you can create a textured, layered look. It works well with bold themes like beer, BBQ, or tools, and adds character without making the background feel too busy.
If you don’t have distress inks, no problem! You can use any ink pads you have, including dye or pigment inks in brown or neutral tones. And if you don’t have a blending brush, a clean makeup sponge works just as well for soft blending.
Foam tape for subtle dimension
Foam tape adds just enough lift without going overboard. I used it behind BBQ elements like the hamburger and beer glasses to create depth without making the card bulky. This adds visual interest and helps your handmade birthday card for him feel more dynamic.
No foam tape? Stack a few scrap paper pieces or bits of cardstock to get the same raised effect. It’s a great way to use up scraps while still adding dimension.
Working with vellum
Vellum adds a soft texture without taking over the whole design. Just make sure to place the glue under printed areas so it doesn’t show through. It works well for a handmade beer card when you want the text to stay light and modern.
If you don’t have vellum, you can use stickers or other sentiment strips.
Tie the theme together
Masculine cards work best when everything fits together. Consider combining everyday elements that make sense together—like beer, BBQ, and casual fun. It keeps your layout strong and makes your card feel more thought-through.
These small details help elevate your DIY card for men, even if you’re just starting out. Try one or two techniques on your next project, and you’ll see how much of an impact they can make.
Let’s Get Creative Together
I hope this tutorial helps you look at your craft supplies with new ideas—and encourages you to create your own DIY masculine birthday card. Some of the best card ideas come from using what’s already in your stash. Use your inks, die cuts, or whatever you have—and create something that feels personal and fun.
Check the Monthly Discovery hop
Don’t forget to check the Monthly Discovery Hop, to see more creations using both old and new supplies. The Monthly Discovery Hop is a great place to see what others are making with both new and older supplies. It’s a good way to stay inspired and find ideas from crafters who enjoy making the most of their stash.
More DIY masculine card ideas
I’d love to see what you make next.
Links of products I used
Here I will link all the products where I have found links, so you can also buy them yourself if you want. Some links are affiliate links. If you buy something through one of these links, I may earn a small commission at no extra cost to you. I only recommend products I use or believe in.
If I haven’t linked a product here, unfortunately, I couldn’t find any shop links.
Products with affiliate links
Distress Ink Antique Linen
Distress Ink Vintage Photo

Distress Ink Walnut Stain

Blending Brush Nellie Snellen

I would like to enter my card in the following challenges
- Try it on Tuesday: Add some text
- Unicorn Challenge Blog: Not square
- Crafty Gals Corner: Dads
- CREATIVE INSPIRATIONS: One for the boys
- Craft Rocket Challenges: No design paper
- Krafty Chicks Challenge: Masculine
- Crafty Catz: Anything goes
- 613 Avenue Create: For the Guys
- Creative Moments: Man or Boy
- Crafter’s Cafe: Anything goes + masculine

Great use of pictures. Love the vellum letters and the look of them on the background. Thank you for joining the challenge at Crafty Gals Corner.
Thank you so much
Really pretty layout! Thank you so much for entering our challenge at TIOT.
Looking forward to see you again next challenge.
Regards,
Mia
Designer for TIOT
craftartista.blogspot.com {My Blog}
Thanks a lot
Love it. Perfect masculine card and what most men love.. food and brew. thanks for sharing your awesome card over at Crafty Catz, Crafty Gals Corner
Thank you so much for your lovely comment
Wonderful card, great detailed post. I like the grill and beer. Cheers! Nicely done, thank you for playing our Masculine Challenge at Krafty Chicks Challenge this week. Have a great day. Leanne DT~KCC
Thank you so much for you lovely comment.
Great masculine card, Renske! Thanks for joining us at 613 Avenue Create. I hope we see you on the front porch again soon!
Hugs, Em
613 Avenue Create Co-Owner
Creative Em my blog
Creative Em on YouTube my Youtube channel
Thank you so much